manuals.online logo
Brands
  1. Home
  2. •
  3. Brands
  4. •
  5. Grundig
  6. •
  7. Security Camera
  8. •
  9. Grundig GCT-K1326T User manual

Grundig GCT-K1326T User manual

Thank you for purchasing our product. If there
are any questions, or requests, please do not
hesitate to contact the dealer.
This manual may contain several technical
incorrect places or printing errors, and the
content is subject to change without notice.
The updates will be added to the new version of
this manual. We will readily improve or update
the products or procedures described in the
manual.
Privacy Notice
Surveillance laws vary by jurisdiction. Check
all relevant laws in your jurisdiction before using
this product for surveillance purposes to ensure
that your use of this product conforms.

camera parameters and functions.

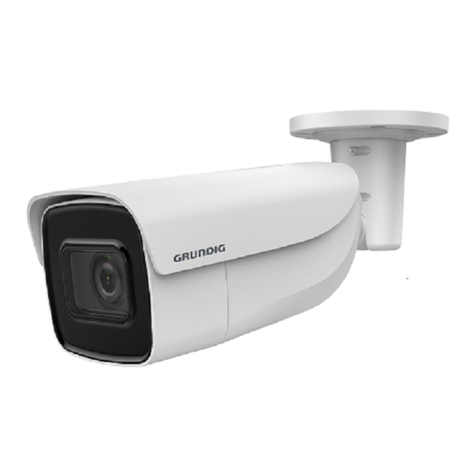
2 MEGAPIXEL FULL HD
INTEGRATED HD-TVI
CAMERA LED, WDR
User Manual
1 INTRODUCTION
1.1 Product Features
This camera adopts new generation sensor with
high sensitivity and advanced circuit board design
technology. It possesses the features of high
resolution, low distortion, and low noise, etc. It
is extremely suitable for supervisory system and
image processing system.
The main features are as follows:
• High performance CMOS sensor and
high resolution bring high-quality image;
• Low illumination;


• Support auto white balance, auto gain control,
electronic shutter control and internal
synchronization;
• SMART IR mode;
• Unit transmission control;

installation requirements.
1.2 Overview

2 INSTALLATION
Before you start:
• Please make sure that the device in the
package is in good condition and all the
assembly parts are included.
• Make sure that all the related equipment is
power-off during the installation.

installation environment.
• Check whether the power supply is matched
with your power output to avoid damage.
• Please make sure the wall is strong enough to
withstand three times the weight of the
camera and the mounting.
• If the wall is the cement wall, you need to
insert expansion screws before you install the
camera. If the wall is the wooden wall, you can
use self-tapping screw to secure the camera.
• If the product does not function properly,
please contact your dealer or the nearest
service center. Do not disassemble the camera
for repair or maintenance by yourself.
2.2 Installation
Both wall mounting and ceiling mounting are
suitable for type bullet camera. Ceiling mounting
will be taken as an example in the section.
And you can take steps of ceiling mounting as
a reference if wall mounting is adopted.
Steps:

ceiling according to the supplied drill template.

into the screw holes.


connect the corresponding cables.
4. Fix the camera to the ceiling with the supplied
screws.

5. Adjust the surveillance angle.

 


 
Power Cable
IR LED
Lens
Main Body
Sun Shield
Mounting Base
Switch Cable
HD Video Cable
CVB S Cable
Zoom
Focu s

Regulatory Information
EU Conformity Statement
This product and - if applicable - the
supplied accessories too are marked
with „CE“ and comply therefore with
the applicable harmonized European standards




Products marked with this symbol
cannot be disposed of as unsorted
municipal waste in the European Union.
For proper recycling, return this product to
your local supplier upon the purchase of equivalent
new equipment, or dispose of it at designated collecti-
on points. For more information see:
www.recyclethis.info.

This product contains a battery that
cannot be disposed of as unsorted
municipal waste in the European Union.

information. The battery is marked with this symbol,


For proper recycling, return the battery to your supplier
or to a designated collection point. For more informati-
on see: www.recyclethis.info
FCC Information
FCC compliance: This equipment has been tested
and found to comply with the limits for a digital

limits are designed to provide reasonable protection
against harmful interference when the equipment
is operated in a commercial environment. This
equipment generates, uses, and can radiate radio
frequency energy and, if not installed and used in
accordance with the instruction manual, may cause
harmful interference to radio
communications. Operation of this equipment in
a residential area is likely to cause harmful inter-
ference in which case the user will be required to
correct the interference at his own expense.
FCC Conditions

Rules. Operation is subject to the following two
conditions:


received, including interference that may
cause undesired operation.


 



3 MENU OPERATION

You can call the menu with the internal OSD Control
Stick and adjust the camera parameters. You can
also call the menu with supported TVI DVR.
3.1 Video out

3.2 Language
English, German, French, Italian, Spanish, Polish, Rus-
sian, Portuguese, Dutch, Turkish etc. are selectable.
3.3 Setup
3.3.1 Scene

low-light as the working environments.
3.3.2 Lens

aperture.
3.3.3 Exposure
Shutter:


AGC:

Sens-up:


Brightness:

D-WDR:

DEFOG:

function. Position, size, and the defog gradation are

 
3.3.4 Backlight
Backlight Compensation (BLC):
-
GAIN: Set the gain of BLC as High, Middle, or Low.
- AREA:

the BLC position and size. Select RET or
 
the BLC area.
-
Default: Restore the BLC settings to the default.
- HSBLC:
Select an HSBLC area. Set the DISPLAY
 
button

Set the HSBLC

 
 
or OFF.

3.3.5 White Balance (WB)


3.3.6 Day & Night



3.3.7 NR







Set the START AGC level as the threshold to enable

disable AGC.
 
3.3.8 Special
Camera Title:
Edit the camera title on this section.
D-effect:
-FREEZE:
-MIRROR: OFF, MIRROR, V-FLIP, and
ROTATE are selectable for
mirror.
-D-ZOOM: 
 
 
-SMART D-ZOOM: The D-Zoom area, sensitivity
 
-NEG. IMAGE: 
 


Motion:

status as




Privacy:
Select a PRIVACY area. Set the DISPLAY status as


the area.
Defect:
LIVE DPC, STATIC DPC and Black DPC are
adjustable in this section.
 
3.3.9 Adjust
Sharpness:

Monitor:
Monitor CRT, and Monitor LCD are selectable.
LSC:

3.3.10 Reset
Reset all the settings to the default.
3.3.11 Exit

NOTE
0~36 0
0~36 0
0~90
1
2
3
Menu
ES
RESET

WB

T

SPECIAL
ADJUST

OUTDOOR

LOW-
LIGHT

SHUTTER
AGC


D-WDR
DEFOG
BLC
HSBLC
ATW
AWC-SET

COLOR
W
T
 
 R
CAM
TITLE
D-EFFECT

PRIVACY
LAUGUAGE
DEFECT
VERSIO

R
LSC
VIDEO.
OUT

SETUP
 
  OFF
  
 RETUR  ET
 
 SMAR RO 
 LEVEL ------|-- 
 START.AGC -|-----0
4.  AGC- |-------0
5.  RET
SPECIAL
 CAMT ITLE 
 D-DFFECT
  OFF
4. PRIVACYO FF
5.  G
 DEFECT
  RET

 SELECT AREA 
 DISPLAYO 
  ----|---0
4.  VIEW 
5. DEFAULT
  RET
PRIVACY
 SELECT ARE
 DISPLAYM OSAIC
 COLO 0
4.  
5. DEFAULT
  RET
ADJUST
 S------|
  LCD
 LSCO FF
4.  RET
W
OSD Joystick
Test Monitor Output

Other Grundig Security Camera manuals

Grundig GD-CI-CT12617F User manual

Grundig

Grundig GD-CI-CT12617F User manual

Grundig GCA-B1322D User manual

Grundig

Grundig GCA-B1322D User manual

Grundig GD-TI-BP1603T User manual

Grundig

Grundig GD-TI-BP1603T User manual

Grundig GD-CI-AC2616E User manual

Grundig

Grundig GD-CI-AC2616E User manual

Grundig GCI-M0566F User manual

Grundig

Grundig GCI-M0566F User manual

Grundig GD-CI-AT8747P User manual

Grundig

Grundig GD-CI-AT8747P User manual

Grundig GCA-C0245P User manual

Grundig

Grundig GCA-C0245P User manual

Grundig GCI-K1523V User manual

Grundig

Grundig GCI-K1523V User manual

Grundig GD-CI-BP4637E User manual

Grundig

Grundig GD-CI-BP4637E User manual

Grundig GCH-K0326T User manual

Grundig

Grundig GCH-K0326T User manual

Grundig GCA-B2323T User manual

Grundig

Grundig GCA-B2323T User manual

Grundig GCI-K1607B User manual

Grundig

Grundig GCI-K1607B User manual

Grundig GD-CI-AT30516Q User manual

Grundig

Grundig GD-CI-AT30516Q User manual

Grundig GCI-N0503B User manual

Grundig

Grundig GCI-N0503B User manual

Grundig GD-CI-AP2605B User manual

Grundig

Grundig GD-CI-AP2605B User manual

Grundig GCI-K1505B User manual

Grundig

Grundig GCI-K1505B User manual

Grundig GD-CI-DT4637T User manual

Grundig

Grundig GD-CI-DT4637T User manual

Grundig GD-TI-CT2510T User manual

Grundig

Grundig GD-TI-CT2510T User manual

Grundig GD-CI-BP4637V User manual

Grundig

Grundig GD-CI-BP4637V User manual

Grundig GCI-K0589T User manual

Grundig

Grundig GCI-K0589T User manual

Grundig GD-TI-AT30105K User manual

Grundig

Grundig GD-TI-AT30105K User manual

Grundig GCI-K1523D User manual

Grundig

Grundig GCI-K1523D User manual

Grundig GCA-B0005B User manual

Grundig

Grundig GCA-B0005B User manual

Grundig GD-CI-AC1616V User manual

Grundig

Grundig GD-CI-AC1616V User manual

Popular Security Camera manuals by other brands

Santec VTC-375IRHG Quick installation guide

Santec

Santec VTC-375IRHG Quick installation guide

Mobotix Mx-SD1A-230-LL Quick installation

Mobotix

Mobotix Mx-SD1A-230-LL Quick installation

D-Link DCS-2310L Quick installation guide

D-Link

D-Link DCS-2310L Quick installation guide

Panasonic BB-HCM381A - Network Camera Service manual

Panasonic

Panasonic BB-HCM381A - Network Camera Service manual

AWS MotionCam System installation manual

AWS

AWS MotionCam System installation manual

Weldex WDN-1003XP Operation manual

Weldex

Weldex WDN-1003XP Operation manual

Optiview 27X Varifocal Zoom Module Camera CM27X Specifications

Optiview

Optiview 27X Varifocal Zoom Module Camera CM27X Specifications

Digisol DG-SC7100P-10 user manual

Digisol

Digisol DG-SC7100P-10 user manual

Concept Pro AIR8010-AHD-Z user manual

Concept Pro

Concept Pro AIR8010-AHD-Z user manual

Vitek VTC-IRT40-2812 manual

Vitek

Vitek VTC-IRT40-2812 manual

Sony BRC-300 Brochure & specs

Sony

Sony BRC-300 Brochure & specs

Hanwha Vision PNM-C16013RVQ quick start guide

Hanwha Vision

Hanwha Vision PNM-C16013RVQ quick start guide

Reolink RLC-1010A/B4K11 Operational Instruction

Reolink

Reolink RLC-1010A/B4K11 Operational Instruction

Panasonic WVCL920 - COLOR CAMERA operating instructions

Panasonic

Panasonic WVCL920 - COLOR CAMERA operating instructions

DW DWC-MV95WiATW user manual

DW

DW DWC-MV95WiATW user manual

Vivotek IP8336W Technical specifications

Vivotek

Vivotek IP8336W Technical specifications

GeoVision GV-EBDP5800 user manual

GeoVision

GeoVision GV-EBDP5800 user manual

Lorex LKE353A SERIES quick start guide

Lorex

Lorex LKE353A SERIES quick start guide

manuals.online logo
manuals.online logoBrands
  • About & Mission
  • Contact us
  • Privacy Policy
  • Terms and Conditions

Copyright 2025 Manuals.Online. All Rights Reserved.