417
1.The filter or connector is obstructed.
1 The related switch has not been
turned on.
.
2. The voltage of the machine is not
normal or stable.
3 The related indicator light flashes
abnormal.
.
1 Switch on the related motor switch..
2 Make sure the machine is working with
stable volatge.
.
3 Turn off the power, and then, turn it on
again.
.
2 Control panel buttons
and indicator lights display.
. Operation control
1
2
5
4
3
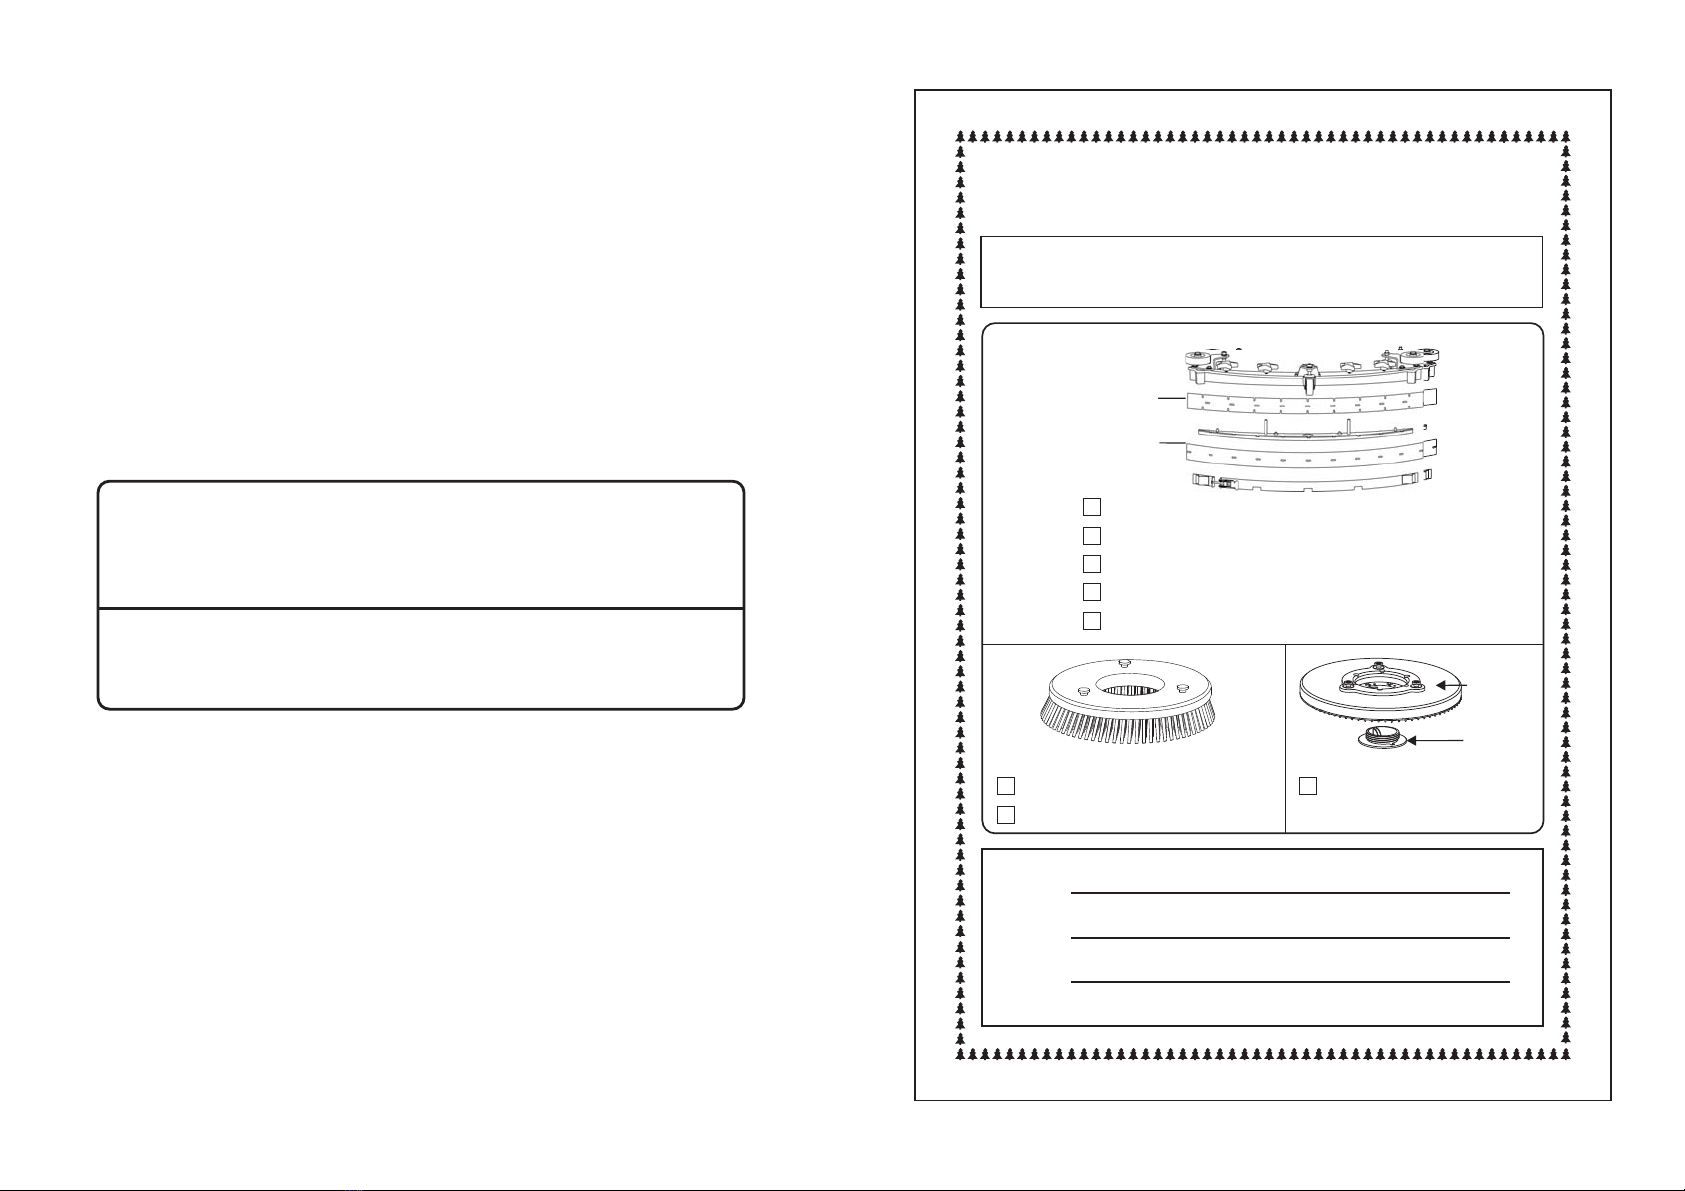
OPERATION INSTRUCTIONS
Description of control components
1.Handle Control the direction of
the machine.
3.Key switch The whole power switch.
Control all the function
buttons.
4.Squeegee lever Lift up it to ascend the
squeegee;
release it to
descend the squeegee.
5. Pedal Step on it rightward to
descend the brush;
it leftward and
to raise the
step
on release
it brush.
Control panel
MAINTENANCE GUIDE
Trouble shooting
Note: Before contacting the repair agent or our customer service department,
please check the followings for possible solutions.
Note:
Problem Cause Solution
The motor
does not run.
No water
come out
or the water
flow is small.
Vacuuming
is weak.
The terminal poles
of the batteries
become hot or
fused.
Water suction
power is weak.
The machine
could not
clean
thoroughly.
1.The machine socket has not been
socket.
connected well with the battery
The control panel’s
LED indicator light
do not blink.
1.Connect the machine socket well with
the battery socket.
2.The floor being cleaned is too dry.
Solution supply is insufficient when
cleaning a new building for the first
time.
3.The solenoid valve or the sprinkling
motor is obstructed. The sprinkling
indicator light blinks.
1.Remove the filter and the connector
and clean them.
2.When the ground is too dry, sprinkle
some water on it before cleaning
water.
3.Clean the solenoid valve and the
sprinkling motor.
4.Check whether the solenoid valve is
short-circuited,the sprinkling motor
is working.
1.The seal ring of the recovery
tank lid failed.
2. The hose clip loosened.
3. The vacuum motor loosened.
4. The suction hose is obstructed.
5. The suction hose is broken.
1.Attach the seal strip properly.
2.Check the hose clip and install it
properly.
3.Open the silencer lid, make sure
the motor is installed correctly
and properly.
4.Clear out the air inlet and outlet.
5.Repair the suction hose.
1.The cable are not tightly
screwed.
1.Tighten the screw.
1.The suction hose is obstructed.
2.There are foreign objects in the
squeegees.
3.The squeegee is excessively
worn out.
4.The height of the squeegee is
not suitable.
5.The vacuum motor does not run.
1.Remove the foreign objects.
2.Remove the foreign objects
3.Use another side of the squeegee
or replace the squeegee.
4.Adjust the height of the squeegee.
5.Check the motor.
.
1.Check the motor.
2.Use a special effect detergent and
sprinkle it on the floor.
3.Replace the brush.
4.Remove the foreign object.
1.The brush motor doesn’t run.
2.The dirt is too stubborn.
3.The brush is excessively worn
out.
4.The brush is obstructed by a
foreign object.
4.The solenoid valve or the sprinkling
motor is too protective.
Suction
button
③
⑥
④
②Power gauge
Manual/Auto
button
⑦
Sprinkling button
Scrubbing/
Assembling
button
⑤
①Removing
button
Key switch
Guangdong Baiyun Cleaning Group Co.,Ltd