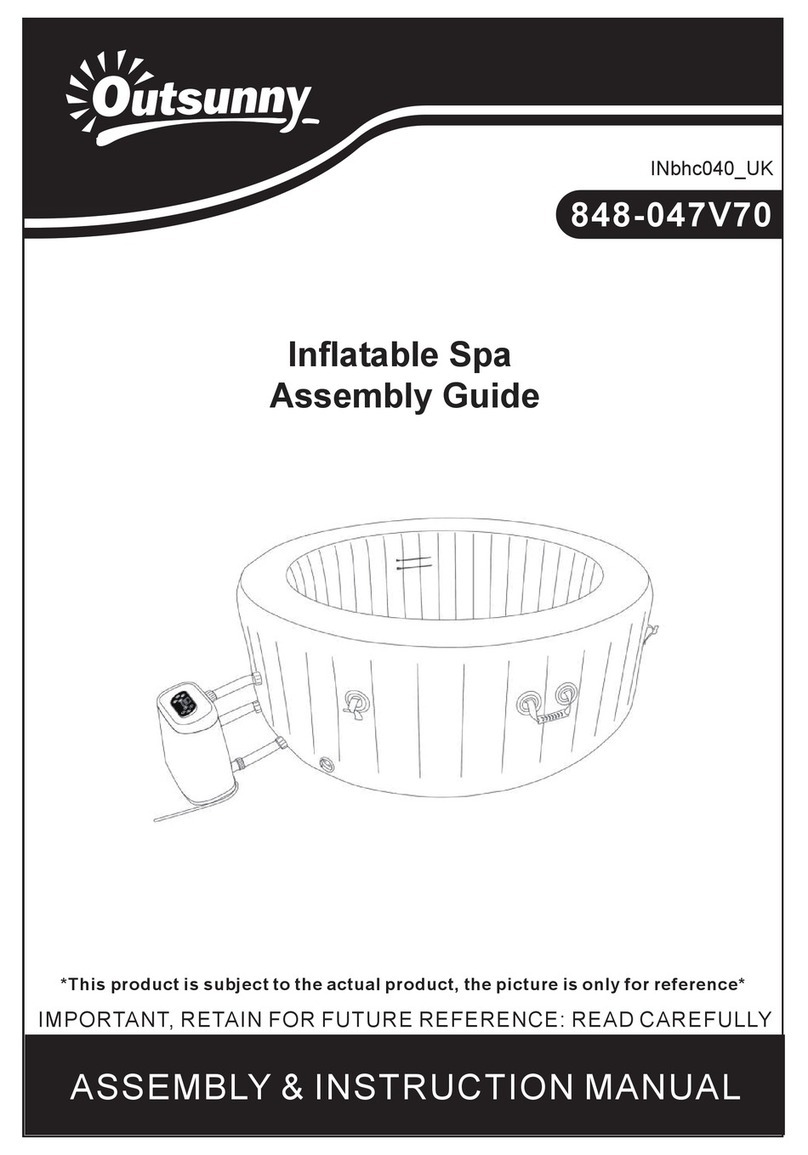
habitat et jardin Antibes 1079 121082 User manual

1
2021-2022
Ref:1079_121082
SPA GONFLABLE
EN

2
Contents
1.General safety rules..............................3
1.1 Explanation of symbols............................................................................................................... 3
1.2 General safety instructions ........................................................................................................ 4
2.Part list ...............................................5
3.Technical specifications ......................5
4.Installation .........................................6
4.1 Before installation outdoors ......................................................................................................... 6
4.2 Before installation indoors ............................................................................................................. 6
4.3 Installation..................................................................................................................................... 6
4.4 Tighten the inflation valve ........................................................................................................... 13
5.Use....................................................14
5.1 Temperature adjustment............................................................................................................ 14
5.2 Inflation /air jets.......... ................................................................................................................ 14
5.3 Heating.... .................................................................................................................................... 14
5.4 Filtering system............................................................................................................................ 14
6.Maintenance and repair ....................14
7.Storage..............................................15
7.1 How to empty your spa............................................................................................................... 15
7.2 How to deflate your spa ............................................................................................................. 16
7.3 Storage ........................................................................................................................................ 16
7.4 When to change your spa filter................................................................................................... 16
8.Troubleshooting ................................17
9.Recycling instructions .......................18
9.1 Recycling and packaging .............................................................................................................. 18
9.2 Recycling old devices................................................................................................................... 18
9.3 Meaning of the "trash can" symbol............................................................................................. 18
10.After-sales service ...........................18

3
Thank you for purchasing our product. Please read the user manual carefully before using the
product for the first time. If you have to transfer this product to a third party, please attach the
user manual together.
Drawings in this manual may not correspond to physical objects. Please refer to physical objects.
1. General safety rules
1.1 Explanation of symbols
This product must not be disposed of with household waste !
Warning against the risk of electric shock !
Warning ! Read the safety instructions carefully. The no-compliance
with safety measures may result in injury or serious damage. Keep
the instructions for use in a safe place.
Note : Unplug the power plug !
Warning !Make sure the product is grounded.
Be especially careful when using this article !
"Limited Warranty - Terms and Conditions":
"This warranty only applies to the original buyer. The warranty period begins on the day
of purchase and lasts from 1 to 6 months depending on the elements. The warranty is
not transferable to posterior buyers. This warranty is subject to the limitations and
exclusions detailed below.
Warranty period
--- 1 month warranty for the spa.
--- 6 months warranty for electrical elements. »

4
1.2 General safety instructions
•The device must be supplied by a residual current device (type RCD / GFCI) whose rated
tripping current does not exceed 30mA.
•Electrical installations must meet the requirements of local standards. Electronics earthed
must be permanently connected to fixed wiring.
•Any damage caused to an electric cable must be replaced by a competent party immediately
before any further use.
•It is recommended not to use an extension cord to connect to the power supply electric.
•RISK OF ELECTRIC SHOCK . Never operate an electrical appliance external / additional when
you are in the spa or when your body is wet.
Keep electrical appliances away from the spa.
•RISK OF ACCIDENTAL DROWNING . Children are prohibited from using the spa unless they
are supervised at all times by a responsible adult.
•For health and safety reasons, we do not recommend that children under the age of 8 years
of using our spas.
•For children 8 years and older, we recommend not to exceed 37 ° C.
•When not in use, the cover should be installed and locked to help retain the heat. This also
helps prevent unsupervised children from accessing the spa.
•Take a shower before using your spa. Cosmetics, lotions, etc. on the skin can degrade water
quality.
•Do not turn on your spa if there is a possibility that the water in the spa or control system be
frozen.
•Pets should be kept away from your spa at all times.
•Soaking in hot water during pregnancy can cause damage to the skin. If you have any special
concerns, please consult your doctor before continuing to use your spa.
•Consumption of alcohol, drugs or medication before or during the use of your spa may
increase the risk of drowning.
•People with a history of heart disease, hypo tension / hypertension, high blood
pressure,circulatory system problems or diabetes should see a doctor before to use the spa.
People taking medication should consult their doctor before using the spa. Some medicines
can make you drowsy,while others can affect heart rate, blood pressure and circulation
during use.
•Spa water should never exceed 42 ° C (107 ° F). Operating temperatures between 38 and 40 °
C are considered safe for a healthy adult. Lower temperatures are recommended for young
children, and when use exceeds 10 continuous minutes.
•A maximum temperature of 42 ° C can be programmed for the water.Once the cover is
removed, the water temperature will automatically drop because heat is released by
evaporation. The additional 2 ° C compensates for the heat loss that can occur. Once you are
ready to use, reduce the maximum temperature to the value recommended temperature of
38-40 ° C (100-104 ° F) and make sure that the measured temperature does not exceed 40 °
C.
•Immediately exit your spa if you feel uncomfortable or drowsy.
•Do not turn on the spa when it is empty. It could cause damage irreparable to the pump
system, which will void any warranty period

5
•To prevent damage to your pump and heating system in cold weather,your spa is equipped
with 365 Freeze Guard technology. Set the temperature to 5°C, this will prevent the water in
the system from freezing.
•Always add chemicals to the water jug to avoid strong vapors or violent reactions that can
result in chemical spraying dangerous.
•To prevent accidental resetting of the thermal circuit breaker, this device must not be
powered by an external switching device, such as a timer, or connected to a circuit which is
regularly started and stopped by the utility.
•WARNING: An adequate drainage system must be provided to treat the water overflows.
•IMPORTANT: For installation, the surface must be smooth, flat, level and capable of support
the weight of the spa, water and users equally. For example, the weight of the spa filled with
a square of 6 people: 980 kg (approximately) plus the combined weight of the occupants.
•It is the responsibility of the spa owner to ensure the integrity of the site at all times.
2. Parts list
•Please check that all parts are present in your package before the first time of use
(see 3. Technical specifications)
3. Technical specifications
Templates
AR-HE-SPA7DH/P
Motor power (heating)
1800 W
Motor power (massage)
600 W
Power supply
220-240 V/ 50 Hz
Filter pump power
12 V / 30 W 1400 L/H
Number of filters
1
Number of filtration slats
80
Temperature increase rate
1,5-2,5 / heure
Electric cable length
3.5 M
Number of seats
7
Maximum water capacity
1120 L
Max temperature
40 °C
Number of massage jets
130-140
Top cover material Top cover in laminated PVC coating insulating
Pool material (inner wall)
Drop-stitch
Pool material (outer wall)
Drop-stitch
Foam thickness
5 mm
Content Package 1 LINER pool spa, Pool cover, Floor mat,Hand pump
with gauge, 1x filtering, Coverage1x filter, Inflation
hose, 2x safety clip wrenches,repair patch, valve
wrench
Content Package 2 Control box, Connection hose 3x ,Toric Seal 6x

6
Outdoor pool size
Ø1.80m x0.65m
Indoor pool size
Ø1.75m x0.65m
Net weight Package 1
22 kg
Net weight Package2
9 kg
4. Setting up
4.1 Before installation outdoors
1. Place your spa on a solid and level base, avoiding sharp objects as they could damage the spa.
2. Make sure your spa is plugged into an external power outlet, installed by a professional and
weather proof. We do NOT recommend the use of a extension cord as this may present a fire
hazard.
3. Do not place your spa in direct sunlight, or over-inflate it, as this will cause the spa to swell in
some areas as the PVC heats up in the sun. This bulge could also put additional stress on the
welds internal, resulting in weld failure.
4. When filling, draining or using, water may spill out. Install them At proximity to a drainage
point capable of handling the volume of water
4.2 Before installation indoor
1. The floor must be able to support the weight of the spa occupants.
2. The floor must be a flat, non-slip surface.
3. Before placing your spa indoors, make sure that an adequate drainage system is
installed,available and can be reached. Think carefully about the location of your spa before to
install it.
4.3 Installation
1. Place the groundsheet on a flat, even surface free of sharp objects.

7
3. Remove the protective plastic from the clips and connectors.
4. Inflating valve, air jet connector, water inlet, water outlet, drainage outlet.
5. Assemble the hand pump, pressure gauge and hose. Insert and twist until they are locked.
6. Locate the inflation valve. Remove the valve cap. Connect the hose by turning clockwise to
lock it. The central button MUST be at the top .
7. Use a double-acting hand pump to inflate. (Air pressure 7 PSI). About 7 PSI.
2. Unpack the spa on the ground sheet.

8
8. Inflation takes 2 minutes (approximately). Note: The drainage outlet must be placed at outside
the spa.
9. Once inflated, turn counterclockwise to release the hose and replace the valve cap.

9
10. Unpack the outdoor unit, screw the pipes 3x onto the outdoor unit in the order shown.
11. Align the pipes with the respective connectors and screw them into place. Plug in, turn on.

10
12. Interior Features: Water circulation outlet, filter connector and plug drainage
13. Screw the filter cartridge onto the filter connector.

11
14. Add the filter protection cover to the filter cartridge.
15. Add water to the level. No higher than the "MAX" level.

12
16. Set the temperature on the control panel.
17. Clip on the top cover to retain heat.

13
18. Double locking clips with security keys.
4.4 Tighten the inflation valve
•Over time, the inflation valve may loosen. Use the valve wrench provided for tighten,
maintaining air tightness.
•Important : When using the wrench - do not loosen the valve, as it may break.

14
5. Use
5.1 Temperature adjustment
• Press SET TEMP / LOCK and the digits on the display screen will start to flash.
Increase / decrease the temperature by pressing TEMP UP or TEMP DOWN .
• Choose the desired temperature, then press SET TEMP / LOCK again to confirm. Temperatures
can be set between 5 ° C and 40 ° C. (see instructions for safety for recommended operating
temperatures).
5.2 Inflation / air jets
• Press INFLATE / AIR JETS to start the air jets - a red light will appear. Press this button again to
stop the operation of the air jets - the indicator light red goes out.
• The air jets stop automatically after 20 minutes. To reset them, wait 10minutes and press
INFLATE / AIR JETS . The air jets can be stopped / started at any moment during their 20-minute
cycle.
• The air jets stop after 20 minutes to prevent overheating of the internal pump
5.3 Heating
• Press HEATER , a red light will appear. Press HEATER again and the heating system will stop, the
red light will go out.
• When the heating system is on, the filtration system is activated automatically to circulate the
water. When the temperature has reached 1 ° C above the preset temperature, the heating system
stops working, but the indicator light remains alight. The filter pump will continue to run even if the
heater is not running.
• When the water drops 1 ° C below the pre-set temperature, the heating system automatically
heats the water up to 1 ° C above the selected temperature. Once this temperature is reached, the
heating will stop to allow the temperature to settle, and stabilize at the preset value.
5.4 Filtering system
• Press FILTER , a red light will appear, the pump will start to run. Press FILTER again to stop the
pump, the red light goes out.
• After about 168 hours, HR will appear on the display screen (blinking) with a signal warning. The
red light will light up on FILTER , the pump will not be operational. the heating system will not work
either and the red light will go out.
• To make sure the filtration system is off, press FILTER . HR on screen display will disappear along
with the warning tone. The water temperature will be displayed, all functions will return to normal.
The key CF and tone warning messages remind the user to replace the filter
6. Maintenance and repair
Water level
Water should be filled and held between the 'Min' and 'Max' fill lines asmarked on the inside
wall of your spa.

15
Importance of water treatment
You should regularly monitor and properly treat your spa water.
People with the following characteristics are at higher risk, including :
−Diabetes, lung and heart disease
−Smokers and heavy drinkers
−Anyone with a weakened immune system
−People with chronic respiratory or kidney diseases
For more information, consult your doctor.
Water and Legionnaire's Disease?
Legionnaires' disease can be contracted by inhaling small droplets of water (called aerosols),
which are suspended in the air and contain the bacteria. Certain conditions increase the risk of leg
ionellosis if:
- The water temperature in all or some parts of the system is between 20and 45 ° C, which is
conducive to the growth of the bacteria.
- It is possible that breathable water droplets are created and the water is stored and / or
recirculated.
- There are deposits that can promote bacterial growth by providing a source nutrients for the
body, for example rust, sludge, scale, material organic and biofilms (from the body).
Cleaning
Detergent residues, dissolved solids from swimsuits and chemicals gradually accumulate in the
water. To clean your spa, use soap and water, then rinse thoroughly.
Please note : Do not use hard brushes or abrasive cleaners.
Repair of punctures
If your spa is torn or punctured, use repair patches. Dry the area completely, apply strong adhesive
to repair the patch, then cover the damaged area. Smooth the surface to remove any air bubbles.
Let dry for 12 hours before to use the spa.
7. Storage
7.1 How to empty your spa
1. Disconnect the spa from the electrical network.
2. Unscrew the plug from the drain port, located near the spa pumping system. Make sure that the
drain plug is inserted to prevent unexpected draining.
3. Remove the drain plug from the outlet on the floor level of the spa, so that the water can drain to
flow.
4. After the spa is emptied, use a sponge to soak up the excess water. Turn on the spa,which will
allow you to use the air blast function for 20 minutes (one complete cycle) to drain the water and dry
the pipes. If it is not completely dry after the first cycle,repeat the operation.
5. When draining is complete, replace the drain plug and outlet cap.
6. Unplug the pump and the heating system and dry them completely

16
7.2 How to deflate your spa
1. Remove the filter cartridge and the filter bag.
2. Locate the inflation valve.
3. Remove the valve cap by turning 90 ° C counterclockwise.
4. Press the inflation valve by turning it 90 ° clockwise to lock it in place, which releases air.
5. Fold carefully, removing as much air as possible through the open valve.
6. When completely deflated, turn the inflation valve 90 ° counterclockwise to close it.
7. Replace the valve cap and turn 90 ° clockwise to release the valve to close.
7.3 Stockage
Make sure all water is completely drained from the spa and pumping system. It is essential for
extending the life of your spa. We recommend the use of a wet / dry vacuum to help blow / suck
water from hoses and pumping lines. Remove the filter cartridge. The spa should be placed in the
bag provided and stored in a dry, elevated place off the ground and away from extreme
temperatures.
Note: When not in use, store it in a dry place with moderate temperature,as subzero temperatures
can seriously damage your spa.
7.4 When to change your spa filter
Keep your spa clean and free from contaminants. For optimal operation, unscrew the filter and rinse
it with clean water after each use to remove small particles and residues. The filter is one of the
most important elements in ensuring the proper functioning of the your spa.
1. Remove the protective cover from the filter bag and then remove the filter.
2. Rinse the filter under a cold tap and reuse it. You can also wash your filter machine (place it
in a pillowcase) to keep it clean and to maintain its performance.
Replace your old filter with a new one if :
•The filter remains dirty after cleaning.
•Holes are visible in the paper.
•The paper is visibly worn.
3. Put the filter protection cover back on the filter and attach it to the filter connector by turning it
clockwise. Do not over tighten, as this may cause a "clicking" noise.
Do not forget ! Check your filter every day!
To help keep your water clean, check your filter cartridge daily.

17
8. Troubleshooting
Problems Possible causes
Solutions
The system air
jet does not
work.
Air pump too hot.
Something is wrong with
the case power supply.
Air pump in mode
cooling.
Disconnect system. Once the air pump has
cooled, insert the plug and press the air jets
button to activate it. Wait 10 minutes and
restart. Call customer service if the pump does
not restart.
The system
heating does
not work.
The temperature is set
too low.
Dirty filter cartridge.
Improper water levels.
Heating element failed
Set to a higher temperature (20 - 40 ° C)than the
current water temperature. Clean / replace the
filter cartridge. Add water to specified levels. Call
customer service if you don't resolve the
problem.
The system
filtering does
not work/
noise of rattling
when setting
filter step
Dirty filter cartridge.
Something is wrong
with the case power
supply
Clean / replace the filter cartridge. Call
customer service if it is not reset.Ask a
professional electrician to check the correct
functioning of the power supply electric from
the house.
Spa leak The spa is torn or
perforated.
Use the repair patch provided.
Water is not
clean.
Filtering time insufficient.
Dirty filter cartridge. Poor
water maintenance.
Increase filtration time. Clean / replace the
filter cartridge. Refer to the manufacturer's
instructions for chemical products.
Temperature
of the screen is
more than42 °
C, after stop
the function of
heating.
Residual water from the
spa will continue to be
heated by residual
temperature . The water
inlet by the filtration
system can be blocked.
Unplug the power plug and wait. The
temperature will start to drop and come back to
normal.
Clean the entrance.
Call customer service if it is not resolved.
Control panel error codes
Code
Cause
Solution
FC
When the filtration system has worked
for about 168 hours,HR is displayed on
the screen with a signal warning. The
red light will be always on on the filter,
the pump will not be operational. The
system heater will not work, and the
red light will be off on the heating.
Check the filter and change it if
necessary. Once it's done,press the filter
again. The code HR error will disappear
and the audible signal will stop. The
water temperature will be displayed, all
functions.
SL/HL
Question of temperature Contact customer service
SH
Water temperature sensor Contact customer service

18
9. Recycling instructions
9.1 Recycling and packaging
•Be sure to follow the guidelines and recommendations in force in your region for
packaging recycling. Sometimes the packaging may contain plastic bags -carefully keep
them away from children. There is a risk of suffocation!
9.2 Disposal of old devices
•Recycle your old devices according to local guidelines and recommendations concerning the
treatment of waste.
•At the end of the life of the item do you dispose of the materials properly so that asuitable
recycling is permitted. If you are not sure how to do the right thing,local garbage caterers are
happy to help.
9.3 Meaning of the "trash can" symbol
Protect our environment, electrical devices should not be thrown in the
classic trash. Go to the recycling centers provided at this effect to get rid of
electrical appliances that you do not serve more. Thus, you help to avoid
potential negative effects on environment and human health due to poor
waste treatment. You thus make your contribution to the recovery of
waste,recycling and any other form of upgrading of old devices electrical and
electronic. You can get information about places to take your devices to local
authorities or your municipality.
10.After-sale service
For the sake of efficiency, and exact collection of information, thank you to send us an email
beforehand with your postal and telephone details, as well as the nature of the breakdown, to
process your request before your call. Thanks in advance :
company habitatejardin
Site http://www.habitatetjardin.com/
After-sales service http://sav.habitatetjardin.com/
Telephone
Fax
Mail sav4@habitatetjardin.com
Opening days and hours undi - jeudi : 9h-12h et 13h -17 h Vendredi : 9h-12 h
In case of emergency

1
2021-2022
Ref:1079_121082
SPA GONFLABLE
FR

2
Table des matières
1. Règles générales de sécurité ............... 3
1.1 Explication des symboles............................................................................................................... 3
1.2 Consignes générales de sécurité ................................................................................................... 4
2. Liste de pièces .................................... 5
3. Spécifications techniques ................... 5
4. Mise en place .................................... 6
4.1 Avant de l’installation à l’extérieur ............................................................................................... 6
4.2 Avant de l’installation à l’intérieur................................................................................................ 6
4.3 Mise en place................................................................................................................................. 6
4.4 Resserrer la valve d’inflation....................................................................................................... 13
5. Utilisation ......................................... 14
5.1 Réglage de la température.......................................................................................................... 14
5.2 Gonflement / jets d’air................................................................................................................ 14
5.3 Chauffage .................................................................................................................................... 14
5.4 Système de filtrage...................................................................................................................... 14
6. Maintenance et réparation ............... 14
7. Stockage ........................................... 15
7.1 Comment vider votre spa............................................................................................................ 15
7.2 Comment dégonfler votre spa .................................................................................................... 16
7.3 Stockage ...................................................................................................................................... 16
7.4 Quand changer le filtre de votre spa........................................................................................... 16
8. Dépannage ....................................... 17
9. Indications de recyclage ................... 18
9.1 Recyclage et emballage............................................................................................................... 18
9.2 Recyclage des anciens appareils.................................................................................................. 18
9.3 Signification du symbole « poubelle »......................................................................................... 18
10. Service aprés-vente..........................18
Table of contents
Languages:
Other habitat et jardin Hot Tub manuals

habitat et jardin
habitat et jardin Cuba User manual

habitat et jardin
habitat et jardin Duo Manual

habitat et jardin
habitat et jardin Monaco 4 places User manual

habitat et jardin
habitat et jardin M-3301 User manual

habitat et jardin
habitat et jardin NICE Series User manual

habitat et jardin
habitat et jardin Monaco 1079 86860 Series User manual
Popular Hot Tub manuals by other brands

Hydropool
Hydropool 19DTfX AquaSport installation guide

Weslo
Weslo Daybreak 510blue manual

Aquatic
Aquatic HOTSOAK 85 ai6032SvhS Specification sheet

Weslo
Weslo Daybreak SPRW52461 user manual

Sharper Image
Sharper Image Foot Spa Thermal Therapy Use & care manual

Jacuzzi
Jacuzzi Signa 6 Plus Whirlpool Bath BP87 Specification sheet