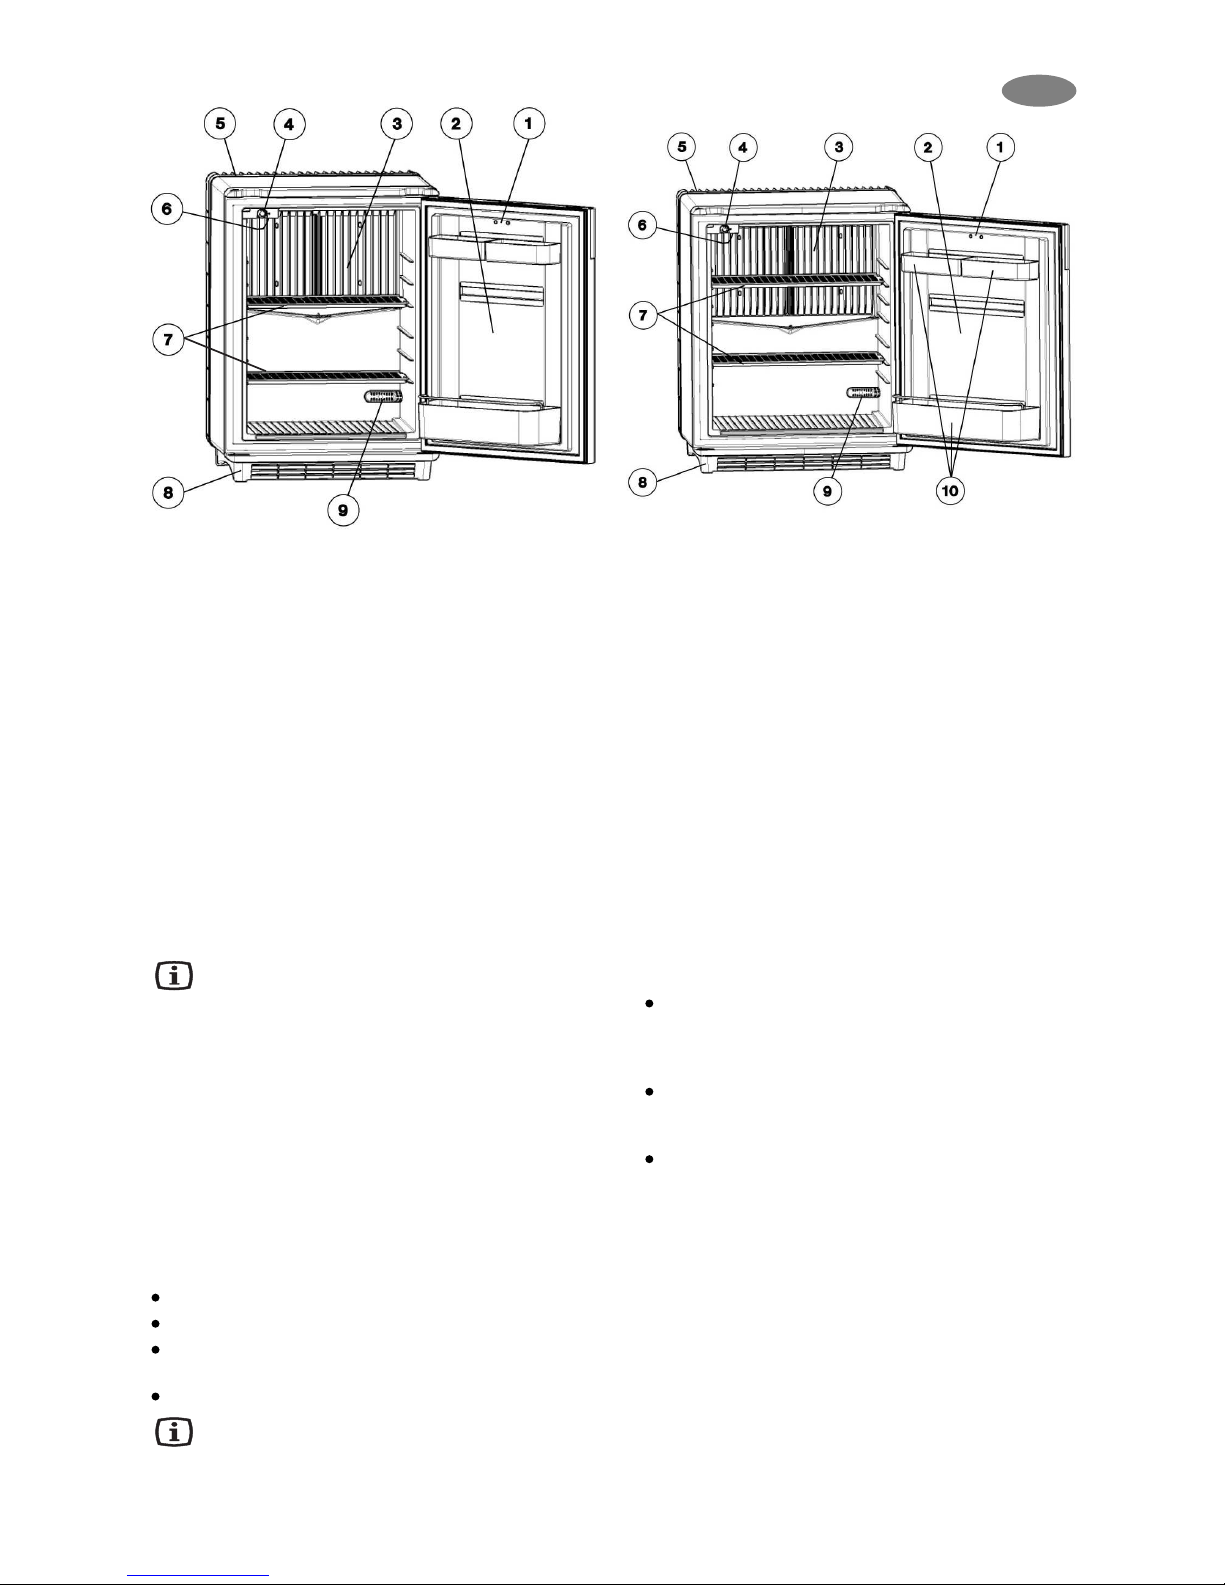
Remove the mounter screws (1) of the forehead panel.(3)
Remove rosette (2) (in case of with lock version fridge).
Lift and remove the forehead panel.(3)
Slide the decorative panel (4) out of the door frame and
insert the new panel (thickness max. 2 mm).
Place back the forehead panel,rosette and screw in reverse
sequence.
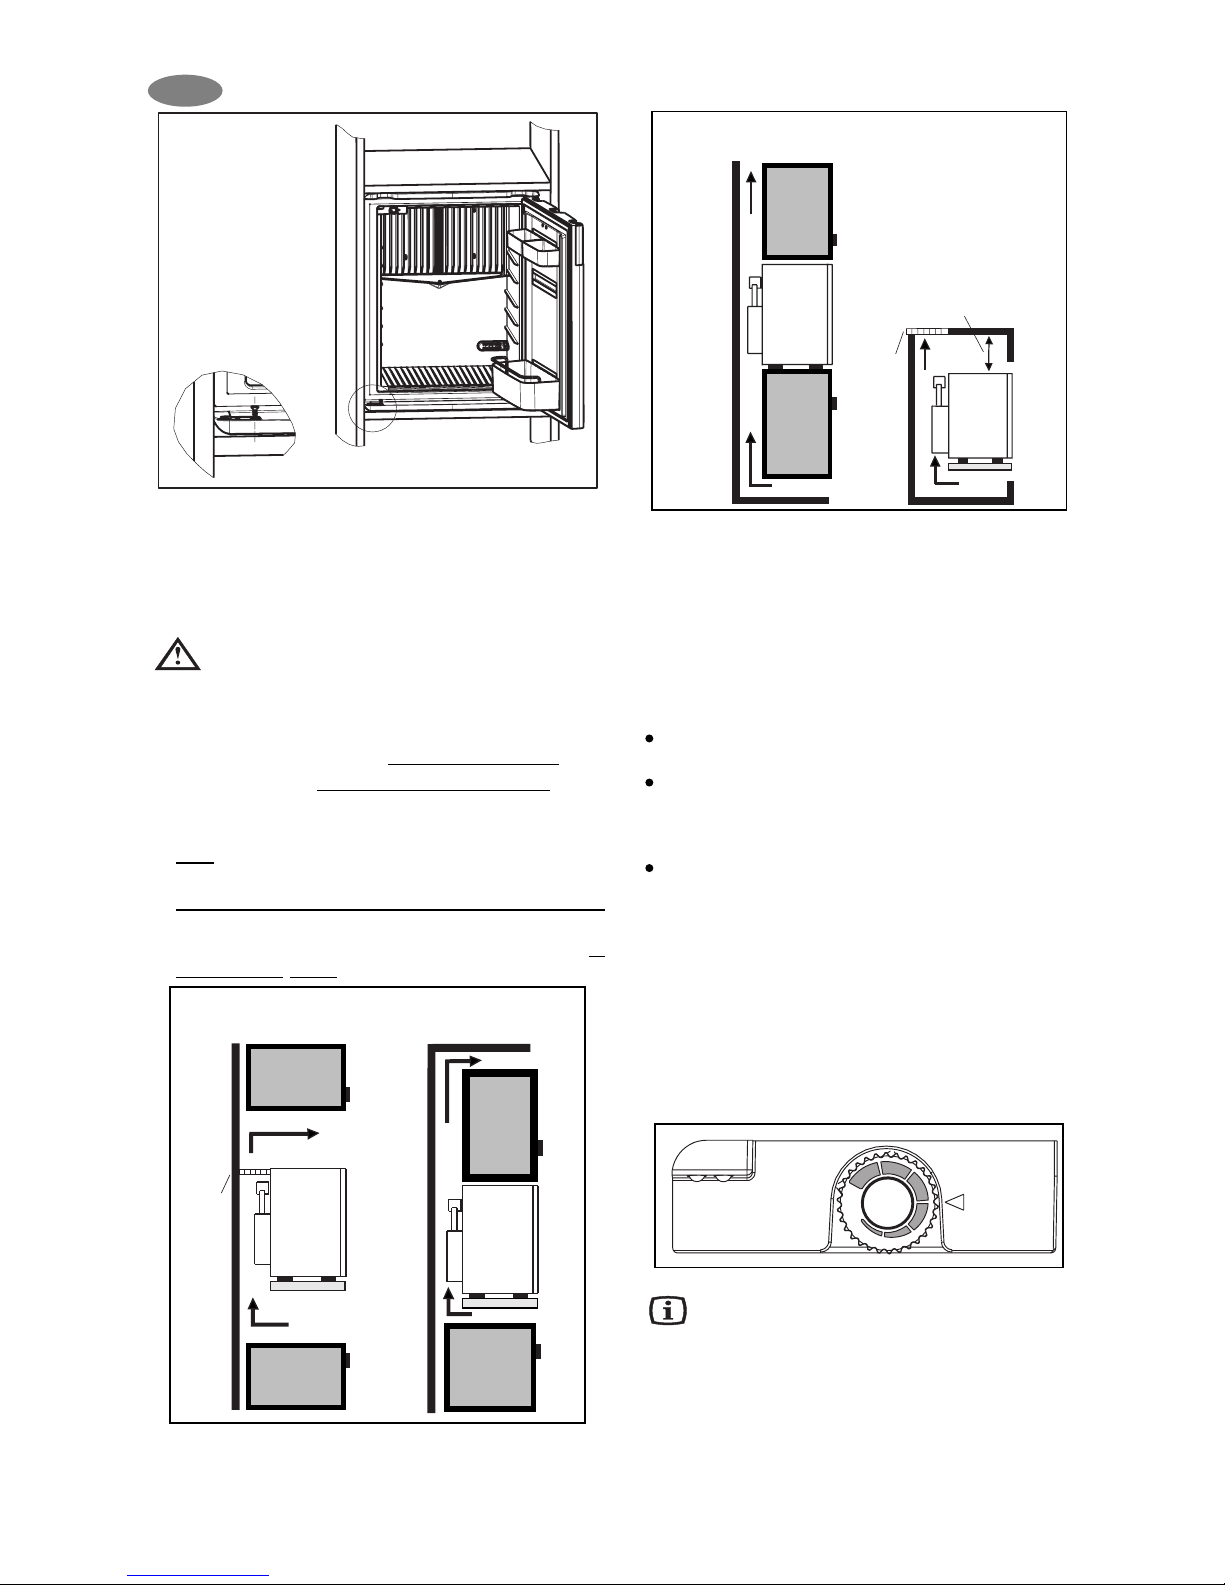
11. Fitting up and removing the
handle
The handle which can be found among the accessories of
the appliance should be fitted and removed as follows:
11.1. Fitting up the handle (fig. 12., 13.)
Figure 12.
Figure 13.
8
GB
12
3
11.2. Removing the handle (fig. 14.)
Figure 14.
12. Customer service
Before you call a service engineer, carry out the
following simple tests:
Is there a power failure? Check the fuses.
Is the plug firmly connected to the socket and is the
socket switched on? Check the socket by plugging in
another appliance, e.g. a table lamp.
Is the thermostat at the correct setting?
Has the door not been closed properly causing the
inside temperature to rise too quickly?
Is the refrigerator level?
Has the ventilation become obstructed?
If after checking all the above points, the refrigerator is
still not working satisfactorily, contact your nearest
service engineer. State the problem, model, product-
and serial-number.
(Details of the model, product- and serialnumber are to
be found on the data label in the top left of the inside
compartment.)
This refrigerator is equipped with overheating
protection. An authorised service technician can check
whether this has been triggered or not.
In the event of a fault developing, contact your nearest
Service Centre-see local telephone directory.
1
32
13. Putting into operation
Technical data:
13.1 Connecting to electrical mains
The appliance may only be operated from
nominal voltage mains as shown on the data
plate. The appliance mains plug may be connected to a
mains socket earthed in accordance with regulations.
Any electrical work required to install this appliance should
be carried out by a qualified electrician or competent
person.
The manufacturer declines any liability should these
safety measures not be observed.
Model DS 200 DS 300 DS 400 DS 600
Type DS20-60 DS20-60 DS20-60 DS20-60
Gross volume 22,5 litre 28,1 litre 36,7 litre 52,6 litre
Mai s operatio 220 - 240V (AC) 220 - 240V (AC) 220 - 240V (AC) 220 - 240V (AC)
I put 65W 65W 65W 85W
E ergy co sumptio 0.74 kWh/24h 0,76 kWh/24h 0.8 kWh/24h 0.88 kWh/24h
Climate class SN SN SN SN
Absorber Solutio 147g H2O + 98 g NH3151g H2O + 101 g NH3151g H2O + 101 g NH3157g H2O + 105 g NH3
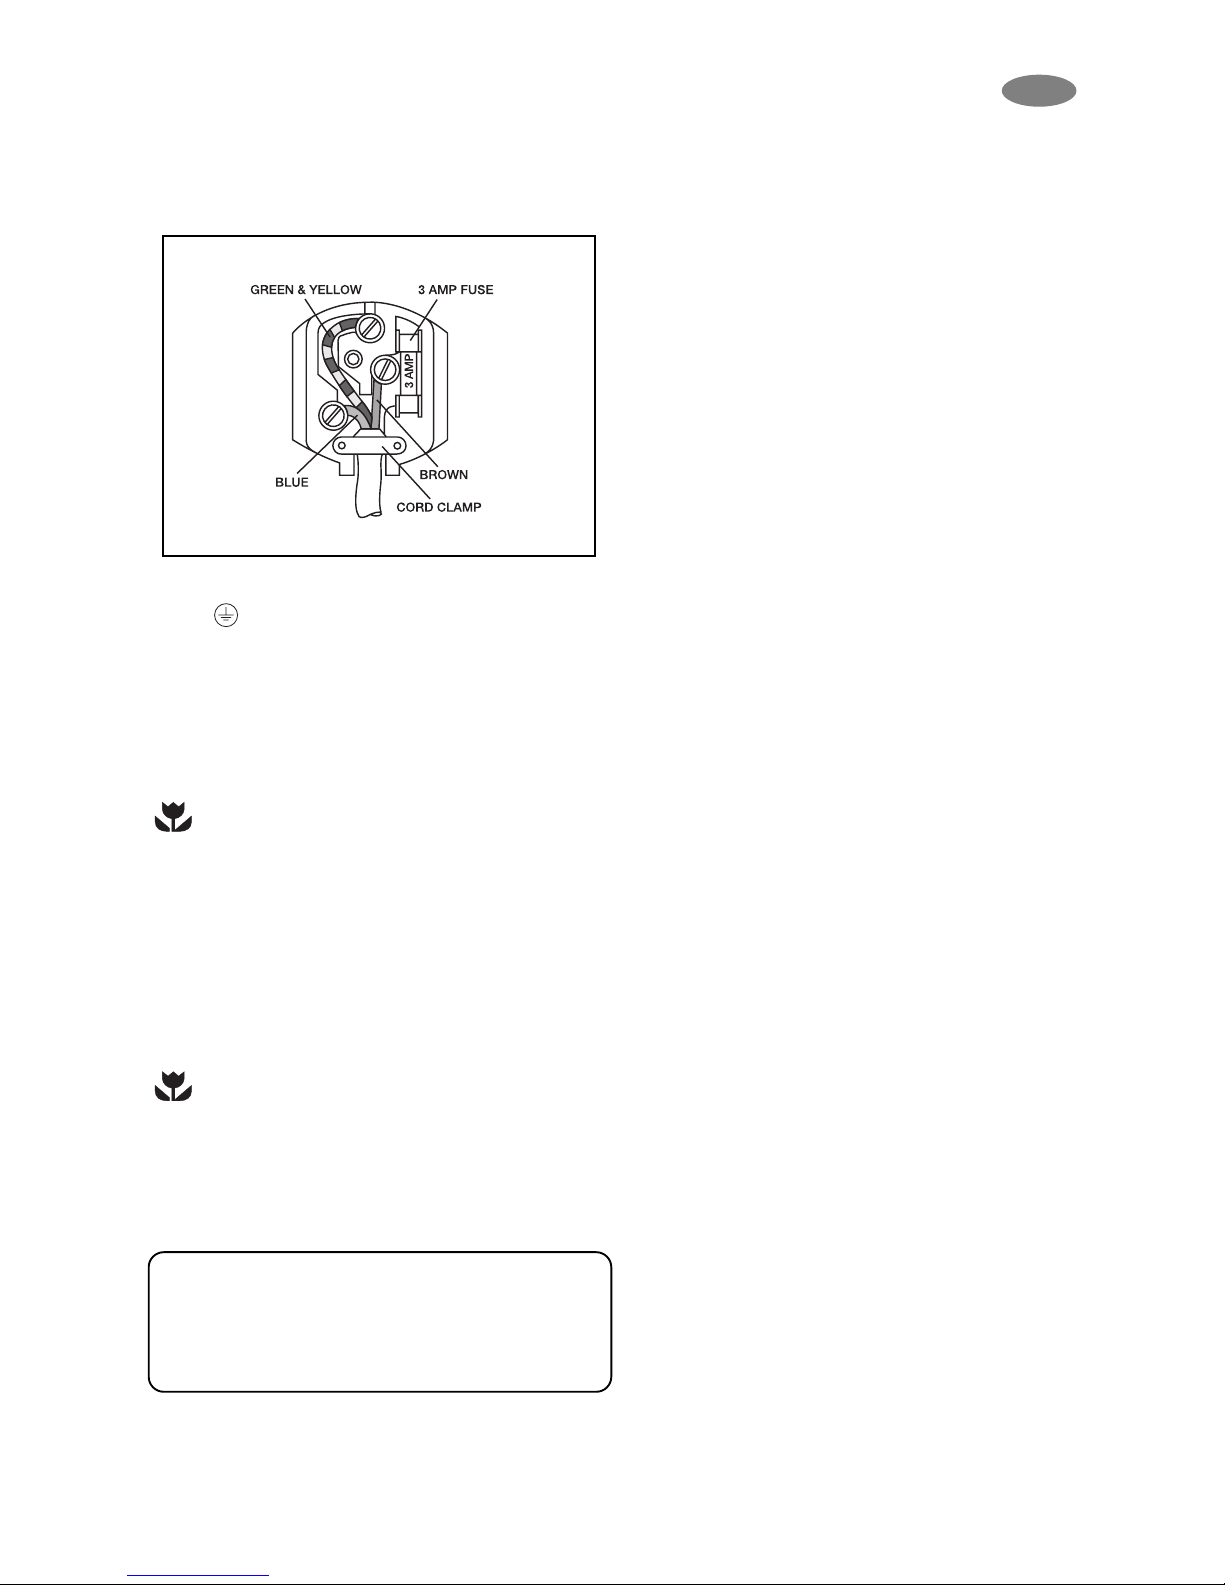
Electrical Requirements
Before switching on, make sure the electricity supply
voltage is the same as that indicated on the appliance
rating plate.
Only for UK:
The appliance is supplied with a 3 amp plug fitted. In the
event of having to change the fuse in the plug supplied,
a 3 amp ASTA approved (BS 1362) fuse must be used.
Should the plug need to be replaced for any reason, the