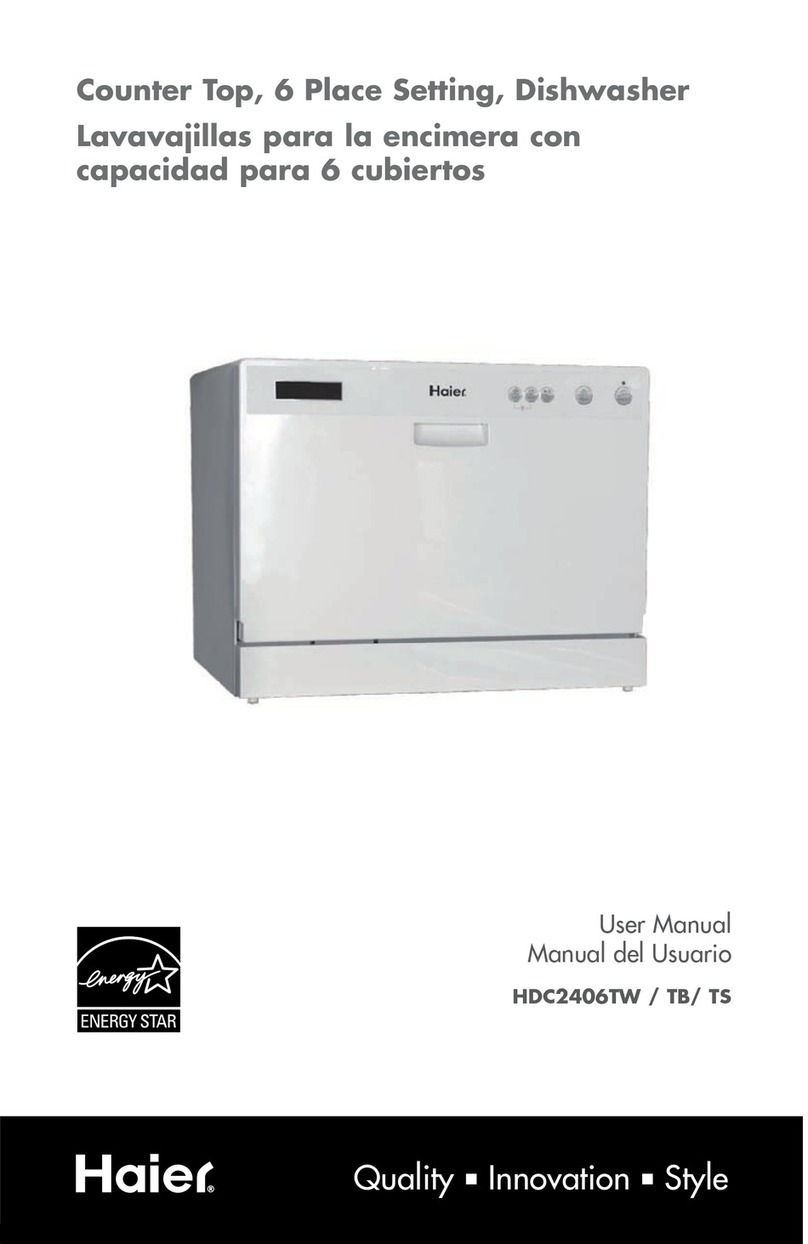
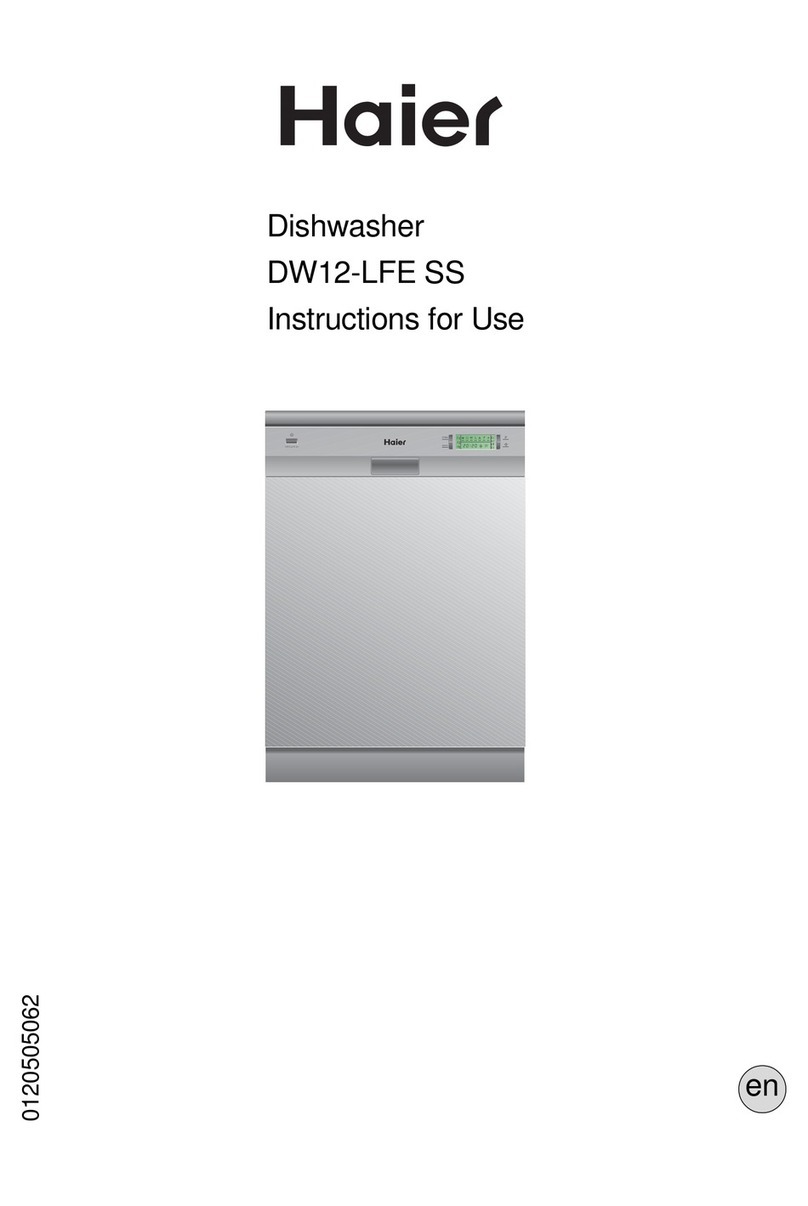
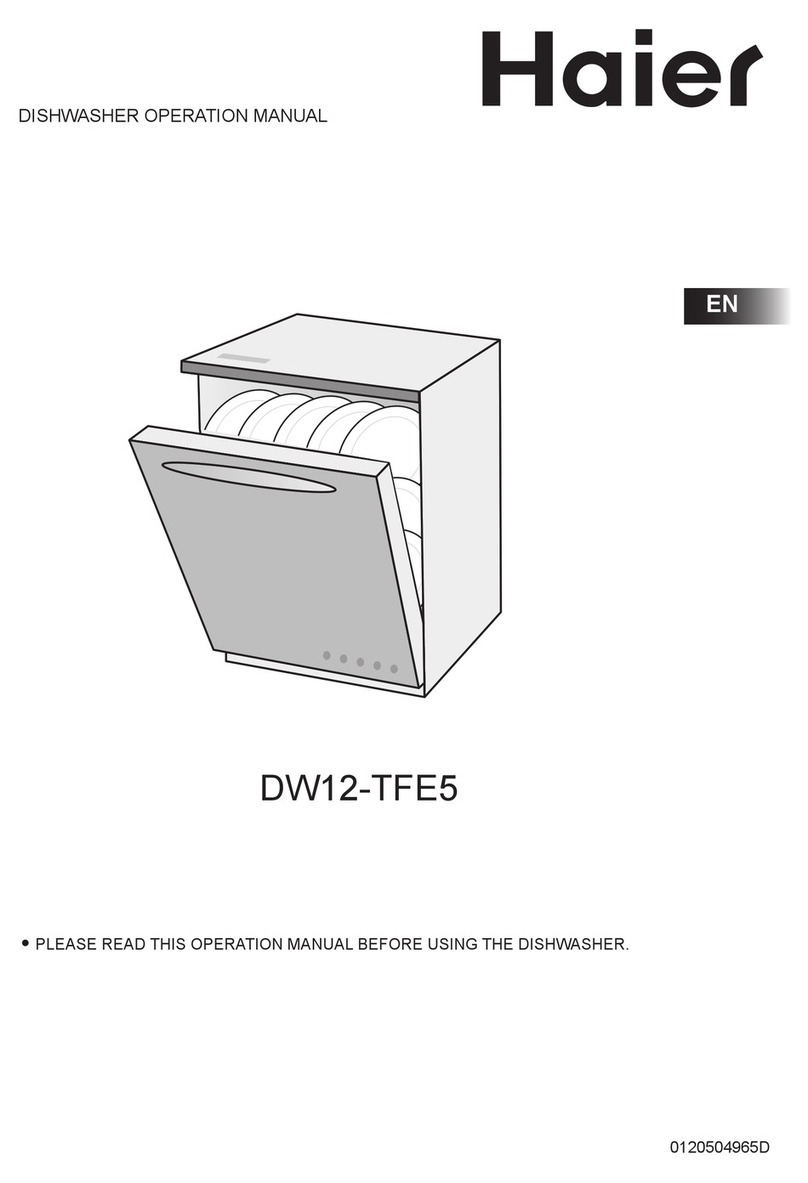
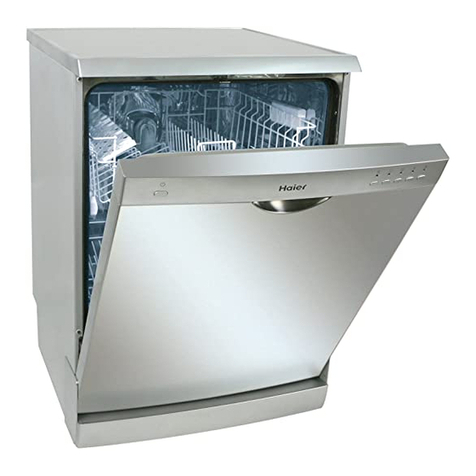
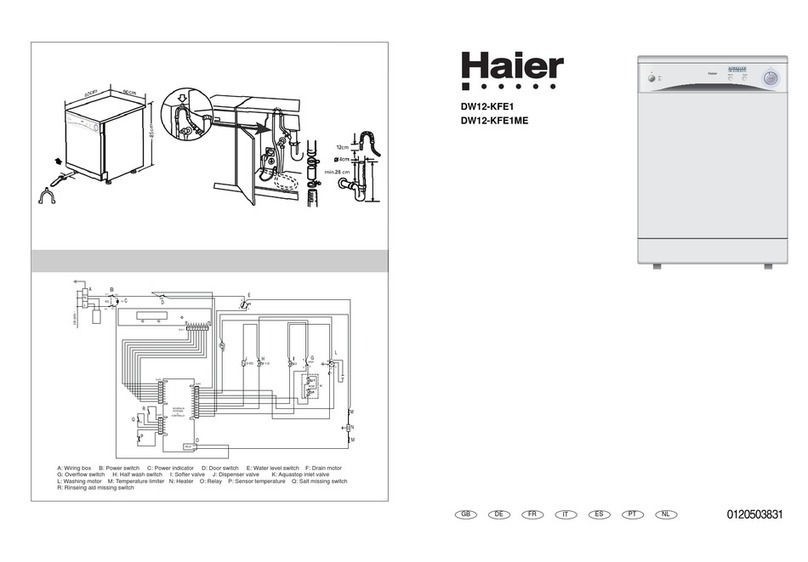
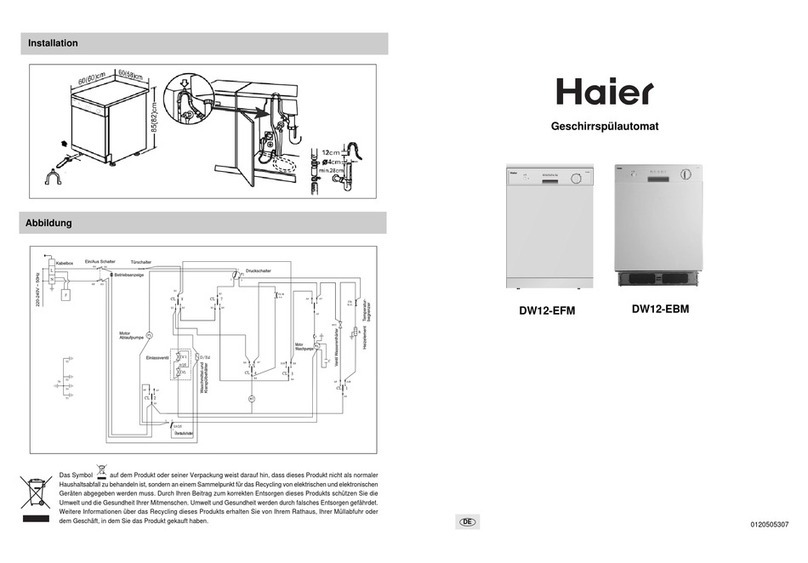
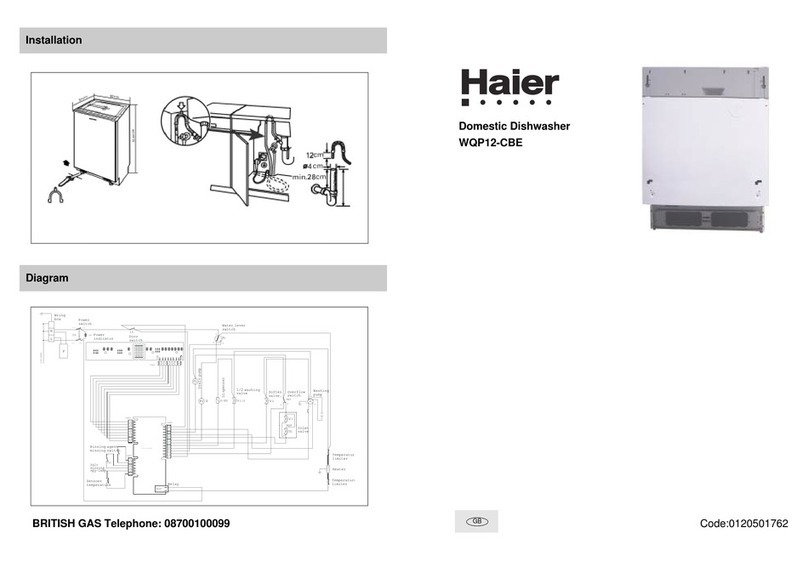
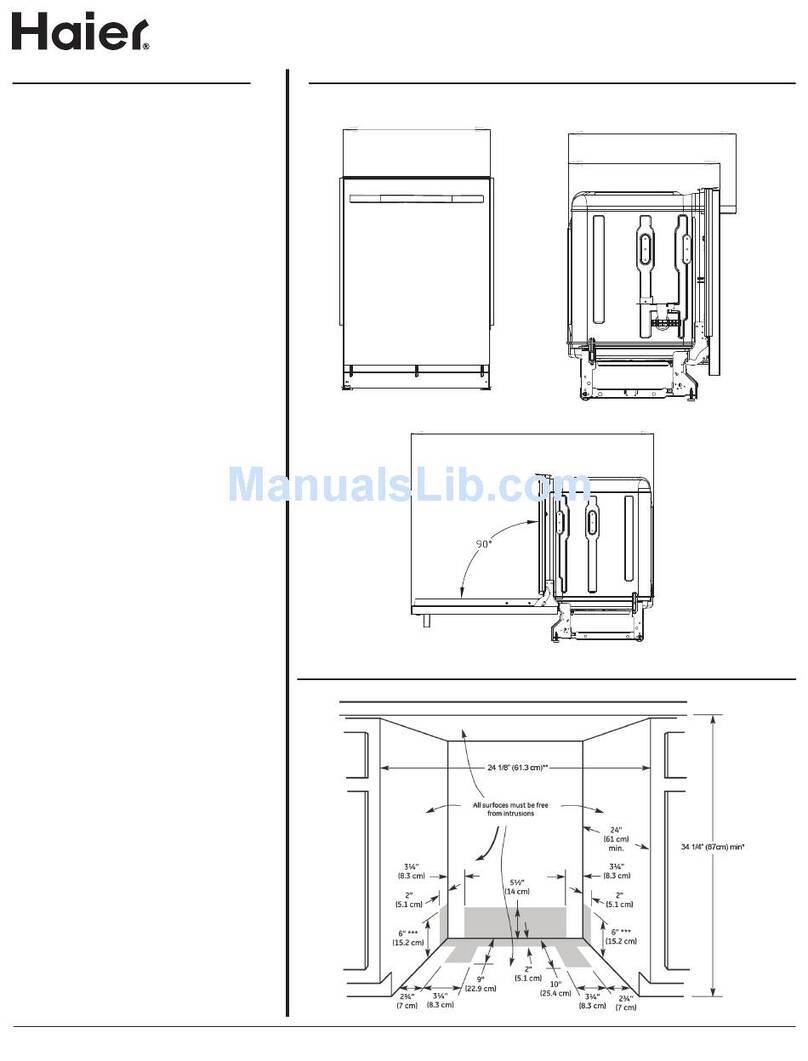
Haier DW12-PFE1 ME User manual

Upute za uporabu
Korisničko uputstvo
Servisna mjesta
Jamstveni list
HR
Servisna mjesta
Garantni list
BiH
Servisna mjesta
Garantni list
CG
Servisna mesta
Garantni list
SR
User Manual
UPUTE ZA UPORABU
PERILICA POSUĐA
DW12-PFE1
DW12-PFE1 ME
RoHS
2002 / 95 / EC
Navodila za uporabo
Udhëzime për shfrytëzim
Упатства за употреба

DW12-PFE1
DW12-PFE1 ME
User
manual
Dishwasher
ENG
RoHS
2002 / 95 / EC

DW12-PFE1 DW12-PFE1 ME
Index
Safety information
Installation
Getting to know your dishwasher
How to fill the salt
How to fill rinse aid
How to fill the detergent dispenser
Not suitable for the dishwasher
Arranging crockery, glasses, etc. in the dishwasher
Programme overview
Care and maintenance
Washing dishes
How to keep your dishwasher in shape
Fault finding
Important information
Technical data
1
2
3
3
4
4
4
5
6
6
7
7
8
9
10

DW12-PFE1 DW12-PFE1 ME
If your family includes children
Warning
Safety of Children when disposing of your old
appliance.Some packaging materials can be dan-
gerous for children. There is a risk of suffocation,
keep packaging materials away from Children.
When disposing of old products remember to dis-
able the door locking system by breaking or re-
moving the door catch. and or hinges. This will
stop children from locking themselves inside the
product when playing. (Danger of suffocation).
Dangerous voltage
The appliance is not intended for use by young children or infirm persons
without supervision.
Young children should be supervised to ensure that they do not play with
the appliance.
Keep detergents out of the reach of children, who must also be kept away
from the dishwasher when it is open.
When disposing of old appliances
Appliances which are no longer being used must be made inoperable by
cutting the power supply cord and removing the door lock.
Take the appliance to a designated waste disposal center.
If a fault occurs
If the appliance malfunctions, turn off water supply to the appliance and
disconnect the plug from the wall socket. Then, consult the section entitled,
"Fault finding" .If you cannot solve the problem, contact a service center.
Only specialised personnel are authorised to make repairs.
If the supply cord is damaged, it must be replaced by the manufacture, its
service agent of similarly qualified persons in order to avoid an electrical hazard.
To maintain the EFFICIENCY and SAFETY of this appliance,we recommend:
- call only the Service Centers authorised by the manufacturer.
- always use original Spare Parts.
At time of delivery
Checkpackaging and dishwasher immediatelyfor signs of transport damage.
If the appliance is damaged, do not put it into use but contact your supplier
or customer service without delay.
Please dispose of packaging materials properly.
Site the dishwasher and connect it up in accordance with the installation
instructions.
The dishwasher must not be connected to the electricity supply while instal-
lation is being carried out.
Ensure that the domestic wiring is properly earthed.
The mains electricity supply must conform to the details shown on the dish-
washer rating plate.
Do not connect the dishwasher to the electricity supply via an extension
cable.
Built-under and built-in appliances should always be installed under a con-
tinuous work surface which is attached to the adjacent cupboards, in order
to ensure that the appliance is entirely stable.
After the appliance has been installed,the mains plug should still be easily
accessible.
Not on all models:
The plastic housing on the water inlet contains an electrically operated valve.
The connecting wires are inside the inlet hose.Do not cut through this hose
and do not immerse the plastic housing in water.
During installation, the power supply cord must not be bent or flattened.
During installation
EN
The dishwasher must only be used by adults for the washing of household
dishes and cooking utensils.
This appliance cannot be installed outdoors, not even if the area in which it
is installed is covered by a roof; it is also very dangerous toleave it exposed
to the elements.
Do not place any heavy objects or swing on the door when it is open. The
appliance could tip forward.
The water inside the dishwasher is not suitable for drinking.
Do not use solvents of any kind inside your dishwasher. They could cause
an explosion.
Open the door very carefully if the dishwasher is operating. There is a risk of
water squirting out.
Do not touch the heating element during or after a wash cycle.
Fundamental rules to follow when using the appliance:
- Never touch the dishwasher when barefoot or with wet hands or feet;
- We discourage the use of extension cords and multiple sockets;
- If the appliance is not operating properly or maintenance must be
performed, disconnect the appliance from the power supply.
The door shall not be left in the open position since this could present a
tripping hazard.
During normal use
Safety information
1

DW12-PFE1 DW12-PFE1 ME
Installation
Cold water connection
Connect the water supply hose to a water outlet tap, making sure that it is
fastened tightly in place (see fig.A). Make sure the rubber washer is seated
firmly in the bottom of the connector.
If the water pipes are new or havenot been usedfor an extended period of time,
let the water run to make sure that the water is clear and free of impurities. If this
precaution is not taken, there is a risk that the water inletcan get blocked and
damage the appliance.
Positioning the appliance
Positioning the appliance in the desired location. The back should rest against
the wall behind it, and the sides, along the adjacent cabinets or wall. The dish-
washer is equipped with water supply and drain hoses that canbe positioned to
the right or the left to facilitate proper installation.
Levelling the appliance
Once the appliance is positioned, adjust the feet (screwing them in or out) to
adjust the dishwasher, making it level. In any case, the appliance should not be
inclined more than 2˚. If the appliance is level, it will help ensure proper
performance.
Warning
The appliance is to be connected to the water mains using
new hose-sets and thatold hose-sets should not be reused.
Drain hose connection
Insert the drain hose into a drain pipe with a minimum diameter of 4cm, or let it
run into the sink, making sure to avoid bending or crimping it. If necessary, fit a
syphon trap (U-bend) with a connecting piece for the drain hose (fig.B). The
free end of the hose must be at a height between 40 and 100 cm and must not
be immersed in water.
Anti-Flooding protection (for some models)
Your dishwasher has an overfill protection device which could automatically shut
off the inlet valve and starts the drain pump if the water level in the unit is detected
to be above the normal level.
If this occurs, turn off the main water supply before calling for servicing. If there is
water in the base pan because of an overfill or small leak, the water should be
removed before restarting the dishwasher.
EN
fig.B
Attention:
The connecting piece for syphon trap (U-bend) must be
solidly fastened to the wall to prevent the drain hose from
moving and allowing water to spill outside the drain.
Electrical Connection
After making sure that the voltage and frequency values for your homecorrespond
to those on the rating plate (located onthe stainless steel inner door oftheappliance)
and that the electrical system is correct for the maximum voltage on the rating
plate, insert theplug into an electrical socket which is earthedproperly (the earthing
of the appliance is a safety requirementmandated by law).
If the electrical socket to which the appliance must be connected is not appro-
priate for the plug, replace the whole cable, rather than using adaptors or the
like as they could cause overheating and burns.
Caution:
The dishwasher plug must be accessible even when the
applianceis installed as a built-in unit so that maintenance
can be done safely.
fig.A
2

DW12-PFE1 DW12-PFE1 ME
Getting to know your dishwasher
Close-up view (control panel) Dishwasher interior
Important
To prevent the formation of rust, load the salt just
before beginning a wash cycle.
Salt
The hardness of the water varies from place to place. If hard water is used in
the dishwasher, deposits will form on the dishes and utensils.
The appliance is equipped with a special softener that uses a salt specifically
designed to eliminate lime and minerals from the water.
According to the “Water Hardness Tabel”, you can calculate the salt con-
sumption setting, then load the salt .
Remove the lower rack and then unscrew and remove the cap from the salt
container.
If you are filling the container for the
first time, fill it with 1/2 a litre of water.
Place the end of the funnel (supplied)
into the hole and fill with about 2 kg
of salt. It is normal for a small amount
of water to come out of the salt container.
Carefully screw the cap back on. Do not
over tighten it.
How to fill the salt
Loading the salt into the container
Always use salt intended for use with dishwashers.
The salt container is located beneath the lower rack and should be filled as
follows:
Adjusting salt consumption
The dishwasher is designed to allow for adjusting the amount of salt consumed
based on thehardness of the water used. This is intended to optimize the amount
of salt consumption keeping it to a minimum.
To adjust salt consumption, proceed as follows:
It is recommended that adjustments be made in accordance with the following
table:
Unscrew the cap from the salt container;
There is a ring on the container with an arrow on it (see figure below ).
If necessary, rotate the ring in an anticlockwise direction from the "-" set-
ting towards the "+" sign, based on the hardness of the water being used.
EN
Water Hardness
Clarke
degrees ºdH mmol/l Selector
position
Salt
consumption
(Grams/cycle)
Autonomy
(cycles/2kg)
Level
1
2
3
4
0 14
Upper Rack
Detergent and Rinse Aid Dispenser
a
b
c
d
e
f
g
h
i
j
k
Top Spray Arm
Salt Container Cap
Silverware Basket
Bottom Spray Arm
Washing Filter
Water Inlet Hose
Drain Hose
Power Supply Cord
Lower Rack
a
d
e
f
h
b
c
i
j
k
g
CA
BON-OFF Button Programme Indicator
Programme Button
A
C
B
3

DW12-PFE1 DW12-PFE1 ME
How to fill the detergent dispenser
Detergent
Detergent specifically intended for use with dishwashers must be used. The
dispenser must be refilled before the start of each wash cycle following the
instructions provided in the "Programme overview". The detergent dispenser is
located on the inside panel of the door.
Rinse aid
This product makes dishes sparkle and helps them to dry without spotting. The
dispenser is located on the inside panel of the door .
When the low rinse aid indicator “ 1” is bright ,it means the rinse aid is low,you
must refill the rinse aid dispenser..
How to fill rinse aid
Important
Proper dosage of the rinse aid improves drying.
If drops of water remain on the dishes or spotting
occurs, the dosage adjustor should be turned to a
higher setting.
If the dishes have white streaks, turn the dosage ad-
justor to a lower setting.
Loading the rinse aid
Regardless of the type of detergent dispenser installed on your appliance, you
must proceed as indicated below when loading the rinse aid.
To open the dispenser, turn the "2" cap in an anti-clockwise direction and then
pour in the rinse aid, making sure not to overfill. The amount of rinse aid used
for each cycle can be regulated by turning the " 3" dose adjustor, located be-
neath the "2" cap, with a screwdriver. There are 6 different settings; the normal
dosage setting is 3.
Important
Dishes or cutlery that have been soiled by tobacco
ash, wax, Iubricating grease or paint, should not
be put in the dishwasher.
Damage to glassware and other dishes
Possible causes
Not suitable for the dishwasher
What you should not put into the dishwasher
Cutlery and tableware manufactured in whole or part from wood.They become
faded and unsightly in appearance.Furthermore,the adhesives that are used
are not suitable for the temperature that occur inside the dishwasher.Delicate
decorative glassware andvases,special antique or irreplaceable china. Thedeco-
rative patterns on such items will not be dishwasher-proof.
Plastic objects that are not resistant to hot water, copper and pewter utensils
are also not suitable. Decorative patterns printed or painted onto the surface of
crockery, glasses, etc.,aluminium and silver items tend to become discoloured
or faded if washed in the diswasher. Some types of glass can become opaque
in appearance afterthey have beenwashed many times in a dishwasher. Highly
absorbent materials, such as spongesand towels,should never be placed in the
dishwasher.
Our recommendation
In future, only purchase table or kitchenware that has been confirmed as being
dishwasher-proof.
type of glass or manufacturing process
chemical composition of detergent
water temperature and duration of dishwasher programme.
Use glassware or porcelain dishes that havebeen marked ‘dishwasher-proof’
by the manufacture.Use a mild detergent that is described as ‘kind to dishes’.
If necessary, seek further information from detergent manufacturers.
Selecta programmewith alow temperature anda short durationas possible.
To prevent damage, take glass and cutlery out of the dishwasher as soon as
possible after the programme has ended.
Suggested remedy
Notice:
To facilitate closing the cover, remove any ex-
cess detergent on the edges of the dispenser.
Loading the detergent
To open the " 4 "cover on the dispenser, press the " 5 "button.
The detergent forthe washcycle should be poured into the "6"compartment.
The detergent for the pre-wash cycle should be poured into the “ 7”
compartment.
After the detergent has been placed in the dispenser, close the cover and
press down until it clicks in place.
EN
5
4
6
7
2
3
1
Low
Full
4

DW12-PFE1 DW12-PFE1 ME
Arranging crockery, glasses, etc. in the dishwasher
Before placing the dishes in the dishwasher, remove larger food particles to
prevent the filter from becoming clogged, which results in reduced performance.
If the pots and pans have baked-on food that is extremely hard to remove, we
recommend that they are soaked before washed. This will eliminate the need
for extra wash cycles.
Pull out the rack to load the dishwasher.
How to use the lower rack
We recommend that you place the most difficult to clean items on the bottom
rack: pots, pans, lids, serving dishes and bowls, as shown in the figure to the
right.
It is preferable to place serving dishes and lids on the sides of the racks in order
to avoid blocking the rotation of the top spray arm.
Warning
knives and other utensils with sharp points must
be loaded in the basket with their points down
or placed in a horizontal position.
fig.D
Pots, serving bowls, etc. must always be placed face down(see fig.C) .
Deep pots should be slanted to allow the water to flow out.
The silverware basket can be doubled (see fig.D) so that only one section
may be used when the silverware load is light. This also makes space for
additional pots and pans and it can also be placed in the upper rack.
Silverware should be placed in the silverware basket with the handles at the
bottom; if the rack has side baskets, the spoons should be located individu-
ally into the appropriate slots. Especially long utensils should be placed in
the horizontal position at the front of the upper rack.
fig.C
Normal daily load
The upper rack is designed to hold more delicate and lighter dishware, such as
glasses, cups and saucers, plates, small bowls and shallow pans (as long as
they are not too dirty).
How to use the upper rack
Shelf
Lean tall glasses and those with long stems against the shelf-not against other
items to be washed.
Place glasses, cups and small bowls on the additional cup rack. The additional
cup rack can be swivelled in or out as required(see fig.G).
Adjust the upper basket by pulling the end stops (Fig.E) outwards and
remove the upper rack completely re-insert using the upper or lower
wheels.
Position the dishes and cookware so that they do not get moved by the spray
of water.
The upper rack can be adjusted for height by using the knobs located on both
sides of the rack itself (see fig.F).
EN
fig.E fig.F
fig.G
5

DW12-PFE1 DW12-PFE1 ME
Programme overview
Wash
progra-
mme
Type of
crokery
e.g.china,
pots/pans,
cutiery,
glasses,
etc
Amount
of food
remains Description of cycle
Condi-
tion of
food
remains
Pre-wash with hot water.
Extended wash at 70°C.
Rinses with cold water.
Rinse with hot water.
Drying.
Pre-wash use cold water.
Extended wash at 55°C.
Rinse with cold water.
Rinse with hot water.
Drying.
Short wash at 40°C.
Cold rinse.
Short cold wash to pre-
vent food residue from
drying on the dishes .
Pre-wash use cold water.
Extended wash at 50°C.
Rinse with cold water.
Rinse with hot water.
Drying.
Soups,
casseroles,
sauces,
potatoes,
pasts, rice,
eggs, roast
or fried food.
a lot
a little
stuck
on hard
Soups,
potatoes,
pasta, rice,
eggs, roast
or fried food.
loosely
attached
Coffee,
cakes, milk,
sausage,
cold drinks,
salads
Very
little loosely
attached
Rinse off if the dishes have
been stacked for several days
in the dishwasher prior to
washing.
Type of
food
remains
Non-
delicate
Mixed
Intensive
Wash
Normal
Wash
Light Wash
(EN50242)
Soak
Rapid wash
Detergent
Exten-
ded
Wash
Pre-
wash
Rinse
Aid
* EN50242 test with rinse aid setting 5
Duration
in
minutes
Energy
consu-
mption
in kWh
Water
consu-
mption
in litres
Regular inspection and maintenance of your appliance helps to prevent prob-
lemsfrom occurring.This savestime and aggravation.Youshould therefore care-
fully inspect the inside of your dishwasher from time to time.
Overall condition of appliance
Check that no grease or scale has accumulated on the inside of the
dishwasher.
If you see any deposits:
Clean the interior of the dishwasher thorughly with a detergent solution.
Filters
The filters “ 8”,“9” prevent larger particles of food in the water from reaching
the pump.These particles may occasionally block the filters.
When the appliance has finished washing, check the filters for particles of
food and, if required, clean.
After undoing the coarse micro-filter “ 8 ”, the filter unit “ 9”can be removed.
Remove any particles of food and rinse the filters under running water.
Insert the filter unit “ 9 ”and tighten the coarse micro-filter.
Spray arms
Lime and remnants of food in the washing water can block the nozzles in the
spray arms “ 10 ”and “ 11 ” and the arm mountings.
Care and maintenance
Inspect the nozzles in the spray arms for blocked holes due to remnants of
food.
If necessary, pull the lower arm “ 11 ” upwards and lift it off.
Unscrew the upper spray arm “ 10 ”.
Clean both spray arms under running water.
Refit the spray arms. Ensure that the lower arm has locked into place and
the upper one is screwed tight.
EN
11
10
9
8
112
102
162
31
12
1.62
1.24
1.05
0.40
0.02
18
16
16
9
3
25g
25g
25g
15g
5g
5g
5g ( )
6

DW12-PFE1 DW12-PFE1 ME
Washing dishes
Programme selection
The most appropriate programme can be identified by comparing the type of
crockery, cutlery, etc., as well as the amount and condition of food remains,
with the details contained in the wash cycle table.The corresponding programme
sequence, duration and consumption details are shown in the right half of the
overview. For example:
Use the« normal» programme for dishes and utensils which have plenty of
food remains stuck on hard.
Savings
If only a small number of dishes have been loaded into the dishwasher,select-
ing a programme that operates at the next lowest temperature will usually be
sufficient.
Switching the dishwasher ON
different amounts of dishes
temperature of mains water supply
pressure of mains water supply
ambient temperature
fluctuations in mains voltage
machine-related factors (e.g. temperature, water volume,...)
Programme data
The stated programme data are based on standard operating conditions. The
values can vary considerably according to:
Energy and water consumption is reduced by up to 1/4 when dishes are washed
in the upper basket only.The water consumption values are related to water
hardness level 1.
Turn on the tap.
Set ON-OFF button “A ” to ON. All the programme indicators“C1,C2,C3,
C5,C6”light .
Press programme button “B1-6”,programme indicator “ C1-6”blinks.
If the door is closed, after 5 seconds, the programme indicator “ C1”lights
steady and the dishwasher beeps once time, then the programme starts
automatically.
End of programme
Six beeps will indicate that the wash cycle has finished and all the programme
indicators light.
Interrupping the programme
Switching the dishwasher OFF
Several minutes after the programme has ended:
Cancelling ormodifying acycle
Acycle that is underway can be modified if it has only been running for a
short time. Otherwise, the detergent may have already been used, and the
appliance may have already drained the wash water. If this is the case, the
detergent dispenser must be refilled ( see the paragraph entitled, “ Loading
the detergent ”).
To modify a cycle that is already underway, press the button“ A”, all of the
settings will be cancelled. To set a new cycle, follow the instructions con-
tained in the paragraph entitled “Switching the dishwasher ON”.
Set main switch “A” to OFF.
Open the door .
Turn the water tap off. (Does not apply when Aquastop unit has been fitted)
Remove dishes, etc. when they have cooled down.
Open the door. Caution! There is a risk of water squirting out from inside the
appliance. Do not open the door fully until spray arm has stopped rotating.
When you open the door, the dishwasher will beep ten times every thirty
seconds.
If the appliance has already heated up orthe hot water was switched ONand
then the appliance door opened, leave the door ajar for several minutes and
then close. Otherwise, the appliance door may open due to expansion.
B1
C1 C2 C3 C5 C6
A
How to keep your dishwasher in shape
After Every Wash
After every wash, turn off the water supply (not necessary for models with
“Aquastop” ) the appliance and leave the door slightly ajar so that moisture and
odors are not trapped inside.
Remove the plug
Before cleaning or performing maintenance, always remove the plug from the
socket. Do not run risks.
No solvents or Abrasive Cleaning Products
To clean the exterior and rubber parts of the dishwasher, do not use solvents or
abrasive cleaning products. Rather, use only a cloth and warm soapy water.
To remove spots or stains from the surface of the interior, use a cloth damp-
ened with water and a little white vinegar, or cleaning product made specifically
for dishwashers.
Moving the Appliance
If the appliance must be moved, try to keep it in a vertical position. If absolutely
necessary, it can be positioned on its back.
Seals
One of the factors that cause odors to form in the dishwasher is food that re-
mains trapped in the seals. Periodic cleaning with a damp sponge will prevent
this from occurring.
The door should not be left in the open position since this could present a
tripping hazard.
When You Go on Holiday
When you go on holiday, it is recommended that you run a wash cycle with the
dishwasher empty and then remove the plug from the socket, turn off the water
supply and leave the door of the appliance slightly ajar. This will help the seals
last longer and prevent odors from forming within the appliance.
EN
7

DW12-PFE1 DW12-PFE1 ME
Resolving minor problems yourself
Experience has shown that you can resolve most problems that rise during
normal daily usage yourself, without having to call out a service engineer.Not
only does this save costs,but it also means that the appliance is available for
use again that much sooner. The following list of common occurrences and
their remedies should help you identify the causes of most problems.
Fault finding
Problems...
...when the appliance is switched on
Appliance does not start up
C
C1 C2 C3
When the programme indicators “ C1,C2,C5” blink.
Have you checked whether:
the drain hose is too low.
When the programme indicators “ C1,C3,C5” blink.
Have you checked whether:
the drain hose is crimped or bent.
the drain hose is too high.
If you take all these checks and the dishwasher still does not func-
tion or your dishwasher has any other error display, you can power
the dishwasher OFF, and wait a few minutes. You can power the
dishwasher on, try it again , if the dishwasher still does not func-
tion and/or the problem persists, contact the nearest authorised
service center and provide them with the following information:
Indicator lamps do not extinguish after washing has finished
Lower spray arm rotates with difficulty
Spray arm is blocked by small items or food remains.
the problem.
the model type number (Mod...) And the serial number (S/N...), which are
indicated on the plate located on the side of the inner part of the door.
Lid in detergent compartment cannot be closed
Detergent compartment has been overfilled.
Mechanism is clogged with remnants of detergent.
Main switch is still set to ON.
Remnants of detergent stuck inside dispenser
Compartment was damp when it was filled up with detergent. Compartment
must be dry before detergent is added.
Water remains inside appliance after programme has ended
Blockage or kink in drainage hose.
Pump is jammed.
Filters are blocked.
The programme is still running. Wait for the programme to end .
...during washing
Unusual amount of foam is creased
Normal washing up liquid has been poured into the rinse-aid container.
Appliance stops suddenly while washing is taking place
Cut off electricity supply to appliance.
Water supply has been interrupted.
Knocking sound can be heared while washing is taking place
A spray arm is knocking against the dishes inside the appliance.
Rattling sound can be heared while washing is taking place
Crockery has not been stacked properly inside the appliance.
Knocking sound coming from inlet valves
This is caused by the way the water pipes have been laid and it has no effect
upon the way the appliance functions. There is no remedy for this.
Remove any spilled rinse aid with a cloth as it could otherwise lead to exces-
sive foaming during the next washing cycle.
...with the dishes,cutlery, etc.
Remnants of food are stuck to the dishes, cutlery,etc.
Dishwasher was not loaded properly. Jets of water could not reach all parts
of the dishes, ect.
Too many items in the rack.
Items in the rack were touching each other.
Not enough detergent was added to dispenser.
Selected wash programme was not intensive enough.
Rotation of spray arm was obstructed by dishes, etc.
N ozzles in spray arm are blokcked by remnants of food.
Filters are blocked.
Filters have been incorrectly fitted.
Waste-water pump is jammed.
Fault with fuse in mains electricity supply.
Plug not inserted in wall socket.
Appliance door not closed properly.
Programme button has not been pressed.
Water tap not turned on.
Blocked strainer in water intake hose.
- The strainer is situated in the Aquastop or supply-hose connection.
Caution
Do not forget that repairs should only be carried
out by a qualified specialist. Improper repairs can
lead to considerable equipment damage as well
as danger to the user.
...with the appliance itself
Error display on the time-remaining indicator
When all the programme indicators “ C” blink.
Have you checked whether:
the door is closed properly.
When the programme indicators “C1,C2,C3” blink.
Have you checked whether:
the water is turned on and the hose is connected properly;
the watersupply to the house is on and has sufficient pressure;
the water supply hose is crimped or bent;
the filter for the water supply hose is clogged.
the drain hose is too low.
EN
C1 C5C3
C1 C5
C2
8

DW12-PFE1 DW12-PFE1 ME
Detergent does not have a sufficient bleaching effect.
Washing temperature was set too low.
Tea stains or traces of lipstick have not been completely removed
Cutlery is not sufficiently rustproof.
Salt content in washing water is too high.
Traces of rust on cutlery
Unsuitable detergent was used.
Glasses are not dishwasher-proof.
Glasses become clouded and discoloured; coating cannotbe wiped
off
Amount of rinse-aid set too high.
Smears left behind on glasses and cutlery; glasses have acquired
a metallic appearance
-Lid on salt container is not screwed tight.
- Too much salt was spilt while filling container.
Important information
Notes on waste disposal
Old appliances still have some residual value. An environment-friendly method
of disposal will ensure that valuable raw materials can be recovered and used
again.
When an appliance has reached the end of its working life,unplug it from the
mains.Cut through the mains cable and dispose of it together with the plug.
Destroy the door locking mechanism. This will ensure that children at play can-
not become locked inside and are not exposed to the risk of suffocation.
Your new appliance was protected by suitable packaging while it was on its
way to you. All materials used for this purpose are environment-friendly and can
be recycled. Please make a contribution to protecting the environment by dis-
posing of the packaging appropriately.
Do not allow children to play with any parts of the packaging. There is a risk of
suffocation by the cardboard boxes and the plastic wrapping.
Up-to -date information concerning options for disposal can obtained from your
retailer or local municipal administration.
General information
Measures must be taken to ensure that built-under and built-in units that
are subsequently re-sited as free-standing appliances cannot topple over.
This can be achieved by bolting the dishwasher to the wall or fitting it under
a continuous work surface which is screwed to the adjacent cupboards.
For Switzerland only:
There are no restrictions on installing the appliance between wooden or
plastic walls as part of a fitted kitchen. If the appliance is not plugged into a
wall socket, it must be connected to the mains via a separator for all poles
within the domestic wiring system. This device must have a gap of at least
3mm between open contacts, in order to conform with relevant safety
regulations.
Not enough detergent was added to dispenser.
Detergent has insuffcient bleaching properties. Use a detergent containing a
chemical bleaching agent.
Plastic items are discoloured
Amount of rinse-aid was set too low.
Glasses have a dull appearance
Selected programme did not include drying function.
Amount of rinse-aid was set too low.
Items were removed from dishwasher too soon.
Dishes,cultlery,etc.have not been dried
Not enough detergent was added to dispenser compartment.
Amount of rinse-aid was set too low.
Although water is quite hard, no salt has been put in appliance.
Water softener was set too low.
Lid on salt container is not screwed tight.
If you used a phosphate-free detergent , try a detergent containing phos-
phates and compare results.
White stains are left on crockery, glasses have a milky appearance
Information on loading the dish washer
EN
Below is an example on how to load this dish washer Figs 1-2.
Fig.1 Fig.2
9

DW12-PFE1 DW12-PFE1 ME
Technical data
12 standard place settings
Width
Depth
Height
Capacity
Mains water pressure
Power voltage
Total absorbed power
60 cm
60 cm
85 cm
0.03-0.6MPa
220-240V~ 50Hz
1950W
Maximum current intensity 10A
K: Heater
L: Relay
M:T 50
o
C
EN
A: Wiring box
B: Door switch
C: Water level switch
D: Drain pump motor
E: Dispenser
F: Softener valve
G: Overflow switch
H: Inlet valve
I: Washing pump motor
J: Temperature limiter
The symbol on the product or on its packaging indicates that this product may not be treated as household waste. Instead it shall be handed
over to the applicable collection point for the recycling of electrical and electronic equipment. By ensuring this product is disposed of correctly, you
will help prevent potential negative consequences for the environment and human health, which could otherwise be caused by inappropriate waste
handling of this product.
For more detailed information about recycling of this product, please contact your local city office, your household waste disposal service or the shop
where you purchased the product.
10

Upute za
uporabu
Perilica
posuđa
HR
BiH
DW12-PFE1
DW12-PFE1 ME
RoHS
2002 / 95 / EC

DW12-PFE1 DW12-PFE1 ME
Sadržaj
Sigurnosne informacije-------------------------------------------------------------------------------------------------------------------------------------------------------------------------------------------------1
Instalacija------------------------------------------------------------------------------------------------------------------------------------------------------------------------------------------------------------------2
Upoznavanje Vaše perilice posuđa---------------------------------------------------------------------------------------------------------------------------------------------------------------------------------3
Kako napuniti sol---------------------------------------------------------------------------------------------------------------------------------------------------------------------------------------------------------3
Kako napuniti sredstvo za ispiranje---------------------------------------------------------------------------------------------------------------------------------------------------------------------------------4
Kako napuniti spremnik za deterdžent-----------------------------------------------------------------------------------------------------------------------------------------------------------------------------4
Nepodobno za perilicu posuđa---------------------------------------------------------------------------------------------------------------------------------------------------------------------------------------4
Slaganje posuđa, čaša, itd. u perilicu posuđa--------------------------------------------------------------------------------------------------------------------------------------------------------------------5
Opis programa -----------------------------------------------------------------------------------------------------------------------------------------------------------------------------------------------------------6
Briga i održavanje -------------------------------------------------------------------------------------------------------------------------------------------------------------------------------------------------------6
Pranje posuđa------------------------------------------------------------------------------------------------------------------------------------------------------------------------------------------------------------7
Kako održavati perilicu u dobrom stanju----------------------------------------------------------------------------------------------------------------------------------------------------------------------7
Otklanjanje problema---------------------------------------------------------------------------------------------------------------------------------------------------------------------------------------------------8
Važne informacije -------------------------------------------------------------------------------------------------------------------------------------------------------------------------------------------------------9
Tehnički podaci ---------------------------------------------------------------------------------------------------------------------------------------------------------------------------------------------------10

DW12-PFE1 DW12-PFE1 ME
1
Sigurnosne informacije
Prilikom dostave
•Nakon dostave odmah provjerite ima li na ambalaži i perilici znakova
oštećenja prilikom transporta. Ukoliko je uređaj oštećen nemojte ga koristiti
većodmah kontaktirajte dobavljača ili službu za korisnike.
•Molimo na ispravan način uklonite ambalažni materijal.
Tijekom instalacije
•Postavite perilicu i povežite je sukladno uputstvima za instalaciju.
•Perilica posuđa ne smije biti uključena u strujnu utičnicu tijekom instalacije.
•Električne instalacije u kućanstvu moraju biti ispravno uzemljene.
•Napon struje u kućanstvu mora odgovarati radnom naponu perilice
navedenom na pločici s tehničkim podacima.
•Ne povezujte perilicu i strujnu utičnicu putem produžnog kabela.
•Ispod ugrađene i ugradbene uređaje bi uvijek trebalo instalirati ispod
neprekidnih radnih površina koje su pričvršćene za susjedne ormare, kako bi
se osigurala potpuna stabilnost uređaja.
•Nakon instalacije uređaja strujni utikačbi trebao biti jednostavno dostupan.
•Samo na određenim modelima:
Plastično kućište na ulazu za vodu sadrži električno upravljan ventil. Povezne
žice su unutar dovodnog crijeva. Ne režite ovo crijevo i ne uranjajte plastično
kućište u vodu.
•Tijekom instalacije strujni kabel se ne smije savijati ili pritiskati.
Tijekom normalne uporabe
•Perilicu smiju koristiti isključivo odrasle osobe za pranje kućnog posuđa i
pomagala za kuhanje.
•Ovaj uređaj se ne smije instalirati na otvorenom, čak niti ukoliko je mjesto na
koje se instalira prekriveno krovom; također je vrlo opasno ostaviti perilicu
izloženu elementima.
•Ne postavljajte teške predmete ili se vješajte na vratima kada su otvorena.
Uređaj bi se mogao prevrnuti prema naprijed.
•Voda unutar perilice posuđa nije podobna za piće.
•Ne koristite otapala bilo kakve vrste unutar Vaše perilice posuđa. Mogla bi
izazvati eksploziju.
•Ukoliko perilica radi vrlo oprezno otvarajte vrata. Postoji opasnost od štrcanja
vode.
•Ne dodirujte grijaći element tijekom ili nakon ciklusa pranja. Osnovna pravila
kojih se treba pridržavati prilikom uporabe perilice:
- Nikada ne dodirujte perilicu ukoliko ste bosi ili mokrim rukama ili nogama;
- Savjetujemo protiv uporabe produžnih kabela i višestrukih utičnica;
- Ukoliko uređaj ne radi ispravno ili ukoliko treba izvršiti održavanje isključite
uređaj iz strujne utučnice.
•Vrata se ne smiju ostavljati otvorena jer to može predstavljati opasnost od
spoticanja.
Ukoliko u Vašoj obitelji ima djece
•Uređaj nije namijenjen za uporabu od strane djece ili nemoćnih osoba bez
nadzora.
•Malu djecu bi trebalo nadzirati kako bi se osiguralo da se ne igraju sa
uređajem.
•Držite deterdžente van dječjeg dohvata, te držite djecu podalje perilice kada je
otvorena.
Ukoliko dođe do kvara
•Ukoliko se uređaj pokvari zatvorite dovodni ventil te isključite utikačiz strujne
utičnice. Zatim pogledajte poglavlje naziva „Otklanjanje problema“. Ukoliko ne
možete otkloniti problem kontaktirajte servisni centar.
•Popravke smije vršiti isključivo specijalizirano osoblje.
•Ukoliko je strujni kabel oštećen treba ga zamijeniti proizvođač, ovlašteni
serviser ili slično kvalificirana osoba kako ni se izbjegla opasnost od strujnog
udara.
•Za održavanje UČINKOVITOSTI i SIGURNOSTI ovog uređaja preporučamo:
- zovite isključivo ovlaštene servisne centre.
- uvijek koristite originalne zamjenske dijelove.
Prilikom odlaganja starih uređaja
•Uređaje koji se više ne namjeravaju koristiti treba učiniti nefunkcionalnima
rezanjem strujnog kabela i uklanjanjem vratne brave.
•Odnesite uređaj u reciklažni centar.
Opasan napon
Upozorenje
Sigurnost djece prilikom odlaganja Vašeg
starog uređaja. Neki ambalažni materijali
mogu biti opasno po djecu
. Postoji opasnost
od gušenja, te stoga držite ambalažne materijale
podalje djece
. Prilikom odlaganja starih uređaja
obavezno onesposobite sistem za
zaključavanje vrata lomljenjem ili uklanjanjem
vratne kvačice
i/ili šarki. To će onemogućiti da
se djeca zaključaju unutar uređaja tijekom igre
.
(Opasnost od gušenja).

DW12-PFE1 DW12-PFE1 ME
2
Instalacija
Pozicioniranje uređaja
Pozicioniranje uređaja na željeno mjesto. Stražnja strana bi trebala biti
naslonjena na zid a strane na susjedne ormare ili zidove. Perilica posuđa je
opremljena dovodnim i odvodim crijevom koja mogu biti postavljena udesno ili
ulijevo kako bi se omogućila ispravna instalacija.
Poravnavanje uređaja
Nakon pozicioniranja uređaja podesite nožice (zavijanjem ili odvijanjem)
kako biste podesili perilicu, poravnavajući je. U svakom slučaju perilica ne bi
smjela biti pod nagibom većim od
2º. Ravna perilica omogućuje ispravna
radna svojstva
.
Povezivanje sa izvorom hladne vode
Priključite dovodno crijevo za hladnu vodu na slavinu, te ga dobro stegnite
(pogledajte sl. A). Uvjerite se da je gumena brtva čvrsto umetnuta na dno
priključka.
Ukoliko su cijevi za vodu nove ili ukoliko nisu korištene dulje
vrijeme, pustite vodu da teče kako bi se očistila od nečistoća. Ukoliko ne
poduzmete potrebne predostrožnosti postoji rizik od začepljivanja dovoda
vode i oštećenja perilice
.
Sl. A
Upozorenje
Uređaj treba povezati sa izvorom vode putem novog
kompleta, te se stari kompleti crijeva ne bi trebali ponovno
koristiti.
Zaštita od poplavljivanja (kod nekih modela)
Vaša perilica posuđa posjeduje uređaj za zaštitu od prepunjavanja koji može
automatski zatvoriti dovodni ventili pokrenuti odvodnu pumpu ukoliko se
ustanovi da je razina vode u perilici iznad normalne razine.
Ukoliko se ovo dogodi zatvorite izvor vode prije poziva servisera. Ukoliko u
donjoj posudi ima vode radi prepunjavanja ili malog istjecanja, vodu bi prije
ponovnog pokretanja perilice trebalo ukloniti.
Povezivanje odvodnog crijeva
Umetnite odvodno crijevo u odvodnu cijev minimalnog promjera 4 cm, ili ga
pričvrstite za rub slivnika, pazeći pritom ga da ne savinete ili izvijete. Ukoliko je
potrebno, postavite držač(oblika slova U) nna povezni dio odvodnog crijeva
(sl.
B). Slobodan kraj crijeva mora biti na visini između 40 i 100 cm i ne smije biti
uronjen u vodu
.
Sl. B
Pažnja:
Povezni dio držača (oblika slova U) mora biti čvrsto
pričvršćen za stijenku kako bi se spriječilo pomicanje
odvodnog crijeva i izlijevanje vode van slivnika.
Električno povezivanje
Nakon provjere odgovaraju li vrijednosti napona i frekvencije struje u Vašem
kućanstvu vrijednostima naznačenim na pločici sa tehničkim podacima (koja se
nalazi na unutarnjim vratima uređaja, izrađenim od nehrđajućeg čelika), te da
je električni sustav dimenzioniran za maksimalni napon naznačen na pločici,
uključite utikaču ispravno uzemljenu strujnu utičnicu (uzemljenje uređaja je
sigurnosni postupak koji nalaže zakon).
Ukoliko električna utičnica u koju namjeravate uključiti uređaj nije prikladna za
utikač, zamijenite cijeli kabel, radije nego da koristite adaptere ili slične uređaje
jer bi mogli prouzrokovati pregrijavanje i požar.
Oprez:
Utikačperilice posuđa mora biti dostupan prilikom
ugradbene instalacije perilice kako bi se održavanje
moglo sigurno vršiti.

DW12-PFE1 DW12-PFE1 ME
3
Upoznavanje Vaše perilice posuđa
Pogled izbliza (kontrolna ploča)
AC
B
ATipka za uključivanje/isključivanje CIndikatori programa
BTipke programa
Kako napuniti sol
Unutrašnjost periliceposuđa
a
c
b
aGornja polica g
bDonja polica h
cGornja prskalica i
dKošara za jedaći pribor j
eDonja prskalica k
fPoklopac spremnika soli
i
e j
f k
d g
h
Filtar pranja
Posuda za deterdžent i sredstvo za ispiranje
Dovodno crijevo
Odvodno crijevo
Strujni kabel
Sol
Tvrdoća vode se razlikuje od mjesta do mjesta. Ukoliko se u perilici koristi
tvrda voda, na posuđu i kuhinjskom priboru će se stvarati naslage.
Uređaj je opremljen posebnim omekšivačem koji koristi posebno osmišljenu
sol za uklanjanje kamenca i minerala iz vode.
Umetanje soli u spremnik
Uvijek koristite sol namijenjenu za uporabu u perilicama posuđa.
Spremnik za sol se nalazi ispod donje police, te bi ga trebalo puniti na slijedeći
način:
•Pomoću „Tablice tvrdoće vode“ možete izračunati postavku potrošnje soli, te
zatim umetnuti sol.
•Uklonite donju policu te zatim odvijte i uklonite poklopac sa spremnika soli.
•Ukoliko punite spremnik po prvi put,
napunite ga sa 1/2 litre vode.
•Postavite kraj lijevka (isporučen) na
rupu i usipajte oko 2 kg soli. Normalno
je da se iz spremnika izlije mala količina
vode.
•Pažljivo zavijte nazad poklopac.
Nemojte ga previše stezati.
Podešavanje potrošnje soli
Perilica je dizajnirana tako da omogući podešavanje količine potrošene soli
na temelju tvrdoće vode. Ovo treba optimizirati i prilagoditi razinu potrošnje
soli kako bi ona ostala minimalna.
Za podešavanje potrošnje soli molimo izvršite sljedeće:
•Odvijte poklopac sa spremnika soli;
•Na spremniku postoji prsten sa strjelicom (pogledajte donju sliku). Ukoliko je
potrebno okrenite prsten u smjeru suprotnom od kazaljke na satu, od
oznake „-“ prema oznaci „+“, na temelju tvrdoće vode koja se koristi.
Preporuča se vršenje podešenja sukladnosljedećoj tablici:
Tvrdoća vode
Potrošnja soli
Važno
Kako biste spriječili nastajanje hrđe, napunite
spremnik solju neposredno prije početka ciklusa
pranja.
Razina Clarke
º
dH mmol/l Položaj
stupnjevi prstena
1 0 14
2
3
4
Autonomy
consumption
(cycles/2kg)
(Grams/cycle)

DW12-PFE1 DW12-PFE1 ME
4
Kako napuniti sredstvo za ispiranje
Sredstvo za ispiranje
Ovaj proizvod čini posuđe blistavim i pomaže da se osuši bez mrlja. Posuda za
sredstvo za ispiranje se nalazi s unutarnje strane vrata
Kada svijetli indikator niske razine sredstva za ispiranje „1“, to znači da je razina
sredstva za ispiranje niska te da trebate napuniti spremnik sredstva za ispiranje.
1
Nisko 2
3
Puno
Kako napuniti spremnik za deterdžent
Deterdžent
Treba koristiti deterdžent namijenjen isključivo za uporabu u perilicama
posuđa. Spremnik za deterdžent treba napuniti prije početka svakog ciklusa
pranja, sukladno uputama danim u „Opisu programa“. Spremnik za
deterdžent se nalazi sa unutarnje strane vrata
.
5 7
4
6
Nepodobno za perilicu posuđa
Što ne biste trebali stavljati u perilicu posuđa
Jedaći pribor i servise za jelo u potpunosti ili djelomično izrađene od
drveta.Oni izbljeđuju i postaju neugledni
. Nadalje, korištena ljepila nisu
podobna za temperature koje se razvijaju unutar perilice
. Delikatno ukrasno
stakleno posuđe i vaze, poseban antikni ili nezamjenjivi porculan. Ukrasni
uzorci na takvim predmetima nisu podobni za pranje u perilici posuđa.
Plastični predmeti neotporni na vruću vodu, bakreni i kositreni predmeti
također nisu podobni
. Ukrasni uzorci naštampani ili naslikani na površini
grnčarije, čaša, itd. Aluminijski i srebrni predmeti gibe boju ili izbljeđuju ukoliko
se peru u perilici posuđa. Neki tipovi stakla mogu postati neprozirni nakon
višestrukih pranja u perilici. Materijali visoke apsorpcije, poput spužvi i ručnika
se nikada ne bi trebali postavljati u perilicu posuđa.
Naša preporuka
U budućnosti kupujte isključivo posuđe koje ima potvrdu da je sigurno za pranje u
perilici posuđa.
Umetanje sredstva za ispiranje
Neovisno o tipu spremnika za deterdžent instaliranom u Vašem uređaju
prilikom umetanja sredstva za ispiranje morate izvršiti dolje navedene radnje.
za otvaranje spremnika okrenite poklopac „2“ u smjeru suprotnom od kazaljke
na satu, te zatim ulijte sredstvo za ispiranje, pazeći da ne prepunite. Količina
sredstva za ispiranje koja se koristi pri svakom ciklusu se može regulirati
okretanjem regulatora doze „3“, smještenog ispod poklopca „2“, pomoću
odvijača. Postoji 6 različitih postavki; normalna postavka doze je 3.
važno
Ispravno doziranje sredstva za ispiranje poboljšava
sušenje. Ukoliko na posuđu ostaju kapljice vode ili
mrlje, regulator doze bi trebalo postaviti na višu
postavku.
Ukoliko ne posuđu ostaju bijele crte postavite
regulator doze na nižu postavku.
Umetanje deterdženta
•Za otvaranje poklopca „4“ na spremniku pritisnite tipku „5“.
•Deterdžent za ciklus pranja bi trebalo usuti u odjeljak „6“.
•Deterdžent za ciklus predpranja bi trebalo usuti u odjeljak „7“.
•
Nakon umetanja deterdženta u spremnik zatvorite poklopac, te ga
pritisnite dok se ne zatvori uz klik
.
Napomena:
Kako biste olakšali zatvaranje poklopca,
uklonite sav suvišni deterdžent sa rubova
spremnika
.
Oštećenja staklenog i drugog posuđa
Mogući uzroci
•vrsta stakla ili postupak proizvodnje
•kemijski sastav deterdženta
•temperatura vode i trajanje programa pranja.
Preporučena rješenja
•Koristite stakleno ili porculansko posuđe koje je označeno kao sigurno za
pranje u perilici posuđa od strane proizvođača.
•Koristite blagi deterdžent opisan kao „nježan prema posuđu“. Ukoliko je
potrebno zatražite dodatne informacije od proizvođača deterdženta.
•Odaberite program sa što nižom temperaturom i što kraćim trajanjem. Za
sprječavanje oštećenja izvadite čaše i jedaći pribor odmah po završetku
programa pranja.
Važno
Posuđe ili jedaći pribor zaprljan duhanskim
pepelom, voskom, strojnom masti ilibojom ne bi
trebalo stavljati u perilicu.

DW12-PFE1 DW12-PFE1 ME
5
Slaganje posuđa, čaša, itd. u perilicu posuđa
Prije postavljanja posuđa u perilicu uklonite većečestice
hrane kako biste Kako koristiti gornju policu
spriječili začepljivanje filtra, što rezultira slabijim radom perilice.
Ukoliko lonci i tave imaju na sebi zapečenu hranu koju je izrazito teško ukloniti,
preporučamo da ih prije pranja pomočite. Ovo će ukloniti potrebu za dodatnim
ciklusima pranja.
Za postavljanje posuđa u perilicu izvucite policu.
Kako koristiti donju policu
Preporučamo da na donju policu postavite posuđe koje je najteže očistiti:
lonce, tave, poklopce, posude i pladnjeve, kako je prikazano na slici s desne
strane.
Preporučljivo je postaviti pladnjeve i poklopce sa strana police kako bi se
izbjeglo blokiranje rotacije gornje prskalice.
•Lonce, zdjele, itd. uvijek treba postaviti licem prema dolje (pogledajte sl. C)
•Duboke lonce treba nakositi kakobi voda mogla otjecati.
•Košara za jedaći pribor se može podijeliti na dva dijela (pogledajte sl. D),
tako da se može koristiti samo jedan dio kada ima malo jedaćeg pribora za
pranje. Ovo također postavlja mjesta za dodatne lonce i tave, te se može
postaviti i na gornju policu.
•Jedaći pribor bi trebalo staviti u košaru za jedaći pribor sa drškama prema
dolje; ukoliko polica ima košare sa strane, žlice bi trebalo staviti zasebno na
odgovarajuća mjesta. Posebno dug kuhinjski pribor bi trebalo postaviti u
vodoravnom položaju s prednje strane gornje police.
sl. C
Normalno dnevno punjenje
sl. D
Upozorenje
Noževe i druge predmete sa oštrim vrhovima
treba postaviti u košaru sa vrhovima okrenutim
prema dolje ili postaviti u vodoravnom položaju.
Gornja polica je dizajnirana za držanje osjetljivijeg i lakšeg posuđa, poput
čaša, šalica i tanjurića, tanjura, malih zdjela i plitkih tava (ukoliko nisu previše
prljave).
•Postavite posuđe tako da ih mlazovi vode ne mogu pomaknuti.
•Visina gornje police se može podesiti pomoću kotačića koji se nalaze s obje
strane samo police (pogledajte sl. F).
Podesite gornju policu povlačenjem zaustavljača (sl. E) prema van, te u
potpunosti uklonite policu. Ponovno je stavite na mjesto uprabom
gornjih ili donjih kotačića
.
Sl. E Sl. F
Polica
Prislonite visoke čaše i čaše sa dugim stalcima uz policu – ne uz drugo posuđe
koje perete.
Postavite čaše, šalice i male zdjele na dodatnu policu za čaše. Dodatna polica
za čaše se po potrebi može sklopiti ili rasklopiti (pogledajte sl. G).
Sl. G
This manual suits for next models
1
Table of contents
Other Haier Dishwasher manuals

Haier
Haier GE GDF510P M4 Series User manual

Haier
Haier DW12-CBE4 User manual

Haier
Haier DW12-AFM3 User manual

Haier
Haier DW12-EFM S User manual

Haier
Haier DW12-TFE2WH User manual

Haier
Haier HDW700BI User manual

Haier
Haier T13 User manual

Haier
Haier DW12-PFE2-E User manual

Haier
Haier HDW15F2S1 User manual

Haier
Haier DW15-PFE2 series User manual

Haier
Haier HDW6WH User manual

Haier
Haier DW12-LBE User manual

Haier
Haier HDBC100AFS User manual

Haier
Haier HDBL865ATS User manual

Haier
Haier GE DDT700S N0 Series How to use

Haier
Haier DW12-PFE1 S User manual

Haier
Haier HDW15V3S1 User manual

Haier
Haier HLV0845FSSS User manual

Haier
Haier DWL3525DBBB User manual

Haier
Haier ESD200 User manual