1
1
4
2
3
1
2
2 00
2 45"
4 25"
5 15"
5 55"
2 10
'
'
'
'
'
Menu Touch Times Weight /Quantity Time
1
4
2
3
5 10
7 20
14 00"
20 10"
'
'
'
'
"
"
'"
1 25
'"
99g
150g
250g
350g
450g
250g
500g
100g
150g
300g
450g
"
33'40
800g "
frying
The microwave oven is therefore not suitable for:
English Instruction for use
6
Making popcorn
melting sugar or fats
cooking dried beans etc.
Should smoke or fire develop inadvertently inside the oven, this problem can usually be easily over-
come by taking the following correct steps:
When preparing food(s) with uncertain compositions, you should keep an eye on the
appliance until the end of the set cooking time.
2.1 How to react when smoke develops inside the oven
CAUTION ELECTRIC SHOCK
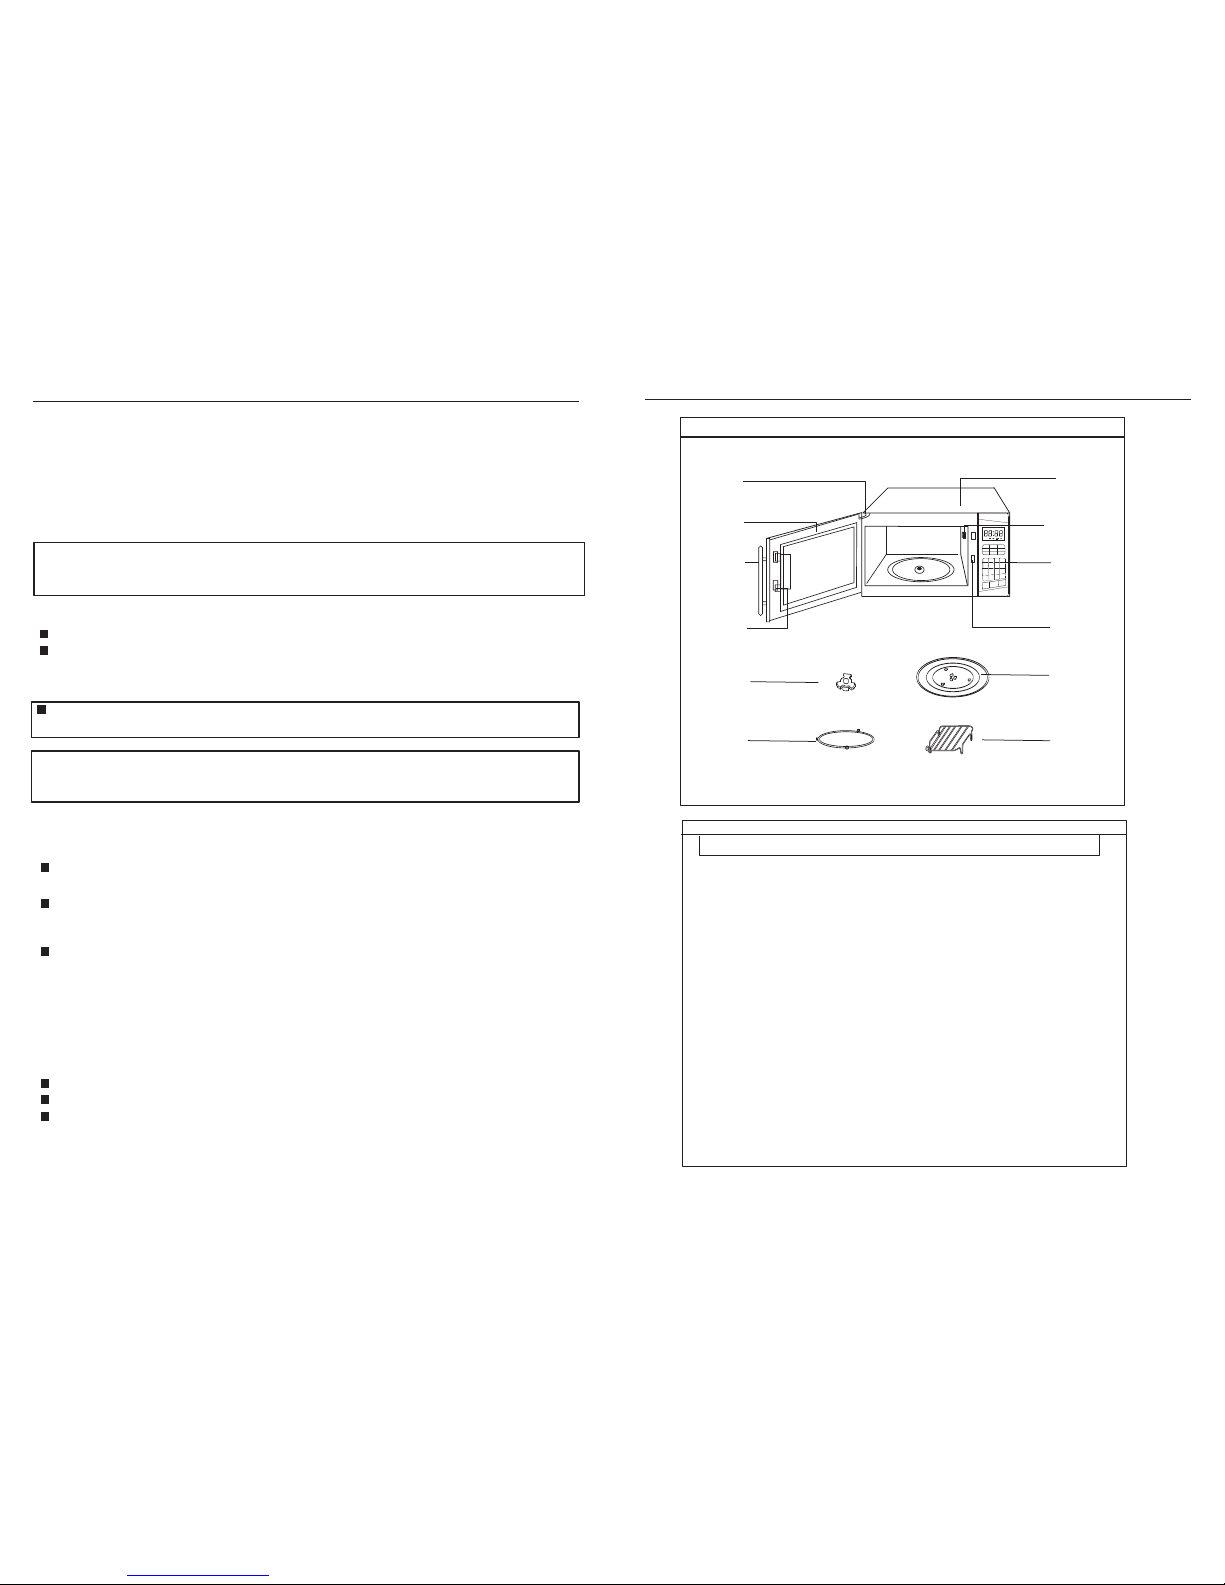
7 How to operate your microwave oven
Under no circumstances should you attempt to extinguish smouldering or burning food inside
the oven with water . In this case serious accidents may be caused by electric shock.
Whatever happens, keep the oven door closed.
First thing, switch off the appliance immediately
Then switch off the power supply by unplugging the appliance or activating the fuse safety switch.
Open the oven to take out the burnt food only when you can no longer detect any smoke.
English Instruction for use
7
Please read and fully understand the instructions before operating the oven.
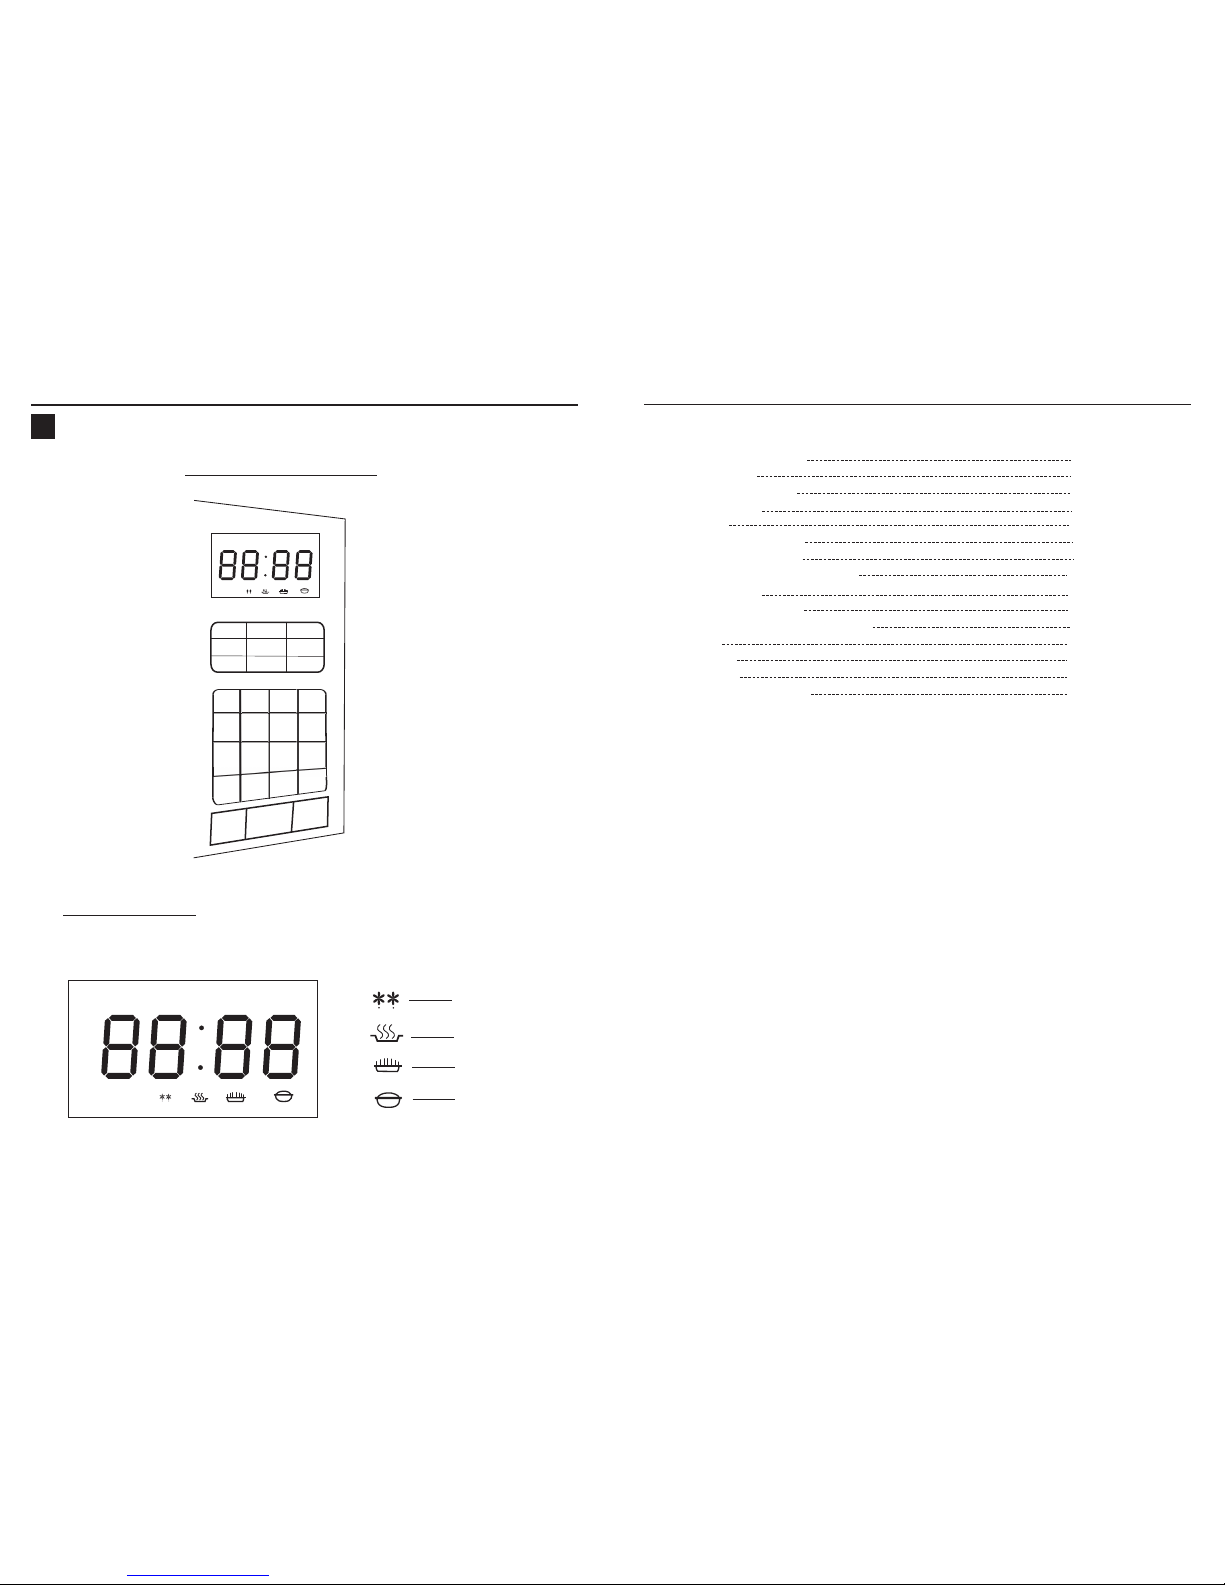
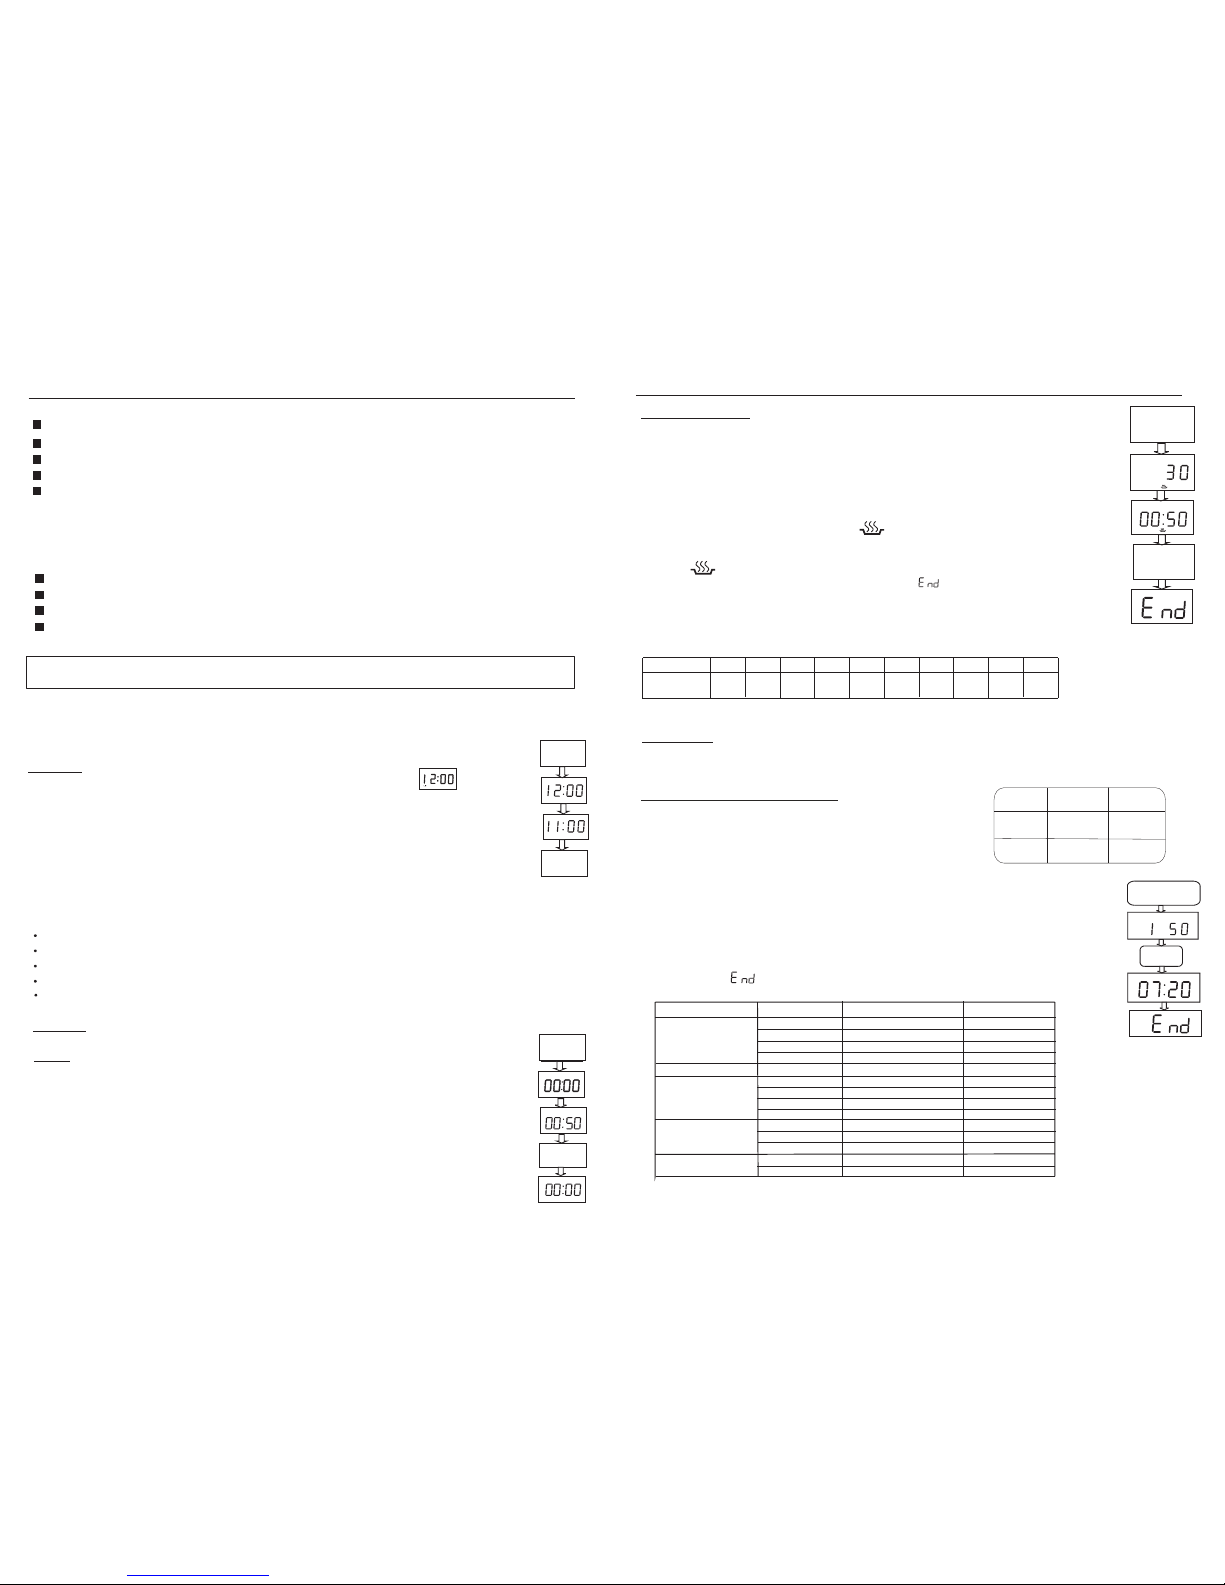
The first time you plug the power cord into an outlet, the display will show and you
will a short beep. At this point, you can set the clock.
1.Press CLOCK on the control pad, Clock indicator will flash. Put in the desired time,
2.Press CLOCK again, and the colon will flash This means the time is set and you wi ll notice
the clock indicator will stay alight.
PAUSE/STOP
This key allows you to do the following:
Cancel any error programming you made.
Cancel cooking time.
Stop the oven for a short time during cooking.
Return to the time display.
Cancel any program/selection you do not want during cooking.
NOTE: To pause a program press the key once.PAUSE/STOP
Clock
Clock
Clock
START
Press this padto start cooking.
You can preset time up to 99 minutes 99 seconds. You can always enter minute after second.
1.Press TIME , 00:00flashes in the display, the numbers and Time indicator will flash.
setup the time.
2.Touch TIME again. the colon will flash and the Time indicator will light, the time will go on
until 00:00. the buzzer of control panel will remind you with a long alarm. Then it returns
to the enter states automatic in 10 seconds
Note: If you want to reset time, please touch pad for one time.PAUSE/STOP
This has nothing to do with oven cooking time.
Rather it is just a kitchen timer to simply remind you of how much time is left on the timer.
Time
Time
Touch Times
POWER LEVEL
(%) 100 90 80 70 60 50 40 30 20 10
1 2 3 4 5 6 7 8 9 10
Please see the chart below for power level:
POWER LEVEL
For your convenience, there are ten preset power levels programmed for different types
of cooking.
Note: using lower power levels increases the cooking time which is recommended for
foods such as cheeses, milk and long slow cooking of meats. Please refer to cooking
guides and recipes for specific recommendations.
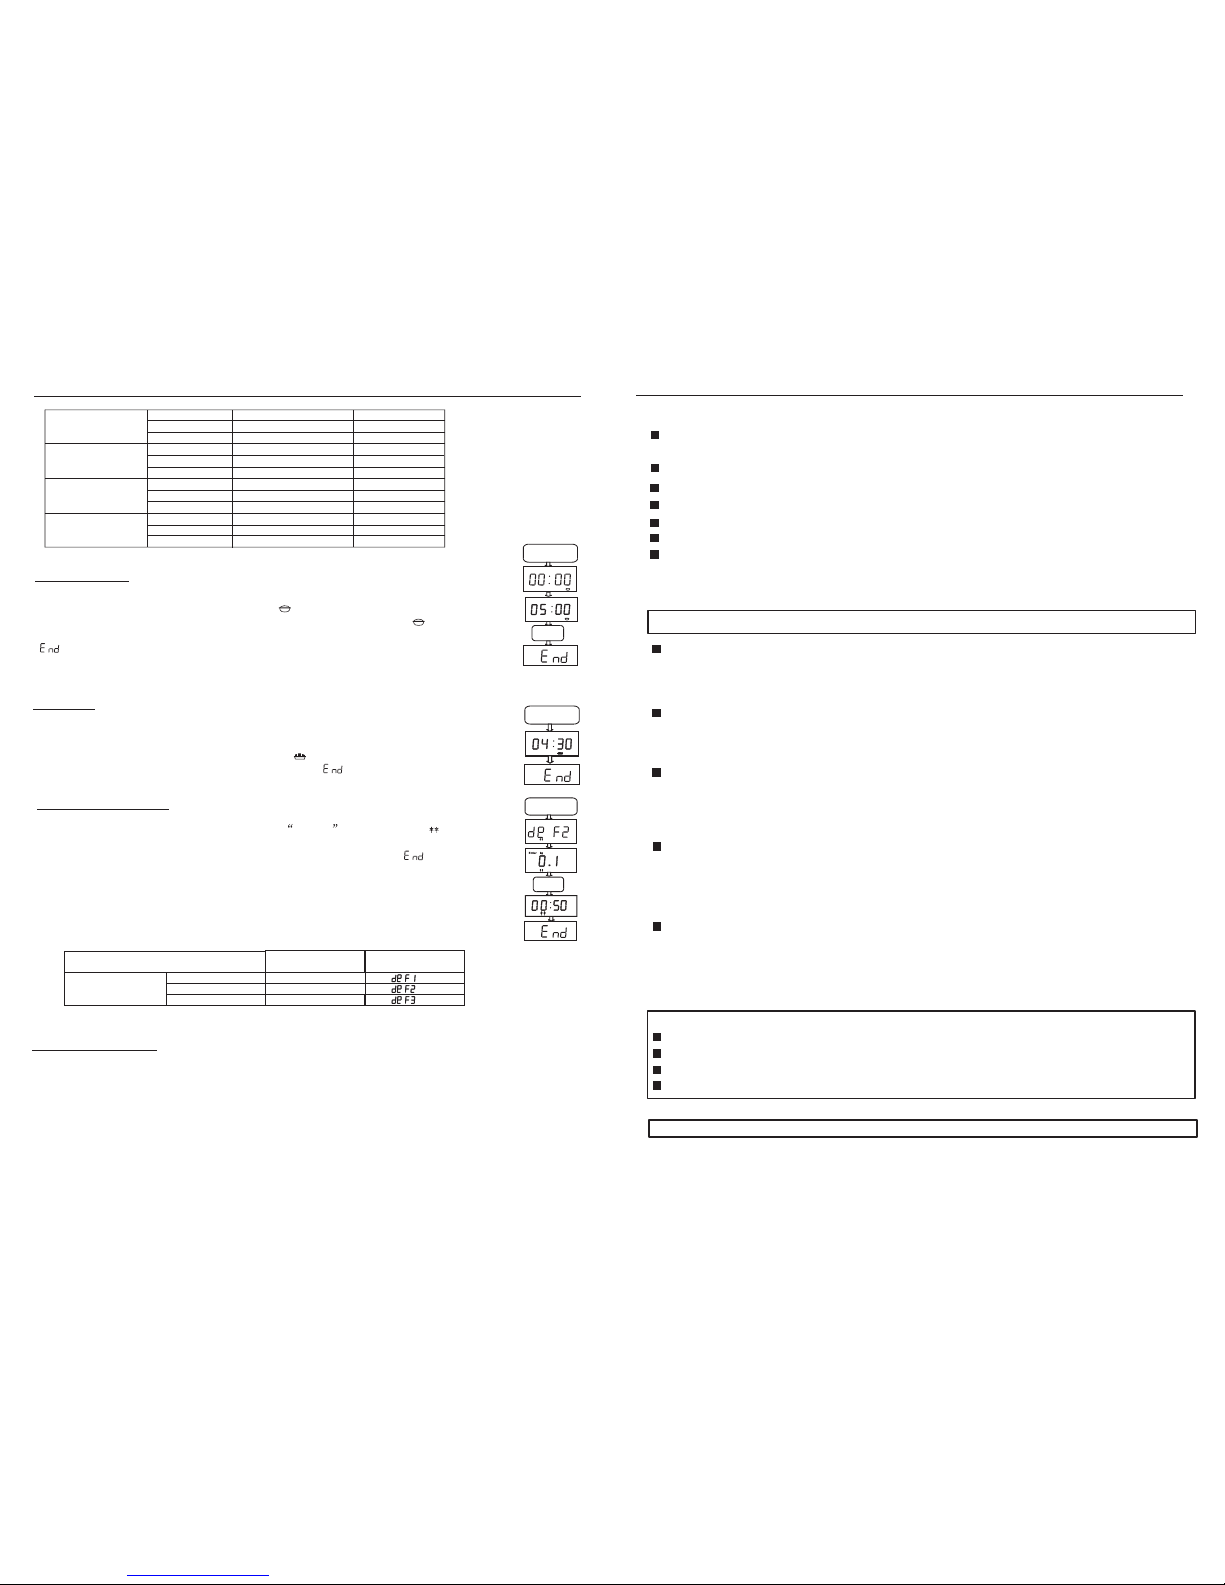
For example: suppose you want to cooking something for 50 seconds at 30%power level.
1.Enter the power level by touching POWER LEVEL 8 times.
The display shows 30 and Enter/Cook/Time/ indicator will flash.
2.Input cooking time 00:50.
3.Now touch START keypad, the oven start working and the time you setup will count
down. indicator light.
When the cooking is finished, The display shows , the buzzer of control panel will
remind you with three short alarms. Then it returns to the enter states automatically in
10 seconds. Or If you want to reenter start states, please touch
pad for 2 times.PAUSE/STOP
POWER
LEVEL
Press once for 30 seconds of cooking quickly at High Power , and the
max time you can setup is
5 minutes .you can put pad to restart after you put the PAUSE/STOP pad.
Automatic express cooking
These Menus allow you to cook or reheat many of your
favourite foods by just touching the relevant keypad.
For your convenience, the microwave is programmed with
12 one touch selection. The follow is part of automatic
express cooking:
Enter Cook Time
Enter Cook Time
For example: if you want to cook a baked potato for 150 g.
1.Put the potato in the proper container and place it in the oven.
2.Touch BAKED POTATO keypad Enter/g will indicator flash, touch the pad two times
and it displays the weight of 150,
3.Touch Start ,Cook indicator lights. the time of 07:20will cut down When the cooking is
finished, the buzzer of control panel will remind you with three short ticks, and the
screen displays . It will return to the enter states automatically in 10 seconds.
Enter g
Cook
BAKED POTATO
1
2
0.5kg
1.0kg
2 30"
4 10
'
'
"(To be continued at next page)
(Look at the operate panel of the page 12)
CLOCK
CLOCK
TIME
TIME
CLOCK
TIME
START
START
PLUS 30S
BEVERAGE
POPCORN
FISH/SEAFOOD
POULTRY MEAT
VEGETABLES
FROZEN DINNER
PIZZA
BAKED POTATO
BEVERAGE
POPCORN
VEGETABLES
PIZZA
BAKED POTATO


 User manual")


M Service manual")