Haier HRT18R1APW User manual

User Manual
Guide de l’Utilisateur
Manual del Usuario
Model HRT Series
Frost-Free Top Mount
Refrigerator/Freezer
Réfrigérateur/congélateur sans
givre à compartiments superposes
Refrigerador/congelador sin
escarcha, de puertas horizontales
Design may vary by model number.
La configuration peut varier selon le numéro de modèle.
El diseño puede variar conforme al número de modelo.
P/N 0060517094 Rev E


TABLE OF CONTENTS
ENGLISH
SAFETY INFORMATION
Important Safety Instructions
SET UP & USE
Electrical Requirements
Installation Guide
Instructions for Unpacking
Parts Included
Accessories
Reversing the Doors
Door Handle Installation
Water Supply Installation
Features and Use
CLEANING & CARE
Proper Care and Maintenance
TROUBLESHOOTING & WARRANTY
Normal Operating Sounds
Troubleshooting
Customer Service
Limited Warranty
PRODUCT REGISTRATION
Thank you for purchasing your Haier product.
This easy-to-use manual will guide you in getting the
best use out of your product.
Remember to record the model and serial numbers.
They are on a label inside of the product.
Staple your receipt to your manual. You will need it to
obtain warranty service.
Model Number
Serial Number
Date of Purchase
3-4
4
4-8
4
5
6
6
7
7
8
10-11
11
12-13
13
14

ENGLISH
WARNING
READ ALL INSTRUCTIONS BEFORE USING THIS APPLIANCE.
WHEN USING THIS APPLIANCE, ALWAYS EXERCISE BASIC SAFETY
PRECAUTIONS, INCLUDING THE FOLLOWING:
1. Use this appliance only for its intended purpose as described in this use and care manual.
2. This refrigerator must be properly installed in accordance with the installation instructions before it is
used. See Electrical Requirements in the Set Up & Use section.
3. This refrigerator should not be recessed or built-in an enclosed cabinet. It is designed for
freestanding installation only.
4. Never unplug your refrigerator by pulling on the power cord. Always grasp the plug firmly and pull
straight out from the outlet.
5. Repair or replace immediately all electric service cords that have become frayed or otherwise
damaged. Do not use a cord that shows cracks or abrasion damage along its length, at the plug or at
the connector end.
6. Do not touch cold surfaces in the freezer compartment, particularly when your hands are damp or
wet. Skin may adhere to these extremely cold surfaces.
7. Do not use any electrical device or any sharp instrument in defrosting your refrigerator.
8. Unplug your refrigerator before cleaning or making any repairs.
NOTE: If for any reason this product requires service, we strongly recommend that a qualified technician
perform service.
9. Do not operate your refrigerator in the presence of explosive fumes.
PAGE 3 ●SAFETY INFORMATION
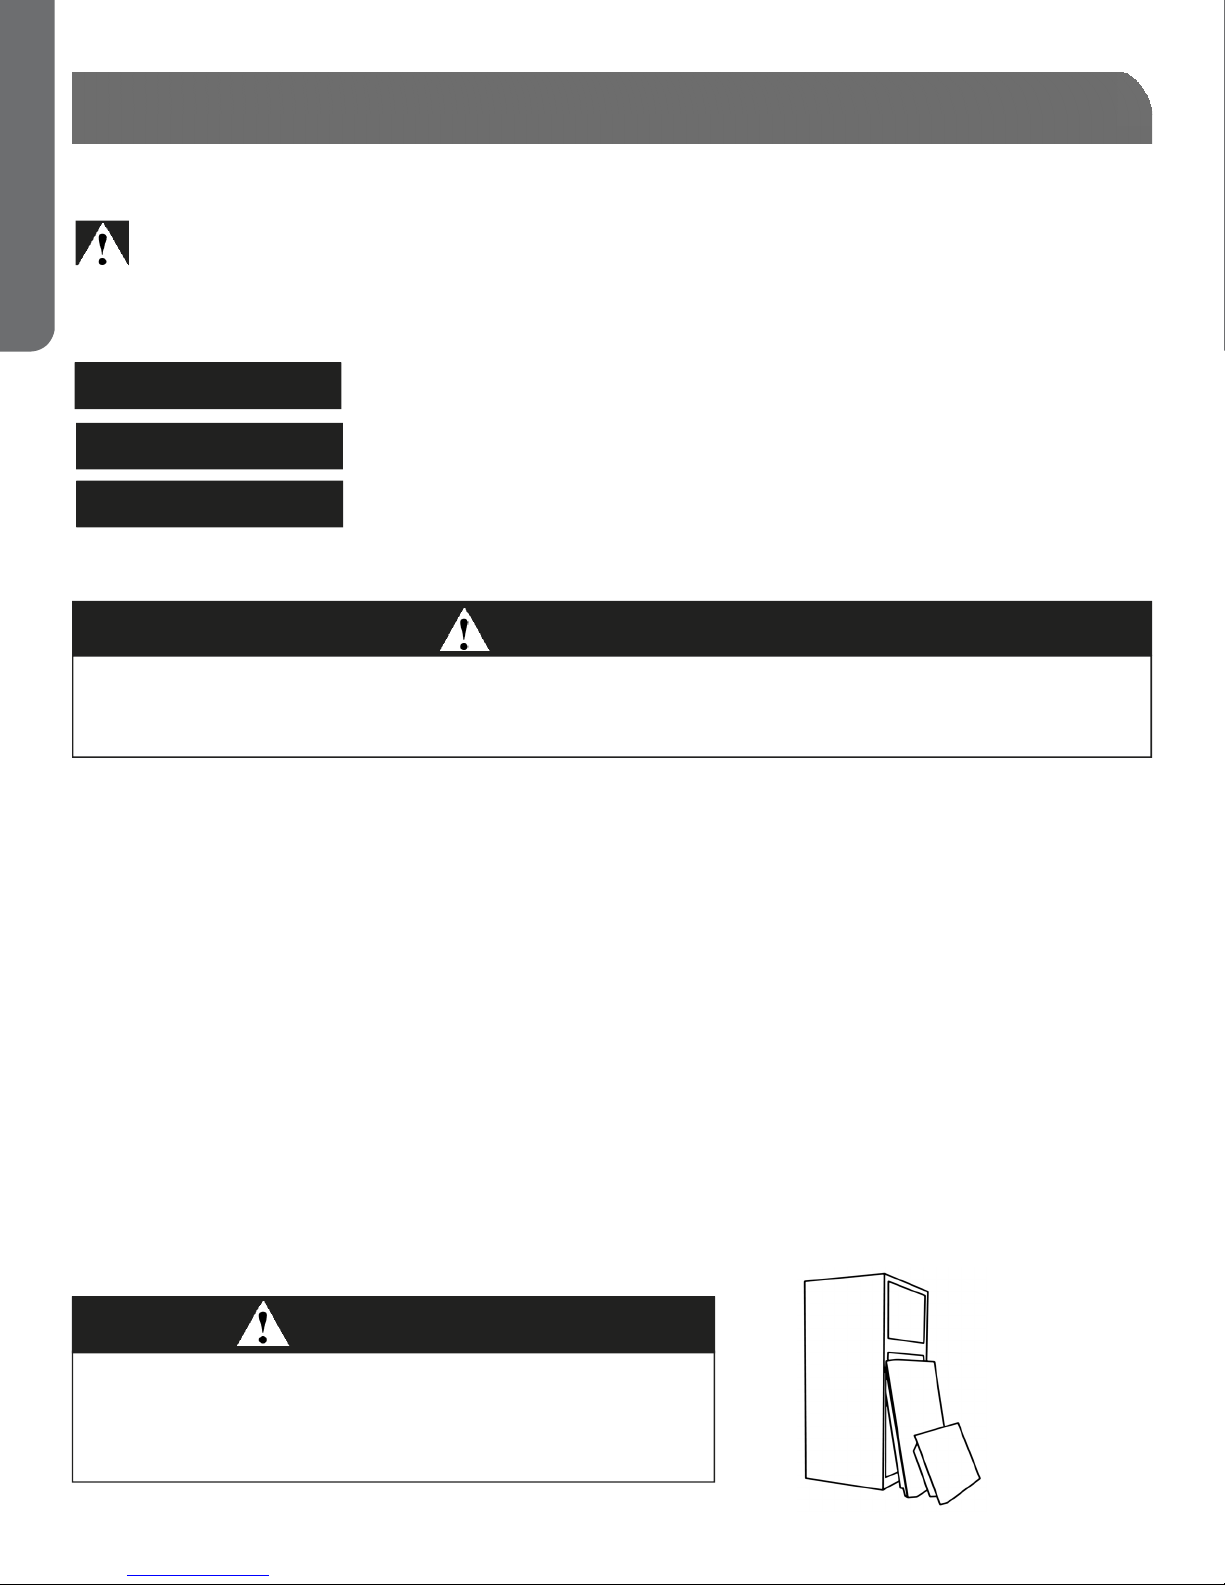
RISK OF CHILD ENTRAPMENT. BEFORE YOU THROW
AWAY YOUR OLD REFRIGERATOR OR FREEZER, TAKE
OFF THE DOORS. LEAVE THE SHELVES IN PLACE SO
THAT CHILDREN MAY NOT EASILY CLIMB INSIDE.
WARNING
IMPORTANT SAFETY INSTRUCTIONS
Your safety and the safety of others is very important.
We have placed important safety messages throughout this manual. Always read and obey these safety
messages.
Safety messages are indicated by the safety symbol: This symbol will be accompanied by one of
the following safety indication terms and an explanation of the potential hazards that could cause death
or injury.
Safety Indication Terms Definitions:
You could be killed or seriously injured if you don’t immediately follow
instructions.
A potentially hazardous situation which, if not avoided, could result in death
or serious bodily injury
A potential hazardous situation which, if not avoided, may result in moderate
or minor injury.
WARNING
DANGER
CAUTION

ENGLISH
INSTALLATION GUIDE
INSTALLATION LIMITATIONS
Select a suitable location for the refrigerator on a hard, even surface away from direct sunlight or heat
source, e.g. radiators, baseboard heaters, cooking appliances, etc. Any floor unevenness should be
corrected with the leveling legs located on the front bottom corners of the refrigerator.
UNPACKING YOUR REFRIGERATOR
1. Remove all packaging material. This includes the corrugated base and all adhesive tape holding the
refrigerator accessories inside and outside. Retain foam block between doors if door swing reversal is
required.
2. Inspect and remove any remains of packing, tape or printed materials before powering on the
refrigerator.
3. If your refrigerator comes with a snack pan, remove the blue adhesive tape from the rear of the pan.
The pan will not slide in and out without removing the tape.
ELECTRICAL REQUIREMENTS
WARNING
ELECTRICAL REQUIREMENT - SHOCK HAZARD
Make sure there is a suitable power outlet. 115 Volt, 15 Amp, 3-prong (grounded) power outlet with
proper grounding to power the refrigerator.
Avoid the use of 3-prong adapters or cutting offthe third grounding prong in order to accommodate
a 2-prong outlet. This is a dangerous practice since it provides no effective grounding for the
refrigerator and may result in death, fire or electrical shock.
WARNING
USE OF EXTENSION CORDS - POTENTIAL SAFETY HAZARD
Avoid the use of an extension cord because of potential safety hazards under certain conditions. If it
is necessary to use an extensions cord, use only a 3-wire extension cord that has a 3-prong grounding
plug and a 3-prong outlet that will accept the plug. The marked rating of the extension cord must be
equal to or greater than the electrical rating of the appliance.
Do not use an extension cord longer than 12 ft.
Failure to follow these instructions may result in death, fire or electrical shock.
PAGE 4 ●SET UP & USE
SAVE THESE INSTRUCTIONS
IMPORTANT SAFETY INSTRUCTIONS
DO NOT PLACE FINGERS OR HAND ON THE AUTOMATIC ICE MAKING MECHANISM WHILE THE
REFRIGERATOR IS PLUGGED IN. THIS WILL HELP PROTECT YOU FROM POSSIBLE INJURY AS WELL
AS PREVENT INTERFERENCE WITH MOVING PARTS OF THE EJECTOR MECHANISM AND THE
HEATING ELEMENT THAT RELEASES THE CUBES.
CAUTION

ENGLISH
INSTALLATION GUIDE CONT.
PARTS INCLUDED
PARTS INCLUDED MAY DIFFER BASED ON UNIT PURCHASED.
ALL MODELS
2 handles
Front grille
4 handle mounting screws
Owner`s manual
STAINLESS STEEL MODELS
Hex key (for handle installation)
ICE MAKER INSTALLED MODELS
Ice bucket
Water supply clamp
#8 screw
IF YOUR REFRIGERATOR COMES WITH A FACTORY-INSTALLED WATER VALVE AND TUBING, DO
NOT CONNECT A WATER SUPPLY TO THE WATER VALVE ON THE REAR OF THE REFRIGERATOR
UNTIL AN ICE MAKER IS INSTALLED.
PAGE 5 ●SET UP & USE
PROPER AIR CIRCULATION
To ensure your refrigerator works at the maximum efficiency it was designed for, you should install it
in a location where there is proper air circulation, plumbing and electrical connections. Your
refrigerator is not designed to operate in temperatures below 55°F (12°C)
or above 95°F (35°C).
Do not install your refrigerator in any location not properly insulated or
heated, e.g. garage, etc.
Keep out of direct sunlight and away from heating sources such as
radiators, heaters and cooking appliances.
The following are recommended clearances around the refrigerator:
Sides and Top ………. 1” (25mm) Back ………. 2” (50mm)
TOOLS NEEDED FOR INSTALLATION
DO NOT USE POWER TOOLS TO INSTALL DOOR HANDLES!
OVERTIGHTENING THE SCREWS COULD STRIP THE THREADS!
Front Grille
Phillips
Screwdriver
T25 Torx
Screwdriver
(Select Models)
Pliers 5/16 & 3/8
Wrenches
Adjustable
Wrench
Or
4. If your refrigerator comes with smooth or stainless steel doors, please remove the clear film before
turning it on for the first time. When removing film, do not pull the film straight down as this could
result in misaligned doors.
5. It is normal for the freezer door to be positioned slightly higher than the top of the cabinet when the
refrigerator is first installed. This positioning is done at the factory to ensure gasket seals properly
once the door is weighted with food items.
LEVELING YOUR REFRIGERATOR
The cabinet must rest firmly on the floor.
The cabinet must sit level from side to side.
The cabinet must tilt slightly (¼”or 6mm) from front to back for the doors to seal
properly.
Turn the leveling legs to raise or lower the cabinet.

ENGLISH
REVERSING THE DOORS
DOOR REMOVAL/REVERSAL
NOTE: Fastener heads may vary depending on model.
1. Disconnect refrigerator from power supply.
2. Remove front grille (if already installed).
3. Remove top hinge cover and top hinge. Lift freezer door offcenter
hinge and set aside.
4. Unscrew center hinge pin. Be sure to retain plastic washer(s) for
reinstallation. Remove refrigerator door from bottom hinge and set
aside.
5. Use either a wrench or T25 Torx screwdriver to remove center hinge
and plastic spacer(s) by unscrewing center bolt, loosening side bolts
and sliding hinge to the center of the cabinet. Tighten bolts.
6. Remove the center bolt on the opposite side, loosen side bolts and
slide center hinge and spacers behind side bolts. Reinstall center bolt
and tighten side bolts.
7. Remove bottom hinge bolts and relocate bottom hinge to the opposite
side of the cabinet. Tighten bolts.
8. Unscrew bottom hinge pin, move to other hinge hole and tighten.
9. Relocate door stops (bottoms of both doors), hinge hole covers and
handle screw plugs (if reversing doors) on both doors to the opposite
side of the doors.
10.Place refrigerator door on bottom hinge pin. Align hinge hole in door
with hole in center hinge. Insert center hinge pin and tighten.
11.Place freezer door on center hinge pin and close.
12.Insert top hinge pin into hinge hole in top of freezer door. Align with
bolt holes in top of cabinet and tighten bolts. Replace top hinge cover.
13.Flip over front grille and reinstall.
14.See door handle instructions to remove and reinstall handles.
15.Reconnect refrigerator to power supply.
Top Hinge
Door Hinge Hole
Door Stop
PAGE 6 ●SET UP & USE
Center Hinge
Handle screw plugs
Bottom Hinge
ACCESSORIES
The following accessories and more are available:
Ice Maker Kits* (Be prepared to specify refrigerator model when ordering)
* Excludes Non-Ice Maker Ready models
Freezer shelving
Replacement light bulbs
Replacement door logo badge
Plugs for door handle screw holes
To order accessories, call 1-877-337-3639 or visit us at www.haieramerica.com/support.

ENGLISH
PAGE 7 ●SET UP & USE
DOOR HANDLE INSTALLATION
PLASTIC HANDLES
1. Remove door handles and screws from plastic bags.
2. Place flared end of handle over pre-installed door face mounting screw. Slide handle down to secure it.
(Screw may need to be loosened slightly if handle is difficult to slide on).
3. Rotate door handle toward gap between doors.
4. Install screws from parts-included bag but do not tighten fully.
5. Repeat above steps for remaining door.
6. With both handles mounted, visually align handles, carefully open door and tighten screws.
2 2
3
STAINLESS STEEL HANDLES:
1. Remove door handles and hex key from freezer compartment
2. Place flared end of handle over mounting stud on face of door; align holes in flat end of handle with holes
on door edge
3. Install screws into flat end of handle
4. Use hex key to tighten set screw on flared end of handle, tighten until handle is flush with door then
tighten another half turn.
WATER SUPPLY INSTALLATION
IMPORTANT: This water supply installation is not covered under warranty by the refrigerator or ice maker
manufacturer(s). Follow these instructions carefully to minimize the risk of expensive water damage.
SUPPLIES REQUIRED FOR INSTALLATION:
Access to a household cold water line with water pressure between 20 psi and 120psi
A water supply line made of 1/4-inch outside diameter, copper tubing. Plastic is not recommended since it
greatly increases the potential for water leaks. To determine the length of the copper tubing needed, you
will need to measure the distance from the ice maker water valve at the back of the refrigerator to your
cold water pipe. Then add approximately 7 feet, so the refrigerator can be moved out for service.

WATER SUPPLY INSTALLATION (CONT.)
A shutoffvalve to connect the water supply line to your household water system
NOTE: Do not use a self-piercing type shutoffvalve.
A compression nut and ferrule (sleeve) for connecting the water supply line to the ice maker inlet valve.
Do not install water supply tubing in areas where the temperature falls below freezing.
Connect the ice maker to a drinkable water source that is not connected to a water softening system.
Chemicals from the softener may damage the ice maker, causing it to malfunction.
INSTALLATION INSTRUCTIONS
1. Disconnect refrigerator from power supply.
2. Turn offwater supply at shut offvalve.
3. Connect copper water supply line to household water system.
4. Turn ON water supply and tighten any connections that leak.
5. Re-install rear access cover for compressor compartment.
6. Coil excess water supply line behind refrigerator, as shown below
and arrange coils so they do not vibrate or wear against other
surfaces. Use water tube clamp and #8 screw from the parts
included bag to secure water supply line to rear of refrigerator.
7. Reconnect refrigerator to power supply.
8. Turn icemaker ON by lowering wire control arm.
Water Supply
Clamp
#8 Screw
Wire Control Arm
PAGE 8 ●SET UP & USE
FEATURES AND USE
Air Flow Control
Temperature
Control with
Interior Light
Full-Width Shelves
Crisper Humidity
Controls
Crisper Bins
Front Grille
Leveling Legs
Freezer Door Shelves
Dairy Compartment
Full-Width Door Shelves
Diagram for instructional purposes only.
Design may vary by model number.
NOTE: All features not available on all models.
ENGLISH

FEATURES AND USE (CONT.)
PAGE 9 ●SET UP & USE
LIGHT COVERS (NOT ALL MODELS)
Freezer (Not All Models) Mid-Level (Not All Models)Main Refrigerator (Not All Models)
CONTROLS
Allow 24 hours for adjustments.
The Refrigerator Temperature control should be set at “1 o’clock” and adjusted in small increments after
24 hours to achieve desired temperature.
The Freezer Temperature control should be set at “12 o’clock” and adjusted in small increments after 24
hours to achieve desired temperature.
Adjusting the refrigerator control will affect the freezer compartment as well.
Turning either control to “Off” or the lowest temperature setting does not disconnect the power supply
from the refrigerator.
Refrigerator Temperature Freezer Temperature Crisper
ICE MAKER (NOT ALL MODELS)
To stop the ice maker, lift the wire arm until it clicks and locks in the OFF
(raised) position. The ice maker turns OFF automatically when the ice
container is full.
NOTE: It takes approximately 24 hours for the ice maker to begin
producing ice. New plumbing may cause ice discoloration and
poor flavor. Discard ice made in the first 24 hours.
Water quality determines ice quality. Do not connect the ice maker to
water that is softened. Chemicals from a malfunctioning softener can
damage the ice maker.
Ice stored too long may develop an odd flavor. Empty the container and make sure the wire arm is in the
ON (lowered) position. The ice maker will then produce ice.
Keep the wire arm in OFF position until the refrigerator is connected to the water supply or whenever the
water supply is turned OFF.
IMPORTANT:
Do not wash the ice container in your dishwasher.
Be sure to stop the ice maker when cleaning the freezer or on vacation.
If the ice maker has to be turned OFF for a long period of time, turn the water supply valve to the closed
position.
Wire Control Arm
STORAGE
In order for air to flow properly inside of your refrigerator, do not store items directly in front of the freezer
fan tower vents, directly under the refrigerator vent or against the sides of the refrigerator compartment.
Position items toward the center of shelves.
Vents
Refrigerator Vent
ENGLISH

PROPER CARE AND MAINTENANCE
WARNING
BEFORE CLEANING YOUR REFRIGERATOR,
ALWAYS UNPLUG IT FROM THE POWER
SOURCE. FAILURE TO HEED THIS WARNING
COULD RESULT IN INJURY OR DEATH FROM
ELECTRIC SHOCK.
NOTE: Before using any cleaning products, be sure to
read the cleaning product manufacturer’s instructions
and warnings. This will help avoid personal injury or
damage to property.
INTERIOR CLEANING
Prepare a cleaning solution of 3-4 tablespoons of
baking soda mixed with warm water. Use a sponge or
soft cloth, dampened with the cleaning solution to
wipe the inside of your refrigerator.
Handle all glass parts with care at all times.
DO NOT USE WARM WATER TO CLEAN GLASS
SHELVES WHILE THEY ARE STILL COLD. GLASS MAY
BREAK WHEN EXPOSED TO SUDDEN TEMPERATURE
CHANGES OR IMPACT.
Do not attempt to wash any parts in a dishwasher.
Do not use harsh chemicals, ammonia, chlorine bleach,
concentrated detergent, solvents, abrasives or metal
scouring pads to clean your refrigerator, inside or out.
They can damage and/or discolor the refrigerator
finish.
EXTERIOR CLEANING
Use a clean, soft, lightly dampened cloth with kitchen
appliance wax or a mild detergent to clean the exterior
of the refrigerator.
Use a clean, soft, lightly dampened cloth with warm
soapy water to clean handles and trim. Use a clean, soft
towel to dry.
For stainless steel models, use a dry cloth and stainless
steel polish.
Door gaskets should be cleaned every three months
following the instructions for interior cleaning. Clean
gaskets will maintain a better seal than dirty gaskets.
Lightly apply petroleum jelly to the hinge side of the
gaskets to keep the gasket pliable and assure a good
seal.
Never use a dirty cloth to clean the exterior of the
refrigerator. Dirty cloths may leave residue on the
refrigerator that can damage the finish. Also, avoid the
use of harsh chemicals, ammonia, chlorine bleach,
concentrated detergent, solvents, abrasives or metal
scouring pads to clean the outside of the refrigerator.
LIGHT BULB REPLACEMENT
NOTE: If your refrigerator is equipped with LED lighting
blocks, these lights are designed to last for the life of
the refrigerator, however, if the lights stop operating,
please contact a certified technician for replacement.
BEFORE CHANGING A BULB, ALWAYS
UNPLUG UNIT FROM THE POWER SOURCE.
FAILURE TO HEED THIS WARNING COULD
RESULT IN INJURY OR DEATH FROM
ELECTRIC SHOCK.
INCANDESCENT LIGHT BULB REPLACEMENT GUIDE
Use the guide below to determine the appropriate bulb
for each fixture.
Upper Refrigerator Light - 40 Watt Daylight
Appliance Bulb w/ medium base (1 or 2, depending
on model)
Mid-Level Refrigerator Light - 25 Watt Appliance
Bulb w/ candelabra base
Freezer Light - 25 Watt Appliance Bulb w/ candelabra
base
LED LIGHT BULB REPLACEMENT GUIDE
Use the guide below to determine the appropriate bulb
for each fixture.
Upper Refrigerator Light - 5 Watt (or 40 Watt
Incandescent equivalent) LED Bulb with medium
base
Mid-Level Refrigerator Light - 1.2 Watt (or 25 Watt
Incandescent equivalent) LED Bulb w/ candelabra
base
Freezer Light - 1.2 Watt (or 25 Watt Incandescent
equivalent) LED Bulb w/ candelabra base
REPLACEMENT INSTRUCTIONS
1. In order to replace a light bulb, first unplug your
refrigerator from the power outlet.
2. After allowing the bulb to cool, turn bulb
counterclockwise in order to remove it from the
socket.
3. Screw a new bulb into the socket by turning the bulb
clockwise.
4. Plug in your refrigerator and open the door to check
that the bulb is working.
WARNING
PAGE 10 ●CLEANING & CARE
ENGLISH

PROPER CARE AND MAINTENANCE
ENGLISH
POWER INTERRUPTIONS
In the event of a power interruption, unplug your
refrigerator from the power source. Avoid opening
the doors until after power has been restored. Your
refrigerator will maintain a cold temperature for a
longer period of time if door opening is avoided or
kept to a minimum.
Once power has been restored, plug your
refrigerator back into the power source and inspect
food in the refrigerator for spoilage or thawing.
Cleaning your refrigerator after a prolonged power
outage is strongly recommended to avoid odors and
potential health hazards due to thawing.
VACATIONS
For long vacations or absences, unplug your
refrigerator and remove all food from it. Turn the
temperature control knob in the refrigerator section
to the OFF position and clean the refrigerator,
including the gaskets, according to the Proper Care
and Maintenance section. Leave the doors propped
open to allow air to circulate inside the refrigerator.
MOVING
Before moving your refrigerator, empty the food
from it and use adhesive tape to secure all loose
items such as shelves, door bins and racks, crispers
and pans, etc. and unplug it. Always move the
refrigerator in an upright position in order to avoid
damaging the sealed refrigerant system.
NORMAL OPERATING SOUNDS
WHIRRING/BUZZING
There are multiple high-speed fans inside your
refrigerator which help it to maintain the
temperature you have selected. Whirring is common
when the refrigerator is first plugged in, when the
doors have been opened often or for an extended
period of time and when a large amount of food has
been added. It may also be heard when the ice maker
is ejecting ice into the ice bucket.
HUMMING
This is a common sounds that comes from the
compressor and is a part of making your refrigerator
run efficiently.
WHOOSHING
It is possible that you may hear a whooshing sound
when closing the doors. This is no cause for concern.
It is simply the pressure in refrigerator equalizing.
OTHER SOUNDS
There are lots of things going on in your refrigerator
at any given time. Additional sounds your may hear,
and possible causes include:
Gurgling is most likely due to the circulation of
refrigerant through the cooling coils.
Running water can be heard while the ice maker is
filling with water.
Sizzling or popping sounds can be frost melting
and falling onto the defrost heater during the
defrost cycle.
Clicking or chirping may be heard as the
compressor attempts to re-start.
Clicking may also be heard when the water valve
opens and closes to fill the ice maker.
Cracking or popping sounds may be from the
expansion and contraction of cooling coils during
and after the defrost cycle.
Also, when your refrigerator is first plugged in, the
foam insulation in the walls will cool and contract,
which can result in cracking or popping sounds
The defrost timer and thermostat control will click
as each cycles on and off.
You will also a hear a thump when ice drops into
the ice bucket.
PAGE 11 ●CLEANING & CARE

TROUBLESHOOTING
PROBLEM POSSIBLE CAUSES(S) SOLUTION
Refrigerator does
not run Temperature Control Knob is set to OFF Turn temperature knob clockwise to turn on
cooling system
Refrigerator is unplugged Plug power cord into power source
Breaker is tripped or turned off/ Fuse is blown Reset / Turn on breaker or replace fuse
Refrigerator is in defrost mode Wait about 40 minutes for defrost cycle to end
and cooling system to re-start
Refrigerator or
freezer is too warm Temperature control is not set low enough Turn temperature knob clockwise to adjust to a
lower temperature; allow 24 hours to adjust
Doors opened frequently or left open Keep door closed / Check that an obstruction
isn’t preventing door from closing
Warm food added recently Allow time for food and refrigerator to cool
Items are blocking proper air flow Store items only inside the trim of the glass
shelves; don’t place items against sides of the
compartments or directly in front of any vents
Refrigerator or
freezer is too cold Temperature control is set too low Turn knob counter-clockwise to change to a
warmer setting; allow 24 hours to adjust
Refrigerator runs
frequently or for
long periods of time
Normal when first plugged in Allow 24 hours for the refrigerator to cool down
Warm or large amounts of food added This is normal; allow 24 hours to adjust
Door is left open Ensure door is not being held open by an item
Hot weather or frequent openings This is normal; allow 24 hours to adjust
Temperature control set to coldest setting Adjust knob to a warmer setting
Moisture on
exterior/interior of
refrigerator
High humidity This is normal; Dry surface and adjust
temperature knob to slightly colder setting
Doors opened frequently or left open Keep door closed / Check that an obstruction
isn’t preventing door from closing
Open container of water in refrigerator Cover or seal container
Refrigerator
has an odor
Food is not sealed or packaged properly Re-seal packaging / Place an opened box of
baking soda in the refrigerator; replace every
three months
Interior needs to be cleaned Follow cleaning instructions in Proper Care and
Maintenance section
Light does not
come on
Refrigerator is unplugged Plug refrigerator in to power source
Bulb is loose Tighten bulb by turning clockwise
Bulb is burned out Follow instructions in Light Bulb Replacement
section
Not all models come with freezer or mid-level
light
Frost or ice crystals
on frozen food
Freezer door left open or opened frequently Keep freezer door closed as much as possible
Items blocking freezer air vents and preventing
proper air flow Move items away from rear wall
Hot or warm air
from bottom of
refrigerator
Air flow coming from compressor during
refrigeration process This is normal
Food placed too close the air vent Move items away from back and top of the
refrigerator
Temperature control knob set too low Turn knob counter-clockwise to change to a
warmer setting; allow 24 hours to adjust
Food freezing in
refrigerator
PAGE 12 ●TROUBLESHOOTING & WARRANTY
ENGLISH

TROUBLESHOOTING
ENGLISH
PROBLEM POSSIBLE CAUSES(S) SOLUTION
Freezer door pops
open when closing
the refrigerator
door
Normal if freezer door closes afterwards on
its own This indicates a good seal if freezer door
closes on it own
If freezer doesn’t close on its own after
popping open, adjust the leveling legs See leveling legs feature instructions in
Installing Your Refrigerator section
Door does not
close properly Refrigerator isn’t level See leveling leg feature instructions in
Installing Your Refrigerator section
Something is obstructing door closure Check for and remove obstructions
Vibration or
rattling Refrigerator is not resting firmly on floor See leveling leg feature instructions in
Installing Your Refrigerator section
No ice produced Not all models come with an ice maker
Refrigerator is not plugged in Plug refrigerator into power source
Ice maker control arm is up (OFF position) Lower ice maker control arm
Ice maker is not plugged into electrical socket
at rear of freezer compartment Plug ice maker into socket in rear of freezer
compartment
Water supply is turned offor disconnected Check that water supply line is connected to
water valve and turned on
Water valve is not connected to refrigerator
wiring harness Disconnect refrigerator from power source,
remove rear access cover, plug valve into
wiring harness in bottom, rear compartment
Water tubing connection(s) loose Check connections on rear of unit
Slow ice
production Refrigerator is set to a warm setting Adjust to a colder setting
Water tubing is leaking or kinked Check tubing on rear of unit for leaks or
kinks
Water leak in
freezer
compartment
Fill tube is not aligned into fill cup on rear of
ice maker Adjust tube to direct water into fill cup on
rear of ice maker
Water tubing on rear of refrigerator is leaking Check tubing on rear of refrigerator
Water valve is leaking Disconnect refrigerator for power supply,
remove rear compartment cover, then
check water connections on water valve
Water leak under
refrigerator
CUSTOMER SERVICE
IMPORTANT
DO NOT RETURN THIS PRODUCT TO THE STORE
If you have a problem with this product, please contact the
Haier Customer Satisfaction Center at 1-877-337-3639.
DATED PROOF OF PURCHASE, MODEL # AND SERIAL #
REQUIRED FOR WARRANTY SERVICE
CUSTOMER
SERVICE
SERVICE DU
CENTRE DE
REPARATION
A LA CLIENTELE
SERVICIO
AL CLIENTE
Hotline
1-877-337-3639
PAGE 13 ●TROUBLESHOOTING & WARRANTY

LIMITED WARRANTY
ENGLISH
What is covered and for how long?
This limited warranty covers all defects in
workmanship or material for a period of:
12 months on Mechanical and Electrical Parts and
Labor
5 Years on Sealed System
This limited warranty commences on the date the
item was purchased and the original purchase
receipt must be presented to the authorized
service center before any warranty service is
rendered.
Exceptions: Commercial or Rental Use
90 Days on Labor (Carry-in Only)
90 Days on Parts
No Other Warranty Applies
What is covered:
The mechanical and electrical parts, which serve a
functional purpose of this appliance for a period of
12 months from the date of purchase. This
excludes finish and trim.
The components of the sealed system (e.g.
hermetic compressor, condenser, and evaporator)
from the manufacturing defects for a period of 5
years from the date of purchase. Any damage to
such components caused by mechanical abuse or
improper shipping and handling are not covered.
What will be done?
We will repair or replace, at our discretion, any
mechanical or electrical part which proves to be
defective in normal usage during the warranty
period as specified.
There will be no charge to the purchaser for parts
and labor on any covered items during the initial 12
month period. Beyond this period, only parts may
be covered, at our discretion. Labor is not
provided and must be paid by the consumer.
What to do if you need service:
Contact your nearest authorized service center.
For the name of the nearest service center,
please call 1-877-337-3639.
THIS WARRANTY COVERS APPLIANCES WITHIN
THE CONTIGUOUS UNITED STATES AND
CANADA. THIS WARRANTY DOES NOT COVER
THE FOLLOWING:
Service calls to correct the installation on your
refrigerator
Service calls to instruct you on proper use of
your refrigerator
Service calls to replace or correct house wiring
or plumbing
Service calls to replace light bulbs
Damages from improper installation
Damages occurred from shipping
Damage from customers’ misuse, abuse,
accident, alteration, lack of proper care and
maintenance or incorrect current or voltage
Damage from non-household use
Damage from service performed by a non-
authorized dealer or service center
Decorative trim
Labor Costs (after the initial 12 month warrant
period)
THIS LIMITED WARRANTY IS GIVEN IN LIEU OF
ALL OTHER WARRANTIES, EXPRESSED OR
IMPLIED, INCLUDING THE WARRANTIES OF
MERCHANTABILITY AND FITNESS FOR A
PARTICULAR PURPOSE.
The remedy provided in this limited warranty is
your exclusive remedy and is granted in lieu of all
other remedies. This warranty excludes incidental
or consequential damages, so the above
limitations may not apply to you. Some states do
not allow limitations on how long an implied
warranty last, so the above limitations may not
apply to you. This warranty gives you specific legal
rights and you may have other rights which vary
from state to state.
Haier America
Wayne, NJ 07470
PAGE 14 ●TROUBLESHOOTING & WARRANTY


TABLE DES MATIÈRES
FRANÇAIS
RENSEIGNEMENTS SUR LA SÉCURITÉ
Consignes importantes concernant la sécurité
RÉGLAGES ET UTILISATION
Exigences en matière d'électricité
Guide d'installation
Instructions de désemballage
Pièces comprises
Accessoires
Inversion des portes
Installation des poignées de porte
Installation de l'alimentation en eau
Caractéristiques et utilisation
NETTOYAGE ET ENTRETIEN
Entretien approprié
DÉPANNAGE ET GARANTIE
Bruits normaux pendant le fonctionnement
Dépannage
Service à la clientèle
Garantie limitée
ENREGISTREMENT DU PRODUIT
Merci d'avoir acheté un produit Haier.
Ce guide facile à consulter vous aidera à utiliser votre
appareil de façon optimale.
Rappelez-vous de prendre en note les numéros de
modèle et de série.
Ils sont indiqués sur une étiquette apposée à
l'intérieur du produit.
Brochez le reçu de caisse au guide.
Vous en aurez besoin pour obtenir du service en
vertu de la garantie.
Numéro de modèle
Numéro de série
Date d'achat
2-3
3
3-7
3
4
5
5
6
6
7
9-10
10
11-12
12
13

FRANÇAIS
AVERTISSEMENT
LISEZ TOUTES LES INSTRUCTIONS AVANT D'UTILISER CET APPAREIL ÉLECTROMÉNAGER.
LORS DE L'UTILISATION DE CET APPAREIL, RESPECTEZ TOUJOURS LES MESURES DE SÉCURITÉ
DE BASE, Y COMPRIS CE QUI SUIT :
1. N'utilisez cet appareil qu'aux fins prévues, tel que décrit dans ce guide d'utilisation et d'entretien.
2. Ce réfrigérateur doit être installé conformément aux instructions d'installation avant d'être utilisé. Consultez
les Exigences en matière d'électricité de la partie Réglage et l’utilisation.
3. Ce réfrigérateur ne doit être ni encastré, ni incorporé dans une armoire. Il est conçu pour une installation
amovible seulement.
4. Ne débranchez jamais votre réfrigérateur en tirant sur le cordon d'alimentation. Saisissez toujours la fiche
fermement et tirez-la en ligne droite pour la sortir de la prise de courant.
5. Réparez ou remplacez immédiatement tous les cordons d'alimentation électrique qui s'effilochent ou sont
autrement endommagés. N'utilisez pas un cordon si celui-ci, la fiche ou l'embout du connecteur présente des
fissures ou d'autres dommages causés par l'abrasion.
6. Ne touchez pas aux surfaces froides du compartiment du congélateur, particulièrement si vos mains sont
mouillées ou humides. La peau pourrait rester collée à ces surfaces très froides.
7. N'utilisez aucun appareil électrique ou instrument coupant pour dégivrer votre réfrigérateur.
8. Débranchez votre réfrigérateur avant de le nettoyer ou de procéder à des réparations.
REMARQUE : Si pour une raison ou une autre, ce produit nécessite un entretien, nous vous recommandons
fortement de faire appel aux services d'un technicien qualifié.
9. Ne faites pas fonctionner votre réfrigérateur en présence de fumées explosives.
PAGE 2 ●RENSEIGNEMENTS SUR LA SÉCURITÉ
RISQUE QU'UN ENFANT RESTE PRIS AU PIÈGE. ENLEVEZ LES
PORTES DE VOTRE ANCIEN RÉFRIGÉRATEUR OU
CONGÉLATEUR AVANT DE LE METTRE AU REBUT. LAISSEZ
LES ÉTAGÈRES EN PLACE POUR RENDRE L'ACCÈS PLUS
DIFFICILE AUX ENFANTS.
AVERTISSEMENT
CONSIGNES DE SÉCURITÉ IMPORTANTES
Votre sécurité et celle des autres sont très importantes.
Nous avons inscrit d'importants conseils concernant la sécurité tout au long du présent guide.
Lisez et observez tous ces conseils de sécurité.
Les conseils de sécurité sont indiqués par le symbole de sécurité : Ce symbole sera accompagné
par l'un des termes d'indication de sécurité suivants et une explication des dangers potentiels qui
pourraient entraîner la mort ou des blessures.
Définitions des termes d'indication de sécurité :
Risque possible de décès ou de blessure grave si vous ne suivez pas
immédiatement les instructions.
Indique une situation potentiellement dangereuse qui, si elle n'est pas évitée,
pourrait entraîner la mort ou de graves blessures.
Indique une situation potentiellement dangereuse qui, si elle n'est pas évitée,
peut entraîner une blessure mineure ou modérée.
AVERTISSEMENT
DANGER
MISE EN GARDE

FRANÇAIS
GUIDE D’INSTALLATION
RESTRICTIONS D'INSTALLATION
Choisissez un emplacement convenant à l'appareil, sur une surface plane et dure, à l'abri des rayons directs du
soleil et des sources de chaleur (p. ex., les radiateurs, plinthes chauffantes, appareils de cuisson, etc.). Toute
inégalité du plancher devrait être compensée au moyen des pattes de nivellement installées sous l'appareil.
DÉSEMBALLAGE DE VOTRE RÉFRIGÉRATEUR
1. Retirez tous les matériaux d'emballage. Cela inclut la base en carton ondulé ainsi que tous les rubans adhésifs
retenant des accessoires à l'intérieur et à l'extérieur du réfrigérateur. Conservez le bloc de mousse entre les
portes si une inversion du battant de porte est requise.
2. Inspectez le réfrigérateur et enlevez tout résidu d'emballage, de ruban adhésif ou de matériel imprimé avant de
le mettre en marche.
3. Si votre réfrigérateur est muni d’un tiroir à collations, retirez le ruban adhésif bleu collé à l'arrière de celui-ci.
Vous ne pourrez ni ouvrir, ni refermer le tiroir si vous ne le faites pas.
EXIGENCES EN MATIÈRE D'ÉLECTRICITÉ
AVERTISSEMENT
EXIGENCE ÉLECTRIQUE - RISQUE D’ÉLECTROCUTION
Assurez-vous de la proximité d'une prise de courant adéquate pour alimenter le réfrigérateur :
une prise de 115 V, 15 A tripolaire (mise à la terre) avec mise à la masse appropriée.
Évitez d'utiliser les adaptateurs tripolaires ou de couper la broche de mise à la terre pour brancher
l'appareil à une prise bipolaire. Cette pratique est dangereuse puisqu'elle ne fournit aucune mise à la
terre au réfrigérateur et peut entraîner un risque de décès, d'incendie ou d'électrocution.
AVERTISSEMENT
UTILISATION DE RALLONGES ÉLECTRIQUES – RISQUE POUR LA SÉCURITÉ
Évitez d'utiliser une rallonge électrique en raison des risques pour la sécurité dans certaines
conditions. En cas de nécessité absolue, n'utilisez qu'une rallonge tripolaire munie d'une fiche à trois
broches, dont une de mise à la terre, et une prise tripolaire pouvant accueillir la fiche. La capacité
nominale indiquée sur la rallonge doit être égale ou supérieure à la capacité nominale de l'appareil.
N'utilisez pas de rallonge électrique de plus de 12 pi.
La non-observance de ces instructions peut entraîner la mort, un incendie ou une électrocution.
PAGE 3 ●INSTALLATION ET UTILISATION
CONSERVEZ CES INSTRUCTIONS
CONSIGNES DE SÉCURITÉ IMPORTANTES
NE PAS METTRE LES DOIGTS OU UNE MAIN DANS LE MÉCANISME DE FABRICATION DE GLAÇONS
AUTOMATIQUE LORSQUE LE RÉFRIGÉRATEUR EST BRANCHÉ. CELA AIDERA À VOUS PROTÉGER CONTRE
D'ÉVENTUELLES BLESSURES ET PRÉVIENDRA ÉGALEMENT TOUTE INTERFÉRENCE AVEC LES PIÈCES
MOBILES DU MÉCANISME D'ÉJECTION ET L'ÉLÉMENT CHAUFFANT QUI LIBÈRE LES CUBES.
MISE EN GARDE

FRANÇAIS
GUIDE D'INSTALLATION (SUITE)
PIÈCES FOURNIES
LES PIÈCES COMPRISES PEUVENT VARIER SELON L’APPAREIL.
TOUS LES MODÈLES
2 poignées
Grille avant
4 vis de montage de poignée
Guide du propriétaire
MODÈLES EN ACIER INOXYDABLE
Clé hexagonale (pour l'installation de la poignée)
MODÈLES AVEC MACHINE À GLAÇONS INSTALLÉE
Bac à glaçons
Collier de l'alimentation en eau
Vis no 8
SI LE RÉFRIGÉRATEUR EST LIVRÉ AVEC UN DISTRIBUTEUR D'EAU ET LA TUBULURE INSTALLÉS EN
USINE, NE RACCORDEZ PAS UNE ALIMENTATION EN EAU À LA VALVE D'ARRIVÉE D'EAU À L'ARRIÈRE
DU RÉFRIGÉRATEUR AVANT QUE LA MACHINE À GLAÇONS NE SOIT INSTALLÉE.
PAGE 4 ●INSTALLATION ET UTILISATION
CIRCULATION APPROPRIÉE DE L'AIR
Afin d'assurer l'efficacité maximale de votre réfrigérateur, vous devez l'installer dans un emplacement où il y a
une bonne circulation d'air ainsi qu’une tuyauterie et des connexions électriques appropriées. Votre
réfrigérateur n’est pas conçu pour fonctionner à des températures inférieures à 12 °C (55 °F) et supérieures à
35 °C (95 °F).
N'installez pas le réfrigérateur dans un endroit qui n'est pas adéquatement isolé
et chauffé, tel qu'un garage.
Gardez cet appareil loin des sources de chauffage comme les radiateurs,
chaufferettes et appareils de cuisson.
Voici les dégagements recommandés autour du réfrigérateur :
Côtés et dessus.......... 1 po (25 mm) Arrière .......... 2 po (50 mm).
OUTILS REQUIS POUR L'INSTALLATION
N’UTILISEZ AUCUN OUTIL ÉLECTRIQUE POUR INSTALLER LES POIGNÉES DE PORTE!
LE SERRAGE EXCESSIF DES VIS POURRAIT ENDOMMAGER LE PAS DE LA VIS!
Grille avant
Tournevis
cruciforme
Tournevis
Torx T25
(certains modèles)
Pince Clés de 5/16 po
à 3/8 po Clé ajustable
Ou
4. Si votre réfrigérateur est doté de portes lisses ou en acier inoxydable, veuillez retirer la pellicule de plastique avant
de le mettre sous tension pour la première fois. Lors du retrait de la pellicule de plastique, ne la tirez pas tout droit
vers le bas, comme cela pourrait entraîner un désalignement des portes.
5. Il est normal que la porte du congélateur soit positionnée légèrement plus haute que le dessus du réfrigérateur
lors de l'installation. Ce positionnement est fait à l'usine pour s'assurer que les joints d'étanchéité assurent
correctement l'étanchéité une fois que la porte est appesantie avec la nourriture.
NIVELAGE DE VOTRE RÉFRIGÉRATEUR
Le réfrigérateur doit reposer fermement sur le sol.
Il doit être de niveau un côté par rapport à l'autre.
Le réfrigérateur doit être légèrement incliné (¼ po ou 6 mm) de l'avant vers
l'arrière pour que les portes ferment bien.
Tournez les pattes de nivellement pour relever ou abaisser le réfrigérateur.
Table of contents
Languages:
Other Haier Refrigerator manuals

Haier
Haier HR-136WL User manual

Haier
Haier HRD-2714CS User manual

Haier
Haier HTMR360 User manual

Haier
Haier PBFS21EDBS Assembly instructions

Haier
Haier ESRN025 User manual

Haier
Haier BC-76 User manual

Haier
Haier PRF-273 User manual

Haier
Haier HDW3620DNPK User manual

Haier
Haier HRF-253 E User manual

Haier
Haier HRC2731AC User manual

Haier
Haier HRF12WNDWW User manual

Haier
Haier HDR3619FN Series User manual

Haier
Haier HB16WMAA User manual

Haier
Haier HSL04WNBSS User manual

Haier
Haier HRZ-60 User manual

Haier
Haier HRN-176 User manual

Haier
Haier HBF165 User manual

Haier
Haier CFL User manual

Haier
Haier CH013 User manual

Haier
Haier HB21FWRSS User manual