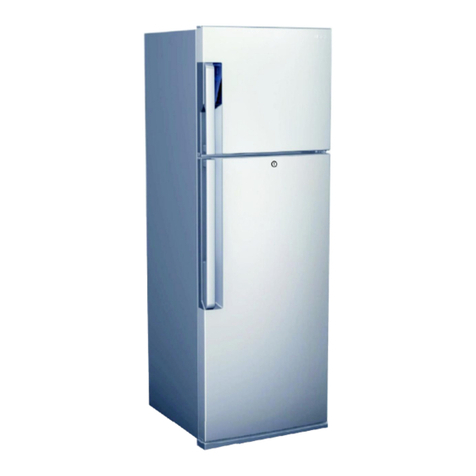
Haier HT SERIES User manual

Frost-Free Top Mount
Refrigerator / Freezer
Réfrigérateur/congélateur sans
givre à compartiments superposés
Refrigerador/congelador sin
escarcha, de puertas horizontales
User Manual
Guide de l’Utilisateur
Manual del Usuario
Model HT SERIES
Design may vary by model number.
!"#$%&'()!*+$%",-(*".!)+-)"/-0$%"0-"%(12)$"3-"1$340-5
60"3+/-7$",(-3-".!)+!)"#$%8$)1-"!0"%91-)$"3-"1$3-0$5

EN G LISH
TA BLE O F C O N TEN TS
PRO D U C T REG ISTRATIO N
T hank you for purchasing our H aier
product. This easy-to-use m anual w ill guide you in
getting the best use ofyour product.
Rem em ber to record the m odel and serial num bers.
T hey are on a label inside ofthe Product.
Model num ber
Serial num ber
D ate ofpurchase
Staple your receipt to your m anual. You w ill need it to obtain w arranty service.
SA FETY IN FO RMATIO N
Im portant Safety Instructions ......................................................................................................................2
SET U P & U SE
Electrical Requirem ents ................................................................................................................................4
Installation Guide .......................................................................................................................................4-5
Instructions for Unpacking............................................................................................................................5
Installing Your Refrigerator............................................................................................................................6
Parts-Included................................................................................................................................................6
A ccessories....................................................................................................................................................6
Parts & Features.............................................................................................................................................7
D oor H andle Installation............................................................................................................................8-9
Reversing the D oor............................................................................................................................... 10-12
Features and Use ........................................................................................................................................ 12
O peration Instructions......................................................................................................................... 13-15
Food Storage Inform ation .......................................................................................................................... 16
C LEA N IN G A N D C A RE
Proper C are and Maintenance.............................................................................................................. 17-18
TRO U B LE SHO O TIN G & W A RRA N TY
N orm al O perating Sounds.......................................................................................................................... 19
Troubleshooting .................................................................................................................................... 20-21
C ustom er Service ....................................................................................................................................... 22
Lim ited W arranty ........................................................................................................................................ 23

N O TE:Ifthe refrigerator has been placed in a horizontal or tilted position for any period oftim e,w ait 24
hours before plugging the unit in.
1)Use this appliance only for its intended purpose as described in this use and care guide.
2)This refrigerator m ust be properly installed in accordance w ith the installation instructions before it is
used. See Electrical Requirem ents in the Set Up & Use section.
3)T his refrigerator should not be recessed or built-in an enclosed cabinet. It is designed for freestanding
installation only.
4)N ever unplug your refrigerator by pulling on the pow er cord. A lw ays grasp the plug firm ly and pull
straight out from the outlet.
5)Repair or replace im m ediately,all electric service cords that have becom e frayed or otherw ise
dam aged. D o not use a cord that show s cracks or abrasion dam age along its length,the plug or the
connector end.
6)Ifyour old refrigerator is not being used,w e recom m end that you rem ove the doors. This w ill reduce
the possibility ofdanger to children.
7)D o not refreeze foods,that have been thaw ed com pletely. T he United States D epartm ent of
A griculture in H om e and Garden Bulletin N o. 69 reads:
"… You m ay safely refreeze frozen foods that have thaw ed ifthey still contain ice crystals or ifthey are
still cold-below 40°F."
"… T haw ed ground m eats,poultry,or fish that have any off-odor or offcolor should not be refrozen
and should not be eaten. T haw ed ice cream should be discarded. Ifthe odor or color ofany food is
poor or questionable,discard it. T he food m ay be dangerous to eat."
"… Even partial thaw ing and re-freezing reduce the eating quality offoods,particularly fruits,
vegetables,and prepared foods. T he eating quality ofred m eats is affected less than that ofm any
other foods. Use refrozen foods as soon as possible to save as m uch oftheir eating quality as you
can."
IMPO RTA N T SA FETY IN STRU C TIO N S
REA D A LL IN STRU C TIO N S BEFO RE U SIN G THIS A PPLIA N C E:
W HEN U SIN G THIS A PPLIA N C E, A LW AYS EX ERC ISE BA SIC SA FETY
PREC A U TIO N S, IN C LU D IN G THE FO LLO W IN G :
W A RN IN G
A FTER YO U R REFRIG ERATO R IS IN O PERATIO N , D O N O T TO U C H THE C O LD
SU RFA C ES IN THE FREEZ ER C O MPA RTMEN T, PA RTIC U LA RLY W HEN HA N D S A RE
D A MP O R W ET.SK IN MAY A D HERE TO THESE EX TREMELY C O LD SU RFA C ES.
W A RN IN G
!"#$%$&$'!(#)*$+,(-./!)+-,
EN G LISH

8)D o not use any electrical device or any sharp instrum ent in defrosting your refrigerator.
9)Unplug your refrigerator before cleaning or before m aking any repairs.
N O TE:Iffor any reason this product requires service,w e strongly recom m end that a certified
technician perform service.
10)D o not operate your refrigerator in the presence ofexplosive fum es.
SAV E THESE IN STRU C TIO N S
RISK O F C HILD EN TRA PMEN T.BEFO RE YO U THRO W A W AY YO U R O LD
REFRIG ERATO R O R FREEZ ER, TA K E O FF THE D O O RS.LEA V E THE SHELV ES IN
PLA C E SO THAT C HILD REN MAY N O T EA SILY C LIMB IN SID E.
D A N G ER
!"#$0$&$'!(#)*$+,(-./!)+-,
EN G LISH
IMPO RTA N T SA FETY IN STRU C TIO N S C O N T.

ELEC TRIC A L REQ U IREMEN TS
IN STA LLATIO N G U ID E
!"#$1$&$'#)$2 $3 $2 '#
EN G LISH
G RO U N D IN G IN STRU C TIO N S
!!"#$%!&'(%!)*%(%!+&!#!&'+)#,-%!./0%(!/')-%)1!223!4/-)&5!23!67.&5!8!9(/:;!<=(/':>%>?!./0%(!/')-%)!0+)*!
proper grounding to pow er the refrigerator.
!!6@/+>!)*%!'&%!/A!)*(%%!.(/:;!#>#.)%(&!/(!B'))+:;!/AA!)*%!)*+(>!;(/':>+:;!.(/:;!+:!/(>%(!)/!
accom m odate a tw o prong outlet. T his is a dangerous practice since it provides no effective grounding
for the refrigerator and m ay result in shock hazard.
U SE O F EX TEN SIO N C O RD S
!!6@/+>!)*%!'&%!/A!#:!%C)%:&+/:!B/(>!,%B#'&%!/A!./)%:)+#-!&#A%)D!*#E#(>&!':>%(!B%()#+:!B/:>+)+/:&1!
Ifit is necessary to use an extension cord,use only a 3-w ire extension cord that has a 3-blade
grounding plug and a 3-slot outlet that w ill accept the plug. The m arked rating ofthe extension cord
m ust be equal to or greater than the electrical rating ofthe appliance. D O N O T U SE EX TEN SIO N
C O RD LO N G ER THA N 12 FT.
IN STA LLATIO N LIMITATIO N S
!!F%-%B)!#!&'+)#,-%!-/B#)+/:!A/(!)*%!(%A(+;%(#)/(!/:!#!*#(>!%@%:!&'(A#B%!#0#D!A(/7!>+(%B)!&':-+;*)!/(!*%#)!
source,e.g. radiators,baseboard heaters,cooking appliances,etc. A ny floor unevenness should be
corrected w ith the leveling legs located on the front bottom corners ofthe refrigerator.
U N PA C K IN G YO U R REFRIG ERATO R
1. Rem ove all packaging m aterial. T his includes the corrugated base and all adhesive tape holding the
refrigerator accessories inside and outside.
2. Inspect and rem ove any rem ains ofpacking,tape or printed m aterials before pow ering on the
refrigerator.
N O TE:Ifyour refrigerator com es w ith a snack pan,rem ove the blue adhesive tape from the rear ofthe
pan. T he pan w ill not slide in and out w ithout rem oving the tape.
U SE O F EX TEN SIO N C O RD S- PO TEN TIA L SA FETY HA Z A RD
W A RN IN G
ELEC TRIC A L REQ U IREMEN T - SHO C K HA Z A RD
W A RN IN G

LEV ELIN G YO U R REFRIG ERATO R
!!G/'(!(%A(+;%(#)/(!*#&!)0/!-%@%-+:;!-%;&!)*#)!#(%!-/B#)%>!+:!)*%!A(/:)!,/))/7!B/(:%(&!/A!D/'(!(%A(+;%(#)/(1!
A fter properly placing your refrigerator in its final position,you can level your refrigerator.
!!H%@%-+:;!-%;&!B#:!,%!#>I'&)%>!,D!)'(:+:;!)*%7!B/':)%(B-/B$0+&%!)/!(#+&%!D/'(!(%A(+;%(#)/(!/(!,D!)'(:+:;!
them clockw ise to low er your refrigerator. T he refrigerator door w ill close easier w hen the leveling legs
are extended.
PRO PER A IR C IRC U LATIO N
!!J/!%:&'(%!D/'(!(%A(+;%(#)/(!0/($&!#)!)*%!7#C+7'7!%AA+B+%:BD!+)!0#&!>%&+;:%>!A/(5!D/'!&*/'->!+:&)#--!+)!+:!
a location w here there is proper air circulation,plum bing and electrical connections. Your refrigerator
+&!:/)!>%&+;:%>!)/!/.%(#)%!+:!)%7.%(#)'(%&!,%-/0!33KL!<2MKN !?!/(!#,/@%!O3KL!<83KN ?1
!!D o not install your refrigerator in any location not properly insulated or heated,e.g. garage,etc.
Keep out ofdirect sunlight and aw ay from heating sources such as radiators,heaters,and cooking
appliances.
!J *%!A/--/0+:;!#(%!(%B/77%:>%>!B-%#(#:B%&!#(/':>!)*%!(%A(+;%(#)/(P
Sides… … … … … 2Q!<M3!77?!! J/.111111111111111111112R!<M3!77?! ! S#B$111111111111111111MR!<3T77?
EN G LISH
!"#$4$&$'#)$2 $3 $2 '#
IN STA LLATIO N G U ID E C O N T.
IN STRU C TIO N S FO R U N PA C K IN G
FRO N T G RILLE
G/'(!(%A(+;%(#)/(!B/7%&!0+)*!#!A(/:)!;(+--%!<)/%!$+B$?5!0*+B*!+&!(%@%(&+,-%!,#&%>!/:!0*+B*!&+>%!/A!)*%!
refrigerator the hinges are m ounted on. To install the front grille,locate the non-hinge end using the
diagram below and follow the instructions below .
1. Snap the non-hinge side into the air flow opening on the low er rail ofthe refrigerator.
2. T hen,snap the hinge side into the opposite air flow opening in the low er rail beside the bottom hinge.
LO W ER RA ISE
N on-hinge side H inge side
N on-hinge side
H inge side

!"#$5$&$'#)$2 $3 $2 '#
EN G LISH
PA RTS-IN C LU D ED
A C C ESSO RIES
IN STA LLIN G YO U R REFRIG ERATO R
TO O LS N EED ED FO R IN STA LLATIO N
3U2V!#:>!8UW!X (%:B*%&!/(!6>I'&)#,-%!X (%:B*Phillips Screw driver Putty Knife
Y Z ![ Z J !\ F]!9Z X ]^!JZ Z HF!JZ !_[ FJ6HH!Y Z Z ^!` 6[ Y H]Fa!Z 4]^J _=` J][ _[ =!J ` ]!FN ^]X F!N Z \ HY !
ST RIP T H E T H REA D S!
For non-stainless steel m odels
that com e w ith a handle
m ounting screw factory installed
on the faces ofthe doors,the
parts-included bag w ill consist
of:
!M!` #:>-%&
!2!L(/:)!=(+--%
!b!` #:>-%!#))#B*7%:)!&B(%0&
!2!]C)(#!` #+%(!-/;/!,#>;%
!2!N /-/(c7#)B*%>!&B(%0c.-';
!Z 0:%(d&!7#:'#-
For m odels that don’t com e w ith
a handle m ounting screw factory
installed on the faces ofthe
door,the parts-included bag w ill
consist of:
!M!` #:>-%&
!2!L(/:)!=(+--%
!M!Y //(!A#B%!7/':)+:;!&B(%0&!
!b!Y //(!%>;%!7/':)+:;!&B(%0
!2!]C)(#!` #+%(!-/;/!,#>;%
!2!X *+)%!&B(%0c.-';
!Z 0:%(d&!7#:'#-
!M!` #:>-%!B/@%(U)(+7!.+%B%&
For stainless steel m odels,the
parts-included bag w ill consist
of:
!M!` #:>-%&
!2!L(/:)!=(+--%
!b!` #:>-%!#))#B*7%:)!&B(%0&
!Z 0:%(d&!7#:'#-
T he follow ing accessories are available:
! _B%!7#$%(!e +)!` _3"e
! X +(%!F*%-A!A/(!L(%%E%(!N /7.#()7%:)
! ^%.-#B%7%:)!H+;*)!S'-,&
To order accessories,call 1-877-337-3639 or visit us at w w w .haieram erica.com /support
PA RTS-IN C LU D ED BA G MAY D IFFER BA SED O N U N IT PU RC HA SED .

EN G LISH
!"#$6$&$'#)$2 $3 $2 '#
PA RTS & FEATU RES
D iagram for instructional purposes only.
D esign m ay vary by m odel num ber.
Leveling Legs
Front Grille
C risper Bins
C risper
H um idity
C ontrols
Full-W idth
Shelves
Tem perature
C ontrol w ith
Interior Light
A ir Flow
C ontrol
Full-W idth
D oor Shelves
Freezer
D oor Shelves
D airy
C om partm ent

D O O R HA N D LE IN STA LLATIO N
For refrigerators w ith a m ounting screw installed
on the face ofboth doors:
Rem ove both handles from inside freezer
com partm ent and screw s from parts-included
bag.
FREEZ ER D O O R HA N D LE
1. Place the tapered end ofthe handle over the
m ounting screw on the freezer door and gently
slide handle in the direction ofthe flat end of
)*%!*#:>-%1!<L+;1!2?
2. O nce the handle is fully seated around the
m ounting screw ,slow ly rotate the flat end of
the handle tow ard the bottom ofthe freezer
door.
3. O pen the freezer door and install the screw s
into the underside ofthe freezer door through
the flat end ofthe handle. D o not use pow er
tools to install screw s. D o not over-tighten the
screw s.
REFRIG ERATO R D O O R HA N D LE
1. Place the tapered end ofthe handle over the
m ounting screw on the refrigerator door and
gently slide handle in the direction ofthe flat
%:>!/A!)*%!*#:>-%1!<L+;1!2?
2. O nce the handle is fully seated around the
m ounting screw ,slow ly rotate the flat end of
the handle tow ard the top ofthe refrigerator
>//(1!<L+;1!2?
3. O pen the refrigerator door and install
the screw s in to the top ofthe refrigerator
door through the flat end ofthe handle
Y /!:/)!/@%(c)+;*)%:!&B(%0&1!<L+;1!M?
4. Ifre-installing handles after reversing the
door sw ing,rem ove screw hole plug from
the parts-included bag and place it in the
handle-m ounting screw hole on the face ofthe
refrigerator door.
5. The nam e badge can be rem oved by using a
putty knife or flat head screw driver to pry the
badge offthe door face,being careful not to
dam age the finish. A ny residue left on the face
ofthe door from the badge should be rem oved
by using Goo Gone©or W D -40©. Be sure to
follow the m anufacturer’s instructions w hen
using these products.
D o not use any abrasives or scouring pads to
rem ove the residue.
A n extra logo badge is provided in the parts-
included bag w ith your refrigerator. T hat badge
can be used to cover the handle m ounting screw
hole on the face ofthe freezer door.
D O O R HA N D LE IN STA LLATIO N
!"#$7$&$'#)$2 $3 $2 '#
EN G LISH
Fig. 1
Fig. 2

D O O R HA N D LE IN STA LLATIO N
For refrigerators w ithout a m ounting screw
installed on the face ofboth doors:
Rem ove both handles from the freezer
com partm ent and the screw s and handle trim
pieces from the parts-included bag.
FREEZ ER D O O R HA N D LE
1. Mount the tapered end ofthe handle to the
door face using the enclosed screw . D o not
use the screw hole closest to the center ofthe
handle.
2. A ttach the flat end ofthe handle to the
underside ofthe door using the enclosed
screw s.
3. Insert tab on handle trim cover into slot in
handle and then press firm ly onto handle.
REFRIG ERATO R D O O R HA N D LE
1. Mount the tapered end ofthe handle to the
>//(!A#B%!'&+:;!)*%!%:B-/&%>!&B(%01!<L+;1!8?!Y /!
not use the screw hole closest to the center of
the handle.
2. A ttach the flat end ofthe handle to the top of
)*%!>//(!'&+:;!)*%!%:B-/&%>!&B(%0&1!<L+;1!b?
3. Insert tab on handle trim cover into slot in
*#:>-%!)*%:!.(%&&!A+(7-D!/:)/!*#:>-%1!<L+;1!3?
4. Ifre-installing handles after reversing the
door sw ing,rem ove the screw hole plug from
the parts-included bag and place it in the
handle-m ounting screw hole on the face ofthe
refrigerator door.
5. The nam e badge can be rem oved by using a
putty knife or flat head screw driver to pry the
badge offthe door face,being careful not to
dam age the finish. A ny residue left on the face
ofthe door from the badge should be rem oved
by using Goo Gone©or W D -40©. Be sure to
follow the m anufacturer’s instructions w hen
using these products.
D o not use any abrasives or scouring pads to
rem ove the residue.
A n extra logo badge is provided in the parts-
included bag w ith your refrigerator. T hat badge
can be used to cover the handle-m ounting screw
hole on the face ofthe freezer door.
!"#$8$&$'#)$2 $3 $2 '#
EN G LISH
D O O R HA N D LE IN STA LLATIO N C O N T.
Fig. 3
Fig. 4
Fig. 5

D O O R SW IN G REV ERSA L
O n black or w hite m odels,the door hinges and
handles can be reversed to accom m odate your
needs.
N O TE:D oor reversal is not available on stainless
steel door m odels.
REMO V IN G THE HA N D LES
Please refer to the appropriate D oor H andle
Installation section to determ ine how to rem ove
the handles from your refrigerator.
REMO V IN G D O O RS A N D HIN G ES
1. Use adhesive tape to secure both sides ofthe
freezer and refrigerator doors to the sides ofthe
B#,+:%)1!<L+;1V?
2. Rem ove the hinge cover screw and the top hinge
B/@%(1!<L+;1!f?
3. Rem ove the tw o bolts that m ount the top hinge
to the cabinet and then rem ove the hinge by
(#+&+:;!+)!@%()+B#--D1!<L+;1!f?
4. C arefully rem ove the adhesive tape holding the
freezer door to the cabinet w hile holding the
door to the cabinet.
31!!^%7/@%!)*%!>//(!,D!<#?!.'--+:;!)*%!)/.!/A!)*%!
>//(!#0#D!A(/7!)*%!B#,+:%)!#:>!<,?!-+A)+:;!+)!#)!
)*%!%!)+7%1!<L+;1!W?
6. Move the door stop on the bottom ofthe door
to the opposite side and secure w ith original
screw s,then place the door aside.
7. Unscrew the center hinge pin by rotating
counterclockw ise,being careful not to lose the
&.#B%(&!A(/7!)*%!)/.!&%B)+/:!/A!)*%!.+:1!<L+;1!2T?
8. Rem ove the refrigerator door in the sam e
m anner as the freezer door,first rem oving
the tape and then lifting up and aw ay from the
B#,+:%)1!<L+;1!2T?!^%-/B#)%!)*%!>//(!&)/.!/:!)*%!
bottom ofthe door to the opposite side ofthe
>//(1!<L+;1!O?!9-#B%!)*%!>//(!#&+>%1
O1!^%7/@%!)*%!B%:)%(!*+:;%!#:>!&.#B%(1!<L+;1!22?
REV ERSIN G THE D O O R
!"#$9:$&$'#)$2 $3 $2 '#
EN G LISH
H inge C over Screw
H inge C over
Bolts
Top H inge
T him ble H ole
Fig. 6
Fig. 7
Fig. 8
Fig. 9
Fig. 10
Fig. 11

10. Rem ove the bottom hinge by unscrew ing the
bolts m ounting it to the cabinet.
N O TE: It is easier to rem ove and re-install the
bottom hinge pin w hile the hinge is itselfis
still attached to the cabinet.
RE-IN STA LLIN G THE HIN G ES A N D
D O O RS
1. Unscrew the bottom hinge pin and re-locate
it to the opposite hole on the top ofthe hinge.
<L+;1!28?
2. A ttach the bottom hinge spacer and bottom
hinge to the cabinet using the bolts originally
provided. Be sure to use the top tw o m ounting
holes on the hinge and the bottom hole on the
sam e side that the hinge is being m oved to.
3. Flip the center hinge according to the diagram
below and attach the hinge spacer and hinge to
)*%!B#,+:%)1!<L+;1!2b?!Y /!:/)!+:&)#--!)*%!B%:)%(!
hinge pin yet.
4. Rem ove the top thim ble cover on the hinge side
ofthe refrigerator door and relocate it to the
opposite thim ble hole. Use both hands to m ount
the door on bottom hinge pin,m aking sure the
pin goes fully into the bottom thim ble hole.
W hen the top thim ble hole is aligned w ith the
hole in the center hinge,place the hinge pin into
the hole,threaded end dow n,and tighten.
D o N ot O ver-T ighten
5. Rem ove the top thim ble plug on the hinge
side ofthe freezer door and relocate it to the
opposite thim ble hole. Place the door onto the
center hinge pin,being sure that the pin goes
fully into the bottom thim ble hole. Tape m ay be
used as it w as during the rem oval steps to hold
the door in place during the next step.
6. Place the top hinge pin into the thim ble hole on
the sam e side as the low er hinges.
!"#$99$&$'#)$2 $3 $2 '#
EN G LISH
REV ERSIN G THE D O O R C O N T.
Fig. 12
Fig. 13
Fig. 14
T him ble H ole
Fig. 15
Fig. 16


ERROR: undefinedresource
OFFENDING COMMAND: findresource
STACK:
/DefaultColorRendering
/ColorRendering
/DefaultColorRendering
Other manuals for HT SERIES
4
Table of contents
Other Haier Refrigerator manuals

Haier
Haier HRF-662RSS User manual

Haier
Haier SC-380A User manual

Haier
Haier HRF505VW User manual

Haier
Haier HTD635WISS User manual

Haier
Haier DD400RS User manual

Haier
Haier HR-106 Instruction Manual

Haier
Haier HR-138A User manual

Haier
Haier SRCS27EDAS User manual

Haier
Haier HDE03WNA User manual

Haier
Haier HB16FMAA User manual

Haier
Haier HBF-1303 User manual

Haier
Haier HRH-137 User manual

Haier
Haier HA10TG21SW User manual

Haier
Haier HYC-260-360 User manual

Haier
Haier HBP08GNA - 01-02 User manual

Haier
Haier HTMR480 User manual

Haier
Haier HRF-628A6 Series User manual

Haier
Haier HB21FNN User manual

Haier
Haier HRN 186 User manual

Haier
Haier C2FE736CSJ User manual