General Information
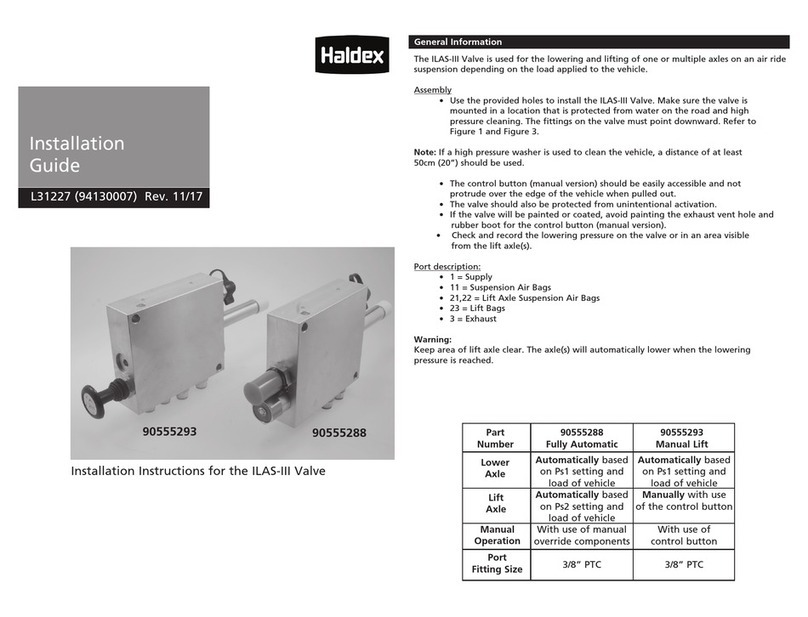
The Haldex ILAS III Valve is used to lower and lift one or more axles on a vehicle. The ILAS III Valve activates
the lift axle as the load is applied to the vehicle. This is achieved by the Ps1 and Ps2 pressure settings in
the valves. The Ps1 pressure setting lowers the axle(s) to the ground and is found on both the Automatic
(90555288) and Manual (90555293) Valves under the yellow cap. The adjustment to Ps1 is made by using
the ILAS Wrench (904053001). The Ps2 pressure setting is used for returning the axle to the up position and
is only found on the Automatic Valves. The Ps2 adjustment is located underneath the red cap and can be
adjusted by hand. Refer to Figure 1 for the Automatic port locations and Ps1 and Ps2 adjustment features.
Refer to Figure 2 for the Manual port locations and the Ps1 adjustment feature. The following instructions
will define the correct procedure to set Ps1 and Ps2 pressure settings and how to check that the valve is
functioning properly.
Prior to setting Ps1 and Ps2 pressures,
you must first determine pressure in the
air suspension system as follows:
1. Determine the pressure in the air
suspension at max. load with the
axle in the up position and also with
the axle in the down position.
2. Determine the pressure in the air
system at empty or no load with the
lift axle in the down position and
again with the lift axle in the up
position.
These four pressure readings will
show the range of pressures the air
suspension is moving through and
will assist in setting the ILAS III Valve
properly for the vehicle.
Note: Before choosing the set points
for the Ps1 and Ps2 familiarize yourself
with local and state (or providence) reg-
ulations that may require a lift axle to
be lowered or raised at a specified load
weight. To determine these set points, a
pressure reading at the desired trigger
load will be needed.
ILAS III Instructions
for Adjustment of
Ps1 and Ps2
L31248 9/09
Ps2 Adjustment for ILAS III Automatic Only
Note. The Ps2 setting of the valve must be higher than the unloaded air bag pressure of the trailer
with all axles on the ground. If this guideline is not followed the Ps2 will not activate and the
axle will remain down.
1. The ILAS III factory setting for Ps2 is approximately 20 PSI. If adjustment is necessary, remove red can
and with fingers back out white nut until face of nut is at the end of the threads. DO NOT REMOVE
WHITE NUT FROM STUD! The Ps2 has a setting range of 10 PSI to 45 PSI, this is dependent on the Ps1
set point. See Figure 5 on previous page for the adjustable range of the valve.
2. Connect a regulated air pressure line to port 11 and set at 80 PSI. Connect the gauge and air switch
to the test port. Close air switch and allow the two gauges to equalize (may take several minutes to
equalize). The Ps1 setting must trigger in order to adjust the Ps2 setting.
3. Once the two gauges are equalized to the same pressure (80 PSI), regulate the pressure down to the
new desired Ps2 setting pressure. May take several minutes to equalize again.
4. To change the Ps2 setting accurately, the test port gauge must equal the regulated pressure gauge
of Port 11 – EXTREMELY IMPORTANT for precise setting of the valve. Once equalized pressure is
reached between both gauges (may take several minutes), very slowly turn the adjustment nut in
(turn to the right) until the exhaust of the valve is heard. Stop the adjustment when the exhaust
is heard. The valve is now set precisely to the regulated pressure that was supplied to Port 11.
Repeat Steps 1-6 from the Functional Check to verify that the Ps2 setting is at the desired
pressure setting.
NOTE: When making an Automatic ILAS III valve adjustment to the Ps1 setting or PS2 setting, this
may result in changes to other settings. Example: An adjustment to increase Ps2 could cause an
increase in Ps1. Always Repeat Steps 1-6 from the Functional Check to verify the settings are
correct before operating the vehicle.
Troubleshooting
Test port gauge does not respond after waiting several minutes:
§Check with soap and water for leaks around all fittings connected to the test port.
§If an adapter is being used over the metric M16x1.5 thread verify that the white check valve is
being engaged by the adapter. If the check valve is not engaged, no air will pass by the gauge.
§Check to see if adequate air is being supplied to the regulator and Port 11.
Ps1 can not be set correctly:
§Perform a Functional Check to verify that the Ps1 triggers and is above the desired set point
use the adjustment wrench to turn in (turn to the right) the adjustment nut until it stops.
DO NOT TORQUE! Back nut out four turns.
§Verify that the desired Ps1 set point is within the adjustable range from 45 to 75 PSI.
Ps2 can not be set correctly:
§Perform a Functional Check to verify that the Ps1 has been triggered prior to the adjustment of Ps2
and that the current Ps2 setting is below the desired Ps2 setting.
§If an adjustment is made to both Ps1 and Ps2 the settings may change slightly as one is
dependent on the other. If needed repeat setting procedures until the desired settings are
achieved.
United States 816.891.2470
Canada 519.621.6722
Mexico 52.81.81569500
L31248
US 9/09
Web Only
Figure 1
Figure 2


