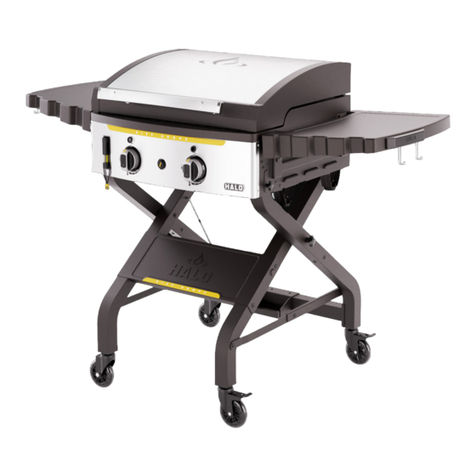
Halo PRIME300 HS-1005-ANA User manual

1
ESSENTIALS GUIDE

2
08
INDUSTRY'S FIRST RECHARGEABLE BATTERY
OPERATED OUTDOOR PELLET GRILL
TABLE OF CONTENTS
04
MEET THE PRIME300 COUNTERTOP PELLET GRILL
06
FEATURES OF YOUR PRIME300
COOKING + CAPACITY 10
11
TEMPERATURE SETTINGS
12
OWNER'S MANUAL
27
TIPS + TECHNIQUES
33
PRIME300 PARTS LIST
16
OPERATING INSTRUCTIONS
13
CSA - EN
25
CARING FOR YOUR PRIME300
FIVE (5) YEAR LIMITED WARRANTY 37
30
TROUBLESHOOTING
36
PRIME300 ELECTRICAL WIRE DIAGRAM

3
40
MANUAL DEL PROPIETARIO
55
CONSEJOS Y TÉCNICAS
61
LISTA DE PIEZAS DEL PRIME300
44
INSTRUCCIONES DE USO DEL PRIME300
41
CSA - ESPAÑOL
53
INSTRUCCIONES DE CUIDADO DE PRIME300
GARANTÍA LIMITADA DE CINCO (5) AÑOS 65
58
SOLUCIÓN DE PROBLEMAS
86
DÉPANNAGE
93
GARANTIE LIMITÉE DE CINQ (5) ANS
81
INSTRUCTIONS D'ENTRETIEN À PRIME300
72
PRIME300 INSTRUCTIONS D’UTILISATION
83
CONSEILS ET TECHNIQUES
LISTE DES PIÈCES DE LA PRIME300 89
92
DIAGRAMME DES FILS ÉLECTRIQUES
68
MANUEL DU PROPRIÉTAIRE 69
CSA - FRANÇAIS
64
DIAGRAMA DE CABLEADO ELÉCTRICO

4
MEET THE
Nothing says Cook, Gather and Create Memories like pellet grilling!
The HALO PRIME300was created with you in mind. With the help of the
12-volt 5Ah Rechargeable Lithium-ion Battery Pack, we have taken the
compact size pellet grill and unthetered it for the perfect outdoor kitchen
addition or on-the-go camping, picnicking and tailgating companion!
We strive to Rise Above in both who we are and what we create. Our mission
is to be a catalyst for re-connecting people and enhancing the experience
of cooking outdoors - In the greatness of nature, on-the-go, and in your
backyard.
The entire team here at Halo thanks you for joining our community. We look
forward to serving you by listening and continuing to bring you authenticity,
versatility and innovation.
-

5

6
Perfect for cooking medium-large cuts of meat.
Sear, roast and smoke at temperatures from 180°F-500°F.
High intensity spark ignition system.
301.9 i n 2TOTAL COOKING SURFACE
Larger capacity holds up to 10 lb at once for longer cook.
10-LB HOPPER CAPACITY
WIDE RANGE TEMPERATURE
NEW TECHNOLOGY
LITHIUM-ION BATTERY OPERATED + IGNITER SYSTEM
12
V
FEATURES OF YOUR

7
SWING AWAY WARMING RACK
301.9 i n 2TOTAL COOKING SURFACE
WIRED MEAT PROBE
DIRECT SEAR SYSTEM
LARGE DIGITAL
CONTROLLER
DISPLAY
Easily view
temperature
display.
Adjust the damper
on center vent to
sear meats for even
distribution.
Heat to an accurate
desired temperature.
Swings away for clear viewing of
food when open and continues
food warming when closed.

8
88
Enjoy the benefits of the compact size without
sacrificing an ounce of pellet smoke flavor.
RECHARGEABLE BATTERY
Our patent-pending igniter system allows
the PRIME300to be powered by a
12-volt 5Ah Rechargeable
Lithium-ion Battery Pack.
Untethered for the perfect outdoor
kitchen addition or on-the-go, camping and
tailgating companion.
GAME CHANGER.

9
BATTERY NOT INCLUDED. Requires (1) 12-volt 5Ah Rechargeable Lithium-ion Battery Pack for auger and igniter.
9
9

10
OR
SEAR
ROAST
SMOKE
COOKING +CAPACITY
HIGH
350-500°F
(176-260°C)
MEDIUM
250-350°F
(121-176°C)
LOW
180-250°F
(82-212°C)
Best for...
Pork Shoulder
Beef Brisket
Whole Turkey
Best for...
Whole Chickens
Scotch Eggs
Beef Roast
Best for...
Hamburgers
Steak
Vegetables
2Rib
Racks 2Whole
Chickens 12Beef
Patties
OR
total cooking space:301.9 in2total weight:45.19 lbs.
pellet hopper capacity:10 lbs.
max temerature:500°F (260°C)

11
TEMPERATURE SETTINGS
■ Temperature readouts on the controller may not
exactly match the thermometer.
■ All temperatures listed are approximate and are
affected by outside ambient temperature, wind, the
quality of pellet fuel being used, the lid being opened,
and the food quantity being cooked.
HIGH
MEDIUM
LOW
350-500°F
250-350°F
180-250°F
This temperature range is used to sears meat at high heat, without
any contact with ame. High temperature is also used as the burn-o
temperature to clean o the cooking grid before and after use. In addition,
high heat can be used in extreme cold weather conditions to compensate
for the contrast of temperatures between outside and inside the unit.
This temperature range is best for roasting and nishing o that slow
smoked creation. Cooking at these temperatures will greatly reduce the
chances of a grease are-up. Great range for cooking anything wrapped in
bacon, or where you want versatility with control.
This range is best used to slow smoke, increase smoky avor, and to
keep foods warm and keep your meats juicy by cooking longer at a lower
temperature.
11
(176-260°C)
(121-176°C)
(82-212°C)

12
SCAN FOR
Product Registration
Online Owner’s Guide
Assembly Videos
12
OWNER'S MANUAL
MODEL NO: HS-1005-ANA

13
IMPORTANT SAFETY INFORMATION
FOR OUTDOOR USE ONLY. Please read manual carefully before assembly. Retain this manual for future reference.
• Regular care and maintenance is required to prolong the lifespan of
your HALO pellet grill. If the pellet grill is stored outside during the
rainy season or seasons of high humidity, use a HALO grill cover to
ensure rainwater does not get into the hopper.
• Do not transport your pellet grill while in use or while is hot. Ensure
the re is completely out and that the pellet grill is completely cool
to the touch before moving.
• Wood pellets will expand
signicantly when wet or
exposed to high humidity,
decompose, and may jam the
feed system. Always disconnect
the power, before performing
any service or maintenance.
• "CAUTION HOT." Wait 5 minutes
to open the hopper lid after grill
lid has been opened.
Follow these guidelines to prevent this colorless, odorless gas from
poisoning you, your family, your pets, or others:
• Recognize the symptoms of carbon monoxide poisoning: headache,
dizziness, weakness, nausea, vomiting, sleepiness, and confusion.
Carbon monoxide reduces the blood’s ability to carry oxygen. Low
blood oxygen levels can result in loss of consciousness and death.
• Seek a doctor if you or others develop cold or u-like symptoms.
Carbon monoxide poisoning, which can easily be mistaken for a cold
or u, is often detected too late.
• Alcohol consumption and drug use increase the effects of carbon
monoxide poisoning.
WARNING
• “Please read this entire manual before installation and
use of this pellet-burning appliance.Failure to follow
these instructions could result in property damage,
bodily injury, or even death.”
• “Contact local building or re ofcials about restrictions
and installation inspection requirements in your area.”
• "Never use gasoline, gasoline-type lantern fuel, kerosene,
charcoal lighter uid, or similar liquids to start or ʼfreshen
upʼ a re in this appliance. Keep all such liquids well away
from the appliance when in use."
• "READ ALL INSTRUCTIONS BEFORE INSTALLING AND USING
THE APPLIANCE."
• "SAVE THESE INSTRUCTIONS."
• Caution against unattended cooking:
- "Remove pots and pans while the operating appliance
is unattended, to reduce the risk of re."
- "DO NOT use accessories not specied for use with this
appliance."
DANGERS AND WARNINGS
″A MAJOR CAUSE OF FIRES IS FAILURE TO MAINTAIN REQUIRED
CLEARANCES (AIR SPACES) TO COMBUSTIBLE MATERIALS. IT IS OF UTMOST
IMPORTANCE THAT THIS PRODUCT BE INSTALLED ONLY IN ACCORDANCE
WITH THESE INSTRUCTIONS.″
• A minimum clearance of 36” (914.4 mm) from combustible
constructions to the sides of the pellet grill from the back of the
pellet grill to combustible constructions must be maintained.
• Any limitations joining of two or more parts to constitute an assembly,
such as installation of support legs, enclosures and the like.
• Do not use this appliance indoors, in an enclosed unventilated area,
under an overhead combustible ceiling or overhang. Keep your pellet
grill in an area clear and free from combustible materials, gasoline
and other ammable vapors and liquids.
WARNING
• Keep electrical supply cords and the fuel away from heated surfaces.
Do not use your pellet grill in the rain or around any water source.
• After a period of storage, or non-use, check the burn pot for
obstructions, the hopper for foreign objects, and any air blockage
around the fan intake or rear barrel exhaust holes. Clean before use.
DANGER
CAUTION
This product can expose you to chemicals, including carbon
monoxide, which are known to the State of California to cause cancer
and birth defects or other reproductive harm. For more information
go to www.P65Warnings.ca.gov
WARNING
CALIFORNIA PROPOSITION 65
SAVE THIS MANUAL FOR FUTURE REFERENCE.

14
Ashes should be placed in a metal container with a tight-tting lid. The
closed container of ashes should be placed on a non-combustible oor
or on the ground, well away from all combustible materials, pending nal
disposal. When ashes are disposed by burial in soil, or otherwise locally
dispersed, they should be retained in a closed container until all cinders
have thoroughly cooled.
WARNING
DISPOSAL OF ASHES
Make sure to clean out the ash from the burn pot after each use to ensure
the proper function of your pellet grill. Failure to clean out the ash from
burn pot after each use may cause the pellets not to ignite or may cause
a build-up of pellet in front of the auger tube potentially causing a burn
back inside auger tube.
WARNING
• This pellet cooking appliance is designed and approved for pelletized,
all natural, wood fuel only.
• You must only use all natural wood pellets designed for burning in
pellet grills.
• "Use only wood pellet fuel specied by the manufacturer. DO NOT
use pellet fuel labeled as having additives."
The pellet mean heating value in 8500 BTU/LB(19,771 KJ/Kg), ash
content < 1%.
There is no industry standard currently for barbecue wood pellets,
although most pellet mills use the same standards to make wood pellets
for domestic use. Further information can be found at www.pelletheat.org
or the Pellet Fuel Institute.
Please contact your local food-grade pellets dealer on the quality of
pellets in your area, and for information on brand quality. As there is
no control over the quality of pellets used, moisture affected pellets.
Halo Products Group LLC undertakes no responsibility to damage to the
appliance caused by poor quality of fuel.
WOOD PELLET FUEL
WHAT DO YOU NEED TO KNOW ABOUT CREOSOTE?
Creosote, or soot, is a tar-like substance. When burning, it produces
black smoke with a residue which is also black in color. Soot or creosote
is formed when the appliance is operated incorrectly, such as: blockage
of the burn pot, blockage of the combustion fan, failure to clean and
maintain the burn area, or poor air-to-fuel combustion.
"Creosote – Formation and Need for Removal. When wood pellets
are burned slowly, they produce tar and other organic vapors that
combine with expelled moisture to formcreosote. The creosote vapors
condense in a relatively cool oven ue and exhaust hood of a slow
burning re. As a result, creosote residue accumulates on the ue
lining and exhaust hood. When ignited, this creosote makes an
extremely hot re."
It is dangerous to operate this appliance should the ame become dark,
sooty, or if the burn pot is overlled with pellets. When ignited, this
creosote makes an extremely hot and uncontrolled re, like a grease re.
Should this happen, turn the unit off, let it cool completely, then inspect for
maintenance and cleaning. It commonly accumulates along exhaust areas.
If creosote has formed within the unit; allow the unit to warm up at a
low temperature, turn off the appliance, then wipe away any formation
with a hand towel. Like tar, it is much easier to clean when warm, as it
becomes liquid.
"The grease duct should be inspected at least twice a year to
determine when greaseand/or creosote buildup has occurred."
"When grease or creosote has accumulated, it should be removed to
reduce risk of re."
WARNING
CARBON MONOXIDE "SILENT KILLER"
Carbon monoxide (CO) is a gas that can kill you quickly. It is called the
"silent killer" because it is colorless, odorless, tasteless and non-irritating.
It's colorless, odorless, tasteless gas produced by burning gas, wood,
propane, charcoal or other fuel.
Carbon monoxide reduces the blood's ability to carry oxygen. Low blood
oxygen levels can result in headaches, dizziness, weakness, nausea,
vomiting, sleepiness, confusion, loss of consciousness or death. Follow
these guidelines to prevent this colorless, odorless gas from poisoning
you, your family or others:
Carbon monoxide is especially toxic to mother and child during
pregnancy, infants, the elderly, smokers and people with blood or
circulatory system problems such as anemia or heart disease.
Alcohol consumption and drug use increase the effects of carbon
monoxide poisoning.
See a doctor if you or others develop cold or u-like symptoms while
cooking or in the vicinity of the appliance. Carbon monoxide poisoning,
which can easily be mistaken for a cold or u, is often detected too late.
RECHARGEABLE LITHIUM-ION
BATTERY PACK
IMPORTANT
Read and follow the information contained herein before handling the
rechargeable battery. Keep this document in a safe place.

15
CSA - ENGLISH
Lithium-ion battery re hazards are associated with the high energy
densities coupled with the ammable organic electrolyte. This creates
new challenges for use, storage, and handling. Studies have shown that
physical damage, electrical abuse such as short circuits and overcharging,
and exposures to elevated temperature can cause a thermal runaway. This
refers to rapid self-heating from an exothermic chemical reaction that can
result in a chain reaction thermal runaway of adjacent cells.
LITHIUM-ION BATTERY HAZARDS
• Store batteries away from combustible materials.
• Remove batteries from the device for long-term storage.
• Store the batteries at temperatures between 41°F and 68°F.
• If practical, store batteries in a metal storage cabinets.
STORAGE
• Never charge a primary (disposable lithium or alkaline) battery; store
one-time use batteries separately.
• Charge or discharge the battery to approximately 50% of capacity
before long-term storage.
• Use chargers or charging methods designed to charge in a safe
manner battery packs at the specied parameters.
• Disconnect batteries immediately if, during operation or charging,
they emit an unusual smell, develop heat, change shape/geometry, or
behave abnormally.
• Remove battery pack from chargers promptly after charging is
complete.
• Do not use the charger as a storage location.
CHARGING PRACTICE
• Handle batteries and or battery-powered devices cautiously to not
damage the battery casing or connections.
• Keep batteries from contacting conductive materials, water, seawater,
strong oxidizers and strong acids.
• Do not place batteries in direct sunlight, on hot surfaces or in hot
locations.
• Inspect batteries for signs of damage before use. Never use and
promptly dispose of damaged or puffy batteries.
• Keep all ammable materials away from operating area.
• Allow time for cooling before charging a battery that is still warm
from usage and using a battery that is still warm from charging.
• Consider cell casing construction (soft with vents) and protective
shielding for battery research and experimental or evolving
application and use.
HANDLING AND USE
Dispose of damaged battery pack that no longer hold a substantial charge.
To check the general condition of your cells, charge them, let them rest for
DISPOSAL
• Keep battery out of sight and reach of children.
• Rechargeable Lithium-ion pack is potentially hazardous and can
present a serious FIRE HAZARD, SERIOUS INJURY and/or PROPERTY
DAMAGE if damaged, defective or improperly used.
• By purchasing the battery, you assume all risks associated with the
battery. We are not responsible for any damages and consequential
damages by using our products. Use at your own risk.
• Do not disassemble or modify the battery on any way. Vibration,
puncture, contact with metals, or tampering with the battery can
cause it to fail.
• Do not disassemble or modify the battery on any way. Vibration,
puncture, contact with metals, or tampering with the battery can
cause it to fail.
• Never leave the battery unattended while charging. If the battery
becomes hot, smokes, swells, or gives off an odor during charging,
terminate charging immediately.
• In the event the battery leaks and the uid gets onto your skin or
into your eyes do not rub. Rinse well with water and immediately
seek medical care. If left untreated, the battery uid could cause
damage to the eye and skin.
SAFETY TIPS
• THE BATTERY HAS BEEN FULLY DISCHARGED AND IS NOT
RECHARGED SHORTLY AFTERWARD.This potential is aggravated
if batteries are damaged, contain an undetected factory defect, are
used or stored at temperature extremes,or are approaching the end
of their useful life. Ideally, battery should be recharged within 24
hours of a full discharge.
• CHARGING IS ATTEMPTED AT TEMPERATURES BELOW 40°F.
Charging below 40°F causes a chemical reaction in the battery cells
that can cause permanent damage and the possibility of re or
explosion during charging.
• THE BATTERY HAS BEEN EXPOSED TO LIQUIDS, ESPECIALLY
SALT WATER. Exposure to liquids can cause internal corrosion or
damage to the cells or to the Battery Management System (BMS).
The BMS protects the battery from overcharging, high self-discharge
or imbalanced charging of the cells, any of which can present the
possibility of re during recharging.
• OPERATING OR CHARGING A BATTERY THAT HAS BEEN DAMAGED
FROM DROPPING OR FROM SHIPPING DAMAGE. USING A CHARGER
OTHER THAN SPECIFICALLY DESIGNATED FOR THE PARTICULAR
BATTERY.
A FIRE IS MOST LIKELY TO OCCUR DURING THE CHARGING
PROCESS UNDER THE FOLLOWING CIRCUMSTANCES
an hour, then measure the voltage. If your cells are close to 12V, the battery
pack is in good condition.

16
OPERATING INSTRUCTIONS
GETTING TO KNOW YOUR CONTROLLER
CONTROL KNOB
1. Push the control knob once to turn the unit
on. The controller will ash several times
and then turn to a solid screen. This lets you
know your unit is powered on.
2. Push the control knob again, this will take
you to the function screen where you can
access the functions listed previously.
DIGITAL LED SCREEN
This isused asthe informationcenter foryour unit.
Push controlbutton onceto poweron theunit. The
LED screenwill displaythe followingfunctions:
• Temperature (F or C)
• Timer
• Meat Probe Temperatures (if connected)
• Battery level (if powered by battery)
• AC adapter icon (if powered by AC adapter)
• Prime
• Cleanout
• Fan, Auger, Igniter indicator
• Battery REMOVE indicator (when applicable)
POWER
Thereare (2) optionstopoweryour
Prime300 grill:
1. With an AC adapter that plugs into
grounded (GFCI) outdoor receptacle 120 volt.
2. With a 12V Rechargeable Lithium-Ion
Battery. You can use one power method
or have both the battery and AC adapter
plugged into the unit at the same time.
3. Rotate the knob until you see the function you need.
4. Push the control button to lock in after you have chosen the preferred
function.
5. Press and hold the control button to turn the unit o. This will begin the 10
min cool down timer. The unit will automatically shut o when the timer
has ended.
6. The following page will detail how to set each of the controller functions.
16

17
CONTROLLER FUNCTIONS
After you've turned the unit on by pressing the
control knob you can access the following
functions:
TEMPERATURE
1. Push the control button to
lock in the Temperature
function.
2. Rotate the knob to select
your desired Temperature.
3. Pushing the control button
will now start the unit.
PRIME
ThePrime functionallows youto
feedpellets intothe burnpot to
initiallystart yourunit orto feed
additionalpellets duringa smoketo
getmoresmoke.
1. Rotate the knob to select the
Prime function.
2. Push and hold the control knob
for the prime function to feed
additional pellets.
3. After youare nished priming
the pellets into the burn pot,
release the control knob and the
auger will stop feeding pellets.
CLEAN OUT
The cleanout function is used to remove the last remaining pellets
from the auger tube.
1. Rotate the control knob to select the Cleanout function and
push the button to lock in this function.
2. The cleanout function is set to run for 3 minutes. The
remaining pellets will be fed into the burn pot.
3. You will need to remove the pellets completely before
starting your unit. Failure to do so may cause re and injury.
IMPORTANT TO NOTE:
• The hopper should be emptied to your
best ability prior to beginning the cleanout
function. You can remove the safety screen
from the hopper in order to do this.
• The unit must be OFF, the AC adapter
unplugged, and the battery removed before
cleaning out the hopper manually.
• The hopper safety screen must be
reassembled into the hopper after most of
the pellets are removed. Failure to do so may
cause harm or injury.
TIME
1. Rotate the knob to select the Time function.
2. Push the button to lock in the Time function. You can set
the number of hours and minutes to time your smoke.
3. Rotate the control knob to the desired number of hours,
then push the control knob to conrm the hours.
4. Rotate the control knob to set the desired number of
minutes, then push the control knob to conrm the
minutes.
5. The timer will count down to zero after your unit is started.
DEGREES F/C
1. Rotate the knob to the F (Fahrenheit) or C
(Celsius) function and push the button to
lock in this function.
2. Rotate the control knob to either F or C
and push the control knob to lock in your
choice.
3. Please note the default setting is
Fahrenheit.
17
MEAT PROBE
The plug-inconnection for themeat probeis on theleft side
of thegrill above thebattery compartment.The meatprobe
temperature willappear on thecontroller afterthe meat
probeisconnected.
1. Rotate the knob to select the Meat Probe function.
2. Push the button to lock in the Meat Probe function, then
rotate the control knob to the desired temperature you
want your meat probe set and push the button to set.
IMPORTANT TO NOTE:
• Disconnect the meat probe from the jack receptacle and
cover the port with the silicone cap when not in use.
• One meat probe is included with the unit.
• Use HALO brand meat probes only to prevent damage
to the unit.
• The unit will go into WARM mode and the unit
temperature will reduce when the meat probe reaches
the set temperature. This will keep the food from
continuing to cook before it is removed from the unit.

18
CONTROLLER INDICATOR
LIGHTS
POWER SOURCE
BATTERY
There will be a battery icon on the controller
after you insert the battery into the unit to let
you know the grill is powered with battery.
AC ADAPTER
There will be an AC plug icon on the controller
when the AC adapter is plugged into your unit
to let you know the unit is powered on with AC
power.
BATTERY
WARNING
1. If the controller displays the “REMOVE” icon in
red, the battery needs to be removed from the
unit promptly to prevent any damage to the
battery.
2. This indicates the battery temperature is too high.
Let the grill cool down to ambient temperature,
insert the battery again, and restart the unit.
3. If this persists, please call consumer services at
1-833-572-1688.
AUGER: PELLET
FEED SYSTEM
The Auger function iconwill appear during
startup and switches ONand OFF during cooks
toperiodicallyfeedthepellets.
1. Delivers the pellets from the pellet hopper,
through the auger tube, to the burn pot at
a controlled programed speed for ecient
combustion.
2. The amount of time the auger feeds pellets,
will depend on which temperature you
want to grill or to smoke.
ELECTRONIC
IGNITER
The igniterfunction iconwill appearduring the
startup andswitches ONand OFFduring cooksto
maintaintemperature.
1. This is a type of ignition system that works
electronic circuits, usually by transistors.
The transistors are controlled by sensors to
generate electric pulses which then generate
a high voltage spark that can burn the lean
mixture and provide a better economy and
lower emission.
2. The igniter will come back on when the
temperature falls 20 degrees below the set
temperature.
FAN
The fanicon willbe litwhen thefan is
operating.
1. Supplies fresh air to the burn pot for
combustion.
2. Generates an even fan-forced heat
circulation, so your food cooks evenly on
all sides.
3. Helps the pellets burn more eciently.
4. Performs maintenance evacuation of
ashes from burn pot during cooking and
shutdown functions.
IMPORTANT TO NOTE:
• Both icons will appear on the controller when
you have both plugged into your grill. Your
grill is powered, but not on at this time.
• The battery will charge in the unit when the
AC adapter is plugged in. The average time
for a battery to charge is between 5-6 hours.
The alternative way to charge the battery is to
remove the battery from the unit and charge
with a Halo charging dock. The charging dock
can be acquired at www.halo-pg.com (once
available for purchase).
18

19
This is the inital start up procedure when you're using
your pellet grill for the rst time.
1.Plug the A/C adaptor power cord into a grounded
(GFCI) power supply or insert the Halo 12 Volt
Lithium Battery (Battery Sold Separately).
2.Remove the grease plate to see the pellets entering
the burn pot when priming the unit. Check the burn
pot to make sure there is no obstruction for proper
ignition. Open the hopper lid. Make sure there
are no foreign objects in the hopper or auger feed
system entry at the bottom of the hopper. Fill the
hopper with dry, all natural barbecue hardwood
pellets.
3.Push the control knob once to turn the unit on, the
screen will ash then turn to solid screen. Push the
control button a second time to get to the function
screen and turn the control button to the Prime
function. Push and hold the control button to start
to feeding pellets. Keep holding the button until you
see or hear pellets dropping into the burn pot, then
release the control button.
PELLET GRILL BURN-OFF
IMPORTANT
• Make sure there are some pellets covering the electrode.
• Replace the grease plate and cooking grid into the unit.
• Make sure the searing damper is closed.
4. Push the control knob and rotate to the
Temperature function. Press the control knob.
Rotate the control knob again to set to 350F (177C),
push the control button to lock in this temp and
start the grill. Allow the unit to preheat for approx.
30-45 minutes. This is used to burn o any residual
oils that might be on the inside of the grill. The lid
must be closed during the burn o cycle.
IMPORTANT
Listen for a roar coming from the burn pot, and notice some heat and
smoke being produced. This lets you know the unit is functioning correctly.
5. The desired temperature for smoking, cooking
or searing can be set after the burn-o period is
complete.
6. Shut the unit down and allow the unit to cool o to
ambient temperature. It may take some time for the
unit to drop to a lower temperature setting.
IMPORTANT
The auger will continue to turn and feed pellets once you select a lower
temperature setting after burn-off. This will momentarily raise the
temperature, but the temperature will eventually decrease and stabilize at
your desired set temperature. Remember, you are trying to regulate a heat,
so time is necessary to achieve your desire set temperature.
This is the standard start up procedure for using your
pellet grill anytime after your initial burn-off.
1. Plug the A/C adaptor power cord into a grounded
(GFCI) power supply or insert the Halo 12 Volt
Lithium Battery (Battery Sold Separately).
2. Push control button once to turn
the unit on, the screen will ash
then turn to a solid screen. Push
the control button a second time
to get to the function screen.
Turn the control button to the
Temperature function. Push
the control button once more to
PELLET GRILL START UP
19

20
IMPORTANT
Make certain the searing damper is closed.
PELLET GRILL SHUT-OFF
conrm the Temperature setting, then rotate the
control button to the desired smoke, cook or sear
temperature. Push the control button one more
time to set the temperature and start the unit.
3. The ignitor will come on for a few seconds to
conrm the ignition is functioning properly and the
igniter icon will appear on the top of the controller
screen. The unit will feed pellets into the burn pot
and the ignitor will come on again to start your unit.
4. The unit is lit when the temperature on the
controller increases, and smoke is coming from the
back of the unit.
1. When nished
cooking, turn the
temperature dial to
350°F/176°C with lid
closed. Let your pellet
grill run for 10 to 20
minutes to go through its normal cleaning method.
If you have been preparing foods that are extra
greasy, allow the pellet grill to burn-o for an extra
10 to 20 minutes. This will reduce the chance of
causing a grease re for the next start-up.
2. To turn your unit OFF, push and hold the control
knob until the fan increases speed and the
controller screen displays a 10-minute countdown.
The unit will now begin its automatic cool-down
cycle. The auger system will stop feeding pellets,
the ame will burn out, and the fan will continue
to run until the cool-down cycle is complete. The
shutdown mode will last 10 minutes.
3. After the cool down cycle is complete, if using
power from A/C adapter, unplug from the electrical
outlet. If using battery power, you can remove the
battery from the battery housing by pushing in on
the battery- it will spring back to disconnect from
the controller.
4. Replace the battery with the faux battery case
that comes with the unit to ensure they remain
protected from environmental factors such as
humidity, water, and dirt. You can also charge the
battery by leaving the battery in the housing with
A/C plugged in. The battery will replenish its full
energy within 5-6 hours.
• It may take about 20-30 minutes for the temperature to stabilize
based on the type or brand of pellets you are using. If you are
having ignition issues, you may need to open the searing damper
during the startup procedure to ensure proper ignition. This can
also be affected by the type or brand of pellets you’re using.
• This pellet grill has a searing damper feature. It is recommended
when smoking food, the searing damper is closed to help obtain
consistent temperatures across the whole cooking surface.
• The sear feature is used to quickly sear a piece of food over an
open ame. This is typically done at the higher temperature
settings (350°F – 500°F) after your smoke is complete.
• The searing damper is in the closed position when the searing
damper handle is pushed toward the pellet grill body and in the
open position when the handle is extended away from the pellet
grill body.
• The hopper capacity is approx. 10 lbs. of pellets. This will typically
last between 10-20 hours depending on the temperature setting.
Make sure your hopper is full before you start your smoke or cook.
This will ensure that you will not have to rell the hopper during
your smoke.
IMPORTANT
20
Table of contents
Languages:
Other Halo Grill manuals
Popular Grill manuals by other brands

Thane International
Thane International FlavorStone InfusionGrill Use & care guide

Dacor
Dacor Epicure OB36 use and care manual

AUSTIN AND BARBEQUE
AUSTIN AND BARBEQUE AABQ 3.0 user manual

cecotec
cecotec PerfectSteak 4250 Stand instruction manual

Gaggenau
Gaggenau VR 230 Operating and assembly instructions

Bakers Pride
Bakers Pride CH-4 XX-4 Operation manual

George Foreman
George Foreman RPGF3801BLX Series use and care manual

Tepro Garten
Tepro Garten Chill & Grill LAMBADA user manual

Napoleon
Napoleon BI-3624-1D1W manual

Outback
Outback Society/Granite Assembly and operating instructions

BONFIRE
BONFIRE 3 quick start guide

Char-Broil
Char-Broil 466270610 Product guide