6
¬Petit mode d‘emploi
7
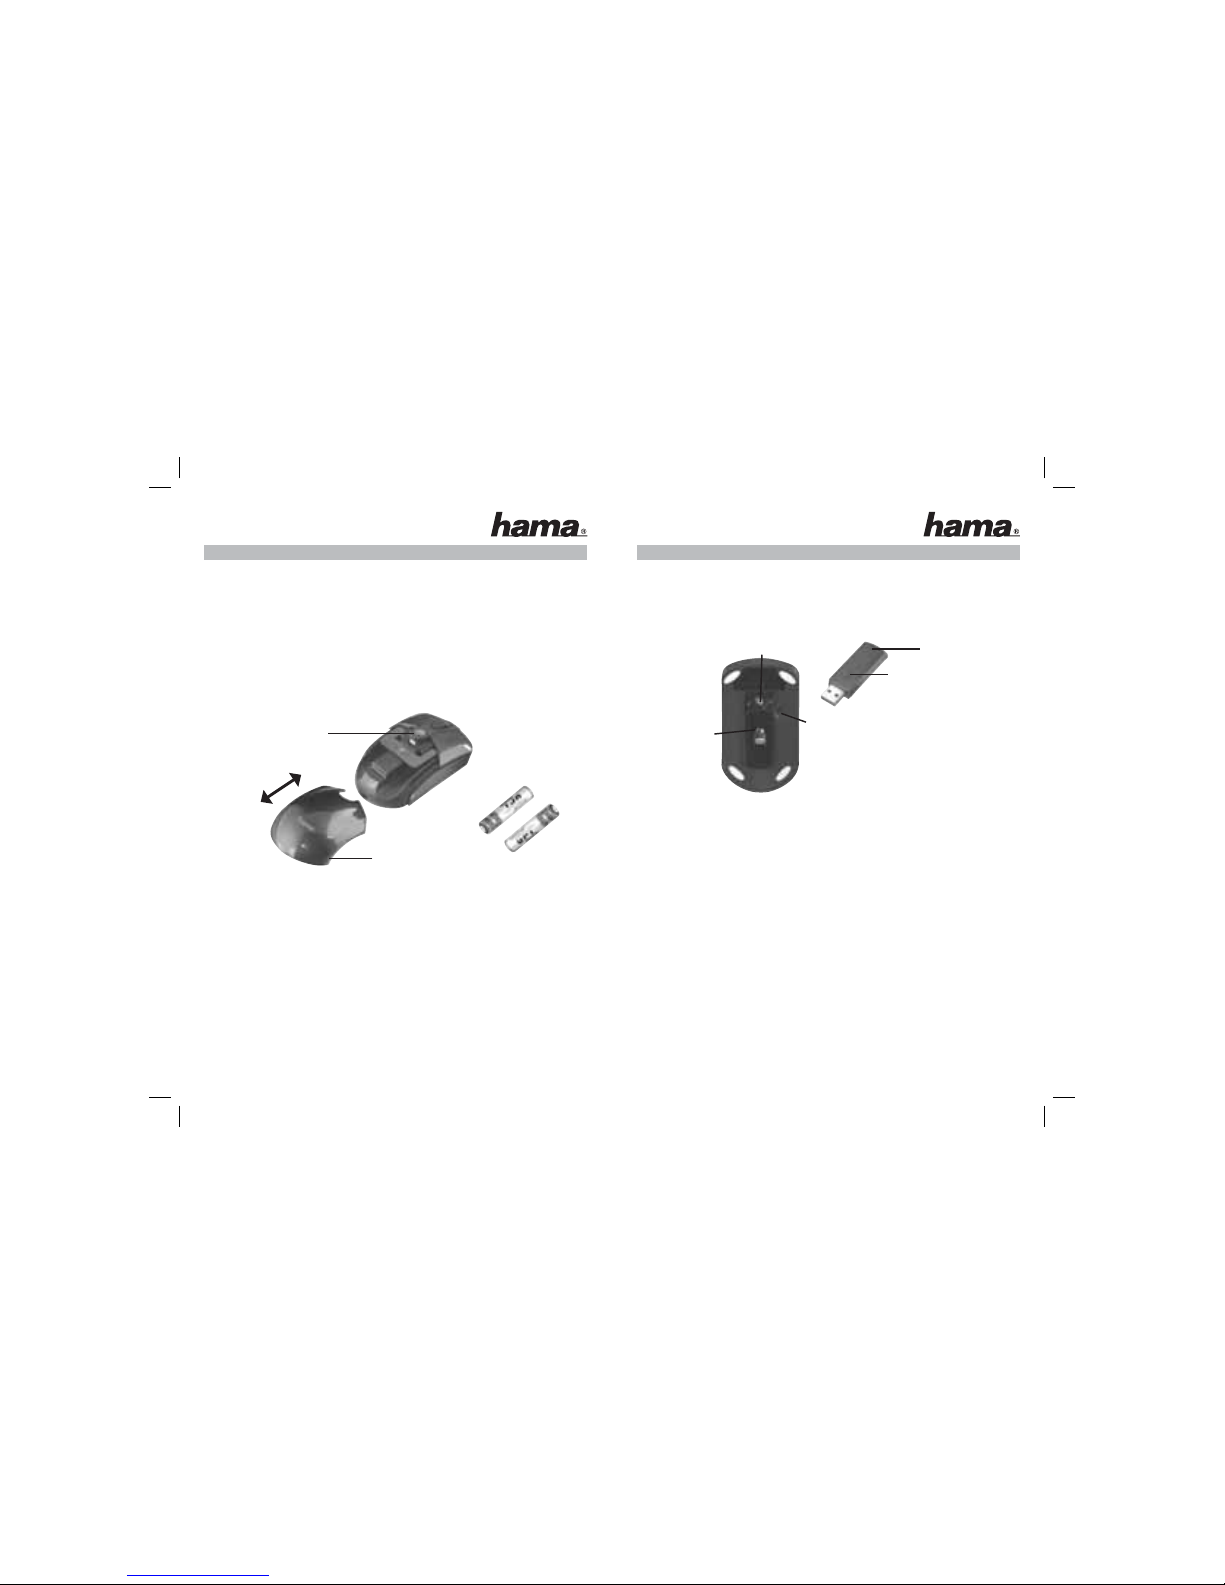
fig.1
fig.2
Poussoir du
compartiment des piles
+
+
-
-
Couvercle
Reliez le bouton
DEL d‘affichage
Reliez le bouton
Mécanisme de fixation
Capteur optique
1. Contenu de l‘emballage
- Souris sans fil optique d’ordinateur portable
· Récepteur USB
· Deux piles LR03/AAA
· Notice d’utilisation
2. Installation du matériel
2.1 Mise en place des piles
a) Appuyez sur le poussoir du compartiment des piles et faites glisser
simultanément le couvercle vers l‘arrière (fig.1)
b) Insérez les deux piles LR03/AAA dans le compartiment en respectant la polarité.
La bonne polarité est indiquée à l’intérieur du compartiment.
c) Refermez le couvercle du compartiment à batteries.
2.2 Branchement du récepteur USB
a) Raccordez le récepteur USB à une connexion USB libre du PC.
b) Mettez votre ordinateur sous tension.
c) Le connecteur USB est alors reconnu par Windows et intégré dans votre système d’exploitation.
d) Réglez le commutateur ON-OFF de la face inférieure de la souris sur „ON”.
3. Synchronisation / mise en service de la souris
a) Appuyez sur la touche de connexion du récepteur ; la DEL d’affichage d’état commence à clignoter
(fig. 2). Le récepteur est alors prêt pour la synchronisation avec la souris.
b) Appuyez dans les 10 secondes sur la touche de connexion de la face inférieure de votre souris à
l’aide d’un objet pointu (un stylo, par exemple). Cette touche est indiquée par „Connect“. La souris devrait
être à une distance d’environ 30 cm du récepteur afin de garantir une connexion parfaite.
d) La LED du récepteur s’allume en continu une fois que la synchronisation est correctement réalisée.
Votre souris est alors prête à fonctionner. Répétez les étapes 3 a-b dans le cas où le pointeur ne bouge
pas. La souris et le récepteur doivent être également à nouveau synchronisés s‘il se produit des
interférences avec d‘autres souris ou claviers radio en cours de fonctionnement.
4. Eteindre/allumer la souris
Vous pouvez éteindre complètement la souris si vous ne la nécessitez pas pendant un certain temps.
Appuyez pour cela sur la touche de connexion pendant au moins 3 secondes. Le détecteur optique s’allume
brièvement, cela signifie que la souris a été éteinte. Appuyez de nouveau sur la touche de connexion si vous
souhaitez rallumer la souris.
Vous pouvez aussi l’éteindre en enlevant le récepteur du PC et en le fixant au dessous de la souris.
5. Problèmes de fonctionnement
Dans le cas où la souris ne fonctionne pas correctement, assurez-vous que vous avez bien effectué les
étapes suivantes :
• Les piles sont neuves et correctement insérées
• Le récepteur est correctement connecté à votre ordinateur
• Le récepteur et les appareils se trouvent à portée radio l’un des autres
(1,5 m au maximum en fonction de la configuration des lieux)