Hammacher Schlemmer 86591 User manual

2
America’s Longest Running Catalog
The Only Bluetooth Shower Mirror Radio
86591

3
USER GUIDE & OPERATING MANUAL
INCLUDES IMPORTANT SAFETY INFORMATION
READ ALL INSTRUCTIONS BEFORE USING DEVICE
SAVE THESE INSTRUCTIONS
The Hammacher Schlemmer Lifetime Guarantee
We make an unconditional and unwavering promise: Our merchandise is
guaranteed for life.
In any product purchased directly from us ever disappoints you, for any reason,
you can return
it for exchange, credit or refund. Even if you receive the item as a gift.
Hammacher
Schlemmer will exchange it for another item of gift certificate of equal value.
Phone: Call us Toll‐Free 1‐800‐321‐1484 to speak with a Hammacher Schlemmer
associate for
assistance 7 days a week 8AM to Midnight, Eastern time. International
customers please call
1‐513‐860‐3397.
E‐mail: Send us an email and we’ll strive to reply within 1‐2 business hours.
customerservice@hammacher.com
Address:
Hammacher Schlemmer
9180 LeSaint Dr.
Fairfield, OH 45014

4
Thank You For Purchasing!
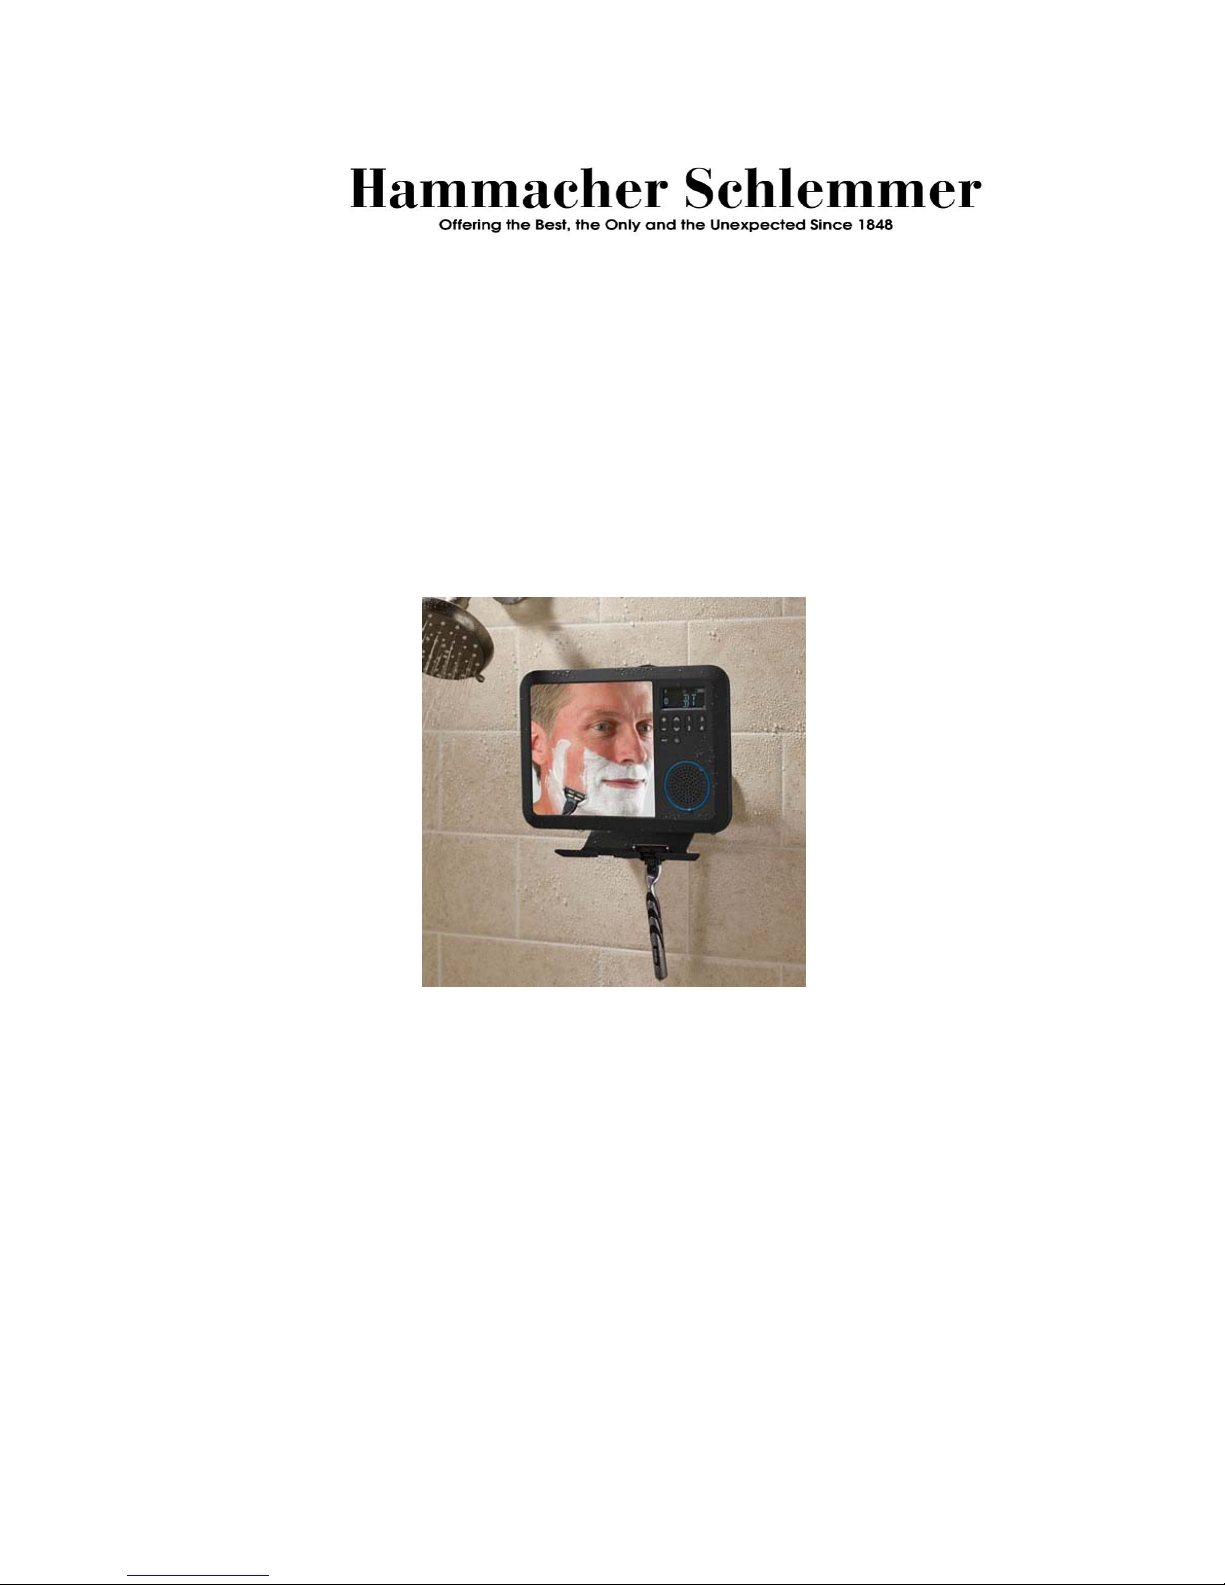
This is the only fog-free shower mirror radio that plays music
wirelessly from a smart phone or tablet. Only available from
Hammacher Schlemmer, it pairs with any Bluetooth-enabled
smartphone or tablet, playing your preferred morning music
through a built-in waterproof 1 1/2”-diam. full-range speaker. Its
integrated AM/FM radio provides four station presets, ideal for
informing oneself as to weather, traffic, and news before heading
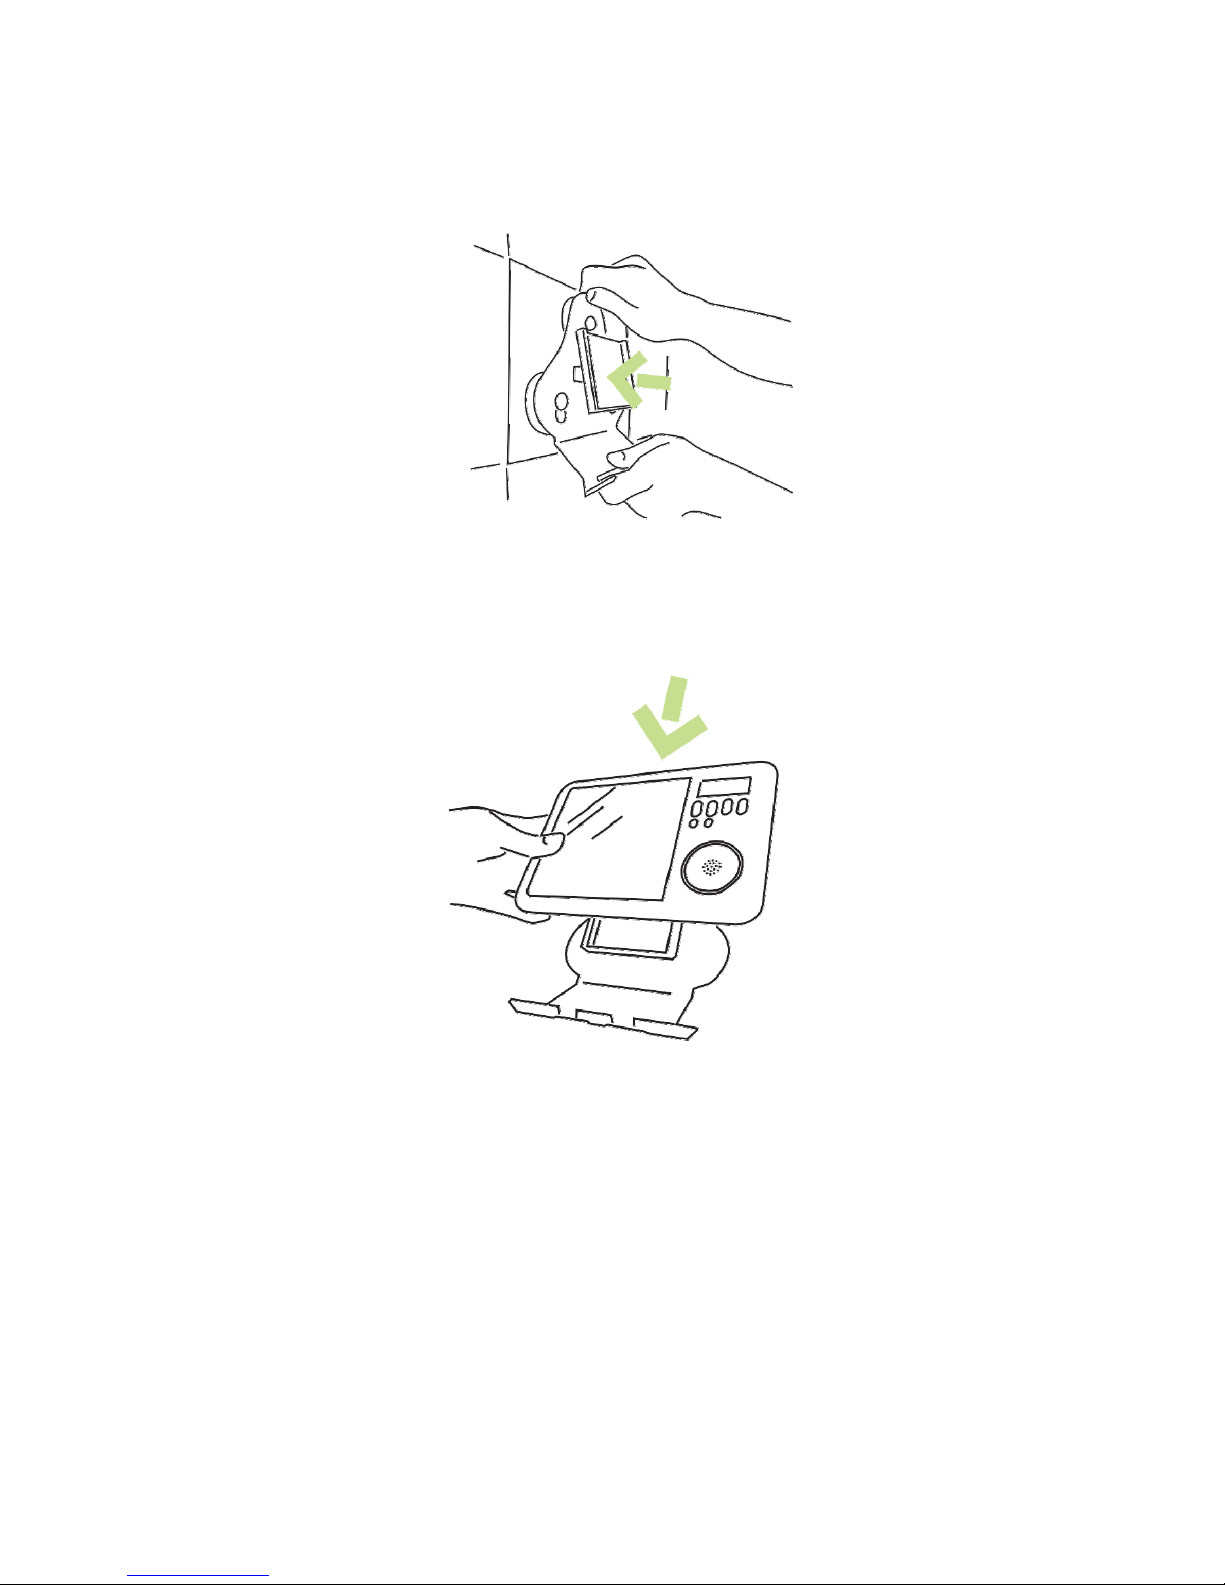
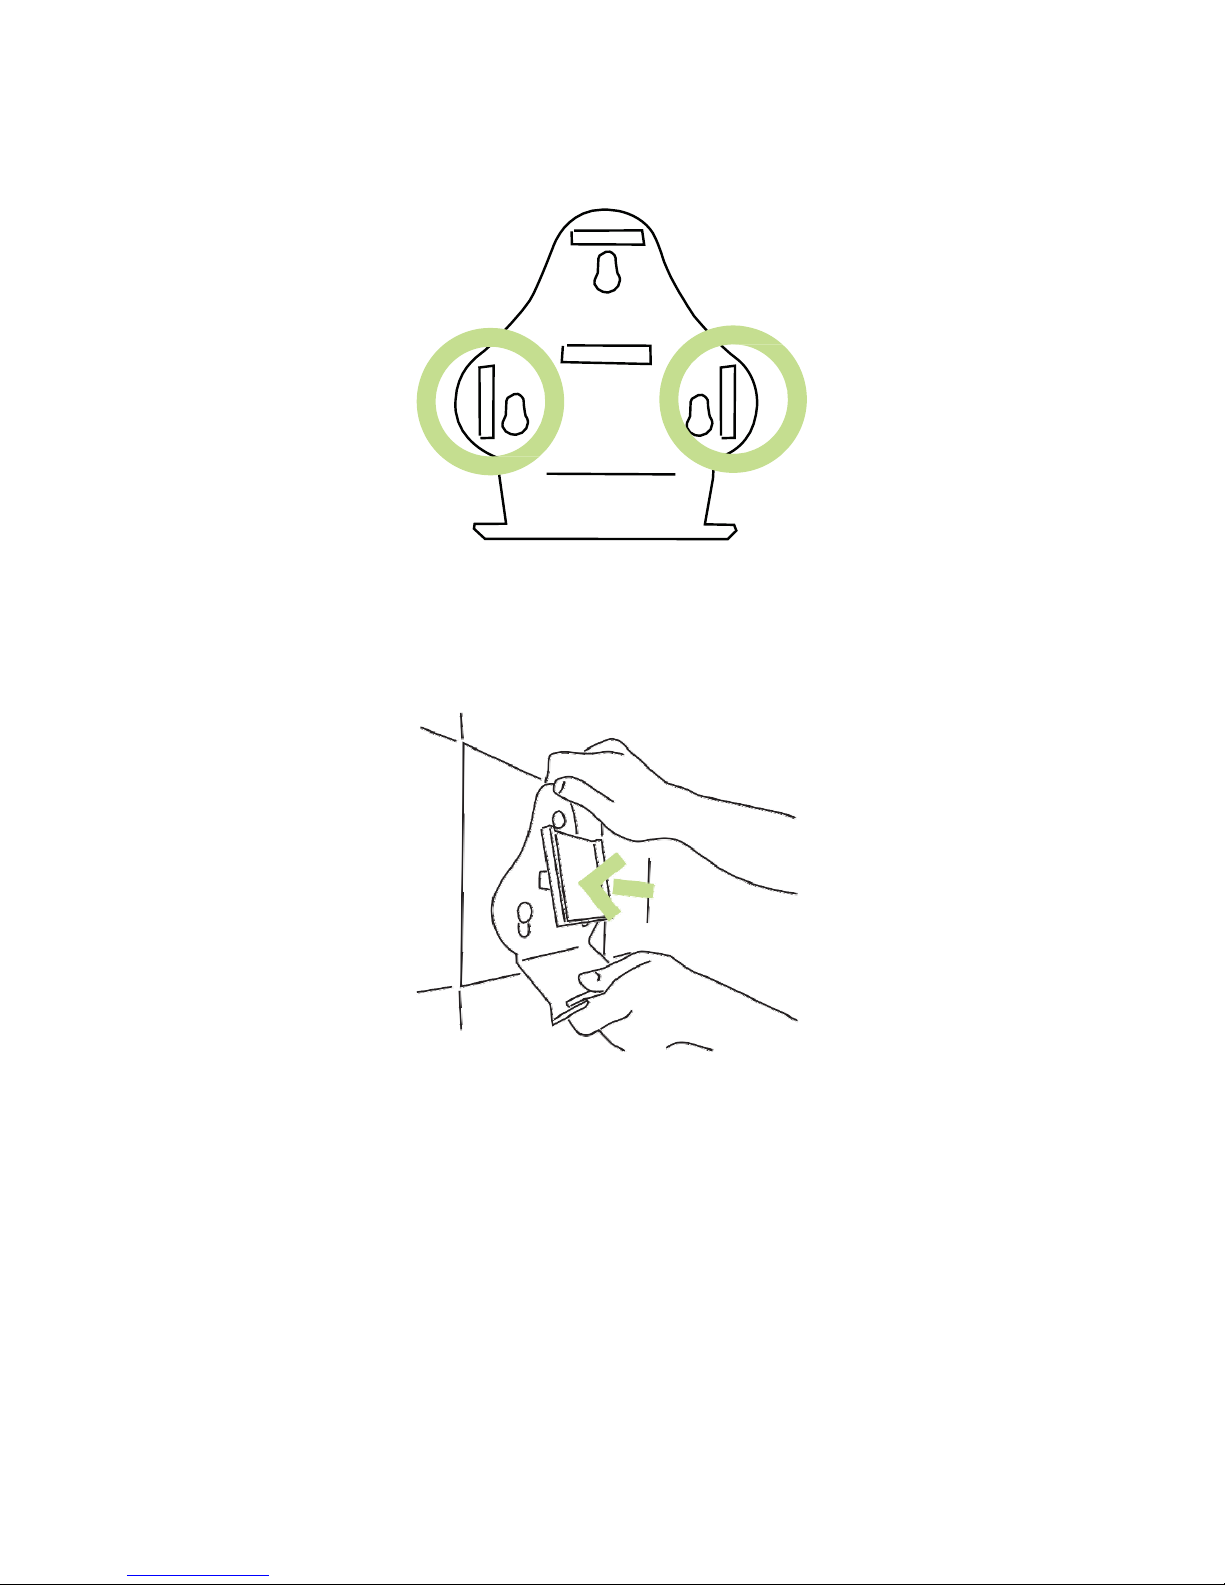
out. Its pivoting mount attaches to tile or glass with three silicone
suction cups and includes two slots for razors. The 5 1/2” x 51/2”
optical-quality glass mirror provides ample viewing for shaving. Its
rechargeable battery provides a full month of audio from a six-hour
charge from the included USB charger cable.
!Warning
-DO NOT use alcohol or solvents to clean the mirror surface.
-DO NOT immerse the mirror in water.
-If cleaning is needed use lightly dampened (water) cloth to wipe
surface.
-Frequent cleaning will weaken the fog-free coating.

5
What’s Included
a) b)
1
A
M
13
24
M
Hold
c) d) e)
a) Bluetooth shower mirror.
b) Mirror mount.
c) Suction cups.
d) Adhesive strips.
e) Charger cable.

6
1 Charge the Bluetooth Mirror
1a) Plug the charger cable into the bluetooth mirror’s waterproof
plug. Plug the charger cable into a USB port(not included) on a
computer or phone charger. The device will be fully charged in
approximately 6 hours. (see image below)

7
Mounting
There are two ways to mount your mirror:
(Step 2) Using suction cups. Recommended if the location you
wish to mount the mirror has a large smooth surface.
(Step 3) Using adhesive strips. Recommended if the location you
wish to mount the mirror does not have a large smooth surface.
2 Mounting with Suction Cups (optional)
2a) Clean the area where the suction cups will be mounted. Make
sure the surface is smooth.
2b) Separate the bluetooth shower mirror from the mirror mount.
2c) Insert the suction cups into the mirror mount slots, then lock
them into place by pushing them towards the narrow end of the
slot. (see image below)

2) Mounting with Suction Cups Continued
2d) Now connect the mirror mount to the wall by pushing firmly
towards the wall. Firmly pull back on the mirror mount to test the
connection. (see image below)
2e) Slide the bluetooth mirror onto the mirror mount. (see image
below)
6

3 Mounting with Adhesive Strips(optional)
3a) Clean the area where the strips will be mounted. Make sure
the surface is dry.
3b) Separate the bluetooth shower mirror from the mirror mount.
3c) Remove the protective film on one side of the adhesive strip.
(see image below)
3d) Stick the adhesive strip onto the back of the mirror mount as
shown, then remove the protective film. (see image below)
7

8
3) Mounting with Adhesive Strips Continued
3e) Repeat steps 3c-3d for remaining two adhesive strips.(see
image below)
3f) Now connect the mirror mount to the wall by pushing firmly
towards the wall. (see image below)

9
3) Mounting with Adhesive Strips Continued
3g) Slide the bluetooth mirror onto the mirror mount. (see image
below)

10
4) Programming Bluetooth
4a) Power on the device.
4b) Press the mode button until you enter bluetooth mode.
M
Hold
1
23
4
4c) The device will count down from 30. During this time, enter
your bluetooth media player’s bluetooth settings. There should
be a device called 389BT. Selecting that device should pair your
bluetooth media player with the bluetooth mirror. The bluetooth
mirror will remember your bluetooth media player.
4d) If you wish to switch bluetooth devices, hold down on the mode
button for 2 seconds and follow steps 4b-4c with your new device.

11
5) AM / FM Radio
5a) Power on the device.
5b) Press the mode button until you enter AM or FM mode
F
M
Hold
1
23
4
5c) To save a station, scroll to your desired frequency, then press
and hold a preset button(1-4)
3
F
1
23
4
M
Hold

11
FCC STATEMENT
1. This device complies with Part 15 of the FCC Rules. Operation is subject to the
following two conditions:
(1) This device may not cause harmful interference.
(2) This device must accept any interference received, including interference that
may cause undesired operation.
2. Changes or modifications not expressly approved by the party responsible for
compliance could void the user's authority to operate the equipment.
NOTE: This equipment has been tested and found to comply with the limits for a
Class B digital device, pursuant to Part 15 of the FCC Rules. These limits are
designed to provide reasonable protection against harmful interference in a
residential installation.
This equipment generates uses and can radiate radio frequency energy and, if not
installed and used in accordance with the instructions, may cause harmful
interference to radio communications. However, there is no guarantee that
interference will not occur in a particular installation. If this equipment does cause
harmful interference to radio or television reception, which can be determined by
turning the equipment off and on, the user is encouraged to try to correct the
interference by one or more of the following measures:
Reorient or relocate the receiving antenna.
Increase the separation between the equipment and receiver.
Connect the equipment into an outlet on a circuit different from that to which the
receiver is connected.
Consult the dealer or an experienced radio/TV technician for help.
FCC Radiation Exposure Statement
This equipment complies with FCC radiation exposure limits set forth for an
uncontrolled environment. This equipment should be installed and operated with
minimum distance 20cm between the radiator & your body
Table of contents