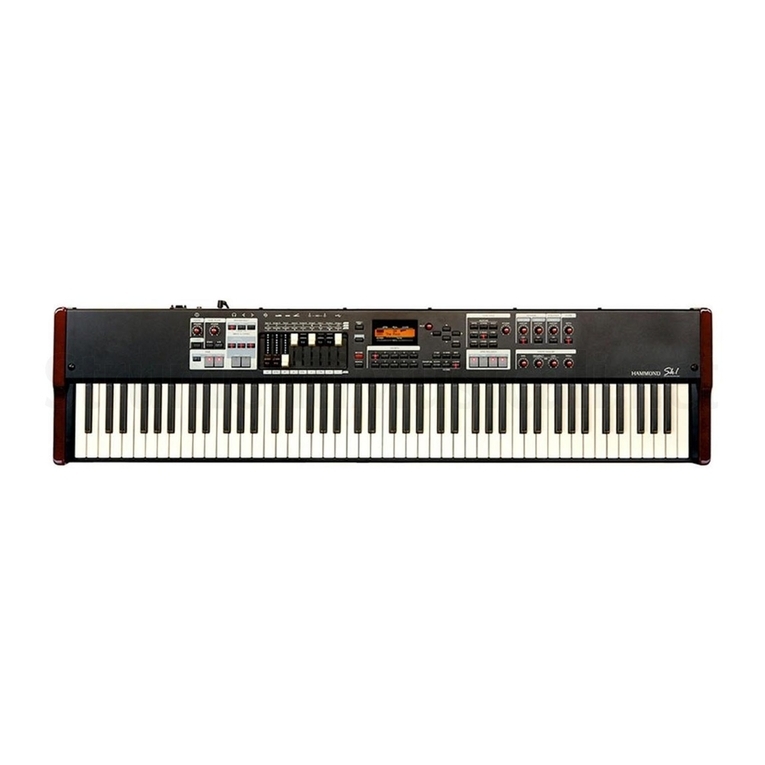
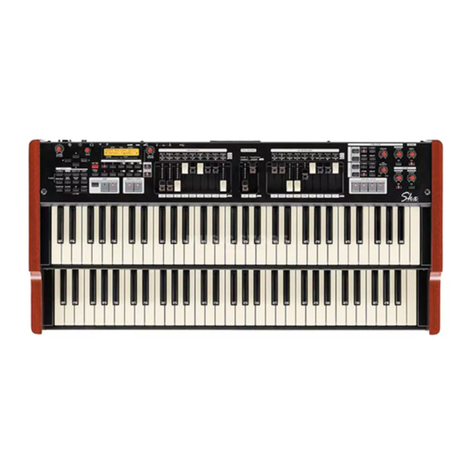
Hammond SKX User manual

PATCHES
&
FAVORITES


3
Patches&Favorites
PATCHES
YourHammondSKX containsalargenumberofdifferenttypesofsoundsandalargenumberofwaystocustomizeand
tailor those sounds. In addition, many of the different types of sounds can be blended or mixed with each other to
produce many unique tone colors. In the organ world, this mixing, blending and tailoring of sounds is called
Registration. Inthekeyboardandsynthworld,asoundorgroupofsoundsandeffectsiscolloquiallyknownasaPatch..
Thistermderivesfromold-stylesynthesizerswhichused patch cords(originallytelephoneswitchboard-typecords)to
connect the various components to produce specific types of sounds. Although modern technologyhas rendered this
techniqueunnecessary,theterm“Patch”hasremained. Each timeaPatchisselected itwill registeraparticularsetting
of the sounds and controls on the SKX.
ËSelecting a Patch
TRY THIS:
1. Make sure the Information Center Display is in PLAY Mode. If it is not, touch the PLAY Touch
Button once. The Information Center Displayshould now look similar to this:
Notice that the bottom line displays a letter (“U” or “P”), a number and a name. The following
paragraphs explain each portion of the bottomline of the display.
There are two categories of Patches on the SK - Preset and User. The Preset Patches are factory-
programmed and cannot be changed. The User Patches are also factory-programmed; however, you
canmakechangestothemorevenoverwritethementirelyinordertocreateyourowncustomPatches.
In the InformationCenter Display, User Patchesaredesignatedbytheletter“U,”andPreset Patches
are designated bythe letter “P.” Each categorycontains 100 Patches for a total of 200.
Thethree-digitnumber following theletter“U” or“P”refers tothe currentlyselectedPatch Number.
The Patch Name appears to the right of the Patch Number.

4
Patches &Favorites
2. From the above display, turn the VALUE Rotary Control to the right. You will see the numbers
increase and the Patch Name change:
If youturn the VALUE RotaryControl to the left, youwillsee the numbersdecrease until “U001” is reached.
In this wayyou can quickly previewor change Patch settings.
ËCreating Your Own Patches
You can programthePatches with your own settings.
TRY THIS:
1 Set up a registration. For this example, use Drawbars, Voices or both together.
2. Touch the RECORD Touch Button. The Information Center Displayshould look similar to this:
3. Now touch the ENTER Touch Button. The lower lineof the Information Center Display will briefly
show:
Recording Patch...
When the above message disappears, the Recording process is complete.
NOTE: As explained on page 1, Preset Patches (those with a “P” in front of the number) cannot be
changed. Therefore, when creating or editing Patches, make sure the Patch number is prefaced bya “U”
for User Patch.

5
Patches&Favorites
ËEditing a Patch
AlthoughyoucancreateentirelynewPatchesandstorethem,theremaybeoccasionswhenaPatchalreadycontainsmost
of what you need, and onlyone or two changes (Extra Voice, Reverb amount, etc.) need to be made.
Toedit an already existing Patch and re-save it with newsettings, do the following:
TRY THIS:
1 Fromeither of the PLAY Modes, use the VALUE Rotary Knob to select the User Patch you want to
change.
2. Make whatever changes to the Patch you wish.
3. After you have finished making your changes, Touch the RECORD Touch Button. TheInformation
Center Display should look similar to this:
4. Nowtouchthe ENTER Touch Button. The lower line of the Information Center Display will briefly
show:
Recording Patch...
When the above message disappears, the Patch is updated with your new settings.
NOTE: After Patches have been saved, they can then be stored to a USB Flash Drive. This is covered
in the USING THE USB PORT section.

6
Patches &Favorites
ËPATCH Edit Menu
This Advanced Feature Menu allowsyou to customize the characteristics of the Patches.
To access the PATCH Edit Menu, do the following:
1. Fromanyof the PLAY Mode screens, touch the MENU/EXIT Touch Button once. TheInformation
Center Display should now look like this:
The word “DRAWBAR” should nowbe blinking.
2. TouchthePAGERIGHTTouchButtontwice. TheInformationCenterDisplayshouldnowlooklike
this:
The word “PATCH” should now be blinking.
NOTE: You can also turn the VALUE Rotary Knob to the right to scroll through the Menus until
“PATCH” is blinking.

7
Patches&Favorites
3. Now touch the ENTER Touch Button. The Information Center Displayshould now look like this:
You are now in the PATCH Edit Menu. You may now use the PAGE NAVIGATION Touch Buttons in
conjunction with the VALUE RotaryControl to make changes to the Patches. Theses changes are explained
starting on the next page.

8
Patches &Favorites
If you followed the instructions on the previous page, Page 1 of the PATCH Edit Menu displays. The Patch Name
on the bottom line should now be blinking.
Patch Name
This Advanced Feature allows you to name or re-name your User Patches.
UsethePAGELEFT andPAGERIGHT SelectTouchButtonstomovethecursortoselectthecharactertobe
edited.
Turn the VALUE Rotary Control to the right to scroll forward through the characters.
Turn the VALUE Rotary Control to the left to scroll backward through the characters.
The available characters include: Punctuation Marks (space - . ‘ &), Numeric Characters (0 ~ 9), Upper-case Letters
(“A ~ Z”), and Lower-case Letters (“a ~ z”).
NOTE: If you touchthe PAGELEFT Touch Button when the cursor is allthe way tothe left, as inthe abovefigure,
you maysee amessage suchas “USB is not ready” if no USB FlashDrive is inserted. In thiscase simplytouch the
ENTER Touch Button and the Patch Name screen will reappear.
From the previous screen, touch the PAGE UP Touch Button once. The Information Center Display should now
look like this:
PATCH LOAD Menu Pages
The PATCH LOAD Menu Pages allow you to select which components of the instrument will be saved as part of a
Patch. The next few pages will explain this in detail.
Patch Load - Drawbar Registration
This Advanced Feature allows you to select how the Drawbar Registration will be saved to a Patch. You can select
whether you want to save the Upper (“UPP”) Lower (“LOW”) or Pedal “PED”) Drawbae settings.
Use the PAGE LEFT and PAGERIGHT Touch Buttons to move back and forth among “UPP” “LOW” and “PED.”
Turn the VALUE Rotary Control to turn the selected function “ON” or “OFF.”

9
Patches&Favorites
From the previous screen, touch the PAGE RIGHT Touch Button until the Information Center Display looks like
this:
PATCH LOAD - Voice Parameters
ThisAdvancedFeatureallowsyoutoselectwhetherDrawbar(“DRAWB”)and/orExtraVoice(“EXV”)parametersare
saved to aPatch.
TheDrawbarparametersincludeorgantypes(“Btype1,”“Farf,”“Pipe,”etc.) aswellasPercussionsettings. TheExtra
Voice parameters include Octave settings, Velocity settings, etc.
Use the PAGE LEFT and PAGE RIGHT Touch Buttons to move back and forth between “DRAWB” and
“EXV.”
Turn the VALUE Rotary Control to turn the selected function “ON” or “OFF.”
From the previous screen, touch the PAGE RIGHT Touch Button until the Information Center Display looks like
this:
PATCH LOAD - Zones
This Advanced Feature allows you to select whether the Internal (“INT”) or External (“EXT”) Zone information will
be saved to a Patch.
Use the PAGE LEFT and PAGE RIGHT Touch Buttons to move back and forth between“INT” and “EXT.”
Turn the VALUE Rotary Control to turn the selected function “ON” or “OFF.”

10
Patches &Favorites
Fromthe previous screen, touch the PAGE RIGHT TouchButton once. TheInformation Center Display should now
look like this:
PATCH LOAD - Effects
This Advanced Feature allows you to select whether Effects are saved to a Patch
The data chart belowshows the options you mayselect.
PATCH LOAD EFFECT Options
Description Function
DRB Drawbar Effects controlled by the EFFECTS Rotary Knob and Touch Button
(Tremolo, AutoPan, Wah-Wah, etc.)
ANI Drawbar Animation (Vibrato & Chorus and Leslie)
EXV Extra Voice Effects controlled by the EFFECTS Rotary Knob and Touch Button
(Tremolo, AutoPan, Wah-Wah, etc.)
NOTE: Drawbar and Extra Voice Effects are covered in more detail in the Overall Effects section.
Use the PAGE LEFT and PAGE RIGHT Touch Buttons to move back and forth among the choices.
Turn the VALUE Rotary Control to turn the selected function “ON” or “OFF.”
From the previous screen, touch the PAGE RIGHT TouchButton once. The Information Center Display should now
look like this:
PATCH LOAD - Reverb
This Advanced Feature allows you to select whether Reverb is saved to a Patch.
Turn the VALUE Rotary Control to turn the selected function “ON” or “OFF.”

11
Patches&Favorites
IMPORTANT: Do not confuse Favorites with Patches. A Patch is a single registration, as
explained on page 1. A Favorite is a numbered button which you use to recall a Patch.
ËFAVORITES
Inordertomakethe200inbuiltPatcheseasiertouseinreal-timeperformance,theSk-seriesgivesyoutheabilitytouse
the FAVORITES Touch Tabs to instantly access the Patches you use most frequently. The principle is similar to the
buttons on the radio in an automobile which allowyou to instantlyfind your most frequently listened-to stations.
The FAVORITES Touch Tabs are used one at a time. Touching a FAVORITES Touch Tab while another is active
cancels the previous combination and selects the newone.
When the Information Center Displayis in the PLAY Mode and a FAVORITE is activated, the Drawbar settings will
change together with the names and volume settings of the Voices shown in the Information Center Display.
The Drawbarsettings,Leslie,Vibrato,Percussion,SustainandVolumescanbechangedasyouwish. However,ifyou
touch another FAVORITES Touch Tab or the CANCEL Touch Tab, the settings you have changed will not be
remembered. If you first Save the changes you have made, your changes will be remembered the next time you select
that Preset.
NOTE: For a complete listing of Patch Parameters, consult the APPENDIX located at the back of this Guide.
ËMANUAL / BANK Touch Button
Normally,oneoftheFAVORITETouchButtonsis“ON”(LEDlie),indicatingthataPatchhasbeenselected. However,
if you want to de-select Patches and use the front panel controls entirely to control the sound, turn this Touch Button
“ON.” The FAVORITE Touch Buttons will all turn “OFF” and all sounds and features of the SKX will be controlled
bythe front panel controls as well as bythe Advanved Feature settings from the Information Center Display.

12
Favorites
ËAdvanced Features - FAVORITE
You can customize the waytheFAVORITES workin several ways. These are explained starting below.
NOTE: Because the FAVORITES section works with the Patches, the Advanced Features which control the
FAVORITES are located in the PATCH Edit Manu.
TRY THIS:
1. Fromanyof the PLAY Mode screens, touch the MENU/EXIT Touch Button once. TheInformation
Center Display should now look like this:
The word “DRAWBAR” should nowbe blinking.
2. TouchthePAGERIGHTTouchButtontwice. TheInformationCenterDisplayshouldnowlooklike
this:
The word “PATCH” should now be blinking.

13
Patches&Favorites
3. Now touch the ENTER Touch Button. The Information Center Displayshould now look like this:
You are now in the PATCH Edit Menu.
4. TouchthePAGEUPTouchButtontwo times. TheInformationCenterDisplayshouldnowlooklike
this:
Notice that the left sideof the Information Center Display now shows, “FAVORITE,” and that the word just
underneath the word“ACCESS” is blinking“ON” and “OFF.” This means you are now in the portion of the
PATCH Edit Menu that allows you to change certain features of the FAVORITES.

14
Favorites
Favorite - Access
ThisAdvancedFeatureallowsyoutodeterminethemethodbywhichPatchesareaccessedandsavedtoFavorites. The
data chart below explains each of the settings.
FAVORITES Access Options
Description Function
ASSOCIATE Allows you to associate a numbered Touch Button with a particular Patch. If you
select a Patch, touch and hold the RECORD Touch Button and then touch a
numbered FAVORITE Touch Button, the selected Patch will be stored as a Favorite.
The Patch data is not changed.
OVERWRITE Similar to ASSOCIATE except that if you select a Patch, touch and hold the
RECORD Touch Button and then touch a numbered FAVORITE Touch Button, the
selected Patch will be stored as a Favorite and the Patch data is also overwritten if
you have made any changes after selecting the Patch.
LOCKED 1~10 The Patches currently stored in Favorites 1 through 10 are “locked” and cannot be
overwritten or changed.
DIRECT Allows you to use the numbered Touch Buttons as a numeric keypad. For example,
if you want to play patch 78, simply touch “7,” “8" and the ENTER Touch Button.
Turn the VALUE Rotary Control to make your selection.
From thepreviousscreen, touch the PAGE RIGHT Touch Button once. The Information Center Display shouldnow
look similar to this:
The name on the lower line should be blinking.

15
Patches&Favorites
Favorite - Patch Load
This Advanced Feature allows you to determinewhich Patches are loaded into theFavorites. This is explained further
in the next section.
ËLoading a Patch Into a Favorite
You can customize the Favorites either with factory-set Patches or with your own Patches in three ways:
Using the VALUE Rotary Control
TRY THIS:
1. Touch the PLAY Touch Button so that the Information Center Display is in PLAY Mode.
2. Turn the VALUE Rotary Control to select the Patch you want to save as a Favorite.

16
Favorites
3. TouchandHoldtheRECORDTouchButtonandtouchthenumberedTouchButtonwhichrepresents
the FAVORITE you want to update.
The lower line of the Information Center Displaywill brieflyshow:
Recording Favorite...
When the above message disappears, the FAVORITE is updated with your selected Patch.
Using the Shortcut from the FAVORITE Touch Buttons
TRY THIS:
1. TouchandHoldaFAVORITETouchButton-forexample,number8. Afterapproximately2seconds,
the Information Center Displayshould look like this:
2. Turn the VALUE Rotary Control to select the Patch you want to save as a Favorite.

17
Patches&Favorites
3. Touchthe numberedFAVORITETouchButtonyoutouchedpreviously. Itwillnowbeupdatedwith
the new Patch.
Using the MENU Touch Buttons
TRY THIS:
1. Follow the instructions on pages 10 and 11 until the Information Center Displaylooks like this:
YouarenowintheFAVORITEportionofthePATCHEditMenu. Thewordunderneath“ACCESS”
should be blinking.

18
Favorites
2. TouchthePAGERIGHTTouchButtononce todisplayPage2oftheFAVORITEAdvancedFeature
Menu. The Information Center Displayshould nowlook similar to this:
When the Information Center Display is in this mode, touching any of the numbered FAVORITE
Touch Buttons will show which Patch is loaded into that particular Favorite.
3. Touch one of the ten numbered FAVORITE Touch Buttons. The Information Center Display will
showwhich Patch is currentlyloaded in that Favorite.
4. Turn the VALUE Rotary Control to select the Patch you want to save as a Favorite.

19
Patches&Favorites
5. Touchthe numberedFAVORITETouchButtonyoutouchedpreviously. Itwillnowbeupdatedwith
the new Patch.
ËFavorite Banks
You can load the FAVORITE Touch Buttons with up to ten (10) Banks of Favorites, so that you can have up to 100
Patches available through the FAVORITE Touch Buttons.
TRY THIS:
1. Touch and Hold the MANUAL / BANK Touch Button. A FAVORITE button will light showing
which Favorite Bank is currentlyactive.
2. Touch and Hold the MANUAL / BANK Touch Button. A FAVORITE button will light showing
which Favorite Bank is currentlyactive.

20
Favorites
3. WhileholdingtheMANUAL/BANKTouchButton,touchanyoneoftheFAVORITETouchButtons.
4. Release bothTouch Buttons. You will see the following:
Notice that the MANUAL / BANK Touch Button and all of the FAVORITE Touch Buttons are
blinking. This indicates that you are now able to select the FAVORITE Bank you want to use.
5. WhileholdingtheMANUAL/BANKTouchButton,touchanyoneoftheFAVORITETouchButtons.
Afterdoingtheabove,alltheblinkingLEDswillturn“OFF”exceptfortheFAVORITETouchButtonyoujust
selected. TheFAVORITETouchButtonsarenowloadedwiththePatchesfromtheFavoriteBankyouselected.
Other manuals for SKX
6
Table of contents
Other Hammond Electronic Keyboard manuals

Hammond
Hammond XK-3 User manual

Hammond
Hammond SK1 User manual

Hammond
Hammond SKX Reference manual

Hammond
Hammond XK-1 User manual

Hammond
Hammond PRO-44Hv2 User manual

Hammond
Hammond XK-1c User manual

Hammond
Hammond SK1 User manual

Hammond
Hammond XK-5 User manual

Hammond
Hammond SKX User manual

Hammond
Hammond XK-1 User manual

Hammond
Hammond XLK-3 User manual

Hammond
Hammond Sk PRO User manual

Hammond
Hammond SKX User manual

Hammond
Hammond SK1 User manual

Hammond
Hammond XK-2 Owner's manual

Hammond
Hammond XK-3C User manual

Hammond
Hammond XK-5 User manual

Hammond
Hammond XLK-5 User manual

Hammond
Hammond S-27H User manual

Hammond
Hammond Sk PRO User manual