Hammond Sk PRO User manual

PIANO / ENSEMBLE
VOICE
SECTIONS

PIANO / ENSEMBLE Voice Sections2
PIANO / ENSEMBLE Voice Sections
The SK PRO, in addition to being able to duplicate the sound of a vintage Hammond Organ as well as
other organ sounds, has an inbuilt library of 163 high-quality waveforms representing various instruments
(Piano, Guitar, Strings, Trumpet, Saxophone, Drums, etc.) These waveforms in turn are incorporated into
Patches along with Parameters such as Attack, Filter, etc., which are applied to the waveforms to create
different instrumental effects.
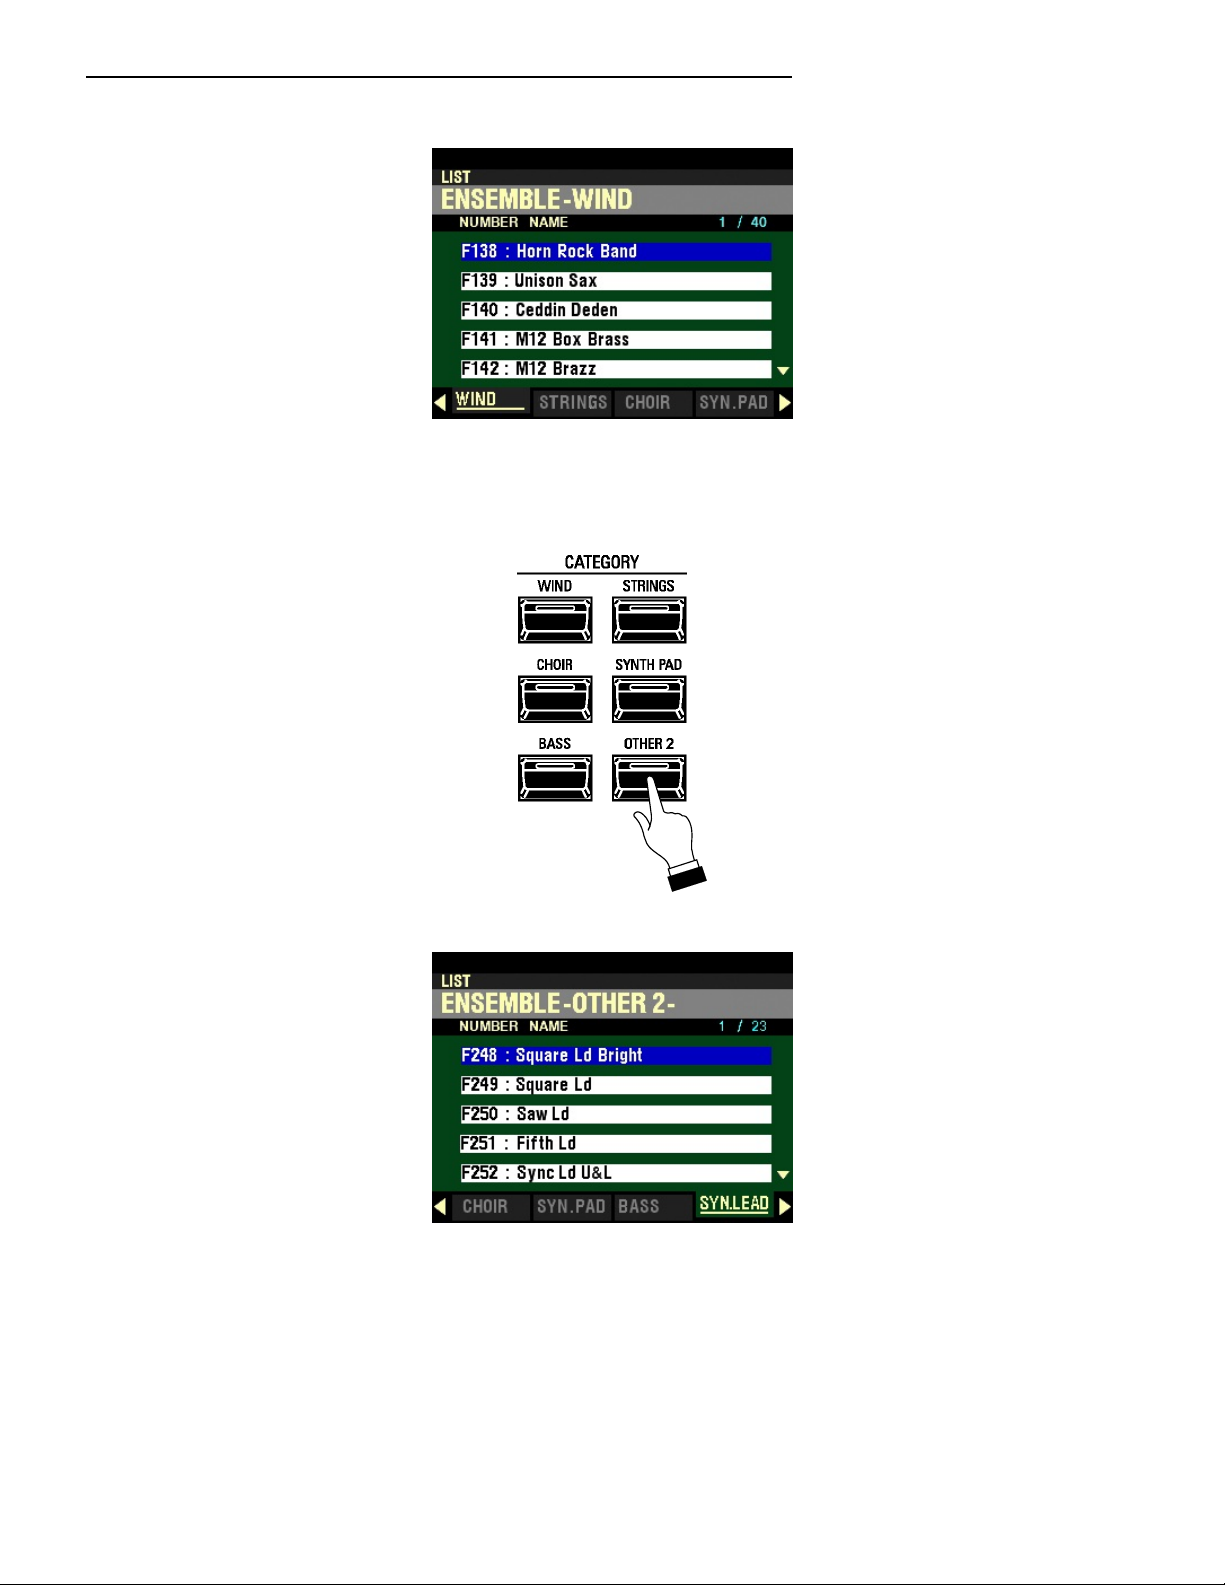
There are 300 Factory (“F”) Patches available representing a wide variety of different instruments and
effects, with provision for 400 User (“U”) Patches. “F” Patches are permanently stored in memory and
cannot be overwritten. “U” Patches can be created, Recorded, edited and re-Recorded at any time.
Both the Factory and User Patches can be played from either the PIANO or ENSEMBLE Section.
NOTE: When you finish editing a custom Patch, you will be shown where you can save your custom Patch - a
“U” number will be shown in the display during the RECORD process as well as a Voice Category. This will be
explained fully later on in this chapter of the Guide.
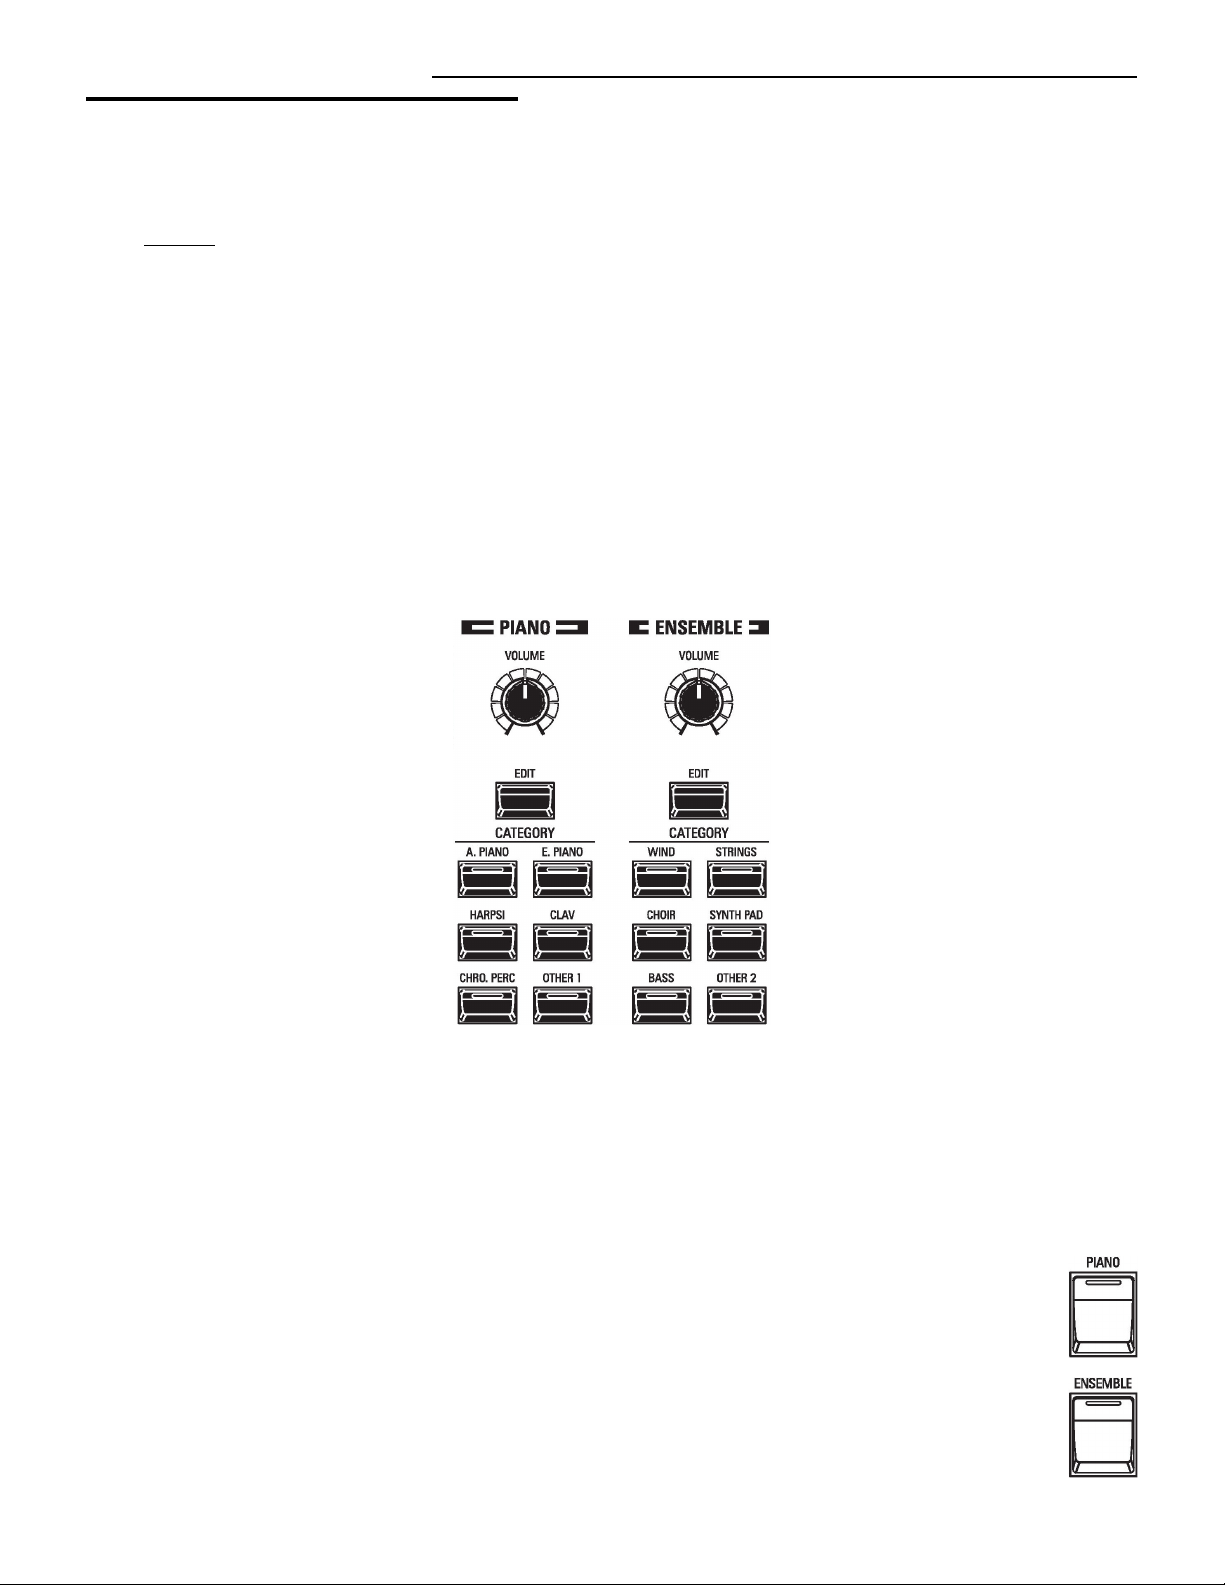
uPIANO / ENSEMBLE Controls
The PIANO / ENSEMBLE Controls are located on the left side of the Information Center Display.
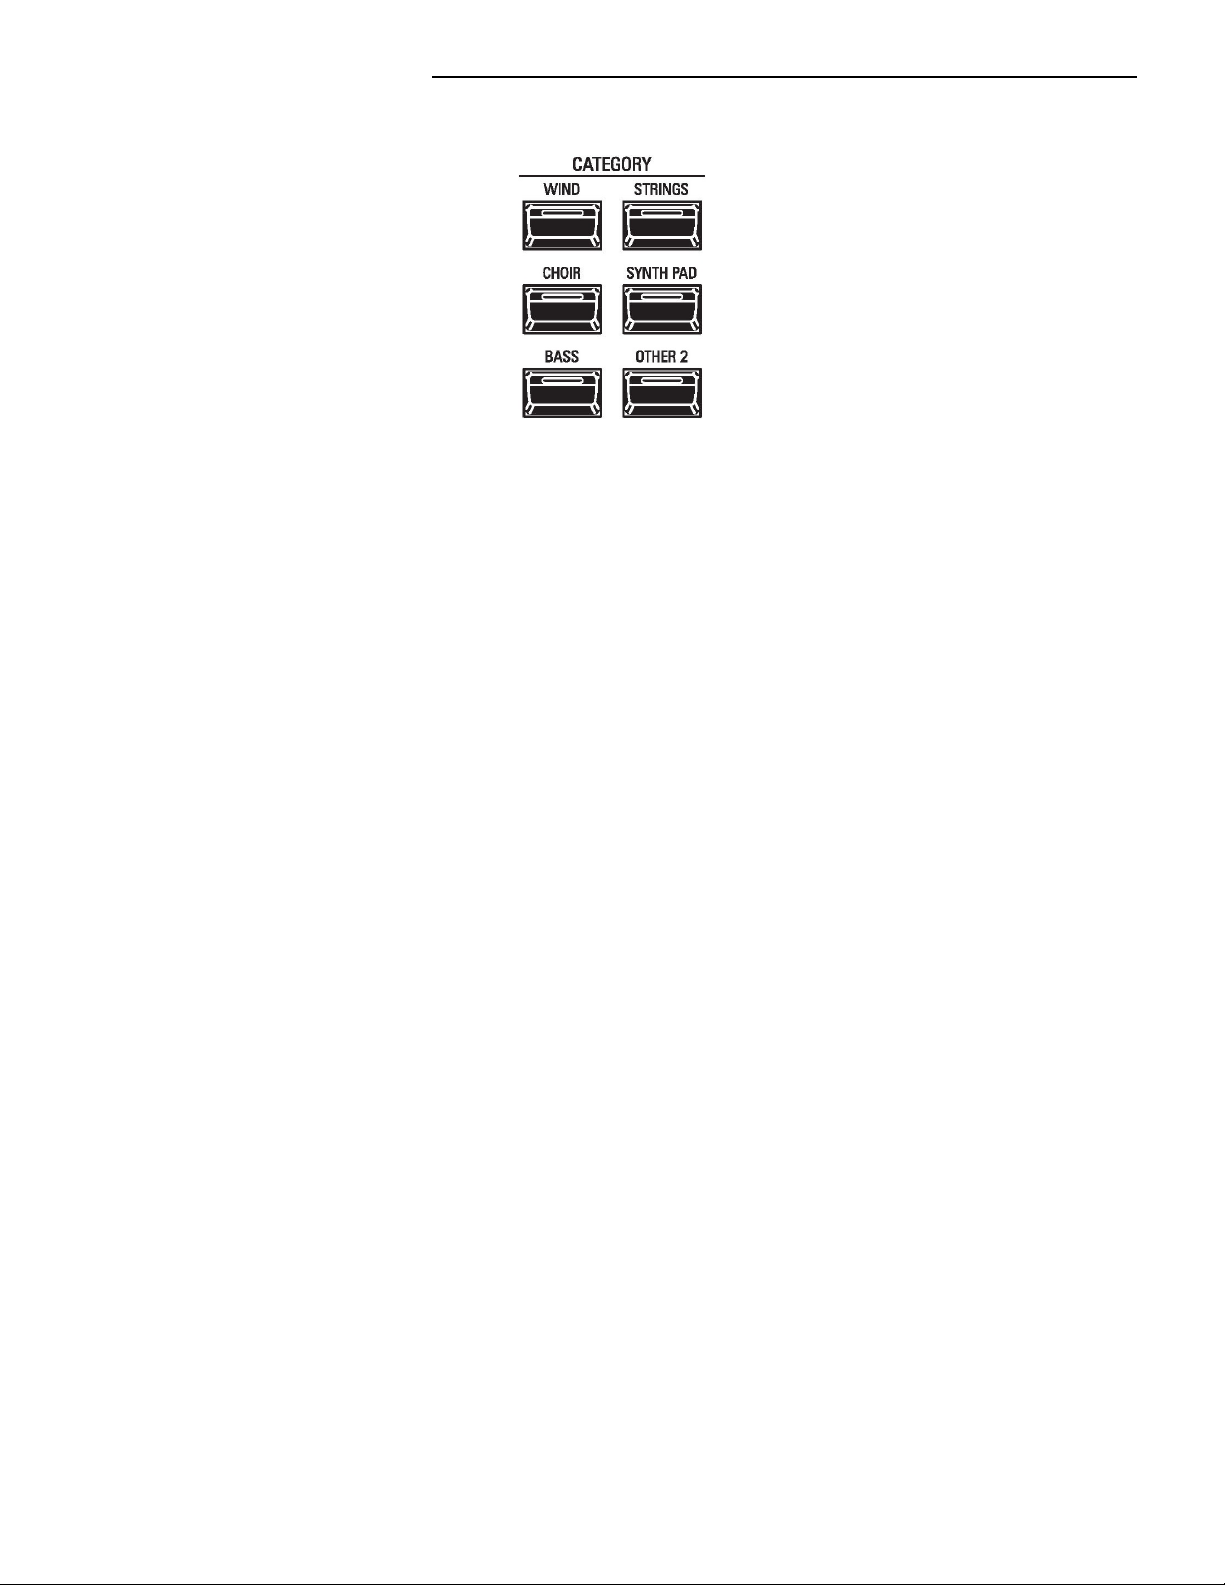
Notice the two control sections are identical except for the Voice Categories. The PIANO Section is set up
for easy access to Piano and other percussive keyboard or chromatic instruments while the ENSEMBLE
Section allows you to quickly register instrumental voices such as Trumpet, Saxophone, Violin, Orchestral
Strings, Choir, etc. However, as explained above, all of the Factory or User Patches can be played from
either Section - the PIANO Section can play Strings if desired, the ENSEMBLE Section can play Electric
Piano if desired, and so on. This is in order to allow maximum registration flexibility and versatility.
Later parts of this chapter will explain this in more detail.
tPIANO ALLOCATE button
Use this button to turn the PIANO Section “ON” or “OFF.” When “ON” an LED will light.
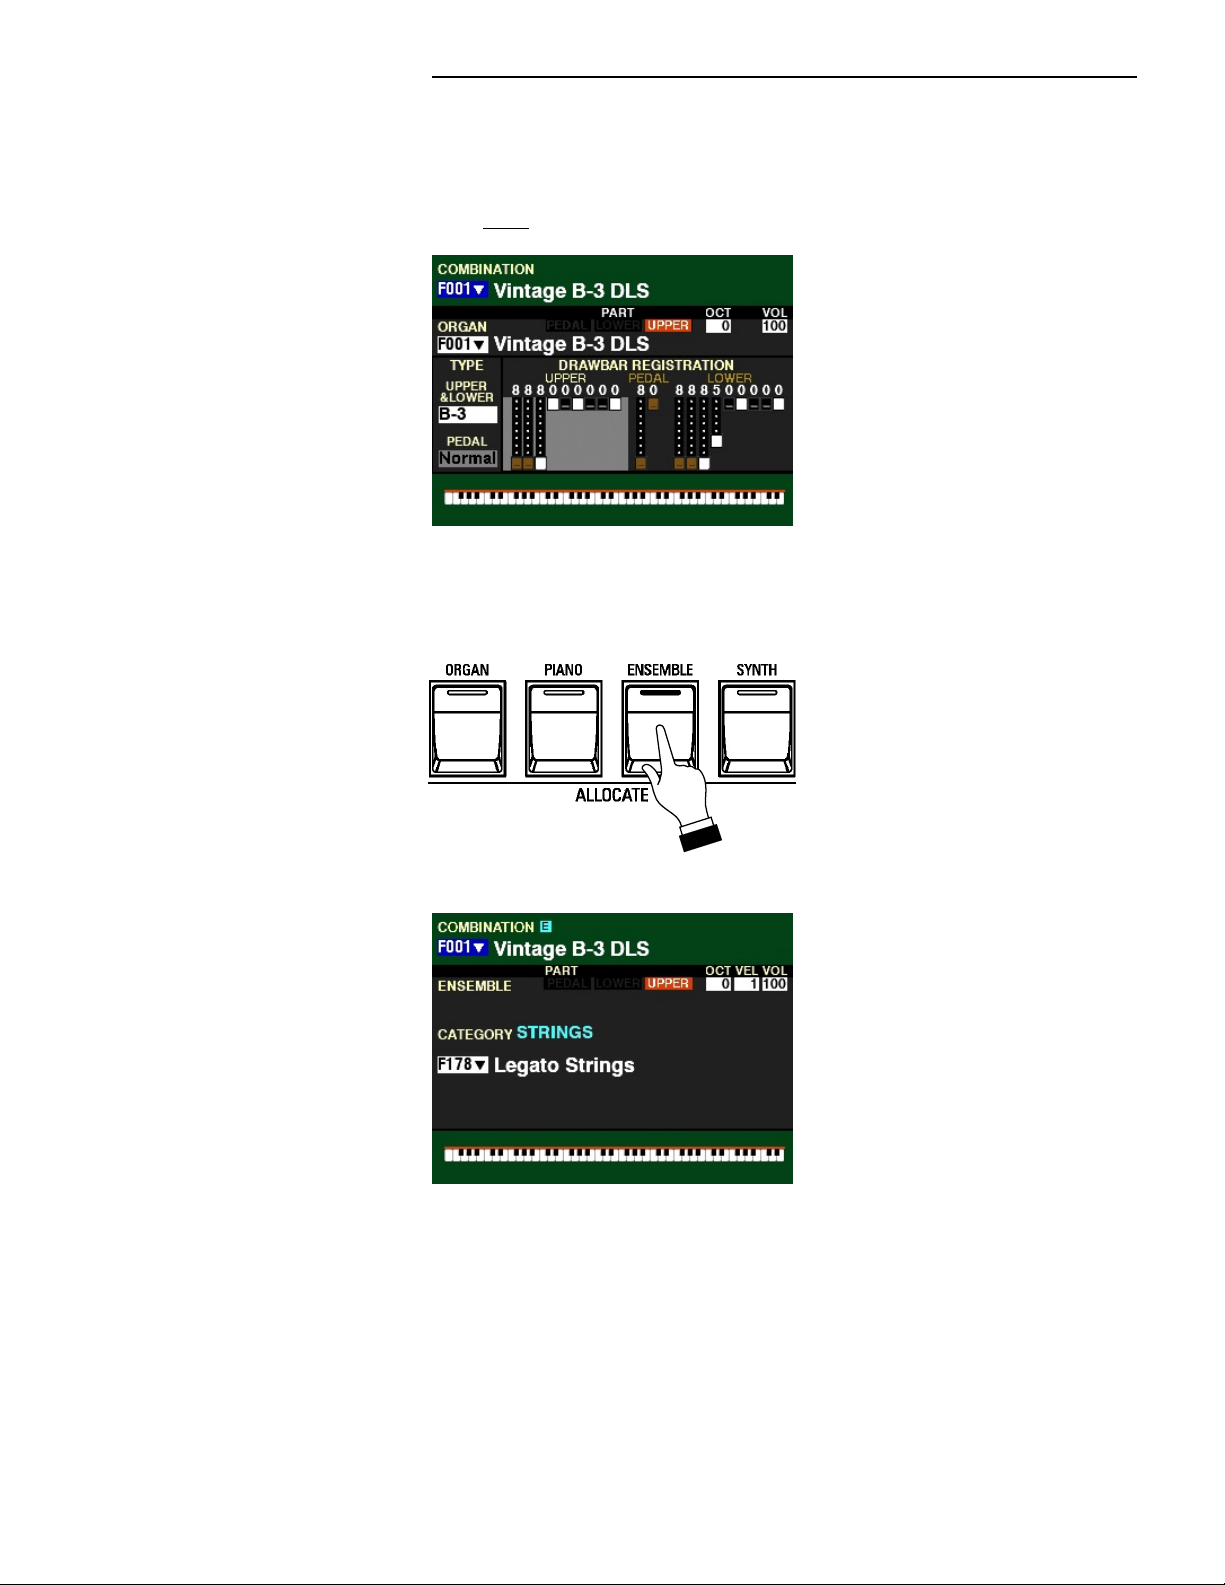
ENSEMBLE ALLOCATE button
Use this button to turn the ENSEMBLE Section “ON” or “OFF.” When “ON” an LED will light.

PIANO / ENSEMBLE Voice Sections 3
tPIANO CATEGORY buttons
The PIANO CATEGORY buttons allow you to access various categories of voices. The categories represent
voices which have been arranged into groups combining instruments of similar characteristics to make
voice selection easier.
A.PIANO
This category contains Acoustic Pianos, Electric Grands, etc.
E.PIANO
This category contains Electric Pianos.
HARPSI
This category contains other keyboard instruments such as Harpsichords, etc.
CLAV
This category contains sounds similar to those produced by an electrically-amplified clavichord.
CHRO. PERC
This category contains chromatic percussion instruments such as Xylophone, Marimba,
Glockenspiel, etc.
OTHER 1
This category contains Voice Categories such as Guitar, Wind, Strings, etc.
These voices can be used either in combination with the other Voice Sections or by themselves.

PIANO / ENSEMBLE Voice Sections4
tENSEMBLE CATEGORY buttons
The ENSEMBLE CATEGORY buttons allow you to access various categories of voices. The categories
represent voices which have been arranged into groups combining instruments of similar characteristics
to make voice selection easier.
WIND
This category contains Wind instruments such as Trumpets, Saxes, etc.
STRINGS
This category contains String instruments such as Violin, Orchestral Strings, etc.
CHOIR
This category contains Choir and Vocal sounds..
SYNTH PAD
This category contains Synth voices suitable for chordal accompaniment.
BASS
This category contains Bass voices.
OTHER 2
This category contains other Voice Categories such as Acoustic Pianos, Chromatic Percussions, etc.
These voices can be used either in combination with the other Voice Sections or by themselves.
There is a total of 163 Wave tables available for creating Piano / Ensemble Patches. These are listed on the
next page and also in the APPENDIX of this Guide.

PIANO / ENSEMBLE Voice Sections 5
tPIANO / ENSEMBLE WAVEFORM List
Category Name
1 A. Piano 1 GrandPf Yam CF3
2 GrandPf Stw D St
3 GndPf StwDSt Rel
4 UpUf Regular
5 UpUf Honky
6 Electric Grand
7 Toy Pf Kaw
8 Toy Pf Kaw Rel
9 Toy Pf Sch
10 Toy Pf Sch Rel
11 Pop Piano CF
2 E. Piano 1 EP Tine Mk1 On
2 EP Tine Mk1 Off
3 EP Tine Mk2 On
4 EP Reed 200A
5 E.Piano FM
6 E.Piano FM Cho
7 EP Tine Mk1 Soft
8 EP Reed Soft
3 Harpsichord 1 Hpsichrd Back
2 Hpsichrd Front
3 Hpsichrd Buff
4 Hpsi Off
4 Clav 1 Clav AC
2 Clav AD
3 Clav BC
4 Clav BD
5 Clav Off
5 Chro. Perc. 1 Xylophone YX
2 Marimba YM Norm
3 Marimba YM Trem
4 Glockenspiel
5 Glock. X-66
6 Vibraphone YV
7 Tublar Bells
8 Tub Bells FM
9 Tub Bells TW
10 Church Bell
11 Wine Glass
12 Tonechimes
13 Hand Bells
14 Syn. Celesta
15 Digi Bell 1
16 Digi Bell 2
17 Crystal
18 Music Box
6 Guitar 1 Nylon-Str Gt.
2 Steel-Str Gt.
3 12Str Gt. A
4 12Str Gt. B
5 Jazz Gt.
6 Pedal Steel Gt
7 Orch Harp
8 OH Whole Tone C
9 OH Whole Tone F
10 Pizzicato Str.
7 Ethnic 1 Dulcimer
2 Sitar
3 Tanpura
4 Banjo
5 Soh
6 Pan Pipes
8 SFX 1 Sine
2 White Noise
3 Rain
4 TelephoneRingSus
5 TelephoneRingRel
6 E. Driver Sus
7 E. Driver Rel
9 Wind 1 Trumpet Str
2 Trumpet Vib
3 Trumpet Muted
4 Tp. Fall Sus
5 Tp. Fall Atk
6 Tp. Grs Up Sus
7 Trumpet Sect.
8 Trombone Str
9 Trombone Muted
10 Tb. Fall Sus
11 Tb. Fall Atk
12 Flute Str
13 Flute Vib
14 Flute Atk
15 Alto Sax Str
16 Alto Sax Vib
17 Tenor Sax Str
18 Tenor Sax Vib
19 Bari Sax Str
20 Recorder
21 Flute Taped
22 M12 Box Brass 1
23 M12 Box Brass 2
24 M12 Brazz 1
25 M12 Brazz 2
26 M12 Horn Ens 1
27 M12 Horn Ens 2
10 Strings 1 Str. Legato
2 Str. Section
3 Synth Str. Mlw
4 Synth Str. Bri
5 Sol. Str.
6 Violins Taped
7 Violin
8 Glass Harp St
9 Glass Harp Mono
11 Choir 1 Choir Aah CM
2 Choir Doo CM
3 Vocal CM Tn/S
4 Choir Taped
12 Synth Pad 1 PWM
2 EPFM Pad
3 WG Pad Bright
4 WG Pad Mellow
5 Noise Choir
13 Bass 1 Acoustic Bs On
2 Acoustic Bs Off
3 Finger Bs Jz
4 Finger Bs Pr
5 Pick Bs Jz
6 Pick Bs Pr
7 Slap Bs Jz
8 FM Bass
9 Timpani Single
10 Timpani Roll
11 Timpani Gliss
14 Synth Lead 1 Square
2 Pulse 66%
3 Pulse 75%
4 Pulse 80%
5 Sawtooth
6 Kinura
7 Lucy
8 Even Bars
9 OPZ LFO
10 Osc. Sync U/D
11 Osc. Sync D
15 Free Reed 1 Accordion
2 Acdn SubOct
3 Reed Organ
4 Melodion B-24
5 Melodion M-37
6 Melodion M-37Oct
7 Melodion PRO-44
8 Melodion S-32
9 Harm Single
10 Harm Chro Norm
11 Harm Chro Vib
12 Harm BsChro
13 Harm Bass Stacc
14 Harm FM
16 Percussion 1 Ride Cymbal
2 Crash Cymbal
3 Crash Cymbal Lp
4 Wind Chime
5 Wind Chime Lp
6 Tone Tang
7 Jazz BD
8 Jazz SD
9 Jazz SD&BD Rnd
10 Brush SD Swl On
11 Brush SD Swl Off
12 Brsh SD Tap/Slap
13 Brush SD&BD Rnd

PIANO / ENSEMBLE Voice Sections6
uSelecting a Voice
tPIANO Voice Section
TRY THIS:
1. Make sure Combination F001 is displaying (see below).
2. Make sure all four ALLOCATE buttons are “OFF” (LED not lit).
3. Press the PIANO button in the ALLOCATE Section. The red LED will light.
The Information Center Display should now look similar to this:
4. Play some notes. You will now hear the sound of a concert grand piano.

PIANO / ENSEMBLE Voice Sections 7
5. Now press the E.PIANO button. The Information Center Display will show the following:
5. Play some notes. You will now hear the sound of an electric piano.
6. Now press the OTHER button in the PIANO CATEGORY Group.
The Information Center Display should now look similar to this:
7. Play some notes. You will now hear the sound of a nylon-string guitar.

PIANO / ENSEMBLE Voice Sections8
tENSEMBLE Voice Section
TRY THIS:
1. Make sure Combination F001 is displaying (see below).
2. Make sure all four ALLOCATE buttons are “OFF” (LED not lit).
3. Press the ENSEMBLE button in the ALLOCATE Section. The red LED will light.
The Information Center Display should now look similar to this:
4. Play some notes. You will now hear the sound of a string section.

PIANO / ENSEMBLE Voice Sections 9
5. Now press the WIND button. The Information Center Display will show the following:
5. Play some notes. You will now hear the sound of a brass section.
6. Now press the OTHER 2 button in the ENSEMBLE CATEGORY Group.
The Information Center Display should now look similar to this:
7. Play some notes. You will now hear the sound of a synthesizer.

PIANO / ENSEMBLE Voice Sections10
uPIANO / ENSEMBLE FUNCTION Modes
The PIANO and ENSEMBLE FUNCTION Modes allow you to modify the characteristics of the PIANO or
ENSEMBLE Voices according to your preference.
NOTE: The PIANO and ENSEMBLE PATCH EDIT FUNCTION Modes are identical. The following pages of
this Guide will refer to the PIANO PATCH EDIT Modes to explain both PIANO and ENSEMBLE.
tAccessing the PIANO / ENSEMBLE PATCH EDIT FUNCTION Mode using the MENU/EXIT button:
1. From any of the PLAY Mode screens, press the MENU/EXIT button once. The Information
Center Display should now look like this:
The word “COMBINATION” should be highlighted.
PIANO Voice Section:
2. Press the DIRECTION “q” button two times. The word “PIANO” should be highlighted.
ENSEMBLE Voice Section:
2. Press the DIRECTION “q” button three times. The word “ENSEMBLE” should be
highlighted.

PIANO / ENSEMBLE Voice Sections 11
3. Press the ENTER button. The Information Center Display should now look similar to this:
NOTE: The PIANO display is shown above, which will display the currently selected PIANO Patch on
the top line of the display. If ENSEMBLE is selected, the top line of the display will show the currently
selected ENSEMBLE Patch. The currently selected Combination Number will display to the left of the
Patch Name.
tAccessing the PIANO / ENSEMBLE PATCH EDIT FUNCTION Mode using the Shortcut:
Press the EDIT button in either the PIANO or ENSEMBLE Voice Section, depending on which Voice
you want to edit. You will see the screen shown at the bottom of the previous page.
tAccessing the PIANO / ENSEMBLE PATCH EDIT FUNCTION via the APP MENU:
1. From any of the PLAY Mode screens, Press and Hold the MANUAL “ ” button. The
Information Center Display should now look like this:
The box “EDIT COMBINATION” should be highlighted.
NOTE: The APP MENU may not display all Voice Sections, depending on which Voice Sections
are active for the selected Combination.

PIANO / ENSEMBLE Voice Sections12
PIANO Voice Section:
2. Press the DIRECTION “q” button two times. The box “EDIT PIANO” should be highlighted.
ENSEMBLE Voice Section:
2. Press the DIRECTION “q” button three times. The box “EDIT ENSEMBLE” should be
highlighted.
2. Press the ENTER button. The Information Center Display should now look like this:
You are now in the PATCH EDIT FUNCTION Mode. You may now use the DIRECTION and PAGE buttons
in conjunction with the VALUE knob to make various changes to the Patches. These changes are
explained starting below.
NOTE: The Parameters for the PIANO and ENSEMBLE Parameters are identical: therefore, for the
explanation of each Parameter the PIANO Patch will be shown at the top of the screen.

PIANO / ENSEMBLE Voice Sections 13
tGENERAL Parameters
LOUDNESS
VOLUME
This Parameter allows you to adjust the overall volume of the selected Patch. You can select from 0 (no
Volume) to 127 (maximum Volume).
Turn the VALUE knob the right to increase the Volume.
Turn the VALUE knob to the left to decrease the Volume.
NOTE: The Loudness Parameter serves to set the maximum volume of the selected ORGAN Patch and works
independently of the PIANO and ENSEMBLE VOLUME knobs. The overall volume of the PIANO or ENSEMBLE
Voice Section is controlled by the VOLUME knob for each Voice Section. The MASTER VOLUME knob and/or
a connected Expression Pedal will control the volume of the entire instrument.
From the screen shown on the previous page, press the DIRECTION “q” button once.
The box to the right of “RANGE UP” should be highlighted.
PITCH BEND
RANGE UP
This Parameter allows you to adjust the number of semitones the Pitch Bend Wheel will bend the pitch of
the selected Patch up. You can select from 1 to 12 semitones, 12 semitones being a full octave.
Turn the VALUE knob to the right to increase the Range.
Turn the VALUE knob to the left to decrease the Range.

PIANO / ENSEMBLE Voice Sections14
From the above screen, press the DIRECTION “q” button once.
The box to the right of “RANGE DOWN” should be highlighted.
RANGE DOWN
This Parameter allows you to adjust the number of semitones the Pitch Bend Wheel will bend the pitch of
the selected Patch down. You can select from 1 to 24 semitones, 24 semitones being two full octaves.
Turn the VALUE knob to the right to increase the Range.
Turn the VALUE knob to the left to decrease the Range.
From the screen shown at the bottom of the previous page, use the DIRECTION buttons to move the
cursor to the right side of the display so the Information Center Display looks like this:
The box to the right of “PORTAMENTO” should be highlighted.
PORTAMENTO
ON / OFF
This Parameter allows you to turn the Portamento effect “ON” or “OFF” for the selected Patch.
Turn the VALUE knob to turn Portamento “ON” or “OFF.”
NOTE: Portamento refers to a smooth transition or “sliding” from one note to another.
NOTE: The PORTAMENTO button to the left of the Keyboard must be “ON” (orange LED lit) to hear the
Portamento effect.

PIANO / ENSEMBLE Voice Sections 15
From the screen shown on the previous page, press the DIRECTION “q” button once.
The box to the right of “MODE” should be highlighted.
MODE
This Parameter allows you to adjust how to control the Portamento effect from the keyboard.
The data chart below shows the options you may select.
PORTAMENTO MODE
Parameter Description
Every The Portamento will be heard with every keypress.
Legato The Portamento will be heard only when keys are played “legato” (a key is depressed while
another key is held).
Turn the VALUE knob to make your selection.
From the above screen, press the DIRECTION “q” button once.
The box to the right of “RATE” should be highlighted.
RATE
This Parameter allows you to adjust the rate at which the pitch rises or falls when Portamento is “ON.”
You can select from 0 (the pitch will rise or fall instantaneously) to 127 (the pitch rises and falls at the
slowest rate). Intermediate rates will cause the pitch to rise or fall at rates between 0 and 127.
Turn the VALUE knob to the right to increase the Portamento Rate.
Turn the VALUE knob to the left to decrease the Portamento Rate.

PIANO / ENSEMBLE Voice Sections16
From the screen shown at the bottom of the previous page, press the DIRECTION “q” button once.
The box to the right of “MODE” below “MONO/POLY” should be highlighted.
MONO/POLY
MODE
This Parameter allows you to select whether the selected Patch will play single notes (Mono) or multiple
notes (Poly) when multiple notes are played on the keyboard.
The data chart below shows the options you may select.
MONO/POLY MODE
Parameter Description
Poly “Polyphonic” - if more than one key is depressed, all notes will sound)
Mono “Monophonic” - if more than one key is depressed, only one note will sound)
Rel.C “Release Cancel” - More than one note can be played; however, the last note released will be erased
by the next note played.
Turn the VALUE knob to make your selection.

PIANO / ENSEMBLE Voice Sections 17
From the screen shown on the previous page, press the DIRECTION “q” button once.
The box to the right of “MONO PRIOR.” should be highlighted.
MONO PRIORITY
This Parameter allows you to adjust which note will sound on the selected Patch if more than one note is
played in MONO Mode.
The data chart below shows the options you may select.
MONO PRIORITY
Parameter Description
Auto If the selected Patch is used with other Voice Sections, the highest note played will sound.
If the selected Patch is used alone, the last played note will sound.
Last The last played note will sound.
Lowest The lowest note played will sound.
Highest The highest note played will sound.
Turn the VALUE knob to make your selection.

PIANO / ENSEMBLE Voice Sections18
uSPECIAL NOTE - ProChord™
When you scroll through the Extra Voices in each Voice Category, you will see Pcd or PrChd in several of
the Voice Names in the PIANO / ENSEMBLE Voice Sections.
Pcd or PrChd are abbreviations for ProChord.™ The next paragraphs will explain in detail how to use the
ProChord™ feature.
tWhat Is “ProChord™” - PLEASE READ
ProChord™is a unique feature of certain Hammond Organ models, including the SK PRO, which allows
you to play a single-note melody augmented by complex harmonies. The melody is played on the UPPER
Part and the harmonies are applied to the melody in response to chords played by the left hand on the
LOWER Part. ProChord is a sophisticated tool that can be used to enrich a performance, or provide an
advanced edge to any style of music.
ProChord works like this: When notes or chords are played on a LOWER Part and a note is played on an
UPPER Part, the note represented by the key played on the UPPER Part is heard along with a scored
harmony pattern which sounds according to the Chord Root and Chord Type selected by the notes played
on the LOWER Part. The Chord Root is the letter name of the chord (F, A, B=, etc) while the Chord Type
is the denomination of the chord (Major, Minor, Augmented, etc.).
The ProChord feature on the SK PRO will recognize 26 different Chord Types in response to notes played
on the LOWER Part. The following page will show how to play the five basic Chord Types using a
minimum number of notes.
NOTE: A note or chord must be played on the LOWER Part in order for the ProChord harmony to sound when
notes are played on the UPPER Part.

PIANO / ENSEMBLE Voice Sections 19
tUsing ProChord
TRY THIS:
1. Make sure all the ALLOCATE buttons are “OFF” (LED not lit) and that “F001" is showing at the
very top of the display.
2. Press the PIANO ALLOCATE button “ON.”
3. Press the DIRECTION “q” button once. The Voice Name should be highlighted.
4. Turn the VALUE knob until F148 shows as the Patch Number.
5. Turn the SPLIT button “ON.”
6. Play a chord on the LOWER Part and hold the keys down. You will not hear any sound.
7. While holding the keys down, play a single-note melody on the UPPER Part. You will hear the
melody note plus a complex harmony pattern underneath the melody based on the chord you
play. The Harmony will always be appropriate no matter what chord or melody you play.
8. Play a chord progression of your choice, and continue to play a melody on the UPPER Part.
You will hear the harmony change in response to the chords you are playing on the LOWER
Part.

PIANO / ENSEMBLE Voice Sections20
The instructions on the previous page apply to all of the PIANO / ENSEMBLE Patches with ProChord. Each
ProChord Patch will consist of a melody note plus a different harmony pattern. For example, the
BigBandSax Patch has a 5-part open-harmony pattern, while the HP OldTime Patch has a 4-part closed
harmony pattern. There are 17 harmony patterns in all, including also 2- and 3-part patterns.
Feel free to experiment with the different ProChord choices; however, remember:
1. The harmony will ONLY sound if SPLIT is enabled and notes are pressed and held on the
LOWER Part while the melody is played.
2. Play ONLY single-note melodies on the UPPER Part.
NOTE: Although several PIANO / ENSEMBLE Patches utilize ProChord (indicated by Pcd or PrChd in the
Patch Name), ProChord can be added to any PIANO or ENSEMBLE Patch via the FUNCTION Mode
Parameters. This is described starting on page 218.
NOTE: When a ProChord Patch is selected, the UPPER Part becomes monophonic - if a chord is played with
the right hand only one key will play. Therefore, when using ProChord play a single-note melody.
From the screen shown on page 213, press the PAGE “u” button once. The PRO CHORD Page
should now display.
The box to the right of “SWITCH” should be highlighted.
tPRO CHORD
This FUNCTION Mode Page allows you to reproduce complex harmonies by playing a single-note melody
with the right hand and chords with the left hand. The four Components provide both the Melody and
Harmony notes in different configurations depending on the specific ProChord Type or harmony pattern
selected.
NOTE: The keyboard must be “SPLIT” (SPLIT button “ON,”) in order to utilize the ProChord feature.
NOTE: The ProChord feature works on the UPPER Part only.
Other manuals for Sk PRO
6
Table of contents
Other Hammond Electronic Keyboard manuals

Hammond
Hammond XK-3 User manual

Hammond
Hammond XK-1c User manual

Hammond
Hammond SK1 Owner's manual

Hammond
Hammond XK-2 Owner's manual

Hammond
Hammond SKX Reference manual

Hammond
Hammond XLK-5 User manual

Hammond
Hammond PRO-44Hv2 User manual

Hammond
Hammond XK-1 User manual

Hammond
Hammond SK1 User manual

Hammond
Hammond XK-1 User manual

Hammond
Hammond XK-5 User manual

Hammond
Hammond XK-3C User manual

Hammond
Hammond SK1 User manual

Hammond
Hammond Sk PRO User manual

Hammond
Hammond SK1 User manual

Hammond
Hammond SKX User manual

Hammond
Hammond SKX User manual

Hammond
Hammond XLK-3 User manual

Hammond
Hammond Sk PRO User manual

Hammond
Hammond S-27H User manual