Hammond PK-23PXK User manual

Model 2-2:-
Owner’s Manual
*#1 *#1
*#1 *#1
*#1
Thank you, and congratulations on your choice of a Hammond PK-25PXK.
The PK-25PXK is the MIDI pedalboard for Hammond XK-3.
In order to get the most out of this instrument for many years to come, first take the
time to read this manual in full.
*#1 2-2:-Owner’s Manual
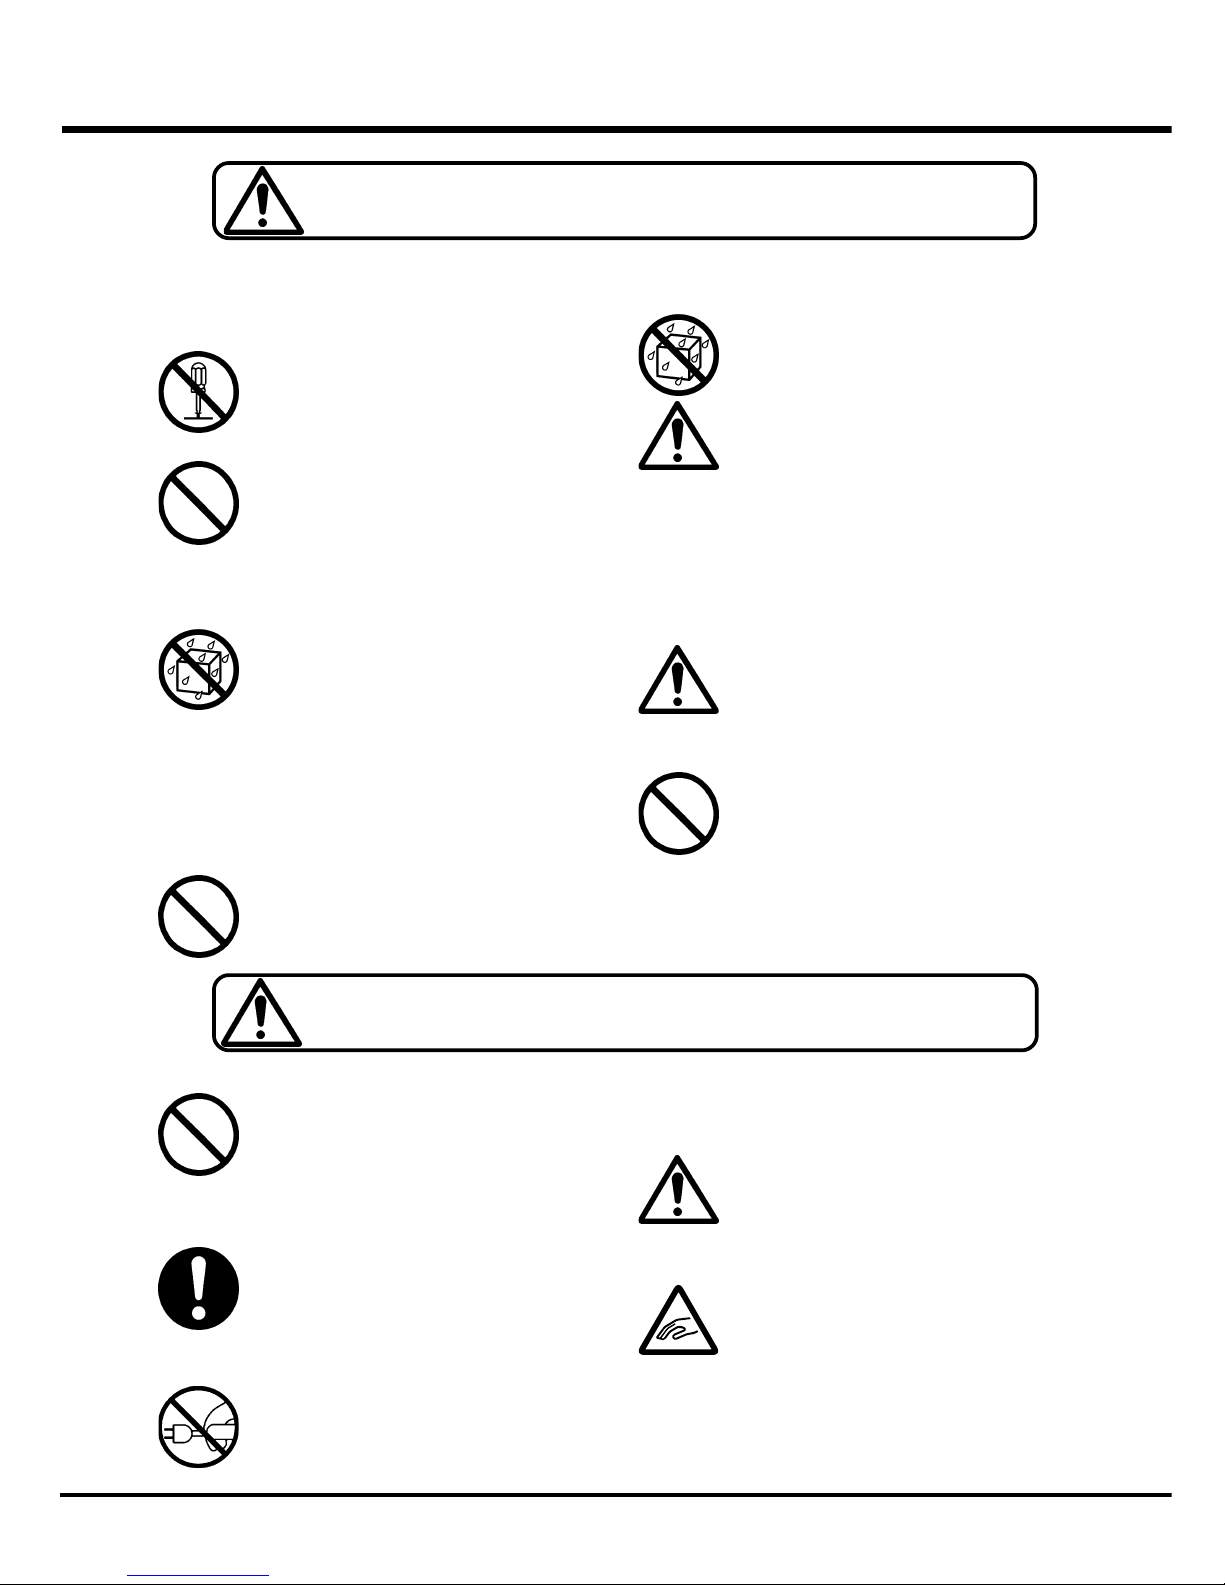
2IMPORTANT SAFETY NOTICE
ATTENTION
Follow instructions:
All operation and user instructions should be
followed.
Do Not Disassemble:
Do not disassemble this unit.
Servicing:
The user should not attempt to service the
appliance beyond that is described in the
Operation Instructions. All other servicing
should be referred to qualified service
personnel.
Location:
Using the unit in the following locations can
result in a malfunction.
In direct sunlight
Locations of extreme temperature or
humidity
Excessively dusty or dirty locations
Locations of excessive vibration
Close to magnetic fields
Object and Liquid Entry:
Care should be taken so that objects do not fall
and liquids are not spilled into the enclosure
through openings.
Damage Requiring Service:
The appliance should be serviced by qualified
service personnel when:
The power supply cord or the plug has
been damaged; or
Objects have fallen, or liquid has been
spilled into the appliance; or
The appliance has been exposed to rain;
or
The appliance does not appear to operate
normally or exhibits a marked change in
performance; or
The appliance has been dropped, or the
enclosure damaged.
Children:
If you let your children use this unit, please
always watch and guide them and do not leave
them alone.
Do Not Cause a Shock
Do not drop or cause a shock to this unit.
CAUTION
Stack/Ride:
Do not stack heavy devices or get on this
unit. Such may cause personal injuries or
falling down.
Transfer:
Remove all the cables when you transfer this
unit, to avoid damages on the cables, or an
electric shock or fire.
Do Not Pull the Cord:
Be sure to grasp the plug when unplugging it
from a wall outlet. Pulling on the power cord
can damage it, and create the danger of fire
and electrical shock.
Hook Up:
Turn off all devices before hook up.
Follow all instructions and use only designated
cables.
Movable Parts:
Make sure not to pinch your fingers when you
assemble or disassemble this unit.
This symbol indicates information that, if ignored or applied incorrectly,
creates the possibility of death or serious personal injury.
This symbol indicates information that, if ignored or applied incorrectly,
creates the possibility of personal injury or property damage.

*#1 2-2:-Owner’s Manual
3
NAMES AND FUNCTIONS
9. Foot Rest
Put your foot for rest.
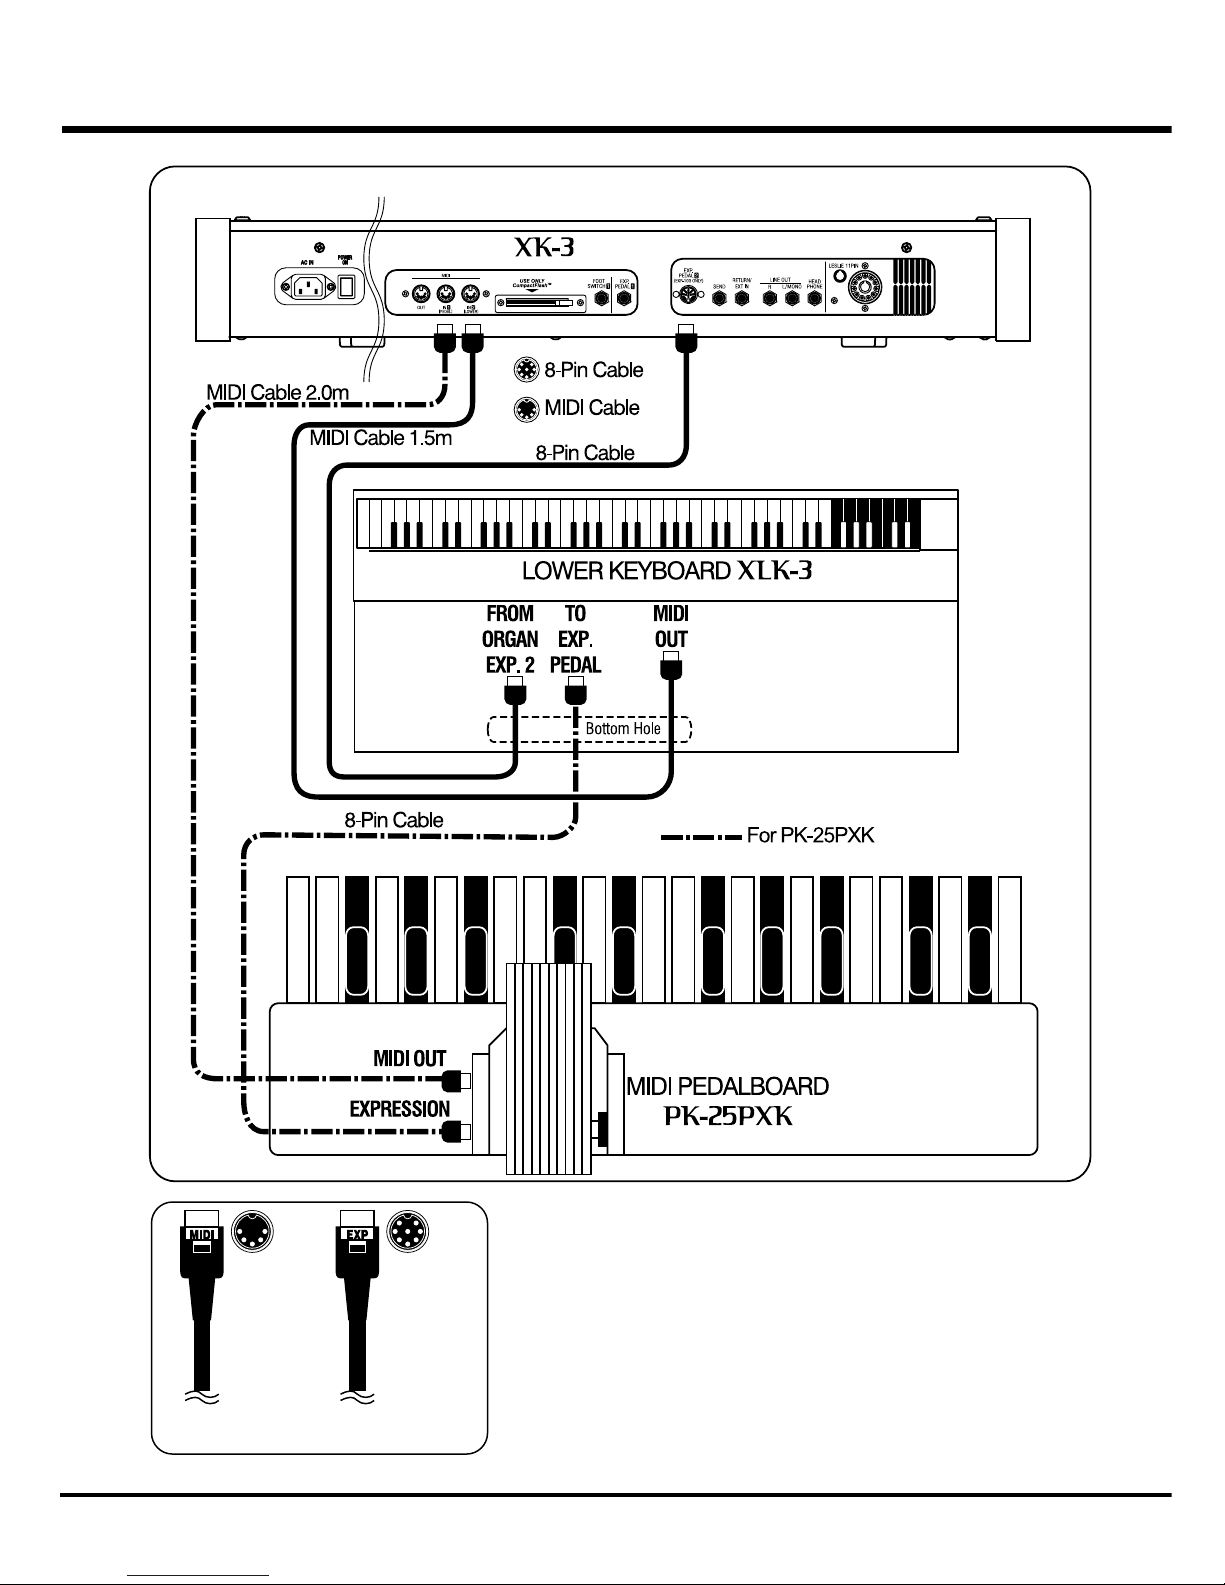
For Expression connection and power supply.
For MIDI connection.
8-Pin Cable
MIDI Cable
1. Pedal keyboard
25-notes, non-velocity pedal keyboard.
2. Expression Pedal
It works as Exp. Pedal 1 (EXP-100) of the XK-3.
3. Knob Bolt
Fix the Expression Pedal assembly.
4. Foot Switch
It works as Foot Switch 2 (EXP-100) of the XK-3.
5. LED
It displays the note is playing, and some values.
6. Key-Scan Cable
Scanning the Pedal Keyboard, and read the playing
notes.
7. Expression Jack
Sending out the expression information and input the
power supply.
8. MIDI OUT Jack
Sending out the playing information.
1
2
3
4
5
6
7
8
9
*#1 2-2:-Owner’s Manual
4XK-SYSTEM STRUCTURE
Place the cable labels as the need arises.

*#1 2-2:-Owner’s Manual
5
BASIC ASSEMBLY
Mount the Expression Pedal on the Pedal
Keyboard and fix it by using the knob bolt.
Plug in the 8-Pin cable to the Expression
jack and the MIDI cable to the MIDI out
jack.
Connect the Key-Scan Cable to the con-
nector on the Pedal Keyboard.
Do this assembly carefully to avoid pinching your fingers or dropping
anything on your feet.
2.
1.
3.
Insert into the
opening
Turn

*#1 2-2:-Owner’s Manual
6ADVANCED OPERATION
REBOUND TIME
MIDI CHANNEL
LOAD DEFAULT VALUES
If you play the pedals very fast with a staccato action or if
the leafsprings used on the pedals change the characteristic
in time (which is a normal situation in heavy use) it may
happen that the pedal key bounces a little on release. It may
have the effect that you will hear the tone twice.
On previous models you could only solve this by increasing
the tension on the leafsprings. With this model you can
also avoid this effect very quickly by adjusting the rebound
time setting.
To change the value, turn on the power while pressing the
highest B and the key corresponding to its value. (See the
left figure.)
Then, the LED on the left of the Expression Pedal blinks
slowly the number of times indicating the value.
The setting range is 1 to 16 times (x) 1.22 milliseconds. 4
times (x) 1.22 milliseconds is the default.
Note: Too long rebound time causes delay in the sound.
You can change the MIDI channel of the Pedal Keyboard for
special purposes.
To change the MIDI channel, turn on the power while press-
ing the highest C and the key corresponding to its value.
(See the left figure.)
Then, the LED on the left of the Expression Pedal blinks fast
the number of times indicating the value.
The setting range is Channel 1 to 16. Channel 3 is default.
To reset the PK-25PXK to the initial status, turn on the power
while pressing the highest A#, B and C (See the left figure).
Then, the LED on the left side of the Expression Pedal blinks
three times, indicating the reset procedure.

*#1 2-2:-Owner’s Manual
7
MIDI IMPLEMENTATION
[Hammond MIDI Keyboard] Date: 23-Dec-2004
Model: PK-25PXK Version: 1.0
Default 3X
Changed 1 - 16
Default 3X
Messages XX
Altered ***** X
36 - 60 X
: True Voice *****
Note ON XX
Note OFF XX
After Key's XX
Touch Ch's XX
Pitch Bender XX
XX
XX
: True # ***** X
System Exclusive XX
: Song Position XX
: Song Select XX
: Tune XX
: Clock XX
: Commands XX
: Local On/Off XX
: All Notes Off XX
: Active Sense OX
: Reset XX
Mode 1: OMNI ON, POLY Mode 2: OMNI ON, MONO O: Yes
Mode 3: OMNI OFF, POLY Mode 4: OMNI OFF, MONO X: No
Remarks
Basic
Channel
System
Real Time
Aux
Messages
Mode
Note
Number
Velocity
Control
Change
MIDI Implementation Chart
Function
Program
Change
System
Common
Transmitted Recognized

*#1 2-2:-Owner’s Manual
8
Printed in Japan
00457-40125
V1.00-050919
SERVICE
SPECIFICATIONS
In the United States contact:
HAMMOND SUZUKI USA, Inc.
733 Annoreno Dr.
Addison, IL 60101
UNITED STATES
In Europe contact:
HAMMOND SUZUKI EUROPE
B.V.
IR. D.S. Tuynmanweg 4A
4131 PN Vianen
THE NETHERLANDS
All other countries contact:
HAMMOND SUZUKI Ltd.
25-11, Ryoke 2 Chome
Hamamatsu 430-0852
(Shizuoka)
JAPAN
Hammond maintains a policy of continuously improving and upgrading its instruments and therefore reserves the right to
change specifications without notice. Although every attempt has been made to insure the accuracy of the descriptive
contents of this Manual, total accuracy cannot be guaranteed.
Should the owner require further assistance, inquiries should first be made to your Authorized Hammond Dealer. If you
still need further assistance, contact Hammond at the following addresses:
Website:
www.hammondorganco.com
E-mail: [email protected]
Website: www.hammondsuzuki.com
Website: www.suzuki-music.co.jp
Technical materials are available and can be obtained by mailing a request to the appropriate address listed above marked
ATTENTION: SERVICE DEPARTMENT.
Manufacturer:
SUZUKI MUSICAL INSTRUMENT MFG. CO., Ltd.
25-12, Ryoke 2 Chome
Hamamatsu 430-0852 (Shizuoka)
JAPAN
Keyboard
25 keys
Controls
Expression, Foot Switch
Terminals
MIDI out
Expression
Dimension
108(W), 90(D), 20(H)cm (without Expression Pedal)
Weight
55 lbs (25 kg)
Accesories
MIDI Cable (2.0m)
8-Pin Cable (1.5m)
Cable Label “MIDI” (2pcs)
Cable Label “EXP” (2pcs)
Table of contents
Other Hammond Music Pedal manuals


