Handpoint Emerchantpay PAX A920 User manual
SmartPOS User Guide: PAX A920 | v01, 01 July 2021 |1
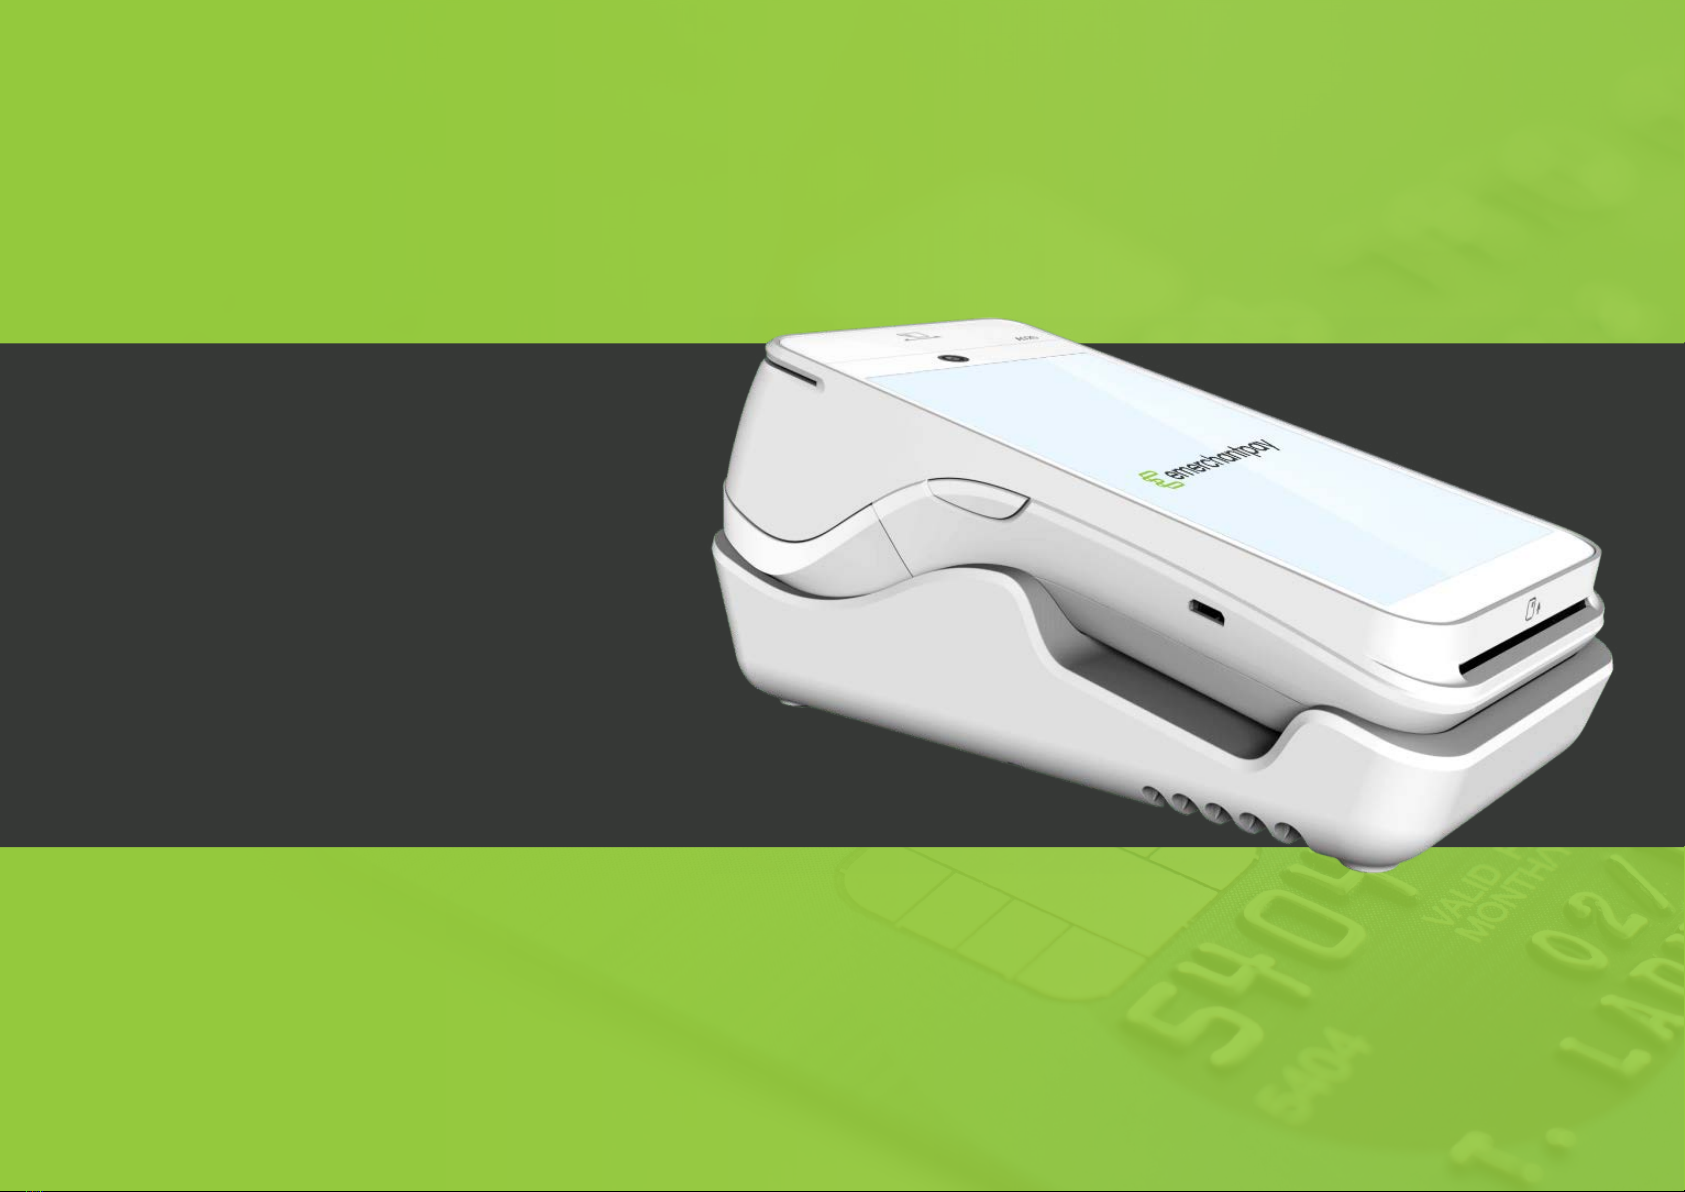
Handpoint SmartPOS
User guide
PAX A920
Version 01, 01 July 2021
SmartPOS User Guide: PAX A920 | v01, 01 July 2021 |2
Table of contents
SmartPOS User Guide: PAX A920
1. Welcome
1.1 About the SmartPOS PAX A920
1.2 Terminal overview
1.3 Getting started
2. Battery
3. Security
4. Printing
5. Refunds
6. Tipping options
7. How to send the receipt over email or phone
8. Analytics
9. Troubleshoot and FAQ’s
3
3
4
5
6
6
6
7
9
12
14
15

SmartPOS User Guide: PAX A920 | v01, 01 July 2021 |3
SmartPOS User Guide:
PAX A920
1. Welcome
Thank you for choosing PAX A920. With this quick start-up guide, you
will be able to understand how to operate your PAX A920 card reader and
start accepting card payments in no time.
1.1 About the SmartPOS PAX A920
The PAX A920 is a powerful portable card reader running on Android
operating system, that accepts highly secure payments as part of the
Handpoint Platform. The Pax A920 can be used together with either
the Handpoint app or a full Point of Sale system (in which case, please
contact your POS solution provider for support).
You can operate the PAX A920 with or without a charging cradle. If
you would like to order a charging cradle, please contact your Account
Manager.

SmartPOS User Guide: PAX A920 | v01, 01 July 2021 |4
1.2 Terminal overview
Below you will find all the features and buttons available on the PAX A920.
MSR payments Contactless payments
Volume up button
Power button
Micro USB
charging port
Volume down
button
Front camera
fixed 0.3 MP
5” Capacitive touch
screen 1280x720
EMV payments
Printing paper cover latch
Serial number
Battery cover
slide latch
Charging stand
contacts
Battery cover
Rear camera
auto zoom 5 MP
SmartPOS User Guide: PAX A920 | v01, 01 July 2021 |5
1.3 Getting started
You can choose to operate your PAX A920 either with Wi-Fi or with
cellular connectivity. See below how to set up each connection type.
Wi-Fi connectivity
1. Turn on the card reader by pressing and holding the power button on
the right side for 2-4 seconds.
2. Use the touch screen to bring the settings bar down from the top
of the screen. You must pull it all the way down until the settings
appear in full with icon names.
3. Select the Wi-Fi name (below the Wi-Fi icon).
4. Select the toggle switch to enable Wi-Fi.
5. Once the list of available Wi-Fi networks appear, select your desired
network.
6. When your card reader has successfully connected to the network, it
will confirm this action by displaying “connected” below the network
name.
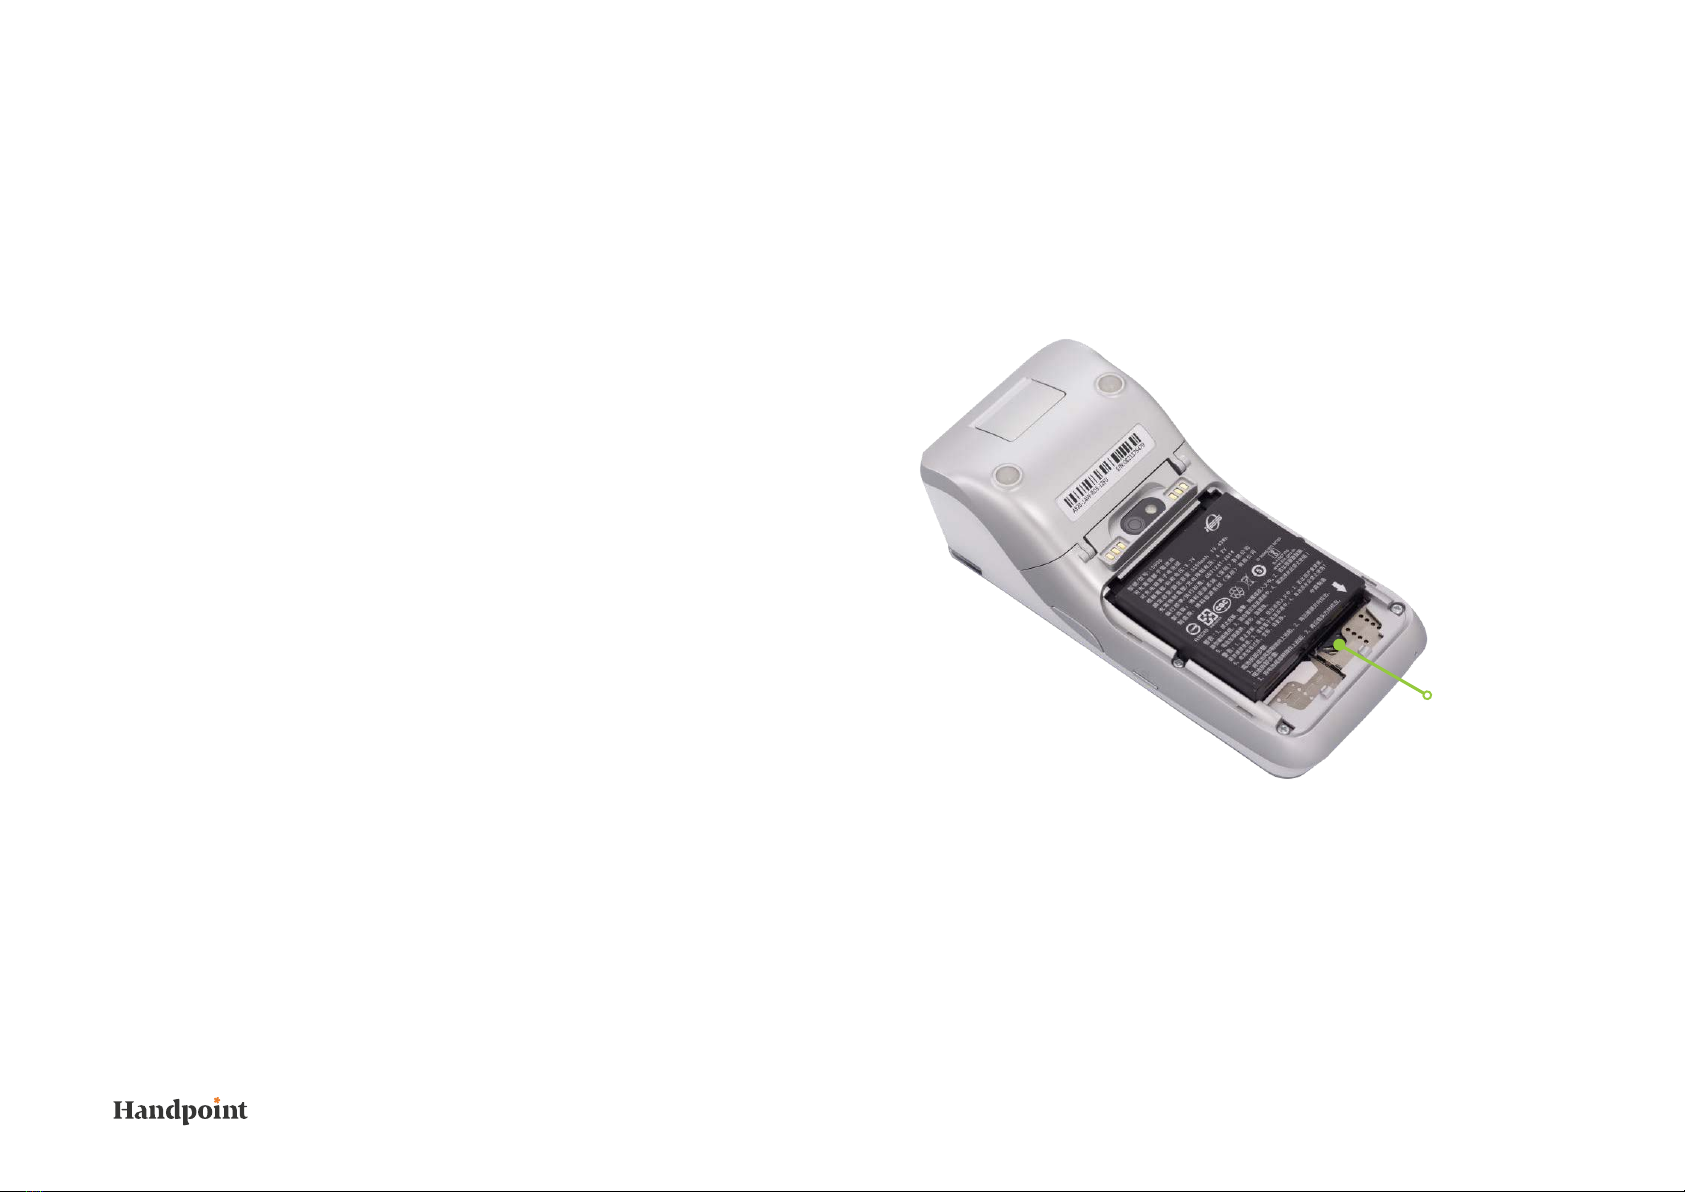
Cellular connectivity
You will be provided with a mini-SIM that is exclusively configured for
you and is likely to be pre-installed in your card reader.
To confirm if your SIM is already installed, please follow these steps:
1. Make sure your card reader is turned off using the power button.
2. Push the battery cover slide latch (at the back of the card reader) to
the right to open, remove the battery case (lifting from the bottom)
and take out the battery (also lifting from the bottom).
3. Once removed, you should see your SIM card in the SIM1 card
slot (on the left-hand side) otherwise insert it here (see the below
image).
4. Re-insert the battery and casing, after which you need to push the
cover slide latch back to the left.
To activate your cellular connectivity, you will need to follow the below
steps:
1. Turn on the card reader by pressing and holding the power button on
the right side for 2-4 seconds.
2. Select the Settings application and the following steps:
SIM slot

SmartPOS User Guide: PAX A920 | v01, 01 July 2021 |6
a. enter the password pax9876@@ and click “OK” (alternatively the
password could be 9876 depending on the hardware).
b. Select “More”.
c. Select “Cellular Networks”.
d. Select “Access Point Names”.
e. Select “+” (plus sign icon in the top-right corner).
f. fill in the following access point (APN) settings: MAVOCO
g. Select the drop-down, dotted icon (three dots icon in the top-right
corner)
h. Select “Menu”.
i. Select “Save”.
2. Battery
Before switching on your PAX A920, the card reader should be fully
charged. Make sure to complete the below steps before the first charge:
1. Push the battery cover slide latch (at the back of the card reader) to
the right to open.
2. Remove the battery case (lift from the bottom).
3. Lift out the battery (lift from the bottom).
4. Remove the battery protective strip from the battery connectors (this
is important).
5. Re-insert the battery and casing, pushing back the cover slide latch
to the left.
To charge the card reader, plug the micro USB connector to the micro
USB port on the left side of the terminal.
3. Security
Handpoint’s payment platform includes stringent P2PE (point to point
encryption) security that protects sensitive card data. As a merchant,
you’re responsible for the security at the point of sale, so be sure to
inspect your card reader carefully for indications of fraud at least once in
every three months. Look out for signs of tampering or substituted card
readers.
4. Printing
The PAX A920 includes an in-built printer for printing receipts with a
thermal paper roll.
Here are the steps you need to take to change the printer paper roll:
1. On the back of the card reader, pull down the paper lid release leaver
and take the whole lid casing away.
2. Remove the paper roll by simply pulling it out of the slot.
3. Insert the new thermal paper roll in the same slot with the glossy side
of the paper sheet facing out the top.
4. Pull out around 2 inches of the paper sheet and close the close over
it, until the lid snaps into place.
5. Tear off any excess paper.
Now your card reader is ready to produce receipts after a transaction.

SmartPOS User Guide: PAX A920 | v01, 01 July 2021 |7
5. Refunds
When you initially receive your PAX A920, you will notice that the refund option is disabled by default. To enable refunds on your terminal, please
contact [email protected] or call us at 08001123344. Follow the steps below to perform a refund on PAX A920:
Go into the “transaction
history” tab (at the bottom:
the second from the left).
Select the transaction that should be
refunded, click “refund” and confirm
your option by selection “OK”.
Enter the password (a merchant is asked
to create a password upon the first log-in:
this can be reset in the TMS.
Step 01 Step 02 Step 03

SmartPOS User Guide: PAX A920 | v01, 01 July 2021 |8
Enter the amount to refund (limited to the
total value of that sale transaction) and
select “REFUND”.
Prompt the customer to insert/swipe/
tap their form of payment to accept
the refund.
(optional) Resend the receipt.
Step 04 Step 05 Step 06
*The refund amount can be smaller or equal to the original transaction amount. Only one refund per original transaction is allowed.

SmartPOS User Guide: PAX A920 | v01, 01 July 2021 |9
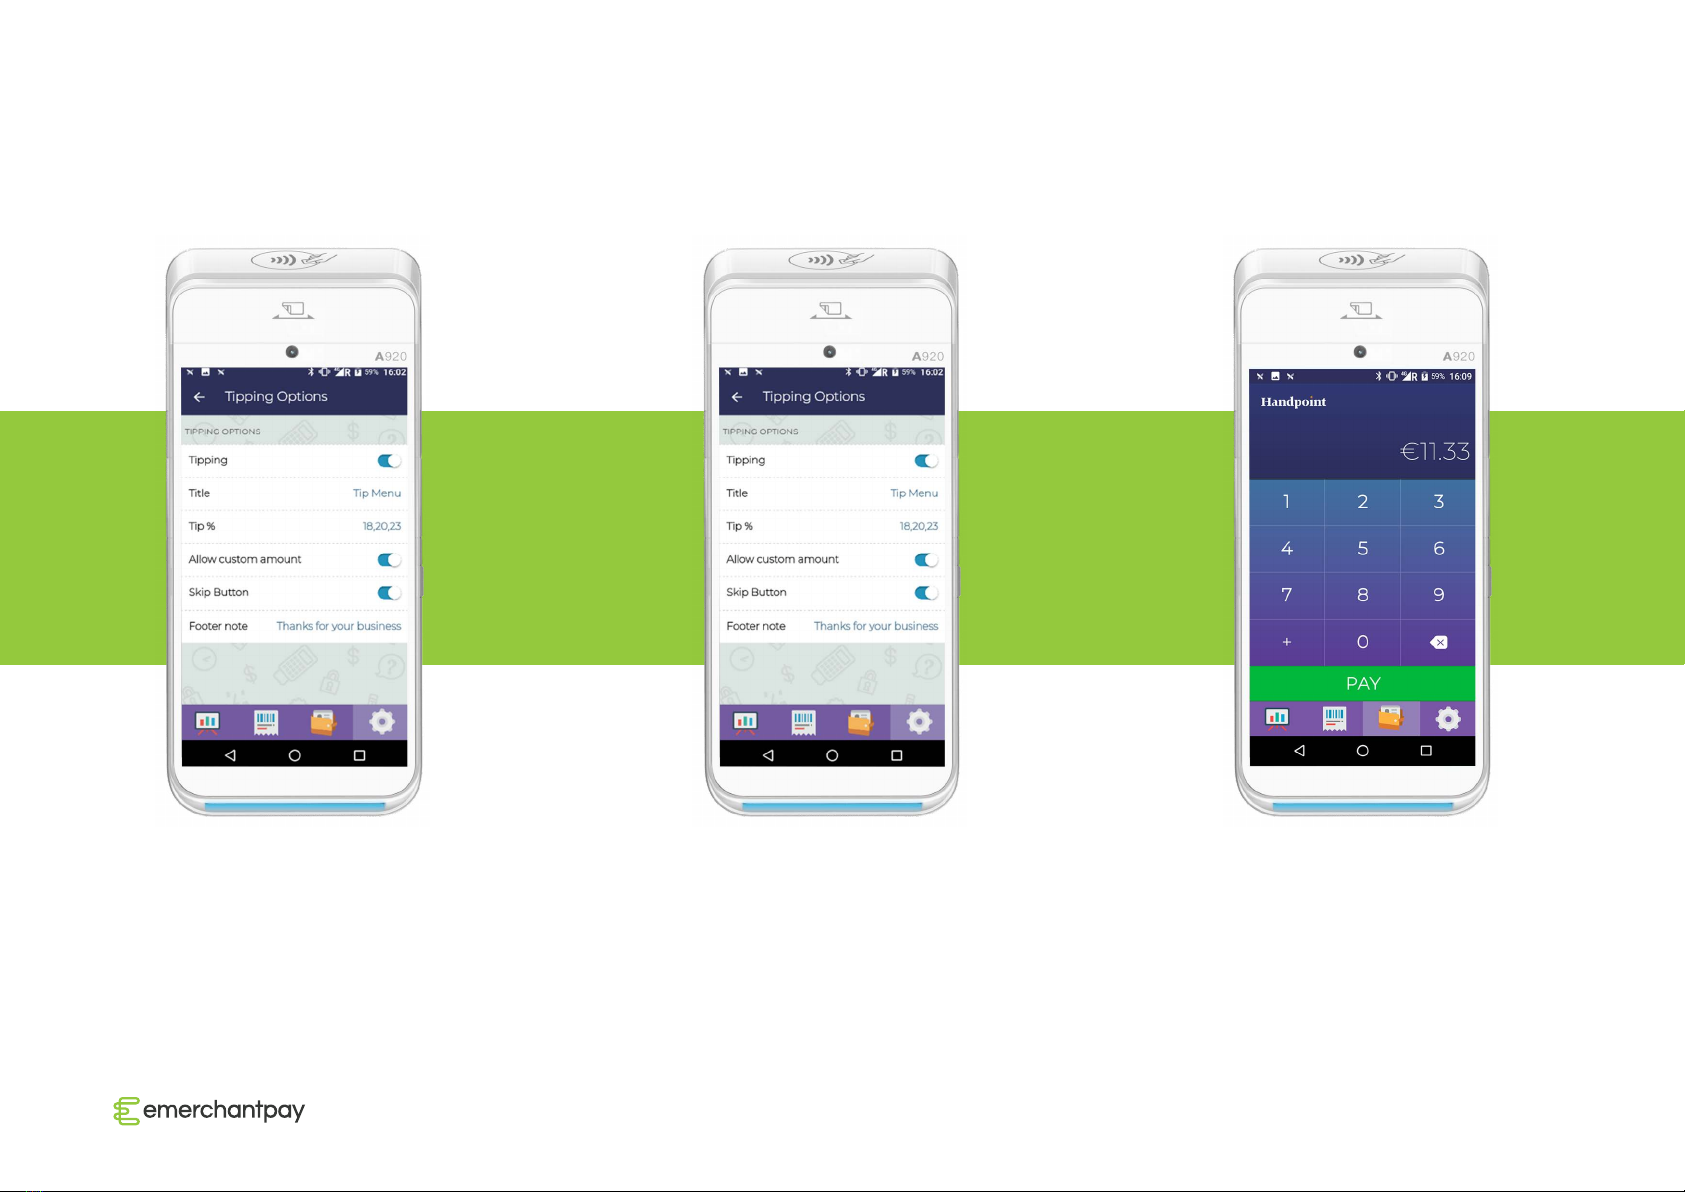
Go to “Settings” (the cogwheel icon
at the bottom: far-right) and select
“Tipping Options”.
Enable “Tipping”. To enable a percentage tip, click “Tip %”,
add your desired percentage options and
click “APPLY”.
Step 01 Step 02 Step 03
6. Tipping Options
Tipping options are available on your PAX A920. If you choose to enable tipping, customers can choose to tip based on a percentage and/or a
custom, flat amount. These options can work separately or together. To enable tipping on your device, follow these steps:
SmartPOS User Guide: PAX A920 | v01, 01 July 2021 |10
Enable the button “Allow custom
amount” for the option to choose
between a percentage tip or a custom
amount during the payment.
Enable “Skip Button” if you want customers to
be able to skip the tipping options altogether.
Your tipping options have now been finalized.
The next steps will describe the actual
transaction process when a tip is added.
Enter the amount of the transaction and
click “PAY”. The Payment Method page
will appear on your PAX A920 screen.
Select “Card and tip” for the option to add
a tip to the payment amount.
Step 04 Step 05 Step 06

SmartPOS User Guide: PAX A920 | v01, 01 July 2021 |11
The “Tip Menu” screen gives the option
to select a tip as a percentage of the total
amount or as a custom flat amount, or to
skip this stage altogether (depending on
your pre-selected settings). The tip will
automatically be added to the total amount.
If “Custom Amount” is selected, a keypad
will appear to enter the flat amount to be
tipped. The green tick button (bottom right)
will return you back to the main “Tip Menu”
page. Click “Continue” to pay.
Insert or tap the customer’s card to
finalize the transaction.
Step 07 Step 08 Step 09

SmartPOS User Guide: PAX A920 | v01, 01 July 2021 |12
The “AUTHORISED” screen signals that
the transaction has gone through. You
can now print a receipt(s).
After you complete a transaction, the
option “SEND DIGITAL RECEIPT” will be
available.
You will be able to send the receipt as
an email or message. You can fill either
of the fields or both and press “SEND”.
Step 10
7. How to send the receipt over email or phone
Step 01 Step 02

SmartPOS User Guide: PAX A920 | v01, 01 July 2021 |13
This option is also available for previous
transactions. Go to the transactions menu
and tap on the transaction you need the
receipt for.
Choose which copy of the receipt you want
to send and tap on it.
The device will show you the receipt for
the transaction. Scroll to the bottom of
the screen and you will find the options
for sending and printing the receipt.
Step 03 Step 04 Step 05

SmartPOS User Guide: PAX A920 | v01, 01 July 2021 |14
8. Analytics
The analytics tab is available in the far left-bottom
icon in the Handpoint application.
Step 06 Step 07
You will be redirected to the screen
for the email and phone number of
the recipient.
The recipient will receive email with the
information regarding the transaction.
Within the application environment, you can
quickly search for the total number of transactions
per day, week, month, or for custom dates.

SmartPOS User Guide: PAX A920 | v01, 01 July 2021 |15
9. Troubleshoot and FAQ’s
Questions Answers
Does my Handpoint PAX need to be connected to the same internet
network as my computer or tablet?
No. If your POS provider is integrated with a Handpoint PAX, you can
securely connect your POS software to your Handpoint PAX terminal
regardless of your terminal’s internet connection.
Do I need to have anything installed on my system to work with
Handpoint PAX terminals?
In theory no, however this is controlled by your POS software provider.
Please contact us at 08001123344 for more details.
I received my Handpoint PAX, but when I click on the icons, nothing
happens or the app just spins. What should I do?
Your terminal has not been connected to the WiFi, internet or SIM
network. You will need to connect it via WiFi or SIM. If that doesn't solve
the issue, please contact us at 08001123344.
It seems like my Handpoint PAX can only operate when the cable is
plugged in and my battery won’t charge.
Plastic tabs are probably covering the connection points of the battery.
Below are the steps you need to take:
1. At the back of the card reader, push the battery cover slide latch to the
right to open.
2. Remove the battery case (lift from the bottom).
3. Lift out the battery (lift from the bottom).
4. Remove the battery protective strip from the battery connectors (this
is important).
5. Re-insert the battery and casing, pushing back the cover slide latch to
the left.
Handpoint PAX says “Reader Not Assigned” The payment terminal has not been assigned to the merchant in the
Handpoint TMS. Please contact us at 08001123344.
Handpoint PAX says: “Server Not Available” Your internet network is unstable. Try to restart your router if you’re
connected to WiFi. If the problem persists or is limited to problems with
your terminal and none of your other internet-connected devices, Please
contact us at 08001123344.
SmartPOS User Guide: PAX A920 | v01, 01 July 2021 |16
Where is my POS software/app on my Handpoint PAX? Open the PAX Store icon or the Handpoint App icon on your PAX A920
landing screen.
Handpoint PAX says: Failed card reader authentication First, try to restart your POS application. If that doesn't work, go to the
terminal settings (pwd is pax9876@@ or 9876) → Apps → Handpoint
→ Storage → CLEAR DATA. If the problem persists, please contact us at
08001123344.
Handpoint PAX says: “Cloud connection unavailable” Please contact us at 08001123344.
My POS software says: “No device listening” Turn on or reboot the PAX terminal and make sure it is correctly
connected to the internet.
My POS software says: "Configuration update failed" This is most likely due to unstable internet connection. Restart the app
and your terminal to reset the connection. If this doesn’t work, please
contact us at 08001123344 for more details.
The cloud connection image on my Handpoint PAX is ORANGE and says
“Connected"
The orange colour indicates that the internet connection is unstable.
Restart the POS app to reset the connection. If you continue to see
an orange cloud connection screen, contact your internet provider to
check the connection. If the problem persists, please contact us at
08001123344.
Can I do a partial refund ? Yes, you can perform a partial refund.
Can I refund more than the original amount? No, you can refund only the amount of the original transaction or less.
Can I refund to a different account/ card than the one made for the
transaction?
No, the refund can only be made to the original account/ card.
Does the customer needs to be present in the store to receive a refund? Yes.
Is the Refund option enabled by default on my terminal? No, the refund option is disabled by default.If you would like the
08001123344.
How can I receive my refund password for the terminal? If the refund option is enabled on your terminal, you will be asked to
create a password upon the first login. If you need the password to be
reset, call us at 08001123344.

SmartPOS User Guide: PAX A920 | v01, 01 July 2021 |17
More questions? We’re here to help!
Contact us at 08001123344 or email us at helpdesk@emerchantpay.com.
emerchantpay.com

Copyright © 2021, emerchantpay ltd. emerchantpay limited is registered as an Authorised Electronic Money Institution with Financial Conduct Authority (FCA United Kingdom).
emerchantpay is part of emerchantpay group. emerchantpay limited is a principal member of VISA and Mastercard and an acquirer in its own right. emerchantpay corporation is
a registered ISO/MSP of Elavon, Inc. Atlanta, GA, a wholly-owned subsidiary of U.S. Bancorp. The text, grahics, links and / or other terms are provided as an ‘as is’, ‘as available’
basis and are protected by copyright. ©emerchantpay 2020. All rights reserved.
Other manuals for Emerchantpay PAX A920
1
Other Handpoint Touch Terminal manuals


