Handsome Cycles Mud Butler Fender User manual
Mud Butler Fender
installation guide

Duval
1620 Central Ave. NE, Ste.157, Minneapolis, MN 55413
Thank you for purchasing
Mud Butler fenders!
Before you get started, please verify that you have the correct size
for your tires, and that your frameset is designed to accept full-
coverage fenders like these. Mud Butler fenders were designed
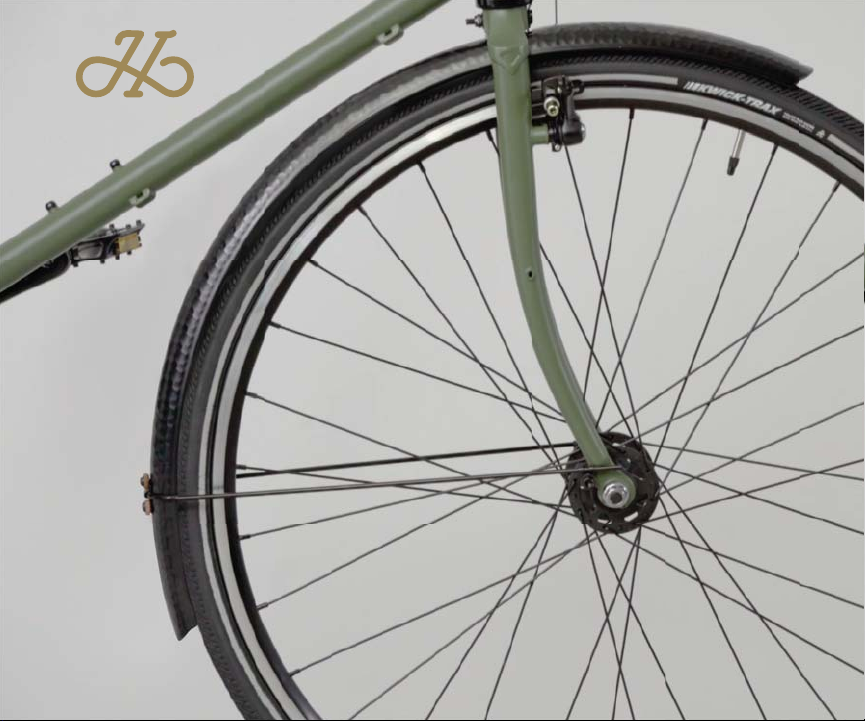
to mount easily to most 700c wheeled bikes designed to take
bolted-on full-coverage fenders, but some bike manufacturers don’t
always put the most forethought into their frame design for fender
mounting. When in doubt, consult a qualified mechanic or check with
us at Handsome before riding your bike with our fenders.

Failure to install our fenders properly and safely can result in serious
injury or death.
Recommended Tire Sizes: 700c tire required
35mm Mud Butler Fenders: 700 x 18 - 25c (and some smooth, low-profile
28c tires)
45mm Mud Butler Fenders: 700 x 26 - 35c (and some smooth, low-profile
38c tires)
Please follow these directions, but note that for
installation on some bikes, occasionally you may need to get crafty.
At the end of this booklet you will find a Troubleshooting / Tips and
Tricks section. We don’t pretend that all scenarios are covered here.
If something comes up, we would love to help.
We also invite you to follow along with our installation
video. Find it at: http://bit.ly/installfender
HARDWARE
INCLUDED
TOOLS
NEEDED
A 4 PHILLIPS HEAD BOLTS
B 4 LEATHER WASHERS
C 2 OVER STRUT MOUNT PLATES
D 2 UNDER STRUT MOUNT PLATES
E 2 STRUTS
F FRONT FENDER
SHORTER WITH PREINSTALLED TAB
G REAR FENDER
LONGER FENDER
H 1 STANDARD FORK CROWN
THROUGH BOLT 50MM LONG
I 2 LARGER ALUMINUM WASHERS
J NUT
PREASSEMBLED
L 6 SHORTER HEX HEAD BOLTS
M 6 SMALLER WASHERS
N 4 PINCH SLEEVES
O 1 PVC COATED BRIDGE CLIP
P LONGER HEX BOLT WITH CORK
Q LONGER HEX BOLT
25MM Use when mounting
rack + fender to the same hole
K 1 LONGER FORK CROWN
THROUGH BOLT 70MM LONG
Use when HIs too short
for your crown fork
4MM ALLEN
PHILLIPS HEAD
SCREWDRIVER
10MM SOCKET
CUTTING TOOL
NEEDLE NOSE
T
SCREWDRIVER

01
Prepare your
workspace
1
Make sure you have enough space to work.
Ideally, your bike is in a bike stand off the ground or secured in a way
that you can work on it with the wheels off. In a pinch, you can flip
your bike upside down to balance it on the saddle and handlebars.
2
Lay out and organize all of your fender hardware.
Make sure you have all of the pieces listed on the previous page.
3
Undo (open) both of your brakes and remove both wheels from your bike.
Set them aside for now. If you have hydraulic disc brakes, insert the
plastic pad spacers so that the calipers do not clamp down without the
rotors in them.

02
Install the struts
to your fenders
4
Put (1) of the leather washers Bonto (1) of the Phillips head bolts A.
Repeat 4x.
5
Pick up the front fender. Align (1) of the under strut mount plates Dto
the pre-drilled holes in the fender so that the protruding part of Dis
facing where the tire will be.
6
Place (1) of the struts Eover the fender so that it is in the middle of
the pre-drilled holes and centered on the fender.
A 4 PHILLIPS
HEAD BOLTS
B 4 LEATHER
WASHERS
D 2 UNDER STRUT
MOUNT PLATES
E 2 STRUTS

7
Place (1) of the over strut mount plates Cover the strut so that it
aligns with the pre-drilled holes. Using (2) of the Phillips head bolts A
with the leather washer Bon it, attach the strut Eto the fender. Make
sure the strut Estays centered over the fender. Screw the bolts all of
the way until snug.
8
Repeat steps 5-7 with the rear fender.
A 4 PHILLIPS
HEAD BOLTS
HEAD
BOLTS
B 4 LEATHER
WASHERS
C 2 OVER STRUT
MOUNT PLATES
E 2 STRUTS

03
Install the front
fender to your fork
If your bike has caliper style brakes, you will need to remove the
brake, and use the post of the brake to mount the front fender.
In this case, skip steps 9 & 11.
9
Decide which fork crown through bolt Hor Kwill work best with your
fork. The bolt should go all of the way through with enough showing on
the back side to fully screw on the nut J. The bolt should not extend out
the back side so far that it touches the bike frame. If your fork crown
does not have a hole all of the way through, but has a threaded mounting
hole, you may need to use (1) of the shorter hex head bolts Land (1) of
the smaller washers Minstead.
10
Position the front fender in the fork so that the shorter side faces forward
and the pre-installed tab on the fender is aligned with the hole in your
fork crown.
H 1 STANDARD FORK
CROWN THROUGH
BOLT 50MM LONG
J NUT
K 1 LONGER FORK
CROWN THROUGH
BOLT 70MM LONG
L 6 SHORTER HEX
HEAD BOLTS
M 6 SMALLER
WASHERS

11
Install (1) of the larger aluminum washers Ion either the standard fork
crown through bolt Hor the longer fork crown through bolt K, depending
on which works best with your fork crown.
12
If you have caliper style brakes, use the post on the brake; otherwise,
push the selected through bolt with washer through the pre-installed tab
on the fender, through the hole in the crown of your fork and all the way
through.
I 2 LARGER
ALUMINUM WASHERS
K 1 LONGER FORK
CROWN THROUGH
BOLT 70MM LONG
H 1 STANDARD FORK
CROWN THROUGH
BOLT 50MM LONG
H I J COME PREASSEMBLED
NOTE:

15
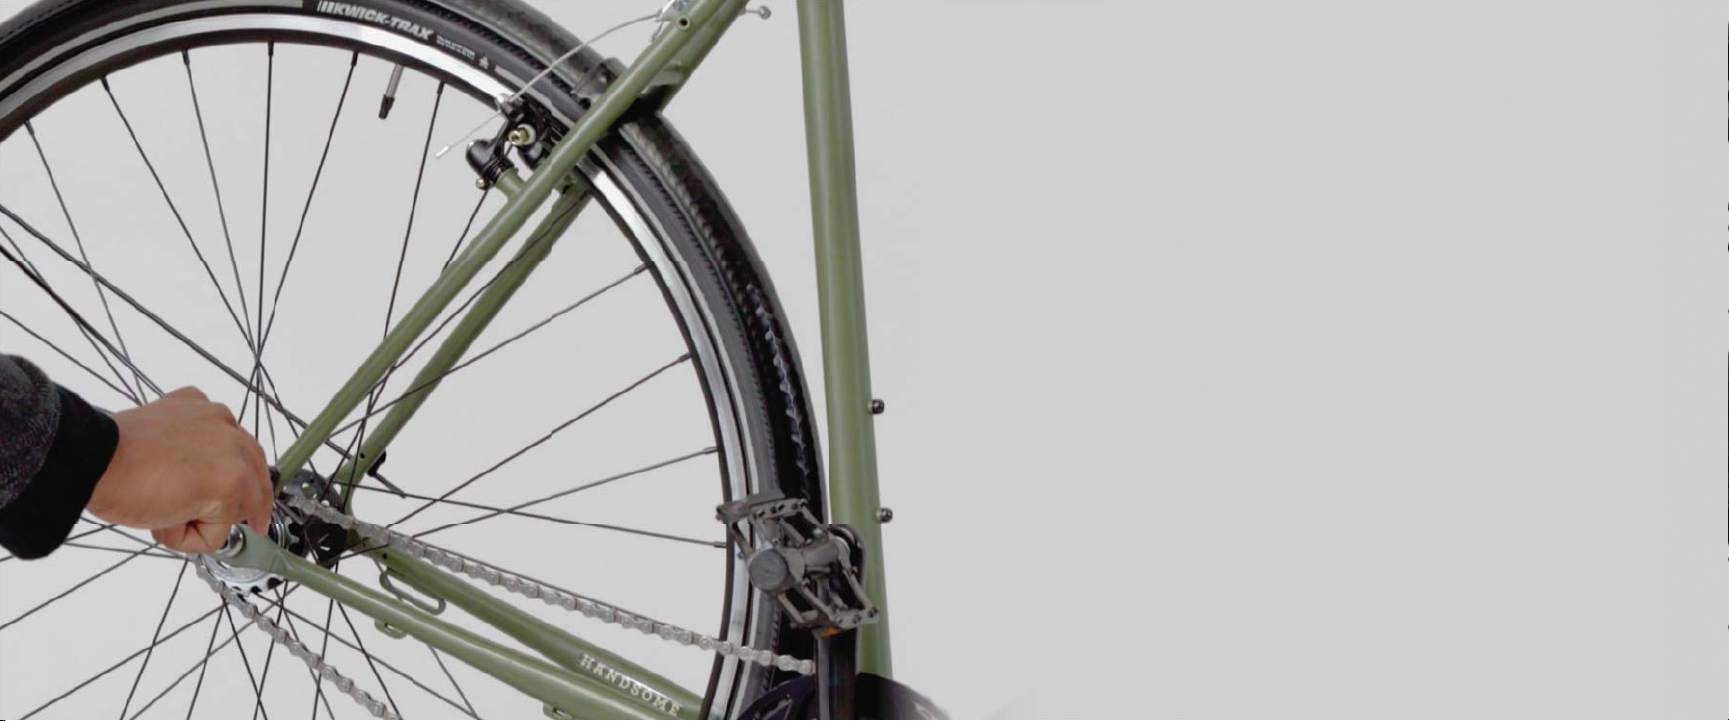
Fasten each side of the strut to the mounts near your front axle. Place
(1) of Mover (1) of Land insert into the side of Nthat has the clips
sticking up. Repeat 2x. Slide one of the combination M, L &N over the
end of the strut and line-up with the threaded mounting hole on your fork
near the front axle. Install the bolt into the threading a few turns with a
4mm hex wrench, but do not install it all of the way tight, just enough to
hold it in place. Repeat for the other side.
16
Center your fender over the front wheel. Check the spacing of the fender
around your tire. There should be no less than 12mm (½ inch) of space
between the tire and the inside of the fender at all points.
13
With your fingers, install (1) of the larger aluminum washers Ion the
back side of the bolt going through the pre-installed tab on the fender
and the fork crown. Then with your fingers, install the nut Juntil finger-
tight. Holding the front side of the bolt with one of the 10mm wrenches,
tighten down the nut Jwith the other 10mm wrench (a small adjustable
wrench may also be used). Note: Make sure that the fender tab does not
press against your headset lower cup or bearing, interfering with your
steering. If needed, you may bend down the top of the fender tab to clear
the headset.
14
Install your front wheel into the fork. Make sure that the fender struts are
free and not between the wheel and the fork.
L 6 SHORTER HEX
HEAD BOLTS
M 6 SMALLER
WASHERS
N 4 PINCH SLEEVES
I 2 LARGER
ALUMINUM WASHERS
J NUT
H I J COME PREASSEMBLED
NOTE:

Always check your fenders for
deformation or loose bolts.
Riding with loose or misadjusted fenders can
cause harm or serious injury.
17
With the fender centered over the tire and the proper gap all the way
around, tighten the bolts that you installed in step 14 with a 4mm hex
wrench. Make sure the fender is tight to the fork, that it is centered over
the tire, and that there is proper spacing.
18
If the struts stick out too far, you may need to cut down the strut with an
angle grinder or hacksaw. To make the cuts, you’ll need to mark the strut,
then remove the strut, make the cut, and then re-install.
DO NOT cut the strut too short!
19
Spin the front wheel. Make sure there is no rubbing and that the tire
clears under the fender easily. If there is any rubbing, loosen the bolts,
readjust, and retighten. Reattach your front brake and again make sure
that the wheel spins freely and that the brake pads hit the rim at the
same time on each side. If needed, readjust your brake.

04
Mount the rear fender
to your bike frame
20
Put (1) of Lonto (1) of M. Then, mount the PVC coated bridge clip O
to the seatstay bridge on your frame using a 4mm hex wrench. If your
bike uses caliper style brakes, you may remove your rear brake and then
use the post of the brake to mount the bridge clip. Make sure that the
bridge clip does not interfere with your brake. If possible, positioning
the bridge clip so that the tabs are not directly under the brake will help
when installing the fender.
21
If your bike has decent tire clearance and longer chainstays, you may
want to use the provided cork and longer bolt P, to space out your
fender at the chainstay bridge so that it sits closer to the tire (go to
step 22). If your bike has tight clearance, you may not need to use the
cork spacer and will instead use (1) of Lwith (1) of Minstalled on it
(go to step 23).
L 6 SHORTER HEX
HEAD BOLTS
M 6 SMALLER
WASHERS
O 1 PVC
COATED
BRIDGE CLIP
P LONGER HEX
BOLT WITH
CORK

25
Pull the fender up and center it into the PVC coated bridge clip. Using
your fingers, fold the tabs of the bridge clip around the fender edges as
tight to the fender as you can. When you are sure the fender is centered
in the clip, crimp down the tabs underneath with needle-nose pliers.
You want the tabs to compress against the inside of the fender as tightly
as possible.
26
You are ready to reinstall your rear wheel. Put the wheel back in the
dropouts, center it and tighten it in place.
22
Remove the bolt from the cork P. Install (1) of Monto the bolt. Put the
bolt with washer through the slot on the rear fender from the inside.
Install the cork back onto the bolt. Now skip to step 24.
23
Install the bolt Lwith washer Minto the slot on the rear fender from the
inside.
24
While it is still through the fender, align and install the bolt into the
threaded hole on the chainstay bridge near your bottom bracket using a
4mm hex wrench. If you are using the cork, be sure not to overtighten the
bolt. The cork can deform and split. The rear fender will now be attached
to your frame, but will sag if you let it go. Hold it in place while you go to
step 25.
L 6 SHORTER HEX
HEAD BOLTS
M 6 SMALLER
WASHERS
P LONGER HEX BOLT
WITH CORK

27
With the wheel now in place, you should have proper clearance between
the tire and the fender at the chainstay bridge and at the seatstay bridge
under the fender. You need at least 12mm (½ in) of space between the
tire and the underside of the fender. If you have less than the required
clearance, readjust the fender, or perhaps your tire is too large for our
fenders with your frame design. When in doubt, contact us or a qualified
mechanic for advice.
28
Fasten each side of the rear strut to the mounts near your rear axle.
Place (1) of Mover (1) of Land insert into the side of Nthat has the
clips sticking up. Repeat 2x. Slide (1) of the combination M, L &N
over the end of the strut and line-up with the threaded mounting hole
on your frame near the rear axle. Install the bolt into the threading a few
turns with a 4mm hex wrench, but do not install it all of the way tight,
just enough to hold it in place. Repeat for the other side.
L 6 SHORTER HEX
HEAD BOLTS
M 6 SMALLER
WASHERS N 4 PINCH SLEEVES
29
Center and space the rear of the fender over your tire. If you cannot move
the fender into place, back off the bolts a turn or two from step 28 so that
you can move the struts. The fender should be evenly spaced around the
tire with no less than a 12mm (½ in) gap anywhere.
30
Once the fender has been positioned properly, thread in the struts, fixing
bolts all of the way tight. The fender should not be able to move, and
the struts should not slide in the clips. If something is loose, check the
hardware, retighten, and check again for movement.
31
The struts may be too long for your frame. If needed, you may bend
the extra end of the struts out of the way, or, very carefully cut off the
excess amount of struts. Note that the best way to cut the struts, without
damaging your frame or the fenders, is to mark where they need to be cut,
remove them from the bike, cut them with an angle grinder or hacksaw,
and reinstall them on your bike. DO NOT cut your struts too short!

05
Safety check
32
Spin the rear wheel to make sure that it clears the fender without rubbing
anywhere. It should be centered in your frame and have equal clearance
on the fender all the way around.
33
Reattach your rear brake. Make sure that the wheel spins freely and that
the brake pads hit the rim at the same time on both sides. If needed,
readjust your rear brake.
34
Your fenders are now installed on your bike. Take one more look around
the fenders to make sure that they are securely fastened everywhere
and that there are no loose bolts. They should have minimal rattle and
not touch the tires anywhere. If something doesn’t look or feel correct,
or if you have any questions about the safe installation of your fenders,
contact a qualified mechanic before use.

06
Troubleshooting /
Tips and tricks
Problem:
Fenders aren’t sitting evenly around tires.
Solution:
Sometimes it helps to “shape the fenders” by hand a little for appearance
or even spacing.
Commonly, the front portion of the front fender will sit a little high and
the fender spacing could be a little uneven with the fender closer to the
tire near the downtube. You can press down on the front end of the front
fender, compressing it to the tire, and then let go. It should bounce back
away from the tire but sit slightly closer and at the same time give a little
more space over the tire near the downtube.
Also, during installation, or when parked, the fenders might get pushed
from side to side and will not sit centered over the tire. Tweak the fender
back so that it sits in the correct position. Be careful not to overbend the
fenders or the struts. If you see any structural problem with the fenders
or hardware, correct the problem or remove the fenders before riding
your bike.

Problem:
My frame doesn’t have the proper threaded mounting holes
or any mounts at all.
Solution:
In some cases, you can get creative to mount fenders, but in every case,
it should be done with proper hardware.
We provide the standard hardware needed to mount our fenders to
bikes designed for full-coverage fenders and proper tire clearance. In
some cases, bikes will have mounting holes for fenders, but they are not
threaded. In that case, you will need nuts on the back side of the bolts
we provide, or you will need to purchase bolts and nuts from a hardware
store. Because of the numerous styles of bikes from many manufacturers,
we cannot provide all the hardware needed in every situation.
Problem:
I only have one set of mounting holes in the rear and I want
to use a rear rack as well.
Solution:
You can mount the rack and the fender struts to the same hole. We
provide a set of longer bolts (Q) for this purpose. Mount the rack against
the frame and the strut pinch sleeves on the outside of the rack support.
When using the longer bolts, make sure that they do not come out the
back side of the frame and interfere with your drivetrain.

Problem:
My frame has a mounting hole on the underside of the
seatstay bridge, not on the front and back.
Solution:
Our rear PVC coated bridge clip, in many cases, can still be used.
Carefully bend the tab on the bridge clip down 90 degrees. Then, mount
the bridge clip to the underside of the seatstay bridge with the bridge clip
facing backward. Mount the fender like normal, angling down the bridge
clip to meet the fender when you pull it up.
Problem:
I cut my struts too short.
Solution:
We sell replacement strut sets. You’ll need to choose which color, and
which size you need.
http://bit.ly/fenderparts
Problem:
I lost some or all of my mounting hardware.
Solution:
We sell replacement hardware kits.
Go to: http://bit.ly/fenderparts

Warranty
Your Mud Butler fenders come with a 1-year warranty from the date of purchase.
Warranty issues will be determined by and remedied directly through Handsome Cycles.
Original receipt with purchase date is required to process your warranty replacement.
Defective parts will be replaced immediately after review by Handsome Cycles.
along with a copy of the original receipt, and your full contact info, to start the process.
Returns & Exchanges
In the event that your Mud Butler fenders need to be returned or exchanged, please
refer to the return and exchange policies of the vendor you purchased them from.
Handsome Cycles accepts returns or exchanges on all direct purchases within 30 days.
Product must be in unused, like-new condition, with all parts and packaging, to be
considered for a full refund or an even exchange. Repackaging or parts replacement
fees will be applied to damaged or incomplete fender sets. Handsome will pay the
shipping cost of returns and exchanges on shipments originating within the United
States. International customers are required to arrange for and pay return shipping.
1620 Central Ave. NE, Ste.157, Minneapolis, MN 55413
Popular Bicycle Accessories manuals by other brands


Specialized
Specialized Elite CylcoComputer user manual

Sigma
Sigma BC 16.16 manual

Playcore
Playcore Dero Setbacks installation instructions

VDO Cyclecomputing
VDO Cyclecomputing x3dw instruction manual

Cateye
Cateye RAPID X2 manual

buratti meccanica
buratti meccanica Clorofilla Trail Use and maintenance manual


