HandyTech Active Braille User manual

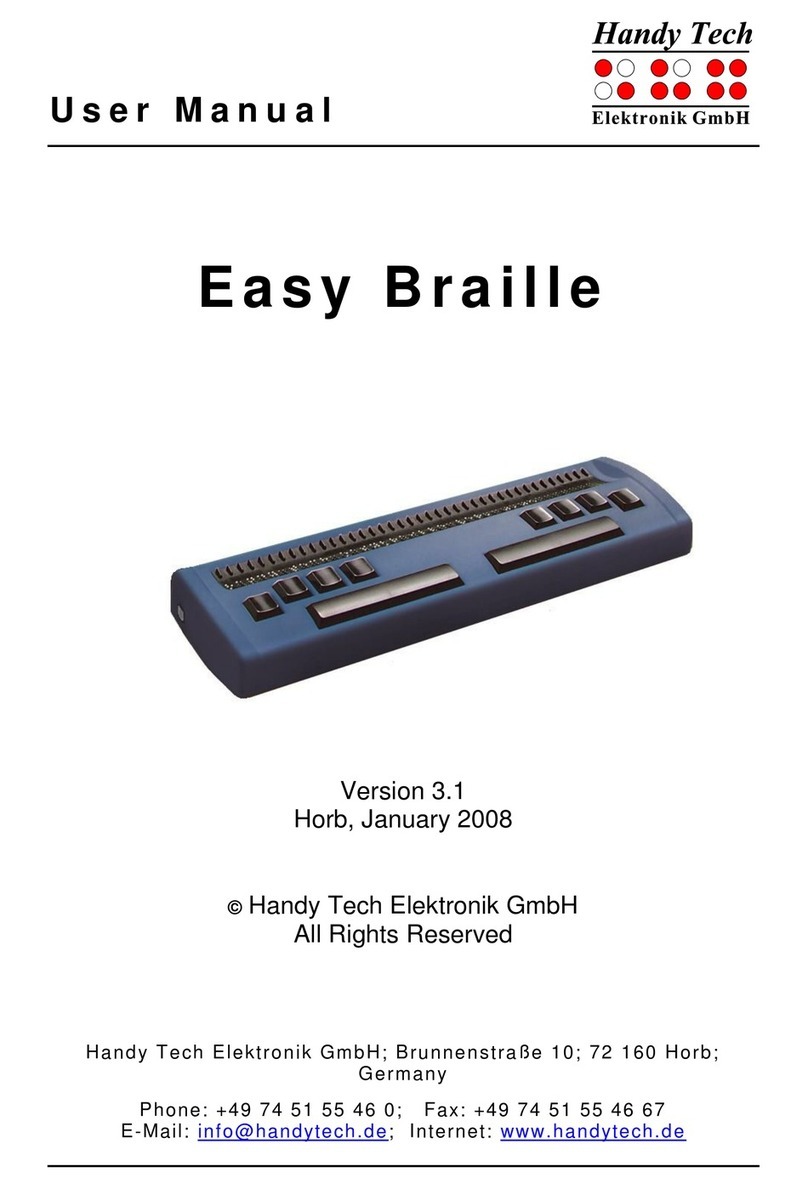
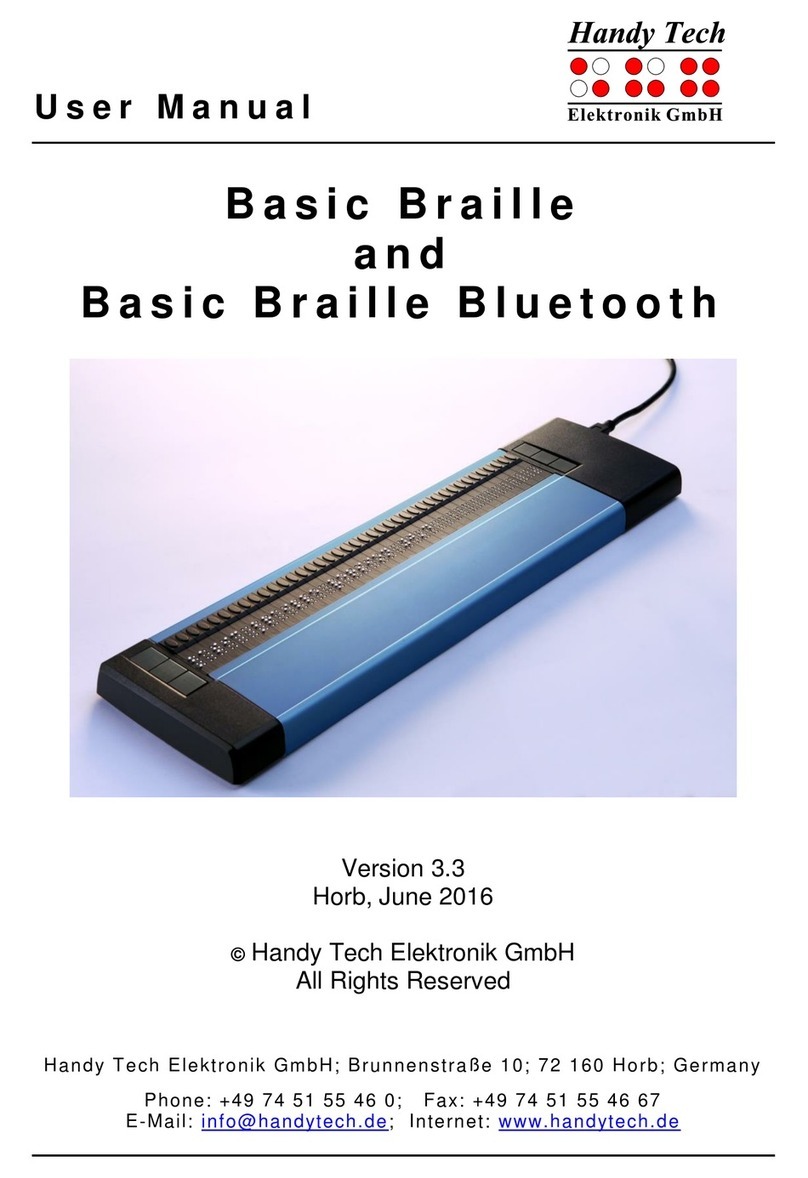
HandyTech
ElektronikGmbH
Active Braille
Table of Contents
Page 2
Table of Contents
1GENERAL 7
1.1 Preface 7
1.2 Active Braille at a Glance 7
1.3 Conventions Used in This Manual 9
2INSTALLATION 10
2.1 Package Contents 10
2.2 Software Installation 10
2.3 Connecting the Power Supply 11
2.4 Connecting the Interface Cable 12
2.5 Connecting a external USB keyboard 12
2.6 The Carrying Case 12
2.7 Installation of the Bluetooth Tie-In 13
2.7.1 Bluetooth-PC Tie-In 13
2.7.2 Bluetooth Apple iOS Device Tie-In 14
2.7.3 Bluetooth-Cell Phone Tie-In 14
2.8 Technical Specifications 15
3START UP 16
3.1 Version Information 16
3.2 Turning the Power On 16
3.3 Basic Operation 17
3.3.1 Chords 17
3.3.2 Signal Tones 17
3.3.3 System Messages 17
3.3.4 Check Boxes 18
3.3.5 Radio Buttons (1 of x) 18
3.3.6 System Files 18
3.3.7 Energy Saving Features 18
3.3.8 The SAVE Mode 19
4QUICK START 20
4.1 The Active Braille as Braille Display 20
4.2 The Active Braille as Notepad 20
4.2.1 Navigating the Menu 20
4.2.2 Writing a Note 21
4.2.3 Saving a Note 21
4.2.4 Opening a File 21
4.2.5 Transferring data between the Active Braille and a PC 22
4.2.5.1 Transferring a File from the Active Braille to the PC 22
4.2.5.2 Transferring a File from the PC to the Active Braille 22
5OPERATION OF THE ACTIVE BRAILLE 23
5.1 The Menu System 23
5.1.1 File (F) 23
5.1.1.1 New file 23
5.1.1.2 Previous file 23
5.1.1.3 New Folder 24
5.1.1.4 File and Folder list 24
5.1.2 Calculator (A) 26

Active Braille
Table of Contents
HandyTech
ElektronikGmbH
Page 3
5.1.3 Scheduler (S) 28
5.1.3.1 Entering a New Appointment (New Entry) 29
5.1.3.2 Entering and Editing Appointments 29
5.1.3.3 Entering Appointments with Variables (Recurring Appointments) 30
5.1.3.4 A Few Notes on Entering Appointments 31
5.1.3.5 The Appointment Schedule 31
5.1.3.6 Full Text Search within Appointments 33
5.1.3.7 Appointment Editing Menu 33
5.1.3.8 Information Regarding Past Appointments 34
5.1.3.9 Resources Management 34
5.1.3.10 Backing up the scheduler data 34
5.1.4 Clock (C) 35
5.1.4.1 Display date/time (D) 35
5.1.4.2 set Alarm (A) 35
5.1.4.3 set Clock (C) 35
5.1.4.4 Stop watch (S) 36
5.1.4.5 count down (O) 36
5.1.5 MusikBraille (M) 36
5.1.6 Games (G) 37
5.1.6.1 BrailleHunt (B) 37
5.1.6.2 Hangman (H) 38
5.1.7 PC mode (P) 38
5.1.8 Braille character sets (B) 38
5.1.8.1 Creating a Braille Character Set 38
5.1.8.2 Loading Braille Character Sets 39
5.1.8.3 Selecting and Activating Braille Tables 39
5.1.8.4 Delete selected braille set (D) 40
5.1.9 Info (I) 41
5.1.9.1 Memory usage (M) 41
5.1.9.2 Battery statistics (B) 41
5.1.9.3 Keyboard layout (K) 42
5.1.9.4 Serial number (S) 42
5.1.9.5 Versions (V) 42
5.1.9.6 System information 43
5.1.10 Options (O) 43
5.1.10.1 6 dots braille (6) 43
5.1.10.2 hotkeys Activate objects (A) 43
5.1.10.3 Highlight hotkeys (H) 44
5.1.10.4 show system files (Y) 44
5.1.10.5 Folders first (O) 44
5.1.10.6 Quick entry (Q) 44
5.1.10.7 show file attributes (B) 44
5.1.10.8 auto switch external keyboard (X) 44
5.1.10.9 Bluetooth on (L) 45
5.1.10.10 Switch Bluetooth on/off automatically(W) 45
5.1.10.11 Startup mode (S) 45
5.1.10.12 Tone signals (T) 46
5.1.10.13 Date/time format (D) 46
5.1.10.14 Input indication (I) 46
5.1.10.15 dot firmness (F) 47

HandyTech
ElektronikGmbH
Active Braille
Table of Contents
Page 4
5.1.10.16 atc sensitivity (E) 47
5.1.10.17 standby (N) 47
5.1.10.18 Restore factory defaults (R) 48
5.2 The Editor 49
5.2.1 Overview of Editor Functions 49
5.2.2 Dialogs and Confirmation of Actions 49
5.2.3 Entering and Deleting Text 50
5.2.4 Reading Text 50
5.2.5 ATC within the Editor 51
5.2.6 Moving the Cursor 51
5.2.7 Editing Modes (SPC+2 4 = Chord i) 52
5.2.8 Calculator function 53
5.2.9 Status Display (SPC+2 3 4 7 = Chord S) 53
5.2.10 Set Mark (TU+TD) 53
5.2.11 Jump to Mark (SPC+1 3 4 = Chord m) 54
5.2.12 Delete Mark (TU+TD, Select Name, SPC) 54
5.2.13 Block Functions 54
5.2.13.1 Marking the Beginning of a Block [SPC+TRC] 55
5.2.13.2 Copy (SPC+1 4 = Chord c) 55
5.2.13.3 Cut (SPC+ 1 3 4 6 = Chord x) 55
5.2.13.4 Paste (SPC+1 2 3 6 = Chord v) 56
5.2.13.5 Exchange Mark and Cursor (SPC+7 8) 56
5.2.13.6 Deleting a Text Block (SPC+ 1 3 4 6 7 = Chord X, SPC+1 2 = Chord b)56
5.2.13.7 Saving a Block to a File (SPC+2 3 4 = Chord s) 57
5.2.14 Searches 57
5.2.14.1 Incremental Search (SPC+1 2 4 = Chord f) 57
5.2.14.2 Buffered Search 57
5.2.14.3 Backward Search (SPC+1 2 4 7 = Chord F) 58
5.2.15 Replace (SPC+1 2 3 5 = Chord r) 58
5.2.16 Opening Additional Files 58
5.2.17 Switching Between Open Files (SPC+5 6 8 or SPC+2 3 7) 59
5.2.18 Suspending the Editor (SPC+1 2 3 4 5 6) 59
5.2.19 Saving Files (SPC+2 3 4 = Chord s) 60
5.2.20 Closing a File and Quitting the Editor (SPC+1 5 = Chord e) 61
5.2.21 Activating PC Mode from the Editor (SPC+1 2 3 4 = Chord p) 61
5.2.22 Help (SPC+1 2 5 = Chord h) 61
5.2.23 The Editor's Setup Menu (SPC+1 3 6 = Chord u) 62
5.2.23.1 Window Scrolling (Global) 62
5.2.23.2 Scroll time (Global) 63
5.2.23.3 Indicate empty lines (Global) 63
5.2.23.4 Automatic scrolling (Global) 63
5.2.23.5 Dialog Timeout (Global) 63
5.2.23.6 Warn Timeout (Global) 63
5.2.23.7 Result position [c] or [e] 64
5.2.23.8 Keep expression [c] or [e] 64
5.2.23.9 Find Exact (Global) 64
5.2.23.10 Margin Action (Global) 64
5.2.23.11 Right Margin (Global) 65
5.2.23.12 Word Wrap (Global) 65
5.2.23.13 Tab Mode (Global) 65

Active Braille
Table of Contents
HandyTech
ElektronikGmbH
Page 5
5.2.23.14 Tab Stops (Global) 65
5.2.23.15 Tab Width (Global) 66
5.2.23.16 Line End (Individual File) 66
5.2.23.17 Insert Cursor (Global) 66
5.2.23.18 Edit Mode (Individual File) 66
5.2.23.19 Scroll Speed (Global) 67
5.2.23.20 Saved Position (Individual File) 67
5.2.23.21 Display Mode (Individual File) 67
5.2.23.22 Step Size (Global) 67
5.2.23.23 Match Column (Global) 67
5.2.24 Important Instructions Regarding the Editor 68
5.3 Controlling the PC from the Active Braille's Keyboard [SPC+1 2 7] (Chord B)69
5.3.1 Table of Key Commands for Controlling the PC 69
6EXTERNAL KEYBOARD 72
6.1 General 72
6.2 Keyboard Keys 73
6.2.1 Alphanumerical Character Inputs 73
6.2.2 Numerical Pad 73
6.2.3 Function Keys 73
6.2.4 Navigation Keys 73
6.2.5 Special Keys 73
6.2.6 Status Indicators 74
7THE ACTIVE BRAILLE AS BRAILLE DISPLAY 75
7.1 Screen reader using Windows, Example Window-Eyes 75
7.1.1 Overview 75
7.2 Screen readers using Windows, Example JAWS 76
7.2.1 Overview 77
7.3 Screen reader using Windows, Example Hal/SuperNova 79
7.3.1 Overview 79
7.4 VoiceOver: Screen reader for Apple iOS Devices 81
7.5 TALKS&ZOOMS: Screen reader for Mobile Telephones 82
7.5.1 Quick Start 82
7.5.2 List of Identification Letters 83
7.5.3 List of Braille Commands 83
7.5.4 Useful Tips for Using TALKS&ZOOMS 84
8OPERATION SETTINGS FOR HANDY TECH BRAILLE DISPLAYS 86
8.1 Connection 86
8.2 ATC 87
8.3 Status Cells 87
8.4 Key Actions 88
8.4.1 Key Lock 88
8.4.2 Fast Keys 88
8.4.3 Repeat Keys 88
8.5 Miscellaneous 89
8.6 Info 89
9ACTIVE TACTILE CONTROL (ATC) 90
9.1 ATC Assistant for Reading or Learning 91
9.2 Tips for Utilizing ATC to Learn Braille 92
9.3 Tips for Utilizing ATC for the Experienced Braille Reader 93
9.4 ATC-Monitor Settings 94

HandyTech
ElektronikGmbH
Active Braille
Table of Contents
Page 6
10 BATTERY MANAGEMENT 95
10.1 Types of Batteries 95
10.2 Battery Charging 95
10.3 Battery Capacity Display 96
10.4 Automatic Recognition of Low Voltage 96
10.5 Replacing the Batteries 96
11 IMPORTANT INFORMATION 98
11.1 Start-Up Procedures 98
11.1.1 Self check of the File System 98
11.1.2 Saving Files in Case of Fatal Errors 99
11.2 Symbols 99
11.3 Safety Information under the Standards for Medical Devices 99
11.4 General Safety Information 99
11.5 Handling the Active Braille 101
11.6 Warranty 101
11.7 Technical Support 101
12 LIST OF KEY COMBINATIONS 103
12.1 Navigating the Menu System 103
12.2 Editor Functions 103
12.3 Keys in PC Mode 104
12.4 Fixed Key Functions on External Keyboard 104
13 ERROR MESSAGES 106
13.1 English Language Error Messages 106
13.1.1 Fatal Errors 106
13.1.2 General Errors 107
13.1.3 Warnings and Messages 107
13.2 Error Messages from the Message File 108
13.2.1 General Messages 108
13.2.2 File System Messages 108
13.2.3 Editor Messages 109
14 COPYRIGHT NOTICE 113

Active Braille
General
HandyTech
ElektronikGmbH
Page 7
1 General
Thank you for choosing the Active Braille. Active Braille was designed with the focus on
easy and intuitive handling. Please take some time to read the Active Braille user manual.
It will help you to get the most out of every feature provided.
1.1 Preface
Before starting Active Braille for the first time it is important to carefully read the safety
instructions regarding the appropriate handling You will find the safety instructions at the
end of this manual.
Active Braille is a new-generation Braille display with note-taking function. Its note taking
function as well as the universal connection options and the latest ATC technology all are
patented by Handy Tech.
With the 4 GB data storage you can use your Active Braille to take notes at anytime,
anywhere. With the HTCom software package (included) the transfer of your notes to your
PC and back into Active Braille is easy and straightforward.
The Active Braille comes with wireless bluetooth technology allowing you to control a PC
or Mobile assistant like a cell phone.
To use Active Braille as a Braille display for a PC (Windows or Linux) an output program
called screen reader is needed. It is available from your supplier. The screen reader
program NVDA will be provided for free if needed.
If you have any ideas or suggestions to improve our product please do not hesitate to
contact your Handy Tech customer service representative or write to
Enjoy using Active Braille.
1.2 Active Braille at a Glance
This chapter will help you familiarize yourself with your Active Braille and its control
elements. We recommend keeping the Active Braille handy, so that you can actively follow
the instructions in this chapter.
The two space bars are located at the centre front. In the following description the left
space bar is called [SPCL] and the right space bar is called [SPCR]. If either the left or
right space bar can be used they will be called [SPC].
Above the Braille display you can find 8 ergonomic function keys. These function keys are
also used for Braille input. They correspond to the usual Braille keyboard layout and are,
from the left to the right as follows:
7 3 2 1 4 5 6 8

HandyTech
ElektronikGmbH
Active Braille
General
Page 8
Located in the middle of the device are 40 ergonomic Braille display elements with
integrated cursor routing keys. The cursor routing (CR) keys which are integrated as part
of each Braille cell enable you to place the cursor directly at the text position of this Braille
cell.
The Triple Action Keys are to the left and right of and flush with the Braille cells You can
activate the Triple Action keys at the top, in the centre, and at the bottom.
The Triple Action Key functions are:
The left or right Triple Action Key's (Up) position also serves as a reading key to move
backward within the text, and will be referred to as [TLU] or [TRU] in the list below. The left
or right Triple Action Key's (Down) position also serves as a reading key to move forward
through the text, and are referred to as [TLD] or [TRD] in the list below. In the event of the
right as well as the left Triple Action Key (Up) can be pressed, it is called [TU]. If
alternatively the Triple Action Key left or right (Down) can be used, this is called [TD]. In
the case that you need to press both [TU] and [TD] simultaneously, such as setting a mark
within the Editor, you may press the keys at the top left [TLU] and bottom right [TRD], or at
bottom left [TLD] and top right [TRU].
The centre position of either the left or right Triple Action Key [TLC] and [TRC] can be
used for additional functions.
In the list below you will find an overview of the symbols used in this manual to represent
the Triple Action Key settings:
Left Triple Action Key, up: [TLU]
Left Triple Action Key, center: [TLC]
Left Triple Action Key, down: [TLD]
Right Triple Action Key, up: [TRU]
Right Triple Action Key, center: [TRC]
Right Triple Action Key, down: [TRD]
If you move along the right side of the housing towards the back, you will first feel the main
power button. Located behind the power button is a USB type A port to connect a USB
keyboard. Behind the USB type A port is the outlet for the power supply.
On the left side of the device are from the front to the back –another USB type A port to
connect a USB keyboard, a Micro SD card for service reasons and a USB type B port to
connect a PC.
Please do not remove the Micro SD card at any time from the device while it is on. Data on
the card can be damaged. Please turn the Active Braille off, before you insert or remove
the Micro SD card.
Left on the back side you find a round headphone plug (2.5 mm) to connect a headphone
or an external loudspeaker. The Active Braille is shipped with an adapter cable to connect
also a 3.5 mm connector.

Active Braille
General
HandyTech
ElektronikGmbH
Page 9
1.3 Conventions Used in This Manual
In this manual, the following conventions are used for inputs and outputs on the Active
Braille and on the PC:
Single keystrokes on Active Braille: [Key1] e.g. [TLU]
Key/dot combination on Active Braille: [SPC + 1 2]
Display on the Active Braille modules: 'Display Text' such as 'File'
Single keystrokes on PC: {Key}, e.g., {ENTER}
Text input on PC: {input text}, e.g., {HTCOM}
Text output on PC: "output text" such as "Done"

HandyTech
ElektronikGmbH
Active Braille
Installation
Page 10
2 Installation
This section contains helpful information about how to install your Active Braille. Please
read it carefully to prevent difficulties while setting up.
2.1 Package Contents
Please verify that your package contains all of the parts listed below. If one of the
components is missing or damaged, please contact us in order to request the missing part
or a replacement.
You should find enclosed the following:
Active Braille
Carrying case
2 USB cables (one short, one long)
1 adapter cable for loudspeaker, 2.5 mm to 3.5 mm, about 10 cm long (4 inches)
Power supply with power cable to be connected to Active Braille (100 to 240 Volt
AC; 9 Volt DC / 1,5 A; FW 7555M/09)
Set of 4 NiMH batteries
Software Package with drivers for screen readers and HTCom (CD)
This user manual printed version
This user manual in daisy format on CD
User manual for file transfer with HTCom
Quick Reference in Braille
2.2 Software Installation
Before you can connect the Active Braille to your computer, you should first install the
enclosed software package. Please make sure that the screen reader program you intend
to use has been installed on the PC and close Word for Windows. Next, insert the CD
containing the installation software into your computer's CD-ROM drive. The installation
program of this CD will install the latest drivers for your screen reader as well as the file
transfer program HTCom and this user manual.
Start "setup.exe" on the CD. The installation program follows the Windows Standards. You
can choose the following components of the software, to be installed:
JAWS driver: latest Braille display driver for JAWS for Windows
Window-Eyes driver: latest Braille display driver for Window-Eyes
HAL/Supernova driver: latest Braille display driver for HAL/Supernova
Active Braille Firmware and Manuals: for updating the internal functions of your
Active Braille and this user manual.
HTCom (Handy Tech Communication Software): communication program for file
transfer between PC and Active Braille
We recommend that you use the default setting for the installation. All required software
components will be installed and a link for HTCom on the Desktop will be created. If there
is no screen reader running when starting the setup program, you have to choose the

Active Braille
Installation
HandyTech
ElektronikGmbH
Page 11
folder for the installation of your screen reader manually. After completion of the
installation program you will find a group named "Handy Tech" in programs in the start
menu. Here you find the following subfolders:
BrailleDriver: here you find the key settings of your Active Braille for your screen
reader.
Active Braille followed by the version number: for version 1.0 it is for example
"Active Braille 1.0". Here you find this user manual, the uninstall program, the
program for updating the firmware and important remarks.
HTCom: here you find the description of HTCom, the program HTCom itself and the
uninstall program.
After installing successfully you can hook on your Active Braille on to your computer. In the
installation folder of your Active Braille firmware you will find the following subfolders
(when installed completely):
Braille tables: contains the various Braille character sets for different Country
versions.
Firmware: contains four files for the internal programming of your Active Braille as
well as system files.
Manuals: includes this user manual and important information
KeyboardLayouts: contains different keyboard files for different countries.
Uninstall: contains the uninstall program for this software.
USB_driver: contains the USB driver for Windows98 and Windows-NT
Beside the start menu you can start HTCom wire the link on your desktop or wire the
preset key combination {Ctrl+Shift+H}. A detailed description of how to use HTCom you
will find this in the separate user manual "File transfer between PC and Active Braille"
which can be found in the sub folder "HTCom".
2.3 Connecting the Power Supply
The power supply included in your package is used to recharge the batteries and for
providing power to the Active Braille. The Active Braille can be used without restrictions
even while the batteries are recharging.
When connecting the power supply, please plug the round, thin plug into the power supply
port behind the USB Type A port on the right side of the housing first. You can feel the
plug snapping into place. Now you can connect the power supply to an easily accessible
wall outlet. When disconnecting the power supply cable, please reverse the order of steps
above. When connecting the power supply cable while the device is off, you get the
message ’Battery quick charging’and the Active Braille turns off again.
If you plug in the power supply while the Active Braille is switched on, a signal tone
indicates that the device runs no longer on Batteries.
WARNING:
Should you decide to use non-rechargeable batteries in the Active Braille for any reason,
you must remove these from the device before connecting the Active Braille to a power
outlet via the power supply cable. The integrated charging circuitry cannot recognize
whether the batteries are rechargeable or not and will try to recharge the batteries. This

HandyTech
ElektronikGmbH
Active Braille
Installation
Page 12
can result in the batteries bursting, which may not only damage the device, but could also
be hazardous to your health.
If you are not sure whether the batteries you are using are rechargeable or not, you can
recognize rechargeable batteries by an indentation in the casing near the top button (plus
pole).
2.4 Connecting the Interface Cable
Your Active Braille can communicate with the PC either via USB interface, or through the
wireless bluetooth interface. If the Active Braille is used as a medical device, the
connected PC needs to comply with the medical device directive or needed to be
additional grounded or needs to be connected via a separating transformation.
Please make sure, that you have installed the enclosed software package, as described in
chapter 2.2 before you connect the USB cable.
To connect the Braille display to the PC via the USB interface, please identify the enclosed
USB interface cable first. The USB interface cable features a small, almost square plug on
one end. The other end features a small, flat plug. Now plug the square plug into the
leftmost port on the left side of your Active Braille. The flat plug is then plugged into the
PC's USB port.
When both the Braille display and the PC have been turned on, the Braille display will
automatically be recognized by USB enabled operating systems. When connecting the
USB cable while the device is off, you get the message ’Battery charging’and the Active
Braille turns off again.
WARNING:
Should you decide to use non-rechargeable batteries in the Active Braille for any reason,
you must remove these from the device before connecting the Active Braille to a PC via
the USB cable. The integrated charging circuitry cannot recognize whether the batteries
are rechargeable or not and will try to recharge the batteries. This can result in the
batteries bursting, which may not only damage the device, but could also be hazardous to
your health.
If you are not sure whether the batteries you are using are rechargeable or not, you can
recognize rechargeable batteries by an indentation in the casing near the top button (plus
pole).
2.5 Connecting a external USB keyboard
You can also connect a standard USB keyboard to your Active Braille. Therefore plug in
the USB cable of the USB keyboard in the right or left USB Type A port of the Active
Braille. For more information please refer to chapter 6 External Keyboard.
2.6 The Carrying Case
An extra compartment is provided on the cover of the carrying case, which can be closed
with a velcro fastener. This compartment can store the cables and your mobile phone.

Active Braille
Installation
HandyTech
ElektronikGmbH
Page 13
On the right and left side of the case are openings for the power cable, the USB interfaces
and the main power button, so that the Active Braille can be operated inside its case.
These outlets are protected by a Velcro fastened cover, which can be flipped upwards. To
completely open the carrying case, also open the Velcro fastener on the bottom.
All of the control elements are now accessible. If you open the two Velcro fasteners at the
right and left back side, the Active Braille can be pulled out backwards of the case.
When you replace the Active Braille in the carrying case, please make sure that the sides
of the case fully enclose the Active Braille, and that the Velcro fasteners are proper closed,
because otherwise the Active Braille could fall out when the case is opened.
2.7 Installation of the Bluetooth Tie-In
Because your Active Braille features a Bluetooth transmission module, you can also
establish a wireless connection between the Active Braille and a computer or a cell phone,
if they are equipped with wireless Bluetooth technology. You need to make sure that the
wireless Bluetooth interface on your Active Braille is active, by enabling the option
“Bluetooth on” in the option menu like described in chapter 5.1.10.9. The wireless
transmission radius is approximately 10 meters (10 yards or 33 feet).
2.7.1 Bluetooth-PC Tie-In
1. Please make sure, that the Active Braille is switched on, the Bluetooth function in
the option menu is enabled and no USB cable is connected.
2. Select "Bluetooth Devices" from the control panel or from your system tray. A
window "Bluetooth Devices" will open.
3. Select on the tab sheet "Devices" the button "Add…"
4. "Add Bluetooth Device Wizard" will appear. Select "My device is set up and ready to
be found" and press "Next".
5. All detected Bluetooth devices will be listed. Select the Active Braille from the list
and press "Next".
6. Select "Let me choose my own passkey", insert into the text field the 5 digit pairing
code. Press "Next".
7. Now the pairing will be done and the COM Port will be assign. Please wait a
moment. All available COM Ports will be displayed. Please confirm by pressing
"Finish".
8. The Braille Star is shown in the window "Bluetooth Devices". Please confirm by
pressing "OK". Now the device is ready to use.
Your Active Braille now has a wireless connection to the PC, and you can utilize all of its
functions, as if it were connected via the USB cable.
Note:
If you move the Active Braille beyond the Bluetooth connection's communications radius
(10 meters/yards), the connection to the PC will be interrupted. The connection will
automatically be re-established by Handy Tech's Braille device driver once you move back
within range. For this you need to have installed the latest Braille display driver (see
chapter 2.2).

HandyTech
ElektronikGmbH
Active Braille
Installation
Page 14
2.7.2 Bluetooth Apple iOS Device Tie-In
Mobile Apple devices, such as the iPhone or iPad, include a screen reader by default,
which enables blind people to operate the devices by speech and Braille output. In order to
connect the Active Braille via Bluetooth with an Apple device, you have to activate
VoiceOver first. Please follow these steps:
1. Please make sure that the Active Braille is turned on, USB cable is not connected
and the Bluetooth option in Config mode is turned on.
2. Open “Settings” on the home screen of your iOS device..
3. Choose „Accessibility from the „General“ page.
4. Turn VoiceOver on.
5. Choose “Braille” on the Accessibility page.
6. If Bluetooth is off, the iOS device will remind you and you should turn it on now.
7. The iOS device is now searching for Bluetooth Braille displays. Please choose the
Active Braille from the list.
8. Now you have to enter the 5 digit pairing code.
9. The Bluetooth connection will be established and you can read the text from the iOS
device on the Braille display.
Note: if the Bluetooth connection was interrupted because the Active Braille or the Apple
device was turned off or in sleep mode, please activate the Active Braille first. The
connection will be reestablished automatically, when turning on the Apple device.
2.7.3 Bluetooth-Cell Phone Tie-In
If your cell phone uses the Symbian operating system (for example the Nokia E50) your
cell phone also includes a wireless Bluetooth interface. Please make sure, that you use
the Braille driver from Version 2.1 of TALKS&ZOOMS By executing the following steps,
you can tie in your Active Braille wirelessly with your cell phone to utilize Talks Premium:
1. In the cell phone's "Connections" menu, select the menu item "Bluetooth". Under
the tab "Paired Devices", select "Options".
2. Select "New Paired Device". All available Bluetooth devices will be displayed. If you
receive the message "Bluetooth is off. Turn on?" you should enter "Yes". Make
sure that your Active Braille's power is switched on and that the small sliding switch
between the two keyboard outlets is in the right position towards the edge of the
housing.
3. Now select the Active Braille from the list of devices. If the Active Braille is not
included on the list, activate the "More Devices" option. The Active Braille is
designated as Active Braille AB4/A0, followed by its serial number.
4. Once you have selected the Active Braille from the list, you will be prompted to
enter a password. This password is the five-digit pairing code.
5. Finally, select "Handy Tech" from the "Braille" tab in the TALKS&ZOOMS settings
menu.
Your Active Braille now has a wireless connection to your Symbian mobile phone, and you
can utilize all of the functions of your telephone with Braille input/output capability, as
described in the Section "TALKS&ZOOMS: Screen reader for Mobile Phones".

Active Braille
Installation
HandyTech
ElektronikGmbH
Page 15
2.8 Technical Specifications
40 concave piezoelectric Braille cells
40 cursor routing keys
2 Triple Action Keys
8 function keys
2 space keys
2 USB Type A port
1 USB Type B port
4 GB memory
1 plug for loudspeaker 2.5 mm
Battery duration ca. 20 hours; ca. 14 hours for Bluetooth operation
Quick charge circuitry (less then 3 hours)
Power: 9 V / 1.3 A
Measurements: 31.9 cm width, 12.4 cm depth, 2.9 cm high (12.56" width, 4.88"
depth, 1.14" high)
Weight 930 gr (2.05 lbs.)

HandyTech
ElektronikGmbH
Active Braille
Start Up
Page 16
3 Start Up
3.1 Version Information
As of this Section, all common characteristics of the Active Braille will be described. This
information applies to firmware Version 3.5 of your Active Braille.
3.2 Turning the Power On
Press the on/off button to turn the Active Braille on. You can now work independent of a
power source, because the batteries are fully charged. You will hear a short, high-pitched
beep, and the following start up message will be displayed on the Braille display:
'Handy Tech ACTIVE BRAILLE 3.5'.
At the end of this string is the version number of the firmware that you are currently
working with (e.g., 1.0).
The high-pitched beep, followed by a second lower beep at start up, indicates that you are
now in work mode. As soon as you hear the lower beep, also called startup sound, you
can begin working.
Please note that the Active Braille is equipped with protection against accidently turning
on. This means that the Active Braille is turning off automatically after 60 seconds if you
don’t read four characters in a row on the Braille display. It doesn’t turn off automatically if
it is connected via USB or power supply or if it is connected via Bluetooth to a screen
reader.
The Active Braille is not fully ready for operation until the startup sound appeared. The
device can only begin exchanging data or reacting to any other external events, such as
keystrokes, after the low beep.
You can change the startup sound by yourself using MusikBraille for composing your own
melody. Please refer to chapter 5.1.5 MusikBraille (M).
You are now in the Active Braille's main menu, which allows you to activate its various
functions.
Should you receive a message beginning with the words 'FER:', 'Warning', or 'WRN:'
instead of the work mode start up string shown above, then the Active Braille's software
has become corrupted. You will find detailed information and trouble-shooting tips in the
sections on firmware updates and error messages.
Now, before you can finally get started, we would like to familiarize you with some of the
basic concepts pertaining to your Active Braille.

Active Braille
Start Up
HandyTech
ElektronikGmbH
Page 17
3.3 Basic Operation
3.3.1 Chords
The Active Braille's keyboard is very easy to use. The keystroke functions are not
activated until the key is released. If a character is composed by several keys, it will be
created after releasing all keys.
In order to make functions available to you which require their own function keys on
standard keyboards, while also providing efficiency of operation, we have introduced the
so-called chord functions. Chords are letters or Braille dots that are used in combination
with the space bar. For example, in the Editor you can use Chord-i [SPC+2 4] to toggle
between insert and overwrite mode.
With Chord Commands it is enough to release one key in order to activate the function.
When entering characters all keys need to be released.
You will find a list of all available key combinations in chapter 12.
3.3.2 Signal Tones
The Active Braille utilizes various signal tones to indicate its status or to alert you to
prompts or possible errors.
1. Startup sound: This is a low tone which sounds during start up. If the startup sound
is preceded by a very short, high tone, followed by a pause, then the Active Braille
is in work mode.
2. Warning signal: This consists of two rapid, consecutive tones and may sound, for
example, when you have reached the beginning or the end of a text in the Editor, or
when you are canceling a search.
3. Error signal: This is a series of warning signals, which may be emitted, for example,
before you delete a file.
Note: You can specify which types of acoustic signals you want the Active Braille to emit
(see chapter 5.1.10 and 5.1.10.12). In this manual, the assumption is that this setting is set
to 'action Confirmations'. This is also the factory default.
3.3.3 System Messages
The Active Braille will display messages to indicate the successful completion of an
operation or to alert you to possible operating errors. If the message is an error message
or if it is an important message, a beep will also sound. We recommend carefully reviewing
these messages before continuing with your work. They frequently contain instructions on
how to proceed.
Most error messages will be in your local language however, there are some system
messages that are only provided in English. In regard to these messages, all messages
beginning with 'fatal', 'fer:', 'error' or 'wrn:' should be attended to.
After you have read the message, you can exit by pressing [TLC], which in most cases will
return you to the place from which the message was initiated. If the message text does not
fit on the Braille display, you can scroll through it by means of the [TD] and [TU] keys.
In chapter 13 you will find a list of the most important messages with explanations.

HandyTech
ElektronikGmbH
Active Braille
Start Up
Page 18
3.3.4 Check Boxes
Check boxes are switches that can be in either an "on" or "off" state. A check box consists
of a symbol indicating its state, and a designation. The symbol "[X]" indicates that the
check box is "on", or active, whereas "[ ]" is an inactive, or "off" check box.
Toggling the state of the check box between on and off is accomplished by pressing [SPC]
or [TRC]: the state is toggled upon each keystroke. Alternatively, you can also press the
cursor routing key above the check box to toggle it. As soon as you move on to a new
menu item, the last state indicated by the check box remains in force. However, the
settings are not permanently saved until the 'Options' menu is closed.
Check boxes are used for controlling your Active Braille's functions and are found in the
Options menu. For example, you can choose either 6 dot or 8 dot Braille this way.
Note:
If the Active Braille is turned off without having closed the Options menu, the last changes
to be entered will be lost. The new settings are saved only upon exiting the Options menu!
3.3.5 Radio Buttons (1 of x)
Radio buttons are similar to incremental dials, e.g., from 0 to 10. They are groups of
buttons that can be set to either an on or off state, of which only one can be selected at
any given time.
A radio button consists of a symbol indicating its state, and a designation. The symbol
"(X)" indicates that the button is active, whereas "( )" represents an inactive, or "off"
button. A radio button is selected by pressing [SPC] or [TRC]. Alternatively, you can also
press the cursor routing key above the radio button to toggle it. An example is the
frequency setting for acoustic alerts, which can be set to one of several levels.
Note:
As noted above, any new settings are saved only upon exiting the Options menu!
3.3.6 System Files
The Active Braille's firmware requires its own files for keeping track of settings and for
saving information. These system files always have the extension "HSF" (Handy Tech
System File). Some examples of system files are the message file (MSG.HSF), and the
layout file for the external keyboard (KBDLYOUT.HSF).
By default, system files are not displayed. However, the display of system files can be
activated via the Options menu (see chapter 5.1.10.4).
3.3.7 Energy Saving Features
Since the Active Braille is battery operated, it is designed specifically for efficiency in
energy consumption. Whenever possible, various components of the Active Braille are
deactivated in order to conserve energy.
If no key is pressed on the Active Braille for several minutes, it will enter sleep mode. In
sleep mode, the Braille display is turned off and some of the electronic modules are also
deactivated. As soon as any key is pressed, the Active Braille "wakes up" within a fraction

Active Braille
Start Up
HandyTech
ElektronikGmbH
Page 19
of a second, and will be fully operational. You will recognize this because the tactile pins
will be pushed backup.
Further explanations concerning the set-up of the energy saving features are contained in
chapter5.1.10.17 standby (N)
3.3.8 The SAVE Mode
In SAVE Mode, the Active Braille can only be operated as a Braille display. The SAVE
Mode is comparable to the save mode in Windows. To get into SAVE Mode, press the
on/off Button for more than 5 seconds or take out the micro SD card before turning the unit
on. Instead of the startup sound you will hear a different sound and on the Braille display
you can read:
’Handy Tech ACTIVE BRAILLE Save Mode 1.3’
The number at the end of the string is the version of the Save Mode. To get back into work
mode, just switch the Active Braille off/on again.

HandyTech
ElektronikGmbH
Active Braille
Quick Start
Page 20
4 Quick Start
4.1 The Active Braille as Braille Display
In order to operate the Active Braille as a Braille display under Windows, you need a
special program called a screen reader to control the display, which is not included with
the Active Braille itself. To use the Active Braille as a Braille display connect the USB
cable to the USB port on your PC or use the wireless Bluetooth connection.
Please make sure that your Active Braille is properly connected and switched on before
starting up the screen reader program, because otherwise the screen reader will not be
able to detect it. As a rule, the screen reader will display the selected position within the
active window on the Braille display. For example, if you are moving through a menu, the
selected menu item is displayed. The reading keys [TD] and [TU] allow you to move
through text. In word processing programs such as Microsoft Word, you can also position
the cursor with the cursor routing keys. In addition, the [CR] keys will also allow you to
activate menu items or functions directly (e.g. when you are prompted for a yes or no
answer with 'Y/N', pressing the [CR] key above the "y" has the same effect as entering
"y").
The screen reader program converts the text and graphic contents of the Windows screen
into speech and Braille. Generally, the computer's built-in sound card is employed for the
speech output function. The display of Braille is achieved with the help of your Active
Braille, after the screen display information has been forwarded from the screen reader to
the Braille display. All standard screen readers are compatible with Handy Tech's Active
Braille. During the installation of the screen reader software, all you need to do is to select
Handy Tech. The Braille display then automatically adjusts correctly to your Active Braille.
When starting your screen reader the first time, a small start up window appears which
displays the name of the Braille system detected by the program, the interface used for
communication, and the country currently selected. The various screen reader program
functions are assigned to specific keys on your Active Braille. How to operate your Active
Braille as a Braille display using Window-Eyes for Windows is described in Section7.1. A
summary of the essential functions of JAWS can be found in Section 7.2 and for
Hal/SuperNova in Section 7.3.
4.2 The Active Braille as Notepad
4.2.1 Navigating the Menu
Turn the Active Braille on and navigate through the menu using the [TU] and [TD] keys.
Pressing [TRC] or the [CR] keys activates functions or opens submenus; by pressing
[TLC] you can close the functions and submenus. [SPC+1 2 3] or [SPC+4 5 6] sends you
to the first or last item on the menu, respectively.
A detailed description of the menu items is contained in chapter 5.1.
Table of contents
Other HandyTech Keyboard manuals

