HANK Electronics HKWL-FLD01W User manual
Flood Sensor User Manual
HKWL-FLD01W
1. PRODUCT OVERVIEW
HKWL-FLD01W is a smart Flood sensor based on wireless solution. While a
water leak happens or the leak disappears, a notification/alert will be sent to
your APP on your mobile devices. Furthermore, it can be configured as a
trigger associated with some alarm devices based on the same system.
2. PRODUCT FEATURES
Working in 802.11 b/g/n;
Support EZ or AP mode for Wireless connection;
Support water leak detection;
Support battery level detection and low battery alarm;
Support 2xAAA battery powered and low power consumption;
Wall mounted installation with extended detecting cable to 2 meters;
Led indicates the working state;
Compliant with CE, FCC and ROHS;
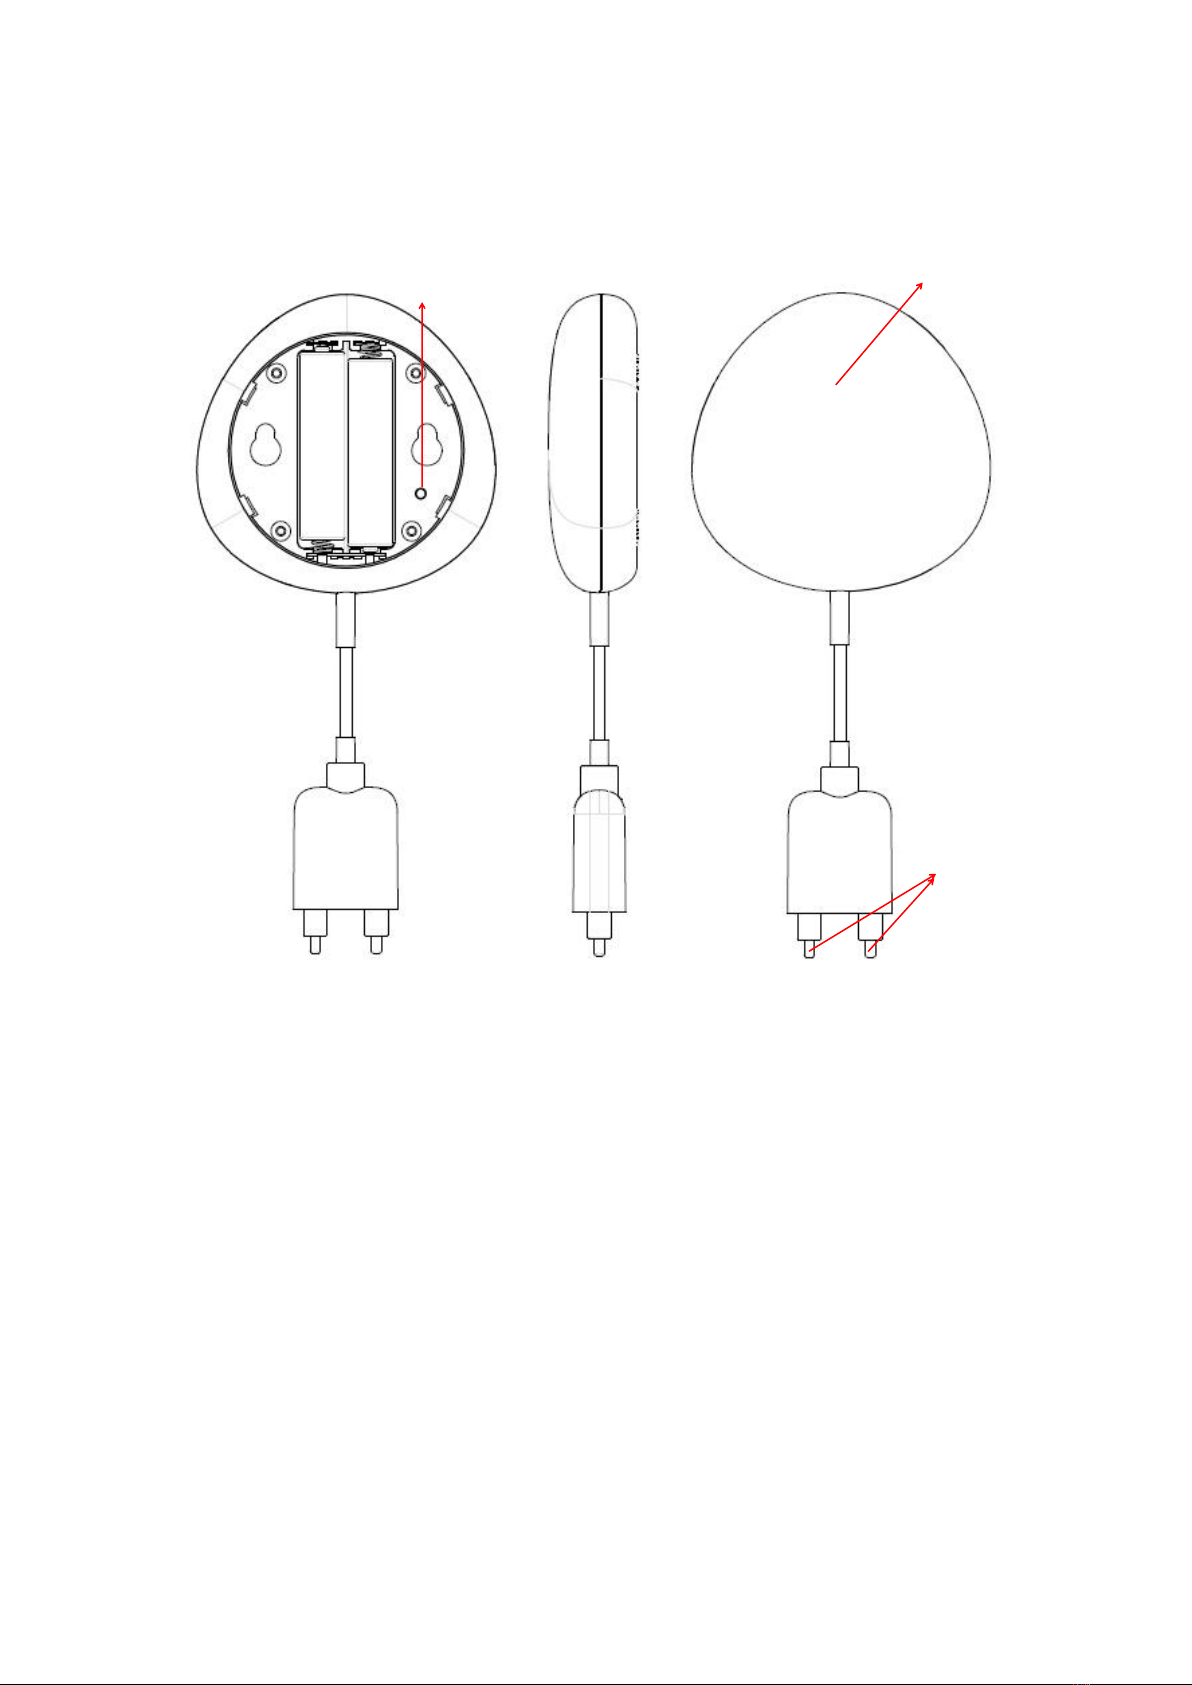
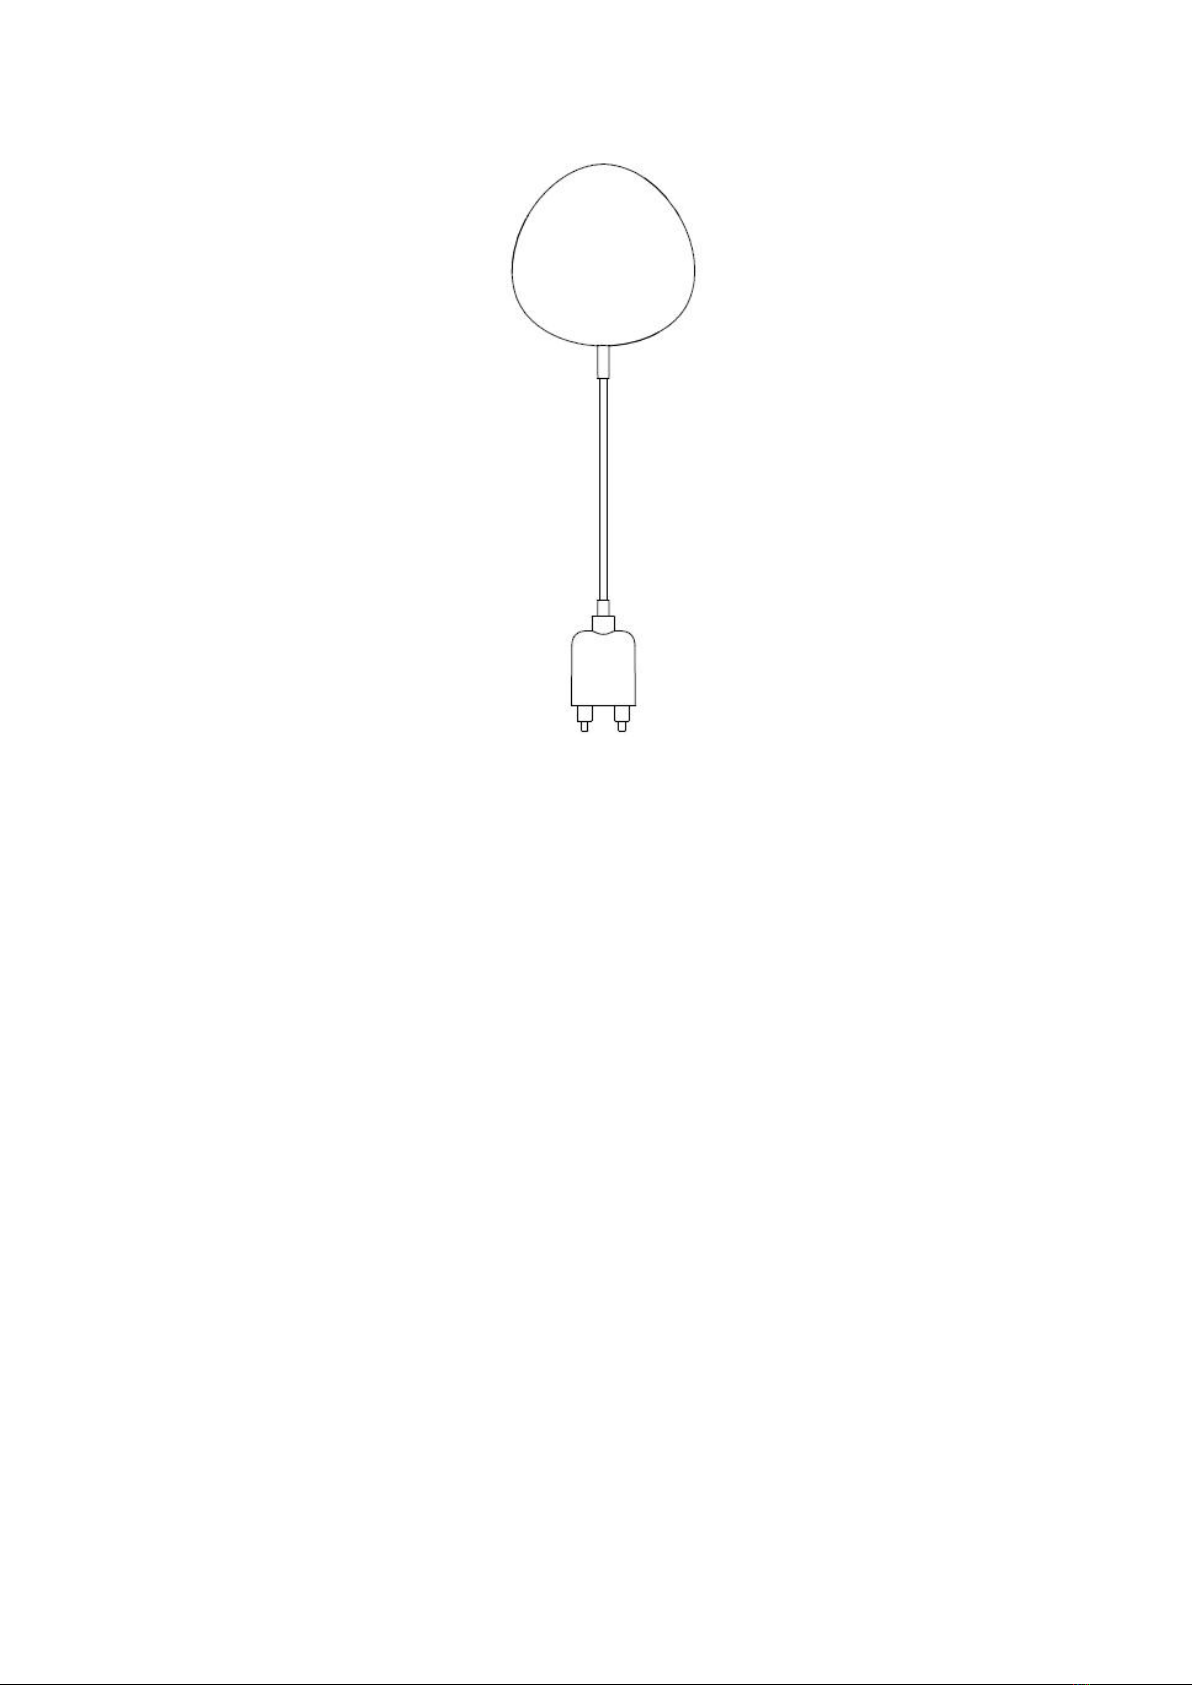
3. PRODUCT STRUCTURE
Button activities and LED indicator:
1) Press and hold the button for 5 seconds to enter into Wi-Fi connection (or
configuration). The red LED indicator will blink rapidly (EZ mode) or slowly
(AP mode). EZ mode connection is set as default in Wi-Fi configuration.
Press and hold the button for 5 seconds will enable the device switch
between EZ mode and AP mode.
2) Led will blink once while the button is pressing. When a water leak is
detected, the Led will blink once.
Button
LED Indicator
Probe
4. SPECIFICATIONS
Power supply
2*AAA battery , 3V
Radio frequency
2.4GHz—2.484GHz
Radio protocol
IEEE802.11 b/g/n
Transmitting power
802.11b: +17dBm@11Mbps
802.11g: +15dBm@54Mbps
802.11n: +13dBm@MCS7
Receiving sensitivity
802.11b:-91dBm@11Mbps 8%PER
802.11g:-75dBm@54Mbps 10%PER
802.11n:-72dBm@MCS7_HT20
10%PER
Working temperature
-10 ~ +45℃
Storage temperature
-20 ~ +70℃
Relative humidity
8% ~ 90%RH(non-condensing)
5. INSTALLATION
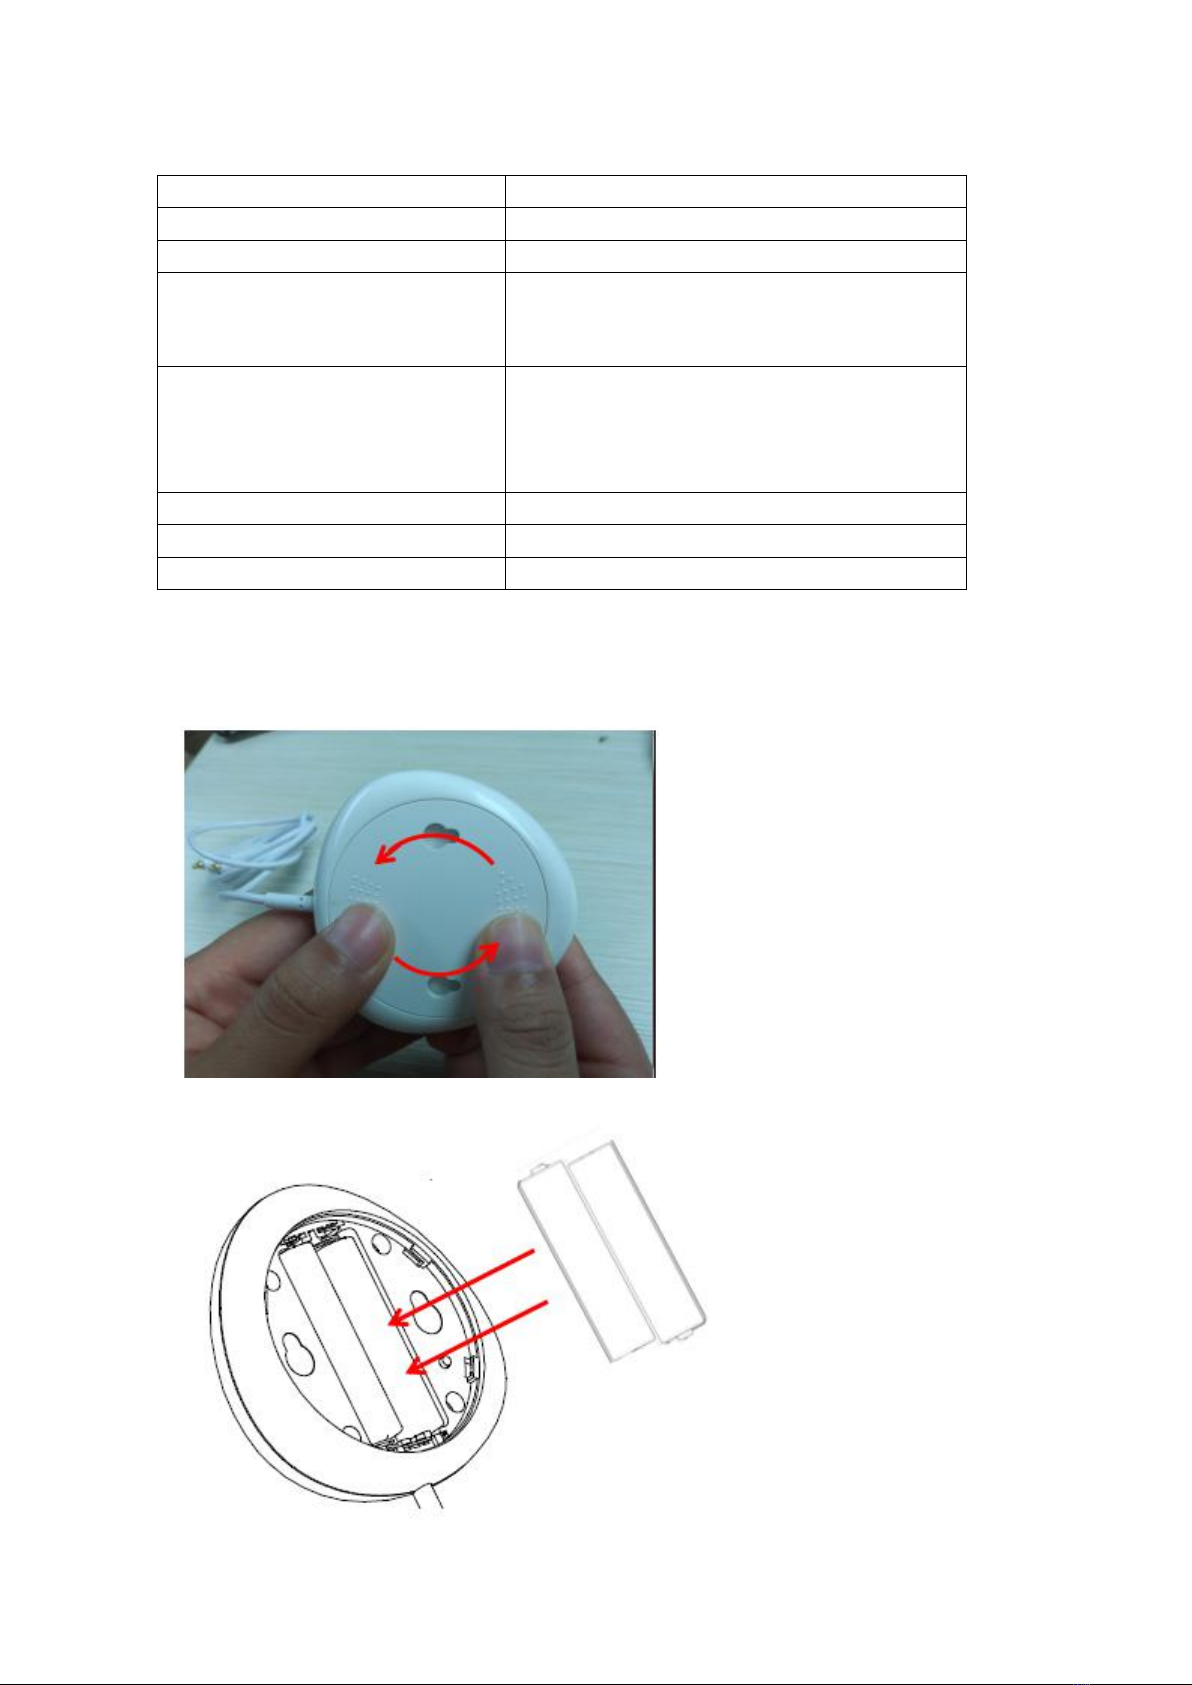
5.1 AAA battery installation
1) Hold the battery cover and rotate it counterclockwise to open the battery cover
2) Put 2xAAA battery in with the correct positive and negative electrode.
3) Close the cover and turn it clockwise
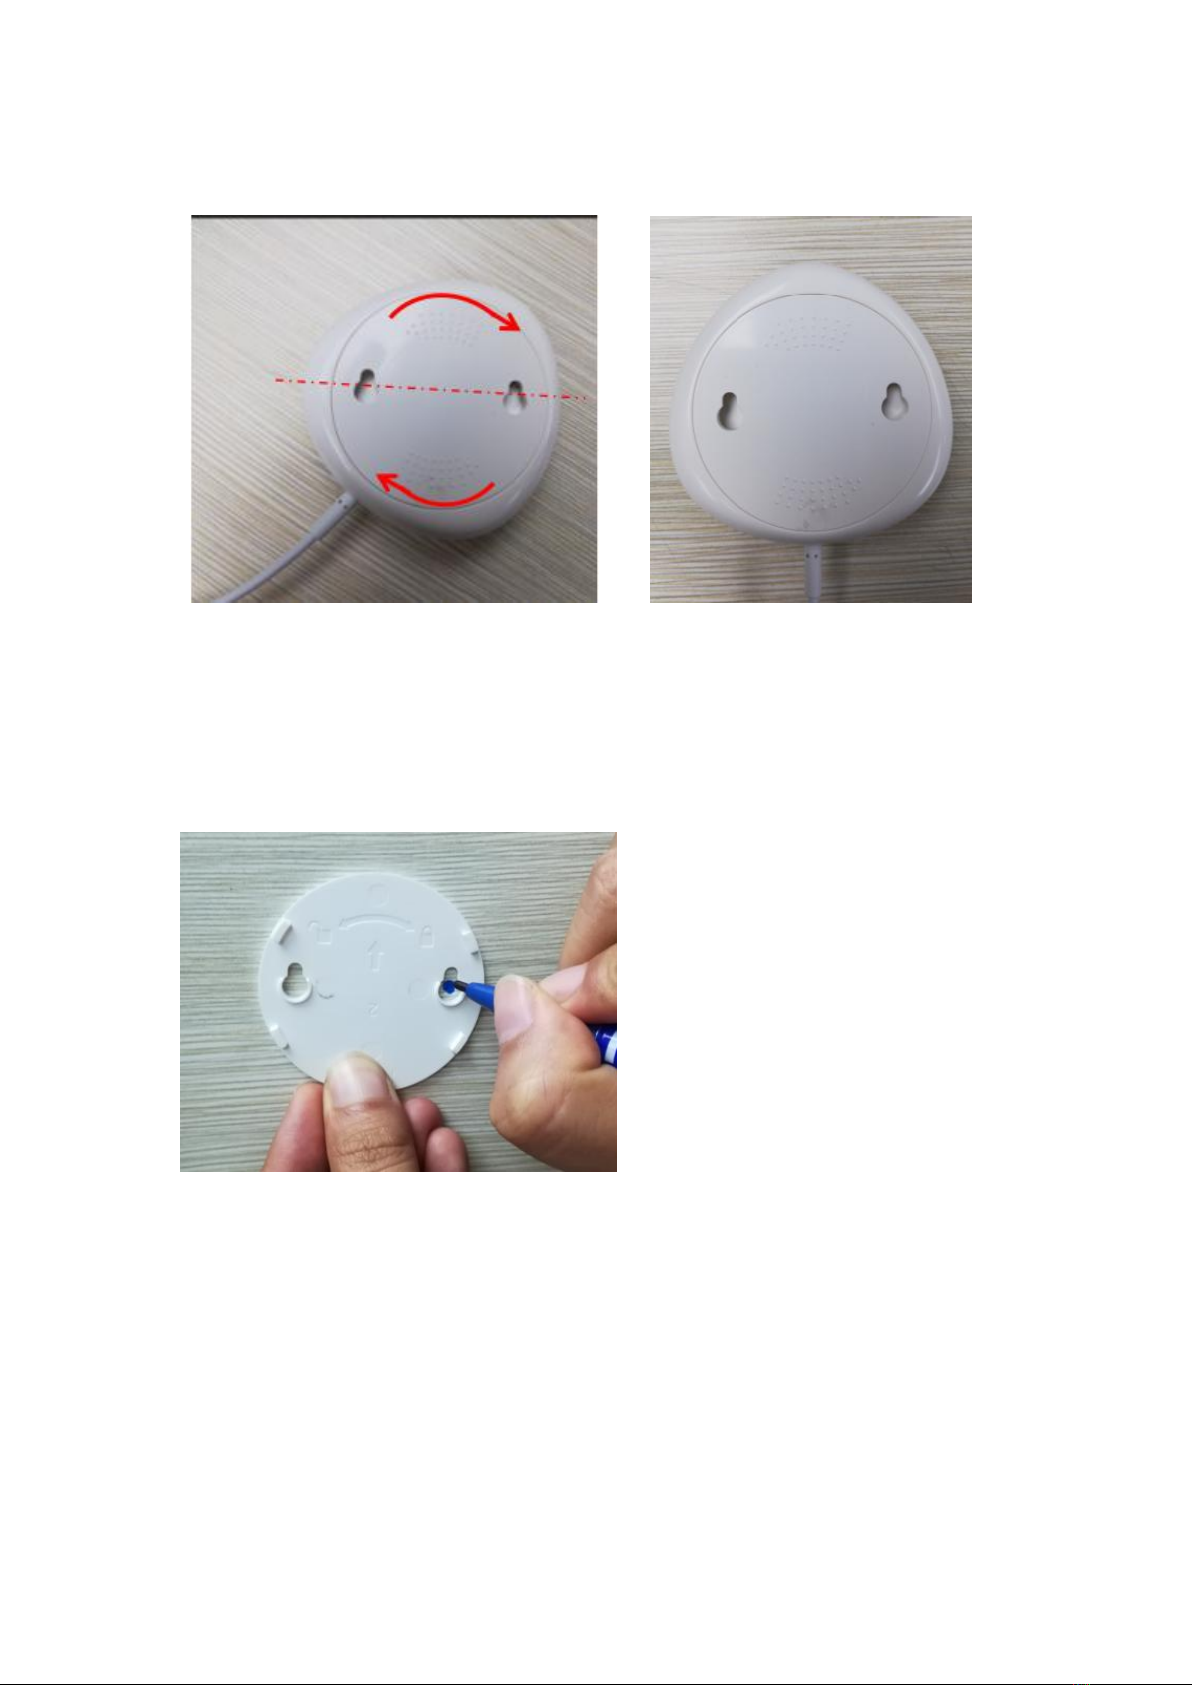
5.2 Mount the device on the wall
There are 2 methods to mount the device on the wall.
5.2.1 Screw mode
1) Mark the hole location as below figure and drill a hole on the wall accordingly.
2) Screw the two bolts within the package on the wall leaving the around 5~8mm bolt
margin out of the wall. Then hang the device on the two bolts.
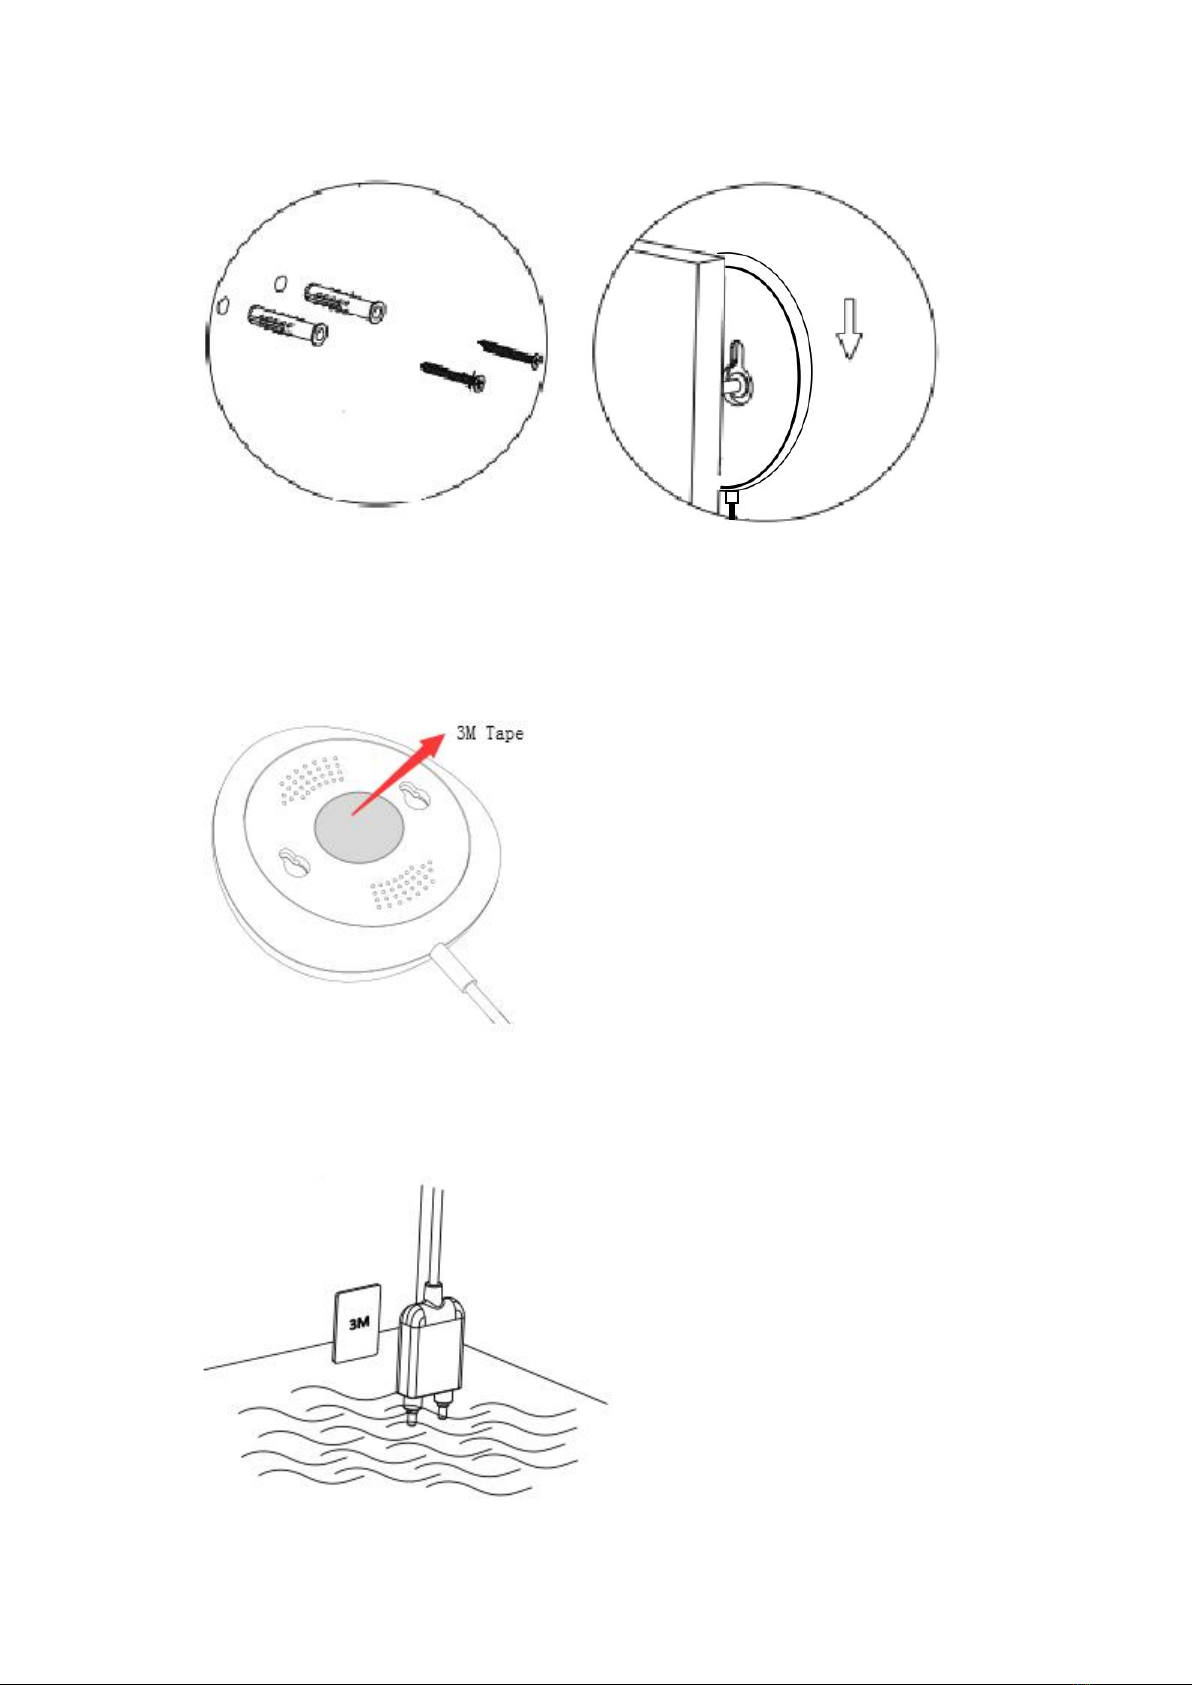
5.2.2 3M Tape mode
5.3 Install the probe case on the wall with a 3M tape, keep no gap between the probe
and floor.

6. APP download and Account binding
6.1 Scan the QR code below to download APP for Android and iOS system. Or
you can download the ”Simple Home Connect” APP on Apple Store and
Google Play.
Android IOS
6.2 Start the APP and register an account with your email address/mobile
number (mobile number registration available for China mainland users ONLY),
and then log in APP with the registered account.
7. Add Device
7.1 Click “ADD Devices” and select the Device Type “Flood Sensor”.
7.2 Open the cover and powered on
EZ mode
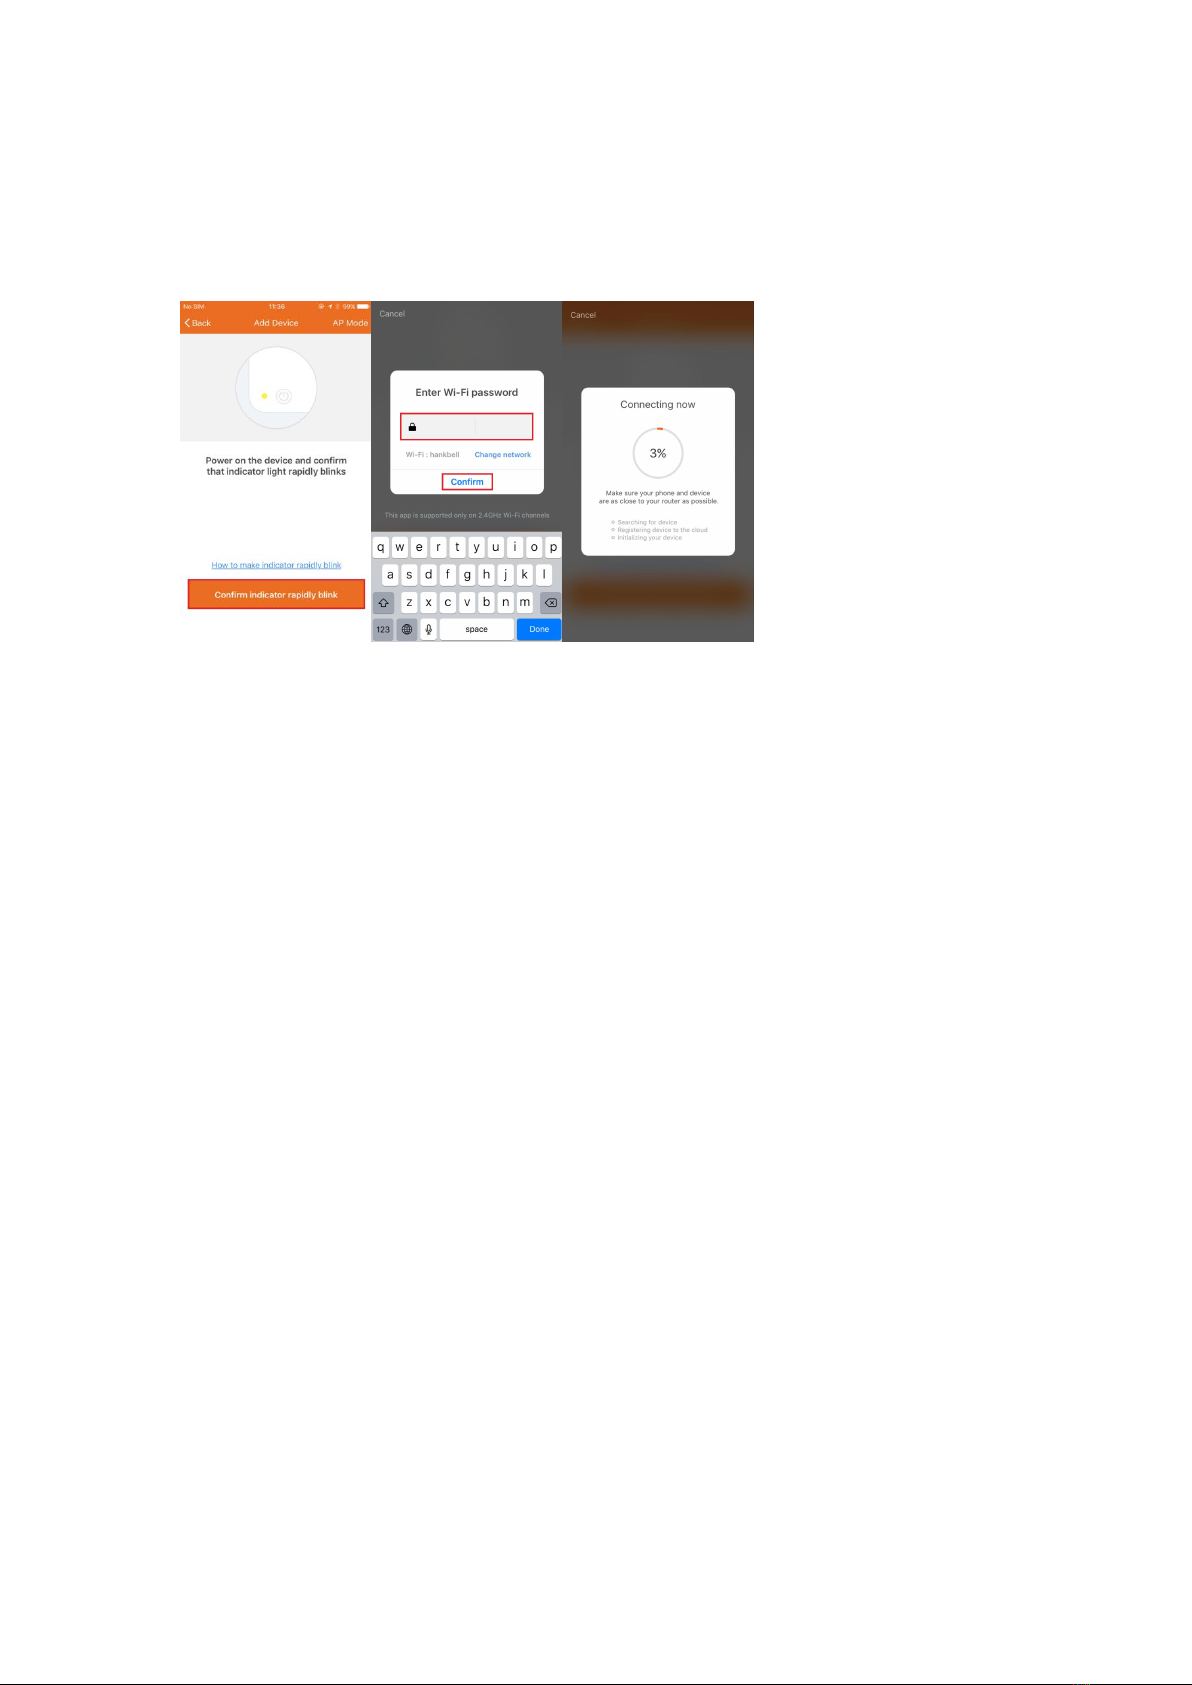
Press and hold the button for 5 seconds and then release,The LED indicator
will blink fast in red . Input the password of the designated Wi-Fi network to
include the device to Cloud. Waiting for around 60 seconds before the device
inclusion process is complete.
AP mode
Press and hold the button for 5 seconds and then release. The LED indicator
will blink slowly in red. Choose AP Mode, select the Wi-Fi network your mobile
is connected to and enter the Wi-Fi password. Select the device AP name in
Wi-Fi list “SmartLife-xxxx” to finish the Wi-Fi connection. APP will jump to
“connection successful” page when the Wi-Fi connection process is complete.

7.3 Users can re-name or share the device after Wi-Fi connection is finished.
Make sure the device is working in EZ/AP mode, if the APP works in EZ/AP
mode.
8. Remove and Reset Device
Click “Remove Device”to remove devices,Click “Restore manufacturer
Defaults”to reset devices.

9. FCC NOTICE (for USA)
This device complies with part 15 of the FCC Rules. Operation is subject to the
following two conditions:
(1) This device may not cause harmful interference
(2) This device must accept any interference received, including interference
that may cause undesired operation.
The manufacturer is not responsible for any radio or tv interference caused by
unauthorized modifications or change to this equipment. Such modifications or
change could void the user’s authority to operate the equipment.
This equipment has been tested and found to comply with the limits for a Class
B digital device, pursuant to part 15 of the FCC Rules. These limits are
designed to provide reasonable protection against harmful interference in a
residential installation. This equipment generates, uses and can radiate radio
frequency energy and, if not installed and used in accordance with the
instructions, may cause harmful interference to radio communications.
However, there is no guarantee that interference will not occur in a particular
installation. If this equipment does cause harmful interference to radio or
television reception, which can be determined by turning the equipment off and
on, the user is encouraged to try to correct the interference by one or more of
the following measures:
-- Reorient or relocate the receiving antenna.
-- Increase the separation between the equipment and receiver.
-- Connect the equipment into an outlet on a circuit different from that to which
the receiver is connected.
-- Consult the dealer or an experienced radio/TV technician for help.
RF Warning statement:
To maintain compliance with FCC's RF exposure guidelines, this equipment
should be installed and operated with a minimum distance of 20cm between
the radiator and your body
Table of contents
Other HANK Electronics Accessories manuals

Popular Accessories manuals by other brands

Siemens
Siemens SIWAREX WT241 manual

Baicells
Baicells Nova-243 eNodeB installation guide

A&E
A&E SUNCHASER quick start guide

HAMPTON BAY
HAMPTON BAY CH-7903-02 Use and care guide

Baby Jogger
Baby Jogger City Select Bassinet Kit Assembly instructions

Gleason Reel
Gleason Reel Dual Hose Reel-Direct Drive K24 Installation and maintenance instructions


