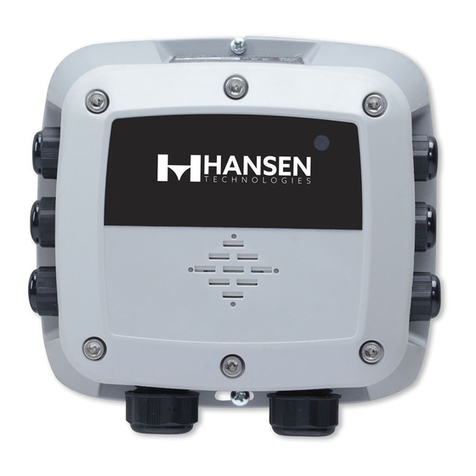
Hansen Technologies HSC4H-N10K Operating instructions

Specifications, Applications,
Service Instructions & Parts
GAS DETECTION
SENSORS, MONITORS
& ALERT SYSTEMS
Bulletin A100g
JULY 2017
For Refrigerants and
other Common Gases
Standard Gas Sensor
INTRODUCTION
Hansen Technologies offers a complete line of industrial
quality Gas Detection Sensors, Monitors and Alert
Systems for refrigerants and other common gases. These
state-of-the-art gas detection products utilize a range of
sensing technologies to suit a given application. Available
in several configurations to meet various application
requirements with optimum accuracy and reliability.
APPLICATIONS
Hansen Gas Sensors are suitable for use in industrial
refrigeration engine rooms, cold storage rooms,
processing rooms, truck docks, and for relief valve vent
lines. They are also suitable for use in supermarkets,
and large institutional and commercial buildings.
Typical gas detection applications include Ammonia,
Carbon Dioxide (CO2), Hydrocarbons, HFCs, HCFCs
and CFCs.
ADVANTAGES
Hansen uses a wide variety of sensing technologies
including electrochemical, semiconductor and infrared
sensors to selectively detect most gases. These sensors
continuously determine the level of gas present in the
surrounding environment. The analog outputs (4-20mA
or 0-10V DC) can interface with nearly any existing
monitor, computer or PLC controller.
The sensing elements (except Basic and Extreme Gas
Sensors) are mounted externally on the enclosure. This
helps to provide quick response to potential leaks,
particularly in still air. Electronics are sealed in a NEMA4
enclosure (except Basic Gas Sensor) which protects
them from moisture, dust and the surrounding gases,
which in the case of ammonia can shorten the life of
electronics. The sensing elements are easily replaced.
Gas Sensors have built-in visual and audible alarms. An
auxiliary one amp SPDT relay output is standard. Testing
and recalibration procedures are simple.
KEY FEATURES–GAS SENSORS
• Accurate, fast responding
• Linear 4-20mA or 0-10V DC output
• Audible alarm
• Power indicator
• SPDT alarm relay (Fail Safe Operation)
• 24V AC/DC low voltage power
• Shipped factory calibrated and tested
• CE approved
• CSA (Electrical Features Only)
KEY FEATURES–MONITORS
• Visual alarm
• Audible alarm
• Power indicator
• Low level alarm relay
• High level alarm relay
• Fault relay (HLM6 only)
• Economical
• CE approved
KEY FEATURES−GAS ALERT SYSTEM
• Provides local display and alarm based on
measured target gas level via gas sensor
• Visual alarm, Amber LED light
• Audible alarm (mutable)
• Power indicator, Green
• Numeric PPM reading
• Bright LED Display
• Shipped factory calibrated and tested

2
A100g
JULY 2017
SELECTING GAS SENSOR TYPES
Hansen Gas Sensors are available in several types of
enclosures to match the environmental and operating
conditions.
PORTABLE GAS DETECTION UNIT
Portable Gas Detection unit includes
the handheld unit, battery charger,
extension wand, spare filters,
voltage output cable, accessories
for calibration, and sensor module
keeper for four sensors in a carrying
case. Sensor modules sold separately.
Portable Unit, HEP1.
GAS SENSOR ACCESSORIES
Sensor Element Shield
The Sensor Element Shield can be screwed on to the
end of the gas sensor to help protect the sensor from
rain, dust, hose directed water, and debris floating in
the air. It can be installed on the Standard, Harsh and
Extreme gas sensors. The shield may slow response
time slightly depending on the surrounding air flow
conditions. Shield, p/n 31-1002.
Standard Gas Sensor
For operating temperatures down to
0ºF (-17ºC). NEMA4 (IP65) watertight
enclosure. Mountable indoors or
outdoors. Enclosure is ABS material
with a gasketed cover; single ½˝ conduit
knockout is provided.
Harsh Environment Gas Sensor
For operating temperatures down
to -40ºF (-40ºC) for wet/humid areas.
Mountable indoors or outdoors.
Enclosure is NEMA4 (IP65) ABS material;
conduit connection must be vaporproof.
Extreme Environment Gas Sensor
For operating temperatures down to
-60ºF (-51ºC). Features a stainless steel
metal enclosure and equipped with
an integral heater and thermostat for
low temperature operation. Mountable
indoors or outdoors. Enclosure is
NEMA4X (IP65); conduit connection
must be vaporproof.
Note: Auxilliary power required when
used with Hansen monitors HLM2 and
HLM6 and Gas Alert System.
Vent Line Gas Sensor
For operating temperatures down to
-40ºF (-40ºC). Mountable indoors or
outdoors. Enclosure is NEMA4 (IP65)
ABS material. Gas sensing element is
in a separate carbon steel housing with
an 1˝ NPT threaded connection; cable
is 10 feet (3 meters).
Explosion Proof Gas Sensor
For operating temperatures down
to -40ºF (-40ºC). Mountable indoors
or outdoors. Enclosure is NEMA7
Aluminum. Used where regulations and
codes specify; consult factory with
specific requirements. Class I, Div II,
Group C and D.
Basic Gas Sensor
For operating temperatures down to
32ºF (0ºC). For commercial applications
such as supermarket refrigeration
systems and air conditioning chillers.
Enclosure is NEMA1 (IP30) ABS material
for indoor installations. Low voltage
cable wiring only.
QUICK DISCONNECT
PLUG KIT
Quick Disconnect Plug Kit
The Quick Disconnect Plug Kit can be added to the gas
sensor to provide a means of easily removing the gas
sensor for recalibration. This feature comes in handy
for gas sensors installed in blast cells, low temperature
rooms and hard-to-reach places. The gas sensor
cable can be quickly disconnected and the entire gas
sensor removed or replaced with a bench recalibrated
gas sensor. The gas sensor can then be brought to an
alternate location for recalibration or sensing element
replacement. Quick Disconnect Plug Kit, p/n 31-1001.
Option only available for field installation. Supplied
cable is 2 feet (0.6 meters) in length.
SHIELD
Harsh Model with Shield
Harsh Model with Quick Disconnect Plug Kit

3A100g
JULY 2017
POINT SENSOR
PLACE SENSOR
NEAR OPERATING
EQUIPMENT
PLAN VIEW
OPERATING
EQUIPMENT
PERIMETER SENSOR LOCATION
PLACE SENSORS
AROUND PERIMETER
OF LARGE ROOM
VENTILATED ROOM
AIR FLOW
PLACE SENSOR(S)
BETWEEN EQUIPMENT
AND EXHAUST FAN
12" - 24" FROM CEILING
LIGHT GASES (AMMONIA)
HEAVY GASES (CO2, HALOCARBON)
MOUNT NEAR GROUND LEVEL
12" - 24" FROM CEILING
LIGHT GASES (AMMONIA)
HEAVY GASES (CO2, HALOCARBON)
MOUNT NEAR GROUND LEVEL
GAS SENSOR LOCATION
Sensors should be located in an accessible area
for maintenance and testing, but away from moving
equipment that could accidentally come in contact with
the sensor. Avoid thermal extremes (close to heaters)
and do not place unprotected in direct, strong drafts/
airflows, near exit doors, or areas where falling water
or condensing moisture are present. If high humidity is
always present, power up the unit as soon as possible,
as long term exposure can shorten the life of the gas
sensing element. Select the unit for harsh environments
where a condensing atmosphere may be present. In
blast freezers, mount the gas sensor below the coil to
avoid high moisture and steam during defrost.
The two generally accepted methods of locating sensors
are “Point” and “Perimeter” detection. “Point” detection
is where sensors are located near the most likely sources
of leakage. “Perimeter” detection is where sensors
completely surround the area in question. The size and
nature of the area will help to decide which method is
the most appropriate. Air flow should be considered
in a ventilated room. Place sensors downstream of
potential leak points.
Any sensor which is to be used for detecting a gas
with a vapor density greater than one (i.e. heavier
than air) should generally be located nearer ground
level. Conversely, for any lighter than air gases such
as ammonia, the sensor needs to be located higher up.
MOUNTING HEIGHT OF SENSORS
FIG. 1
Typically ammonia sensors are mounted 12˝–24˝ (.3 to .5m)
from the ceiling. Sensors should not be located too close
to the ceiling as hot air trapped under the ceiling may
act to buffer the target gases from reaching the sensor.
The number of sensors in each area is a function of local
codes and regulations and the customers’ guidelines
for gas detection.
VENTILATED ROOM
FIG. 4
PERIMETER DETECTION
FIG. 3
POINT DETECTION
FIG. 2

4
A100g
JULY 2017
GAS SENSOR SPECIFICATIONS
TABLE 1
BASIC STANDARD HARSH VENT LINE EXPLOSIO N
PROOF EXTREME
OPERATING TEMPERATURE
RANGE
0ºF TO 122ºF
(-17ºC TO 50ºC)
0ºF TO 122ºF
(-17ºC TO 50ºC)
-40ºF TO 105ºF
(-40ºC TO 40ºC)
-40ºF TO 122ºF
(-40ºC TO 50ºC)
-40ºF TO 122ºF
(-40ºC TO 50ºC)
-60ºF TO 105ºF
(-51ºC TO 40ºC)
OPERATING CURRENT @ 24V DC 230mA/6W 50mA/1W 280mA/7W 280mA/7W 280mA/7W 1900mA/46W
OPERATING CURRENT @ 24V AC 460mA/11VA 100mA/2VA 560mA/13VA 560mA/13VA 560mA/13VA 2100mA/50VA
VOLTAGE REQUIREMENTS 12-24V AC/DC* (-15%/+10%) 24V AC/DC*
HUMIDITY RANGE
(NON-CONDENSING) 0-95% 0-100%
MAX LOOP RESISTANCE 1000 OHMS
OUTPUT 4-20mA, 0-5V, 1-5V, 0-10V, 2-10V DC
4-20mA SIGNAL OUTPUT Isolated, 2 wire
ALARM RELAY SPDT, 1 A, 120V
TRUE ALTITUDE 2000M
POLLUTION DEGREE 24
EQUIPMENT CLASS 3
INSTALLATION CATEGORY 31
DUTY CYCLE 100%
*Approved Class2/SELV; -5%/+10% voltage tolerance. AC or DC voltage user selectable. See pages 6 and 7 for
configuration.
DO NOT SUBSTITUTE OR MODIFY
Because of the danger of introducing additional hazards,
do not install substitute parts or perform unauthorized
modifications to the equipment listed herein.
CLEANING/DECONTAMINATION
EXTERNAL SURFACE
The external surface, excluding the sensing element,
can be cleaned using light detergent and water. Do not
allow any of the solution to come in contact with the
sensing element sintered surface.

5A100g
JULY 2017
GAS DETECTION SYSTEM CONFIGURATIONS
There are a number of typical installation configurations to meet national and local codes.
RELIEF VALVE VENT LINE
Often the vent line is extended high above the ground or roof. The sensor element can be installed near the outlet of
the vent line and the gas sensor electronics mounted at a convenient height for servicing. A small length of tubing
can be run for injecting test gas near the sensor element. Install a plug with a small opening to allow a small air
flow to clear fugitive gases and detected gas after a release. Hansen recommends the alarm setting at 5000 PPM.
For water diffuser systems where the relief valve vent piping is diverted into a water diffusion tank, install the vent
line sensor on the diffusion tank exhaust vent, not on the piping to the diffusion tank.
REMOTE SENSOR WITH MONITOR
INDOOR OUTDOOR
VISUAL
AUDIBLE
GAS
SENSOR
VISUAL
A
UDIBLE
A
LARM ALARM
ALARM
ALARM
SIMPLE ALARM SYSTEM
INDOOR OUTDOOR
VISUAL ALARM
AUDIBLE ALARM
GAS
SENSOR
INSIDE SPACE OUTSIDE SPACE
GAS SENSOR ELEMENT
10' (3m) CABLE, MAX
WEATHER PROOF
GAS SENSOR ELECTRONICS
RELIEF LINE DISCHARGE HEADER
DRIP LEG
INSTALL
GAS SENSOR
ELEMENT WITHIN
2' (.7m) OF
DISCHARGE
VENT LINE APPLICATION
PROTECT
EXIT WITH
SUITABLE
OPTIONAL TUBING
LINE For "BUMP" TESTIN
G
GAS AND AIR PURGEROOF LINE
PIPE TEE
GAS SENSOR ELEMENT
1" X 3/4"
TO ALLOW A SMALL AMOUNT OF
AIR FLOW TO CLEAR DETECTED
GASES AND AVOID FALSE ALARMS
REDUCING BUSHING
SCREEN
STAND ALONE CONTROL
The Hansen Gas Sensor can operate as a stand alone device. All that is needed is a 24V AC/DC power supply for
the gas sensor and auxiliary devices for light, horn or digital readout, such as the Hansen GAS Alert System.
LOCAL AND REMOTE VISUAL/AUDIBLE ALARM
Sometimes it may be advantageous to have both local and remote displays and alarms. A display/alarm control
inside or just outside of a room can be monitored and the same display/alarm or a Hansen monitor in the control
room can also alert the operator to an abnormal condition in the plant.
FIG. 5
FIG. 6
FIG. 7
INSIDE ROOM OUTSIDE ROOM

6
A100g
JULY 2017
*ADD 3.25” (83) FOR SHIELD
WIRING GAS SENSORS
Install the Hansen Gas Sensor in an area where operating
personnel can easily monitor the remote sensor. Refer
to Gas Sensor Location on page 3 for suggestions on
proper placement of Remote Sensors.
Use three-wire (VDC supply voltage), twisted pair shielded
cable such as Belden 8770 or equivalent to connect
the gas sensor to the gas monitor (page 15), GAS Alert
System (page 19), customer supplied PLC or computer
(page 20). When powering the gas sensor from a VAC
power supply use four-wire, twisted pair shielded cable,
such as Belden 82418 or equivalent. Connect the power
input wires to terminals ØV and +V. Set applied voltage
jumper to appropriate AC or DC position. Extreme Gas
Sensor requires an additional external 24V AC or DC
power supply wired with 18 AWG cable. Refer to Fig. 21
for wiring details. Connect the signal wire to terminal I
for 4-20mA output or V terminal for 1-5 volt output. The
4-20mA output is best for long distances to the monitor
and where electrical noise is a problem. The voltage output
is for short distances within 10 feet (3 m) of the monitor.
The maximum 4-20mA cable length is 1000 ft (300 m).
Under no circumstances should the gas sensor low
voltage signal wires be in a common conduit, tray or
wiring panel with power wiring over 48 volts. Do not run
wires near variable frequency drive (VFD) equipment.
When using the gas sensors connected directly to a
customer supplied PLC or computer, refer to Fig. 20
for wiring details.
Hansen recommends backup of gas detection system
with an uninterruptable power supply to provide battery
backup in the event of a power failure.
INSTALLATION
Mounting the gas sensor varies by model. Refer
to Installation Dimensions below for mounting
requirements.
SENSING ELEMENT
Typical sensor life is based on normal operating
conditions. Exposure to the target gas will shorten these
times. The typical sensor life of the electrochemical gas
sensor element is 1 to 2 years; typical sensor life for
semiconductor element is 2 years; and typical sensor
life for infrared element is 5 to 7 years. Recalibration
should be performed at least every 6 months. Calibration
can be performed locally at sensor installation site. If
desired results cannot be achieved or if signal reads
0.5mA, replacement of the sensor element may be
required. See Sensor Element Replacement section
for further instruction.
Note: Insurance companies, local and state agencies
may require more frequent testing and calibration; refer
to insurance carrier mandates as well as local and state
codes.
INSTALLATION DIMENSIONS
INCHES (MM)
FIG. 8
BASIC STANDARD & HARSH
EXTREME EXPLOSION PROOF

7A100g
JULY 2017
ELECTROCHEMICAL SENSOR
(SHOWN WIRED FOR 4-20MA OUTPUT)
FIG. 9
SEMICONDUCTOR SENSOR
(SHOWN WIRED FOR 4-20MA OUTPUT)
FIG. 10
Electro-chemical Sensor
6
5
4
3
2
1
Sensor Voltage (VS)
0 V Pin
Alarm Horn & Relay Set Point Voltage (Ref 1)
Horn and Alarm
Relay set point
HORN
ZZero
S
Calibration
Screws
A
G
R
Span
External Sensor Element 4 Wire Connection
(Standard and Harsh Environment Model)
Horn & Alarm Delay - JP5&JP6 off: no delay
JP5 on only: 1 Minute
JP6 on only: 5 Minutes
JP5&6 on: 10 Minutes
JP3 - on: 4-20mA / 2-10V / 1-5V output
JP2 - on: Horn enabled
JP1 - on: 0-5V / 1-5V / 4-20mA output
off: 0-5V / 0-10V output
off: 0-10V / 2-10V output
*Factory Default
*
*
*
*
No Jumper
To Monitor or PLC
NO
NC
COM
+V
V
0 V
0 V
I
{
Relay Output
4-20mA output
(POWER)
(COM)
(SIGNAL)
MULTI-WIRE SHIELDED CABLE
(GROUND SHIELD AT OTHER END)
Voltage Selector - "D": 24V DC
"A": 24V AC *
D
A
Fail Safe Relay - Relay engerized
to normally open
position when
power applied
AC APPLIED VOLTAGE
(POWER)
SEMI-CONDUCTOR SENSOR
NO
NC
COM
+V
V
0 V
0 V
I
{
Relay Output
6
5
4
3
2
1
Horn & Alarm Delay - JP5&JP6 off: no delay
JP5 on only: 1 Minute
JP6 on only: 5 Minutes
JP5&6 on: 10 Minutes
JP3 - on: 4-20mA / 2-10V / 1-5V output
JP2 - on: Horn enabled
JP1 - on: 0-5V / 1-5V / 4-20 mA output
off: 0-5V / 0-10V output
off: 0-10V / 2-10V output
Sensor Voltage (VS)
0 V Pin
Alarm Horn & Relay Set Point Voltage (Ref 1)
Horn and Alarm
Relay set point
HORN
ZZero
S
Calibration
Screws
A
*Factory Default
*
*
*
*
G
RSpan
4-20mA output
External Sensor Element 4 Wire Connection
(Standard and Harsh Environment Model)
No Jumper
(POWER)
(COM)
(SIGNAL)
MULTI-WIRE SHIELDED CABLE
(GROUND SHIELD AT OTHER END)
Voltage Selector - "D": 24V DC
"A": 24V AC *
D
A
Fail Safe Relay - Relay engerized
to normally open
position when
power applied
AC APPLIED VOLTAGE
40 dB @ 2' BASIC
(POWER)
To Monitor or PLC

8
A100g
JULY 2017
INFRARED SENSOR
(SHOWN WIRED FOR 4-20MA OUTPUT)
FIG. 11

9A100g
JULY 2017
SETTING ADJUSTMENTS OF SENSORS
There are several selectable features included in the
Hansen Gas Sensor. Refer to pages 7 and 8 for the
adjustable features. Note the adjustment screws on
the circuit board for the electrochemical sensor have
a different layout then the semiconductor sensor. The
jumpers may be moved without shutting off the power.
With the use of a 12-24V AC/DC power source, these
sensors can be set to the customers specifications
prior to mounting the gas sensor in the engine room or
refrigerated area.
Relay and Horn Set Point
The adjustment screw A sets the trip point for the relay
and the alarm horn. A 0-5V scale measures the full
sensing range of the Gas Sensor. The trip point voltage
can be measured at points ØV and REF1 located on the
board. Refer to pages 7 and 8 for location of the reference
pin REF1. A 100 PPM range gas sensor reading 2.5 volts
at the reference pin would be equivalent to half the range
or 50 PPM. Default factory setting is 50% of range.
Note that the set point of the relay is independent
of the set points to the Gas Detection Monitor. To
assist in selecting the correct voltage for the desired
PPM set point, refer to Table 2 below.
VOLTAGE PPM RANGE
5100 250 500 3000 10,000
480 200 400 2400 8000
360 150 300 1800 6000
240 100 200 1200 4000
120 50 100 600 2000
.5 10 25 50 300 1000
TABLE 2
Setting Minimum or Maximum Relay Set Point
There is a practical limit for setting the minimum or
maximum relay set point. There is the tolerance of the
electronic board and the test meter. It is recommended
to keep the relay set point between 10% and 95% of
the range.
Time Delay
A time delay for the operation of the relay and alarm horn
can be selected using jumpers JP5 and JP6. Default
factory setting is zero.
Alarm Horn
Alarm horn is 40dB at 2 feet for Basic Sensor; all other
models not audible with cover closed. The alarm horn
can be disabled using jumper JP2. Default factory
setting is enabled.
Adjustment of the Detection Range
Adjustment Screw Z sets the zero (0 PPM) and Adjustment
Screw S sets the span. (full range = 1000 PPM, for
instance). The output of the sensor circuit can be
monitored via test points ØV and VS. The full range equals
5 volts DC. See Calibration Procedures for further details.
Note: The unit is calibrated in factory there is no need
for adjustment of Span in regular circumstance. Span
needs to be adjusted only when the unit is calibrated,
e.g. calibration gas applied to the sensor. After initial
installation of the unit adjustment of Zero might be needed
as the ambient conditions are different between factory
and install location.
GAS SENSOR OPERATION
On power up the internal relay will energize switching
from the normally closed position to the normally open
position. In addition, the sensor will go through an
initial warm-up delay for five minutes. At this time, the
I and V outputs are 0. This is indicated by the green
LED flashing approximately every second. After five
minutes, the green LED stays on continuously, indicating
power to the gas sensor and ready for service. The gas
sensor also sends a milliamp output signal to the gas
detection monitor, PLC, or computer. This output signal
is proportional to the amount of the specific gas being
monitored in the air around the gas sensor. If signal
reads 0.5mA, it is an indication the sensing element has
failed or disconnected. Verify proper installation and
refer to testing and calibration procedures.
Fail Safe Operation
Hansen Gas Sensors feature a one amp SPDT alarm
relay for fail safe operation. In the event of a sensor
element failure, power loss or gas leak detection, the
internal relay will be de-energized. This relay can be
used to trigger an external alarm.
Start Up Test
Once the installation of the gas sensors and monitors
is complete, the entire gas sensor system should be
tested. Normally, two people are required—one person
using a small amount of the target gas to “bump” each
sensor in turn, a second person at the monitor location
to verify the sensor is connected to the correct input,
responds to the target gas and causes the lights and
alarms to respond.
Gas Sensor Testing
Field testing of the gas sensor is normally done for three
reasons. The first is to determine if the gas sensor is
responding to the specific gas. This test is sometimes
called a “bump” test. The frequency of the test is usually
stated in the facilities Process Safety Management (PSM)
document, but not less than every six months.
The second reason for gas sensor testing is to be sure
the gas sensor is properly calibrated. Depending on the
sensing element type, the sensor sensitivity will change
with time. In particular, electrochemical sensors use a
material that is depleted with time. The length of time
varies depending on the amount of exposure to the target
gas, the ambient temperature and humidity, and changes
to temperature and humidity range. Atmospheres that
are very dry or very humid will shorten the life of a
sensing element.
The third reason is to be sure the gas sensor output
triggers the alarms on the monitor, PLC, Gas Alert System,
horn or lights. All gas sensors are recommended to be
recalibrated at least every 6 months. All sensor types
should be recalibrated immediately after exposure to
a large concentration of the target gas.
Note: Insurance companies, local and state agencies
may require more frequent testing and calibration; refer
to insurance carrier mandates as well as local and state
codes.

10
A100g
JULY 2017
LED LOGIC
GAS SENSOR LED INDICATORS
LED OPERATIONS RE SU LT
Green LED Flashing / Red LED off Warming up ≈ 5 min
Green LED on / Red LED off Ready to detect gas
Green LED on / Red LED on Gas level above gas
sensor trip point
Green LED off / Red LED on
Sensor element
failure or sensor
disconnected
Green LED off / Red LED flashing Low supply voltage or
low supply current
TABLE 3
CALIBRATION PROCEDURES
Refer to Fig. 12 for calibration of Hansen sensors.
Equipment required:
Hansen calibration kit, stopwatch, hex wrench; 5/32˝,
long nose pliers, 24V AC/DC power supply, voltmeter,
2 minigrabber voltmeter leads and calibration gas for
the specific sensor.
Setup:
1. Be sure the system is made safe during
calibration. The 4-20mA output and internal relay
will be active during calibration.
2. Be sure the gas sensor has been powered up for a
minimum 24 hours to stabilize the sensing element.
3. Verify the green LED is illuminated and the red LED
is off.
4. Disable the internal horn by removing JP2 jumper.
Zero Calibration:
5. Set the voltmeter to the appropriate DC range. The
sensor element output is measured in DC volts;
zero volts equals zero PPM and 5 volts equals the
gas sensor PPM rating. (i.e. 100 PPM, 250 PPM).
Attach the voltmeter leads to the VS, (+) lead from
the voltmeter, V0, (-) lead of the voltmeter.
6. Be sure the ambient atmosphere around the gas
sensor is free of any background gases. To zero
CO2 sensors, pure nitrogen needs to be used to
ensure free ambient conditions.
7. Adjust the zero potentiometer (Z) until the voltage
reading on the voltmeter reads between zero volts
and +/- 0.030VDC.
Span Calibration:
1. Always perform the zero calibration before doing
the span calibration.
2. Place the boot over the sensor element. Use the
correct concentration of calibration gas for the
full range of the sensor. In other words, for a gas
sensor with a range of 0 to 250 PPM, use a 250 PPM
calibration gas when setting the span. If full range
calibration gas is not available, a calibration gas of
less than full range can be used then adjust to the
corresponding output voltage. This may result in
some loss of accuracy.
3a. Gas sensors (except Vent line and
Semi-conductor gas sensors).
Start the flow of gas. Observe the output, it should
begin to increase after 5 seconds. Leave the gas
flow on and observe the voltage. The sensor voltage
will slowly climb toward 5VDC. When the voltage
does not change by more than +/- 0.010 volts per 15
seconds the sensor output voltage is considered to
be stable. Adjust the span potentiometer (S) so the
output voltage reads between 4.95 to 5.00 volts DC.
3b. Vent line and Semi-conductor gas sensors
Start the flow of gas. Observe the output, it should
begin to increase after 5 seconds. Leave the gas
flow on and observe the voltage. The sensor voltage
will ramp up quickly. When the voltage does not
change by more than +/- 0.010 volts per 15 seconds
the sensor output is considered to be stable. Adjust
the span potentiometer (S) so the output voltage
reads between 4.95 to 5.00 volts DC.
4. Stop the flow of gas and remove the boot from the
sensor element. Verify the sensor voltage output
begins to decrease.
5. Do not attempt to re-adjust the zero or span
calibration until another 24 hours of powered
operation has passed.
6. Enable system. Verify proper operation.
7. Enable the internal horn by installing JP2 jumper.
Electrochemical Sensor Only (Zero Offset)
If the gas sensor is calibrated in the environment for
which it will be used a final zero adjustment will not be
necessary. If the gas sensor will be calibrated at one
temperature (70ºF, 21ºC) then moved to its operating
environment (-4ºF, -20ºC) a maximum zero offset of
2% will occur. If unacceptable, adjust the zero point as
described in section Calibration Procedures, Zero
Calibration. At (-40ºF, -40ºC), a maximum zero offset
of 12% will occur. If unacceptable, adjust the zero point
as described in section Calibration Procedures, Zero
Calibration.
CALIBRATION GAS CYLINDERS
Warning: Refer to Material Safety Sheet supplied with
gas cylinder and local safety precautions for proper
usage, handling and disposal.
Hansen calibration gas standards are traceable to NIST
(National Institute of Standards and Technology) and
analysis data is available on request.
A variety of calibration refrigerant gases and PPM ranges
are available, refer to Page 23. For special mixtures,
consult factory. Calibration gas should be stored in a
cool area, 65ºF/75ºF. Shelf life labeled on cylinder−one
year from date of manufacture.
Calibration gas must be shipped according to Department
of Transportation Hazardous Gas Regulations. Special
shipping charges will apply. Shipping only available in
the continental USA.

11 A100g
JULY 2017
CALIBRATION OF SENSORS
FIG. 12
HORN
S
Z
1234 5678
ELECTRO CHEMICAL BOARD SHOWN
(SEMI CONDUCTOR IS SIMILAR)
ZERO POT
ADJUSTMENT
SPAN POT
ADJUSTMENT
SENSING
ELEMENT
0-5V DC
FIG C
O V
V S
REGULATING
VALVE
CALIBRATION GAS
3100-13
BOOT
SENSING ELEMENT REPLACEMENT
Basic Sensors
The Basic Gas Sensor uses a three pin plug-in element
for Ammonia Sensors and six pin plug-in element for
Halocarbon Sensors which is internally mounted to
the circuit board. To replace, disconnect power and
open the enclosure. The sensing element is removed
by hand; lifting it off the circuit board. Install the new
sensor element by lining up the pins and press firmly into
place. Connect power and allow the sensor element to
stabilize for 24 hours. Recalibrate and install the cover.
Standard, Harsh and Explosion Proof Sensors
Standard, Harsh and Explosion Proof Sensing Elements
are externally mounted to the enclosure. To replace,
disconnect power, open enclosure and disconnect cable
wire from the circuit board. Unscrew sensor element
from enclosure. Install new sensor element. Connect
power and allow sensor element to stabilize for 24 hours.
Recalibrate and install the cover.
Extreme Sensors
Extreme Sensing Elements are internally mounted to
the enclosure. To replace, disconnect power, remove
nut and gasket from sensing element at the base of the
unit, open enclosure and disconnect cable wire from the
circuit board. Remove sensor element from enclosure.
Install new sensor element in reverse order. Connect
power and allow sensor element to stabilize for 24 hours.
Recalibrate and install the cover.
Note: After replacing sensing element recalibration of
sensor is required.
Note: Infrared sensing element (CO2) is not replaceable
Note: For 250 PPM sensors only, special kits are
available which include both the new circuit board and
appropriate 250 PPM sensing element. Refer to page
24 for special replacement kits.

12
A100g
JULY 2017
HLM6 - Six Channel Monitor HLM2 - Two Channel Monitor
KEY FEATURES–MONITORS
• 100 – 230 VAC 50/60Hz
• Audible alarm
• Visual power indicator
• (2) alarm and (1) fault relay outputs - Model HLM6
• (2) alarm relay outputs - Model HLM2
• CE approved
TYPICAL SPECIFICATIONS
Two Level Monitors: Model HLM2 and Model HLM6
Low-level Alarm:
- Visual Warning Yellow LED
- Audible Warning Intermittent
- Relay SPDT Energized
High level alarm:
- Visual Warning Red LED
- Audible Warning Continuous
- Relay SPDT Energized
The Model HLM2 two channel monitor has the audible
alarm built in.
The Model HLM6 six channel monitor has an externally
mounted horn. A device rated up to 12V DC at 100mA
maximum may be connected to CN11, see Fig. 14. The
high level SPDT relay may be set for Normal Operation
(normally closed position with no power) or Fail-Safe
Operation (relay energized when power to monitor is
applied). The Fail-Safe Operation is initialized by setting
Jumper JP1 over pins 2 and 3.
Low level alarms reset automatically when the detected
gas dissipates. High level alarm condition requires a
manual reset (user to press the reset button on the
topside of the monitor). Please note that a high level
alarm condition can only be reset 30-60 seconds after
the gas clears from the sensor.
The audible alarm produced by the horn may be disabled
by turning the key switch off. The key switch is located
on the topside of the monitor.
TECHNICAL SPECIFICATIONS–MONITORS
Operating Temperature Range: 32ºF (0ºC) to
125ºF (50ºC)
Output: 2 SPDT dry contact relays (alarms) - 10 amp
@ 230V AC
1 SPDT dry contact relay (fault output) - 10 amp @
230V AC (HLM6 Model only)
Power Required: 100 – 230 VAC
Power Consumption:
HLM2 15W
HLM6 25W)
Audible Alarm:
HLM2 - internal 80 dB
HLM6 - external 110 dB/12V DC
INSTALLATION INSTRUCTIONS
The Hansen Technologies Gas Detection Monitor should
be located in an accessible area, away from moving
equipment that could accidentally come in contact
with the unit. Avoid thermal extremes (close to heaters).
Monitor must be protected from direct strong drafts/
airflows and areas where falling water or condensing
moisture is present.
WIRING OF GAS DETECTION MONITORS
Install the Hansen Gas Detection Monitor on a wall or in
an electrical panel in an area where operating personnel
will easily monitor the leak detection system. There are
three mounting holes on the back of the panel. Remove
the front cover and disconnect the grounding wire to
access the mounting holes. Attach the monitor to the
wall using the appropriate mounting screws.
Hansen Gas Detection Monitors are available for use
with two or six sensors. For larger systems, use multiple
Gas Detection Monitors. Alternately, the gas sensors
can be used directly with a customer supplied computer
or PLC and software.
Connect specified AC power to the Gas Detection
Monitor. Size the circuit for a minimum 5 amps for 120V or
2 amps for 230V. Use two wire plus ground with minimum
18 gauge wire (.823mm sq.) for 120V service or .75mm
sq. wire for 230V service. Bring power into the bottom of
the enclosure. Seal any excess conduit or cable entries.
See page 14 and 15 for terminal connections.
Extreme Gas Sensor requires an additional external 24V
AC or DC power supply. Refer to Fig. 21 for wiring details.

13 A100g
JULY 2017
Maximum Power Wiring Length to a Monitor
120V
System
230V
System Wire
Size
Maximum
Ohms/Wire
Length Length
Ft mFt m
HLM2
200 60.9 120 40 22 Gauge
7/.2mm 3.52
500 150 300 100 18 Gauge
7/.386mm
HLM6
500 150 300 100 22 Gauge
7/.2mm 8.8
1300 430 700 230 18 Gauge
7/.386mm
TABLE 4
Note: There is a 5 minute delay before the green power
light on the gas monitor is energized. This is to allow the
Gas Sensor to stabilize and not give off false information.
The Hansen models HLM2 and HLM6 have both low level
alarm and high level alarm single pole double throw
(SPDT) relays. In addition model HLM6 has a fault
output.
RELAY SET POINTS FOR
GAS DETECTION MONITORS
Gas Detection Monitors are equipped with two relays—
low level and high level. Shipped from the factory, the
relays are set for 20% and 60% of the output of the
sensor. In other words, a 250 PPM sensor will activate
the low level alarm at 50 PPM and the high level alarm
at 150 PPM. The relay settings can be field adjusted.
Refer to page 13 for details.
SETTING ALARM OUTPUT FOR HLM6
MONITOR
Use a voltmeter to monitor the voltage on the calibration
pins. The voltage range is from 0.4V DC to 2.0V DC. The
voltage range corresponds to the 4-20mA range. (ie.
0.4V DC equals 4mA, 2.0V DC equals 20mA).
For the low level alarm relay setting, measure the voltage
across VLOW and GND. Set the desired low
level alarm relay using VLOW Pot. This setting applies
to the six channels.
For the high level alarm relay setting, measure the voltage
across VHIGH and GND. Set the desired high level alarm
relay using VHIGH Pot which is located furthest from the
calibration pins. This setting applies to the six channels.
SETTING ALARM OUTPUT FOR HLM2
MONITOR
Use a voltmeter to monitor the voltage on the calibration
pins. The voltage range is from 0.4 V DC to 2.0V DC. The
voltage range corresponds to the 4-20mA range. (i.e.
0.4V DC equals 4mA, 2.0V DC equals 20mA).
For the low level alarm relay setting, measure the
voltage across VLOW and GND. Set the desired low
level alarm relay using VLOW Pot. This setting applies
to both channels.
For the high level alarm relay setting, measure the
voltage across VHIGH and GND. Set the desired high
level alarm relay using VHIGH Pot. This setting applies
to both channels.
OUTPUT DELAYS
There is a fixed delay between the sensor output
indicating an alarm and the controller registering
this alarm condition as valid. This is to prevent false
alarms on transient outputs. This delay period is fixed
and is approximately 25 seconds for the low level and
another 25 seconds for the high level.
FAIL SAFE OPERATION
The fail safe jumper on all units is used to enable/
disable the high-level alarm relay to operate in fail
safe mode.
TABLE 5
OUTPUTDELAYS
FAILSAFEOPERATION

14
A100g
JULY 2017
HLM2 WIRING DIAGRAM
FIG. 13

15 A100g
JULY 2017
HLM6 WIRING DIAGRAM
FIG. 14

16
A100g
JULY 2017
TROUBLESHOOTING GAS MONITORS
Symptom: No lights displayed on panel.
Cause:
1. Power failure. Check incoming line.
2. Tripped circuit breaker or blown fuse on electrical
supply.
3. Unit warming up. It takes 3-5 minutes after power
is switched on.
Symptom: Red light is on, but no alarm condition is
active. (i.e. No horn or no relay operation after 3 minutes).
Cause:
1. Check to be sure the horn has not been
deactivated by Key switch.
2. Possible wiring or sensor fault. Check wiring and
connections for continuity.
3. Check calibration for proper alarm levels.
TROUBLESHOOTING GAS SENSORS
Symptom: Sensor green light is off.
Cause:
1. Possible wiring fault between controller and
sensor. Check power supply to Controller. Check
connections between the controller and the
sensor. Check wires are connected to the proper
number terminal.
2. Sensor possibly damaged. Check by installing
another sensor to confirm sensor fault.
Symptom: Output from sensor is 2mA (for 4-20mA
output). Output from sensor is 0 V or .5V (for 0-10, 0-5,
1-10, 1-5 output signals).
Cause:
1. Sensing element has failed or is disconnected
from printed circuit board. Check wiring and
sensor element for proper installation.
2. Electronics do not match replacement sensing
element (250 PPM only). Check electronic revision
identification label on the circuit board located
inside the enclosure. See Special Element
Replacement section on page 24.
Sensing Element Type Electronic Revision
Identification Label
Semi-conductor sensor 1000-5501.1
Electrochemical sensor
above 250 PPM 1000-5503.1
Electrochemical sensor
for 250 PPM or below 1000-5504.1
Infrared sensor 1000-5508.1
Symptom: Zero fluctuations without the presence of
target gas.
Cause:
The sensitivity characteristics of the sensing element
can be altered by changes in atmospheric temperature
and humidity.
1. Following a change in temperature/humidity
allow 2-3 hours for the sensor to stabilize. Small
changes of +/-1% or less should be considered
normal and know further action is required.
TABLE 6

17 A100g
JULY 2017
INSTALLATION DIMENSIONS
INCHES (MM)
HLM2
FIG. 15
HLM6
FIG. 16
GAS ALERT SYSTEM
FIG. 17
5.26"
(134)
2.72"
(69)
6.30"
(160)
6.54
(166)
7.39
(188)
1.06
(27)
1.125
(28)
1.16
(29.5)
1.06
(27)
3xM20M16/PG9
6.30
(160)
.38
(9.6)
5.94
(151)
5.26"
(134)
2.72"
(69)
6.30"
(160)
6.54
(166)
7.39
(188)
1.06
(27)
1.125
(28)
1.16
(29.5)
1.06
(27)
3xM20M16/PG9
6.30
(160)
.38
(9.6)
5.94
(151)
5.26"
(134)
2.72"
(69)
6.30"
(160)
6.54
(166)
7.39
(188)
1.06
(27)
1.125
(28)
1.16
(29.5)
1.06
(27)
3xM20M16/PG9
6.30
(160)
.38
(9.6)
5.94
(151)
2.56
(65)
.62
(16)
2.07
(53)
4.13
(105)
.173 DIA (4,4)
MOUNTING HOLE
3 PLACES
.29
(7)
2.93
(78)
6.37
(162)
.358 DIA (9,1)
MOUNTING HOLE
3.10
(79)
7.58
(191)
.173 DIA (4,4)
MOUNTING HOLE
3 PLACES
.358 DIA (9,1)
MOUNTING HOLE
9.50
(241)
10.38
(264)
5.19
(132)
.56
(14)
.29
(7)
8.58
(218)
9.56
(243)
3.30
(84) 2.80
(71)
.49 DIA (5X)
(12)
AUDIBLE ALARM
KEY SWITCH
HIGH LEVEL
ALARM RESET
HIGH LEVEL
ALARM RESET
AUDIBLE ALARM
KEY SWITCH
.49 DIA (5X)
(12)

18
A100g
JULY 2017
KEY FEATURES−GAS ALERT SYSTEM
• Provides local display and alarm based on
measured target gas level
• Visual alarm, Amber LED light
• Audible alarm (mutable)
• Power indicator, Green
• Numeric PPM reading
• Bright LED display
• Shipped factory calibrated and tested
TECHNICAL SPECIFICATIONS
Operating Temperature Range: -10ºF (-23ºC) to
125ºF (50ºC)
Humidity Range (Non-condensing): 0-95%
Voltage Requirements: 24V AC/DC, 50/60 Hz
Display: LED, Red
Loop Resistance: 100 ohms
Power Requirements at 24V AC, 50/60Hz with sensor:
11.4VA
Power Requirements at 24V DC with sensor: 247mA
Audible Alarm Sound Pressure: 97dB at 2 feet
Tone Type: Continuous, 2900 Hz
Muted Sound Pressure: 60dB at 2 feet
Visual Alarm, LED Lamp: Amber, 38 lumens
Enclosure: Watertight, NEMA4X (IP65)
Pollution Degree: 4
True Altitude: 2000M
Installation Category: 1
Duty Cycle: 100%
Equipment Class: 3
INSTALLATION OF GAS ALERT SYSTEM
The GAS Alert System is shipped factory calibrated
and tested; ready to use. Mount in a location safe and
easily accessible. Avoid thermal extremes and areas
where falling water or condensation moisture is present.
The GAS Alert System can be mounted to any solid flat
surface. See installation dimensions on page 17. Two
options are available for mounting; screw the base to a
solid flat surface or clip-on to a DIN-rail. The lower cover
must be removed to access the two mounting holes for
screw mounting. Attach to the wall with the appropriate
mounting screws. Replace the cover when complete.
WIRING GAS ALERT SYSTEM
The GAS Alert System can be used as a standalone,
locally monitored system or as part of a larger gas
monitoring and signaling system. The lower cover to
the terminal compartment must be removed to gain
access for wiring. Knockouts are available for ¼˝ and
½˝ conduit or liquid tight cable clamps. To use as a
standalone system one gas sensor is required. The
gas sensor is powered via the GAS Alert System. The
gas sensor 4-20mA signal is fed back to the GAS Alert
System to allow for a numeric readout of the actual
PPM value measured. The gas sensor internal relay is
wired to the GAS Alert System to trigger the signaling
lamp and sounder. The GAS Alert System signal lamp
and sounder will clear when the gas level as detected
by the gas sensor drops below the adjusted trip point.
The default setting from the factory for a specified gas
sensor is half the total range. For typical wiring refer
to page 19.
To use as part of a larger gas monitoring and signaling
system, each GAS Alert System will be mated with a
gas sensor. The 4-20mA signal can be used to drive
the GAS Alert System device, plus a larger monitoring
system or PLC monitoring signaling system. For typical
wiring refer to Fig. 19.
Due to system irregulaties the Gas Alert System LED
display, when connected to a gas sensor with no target
gas present, the display may not read at zero. If this is
not acceptable, the user can adjust the LED display in
the Gas Alert System or adjust the zero setting in the
gas sensor. Refer to pages 9 and 10 for adjusting the
gas sensor zero setting.
To adjust the Gas Alert System LED display, open
the clear cover and remove the LED display panel by
removing the 4 screws. On the backside of the LED
display, adjust the potentiometer labeled Z until the
display reads 0 PPM. Reverse procedure to assemble.
GAS Alert System

19 A100g
JULY 2017
TYPICAL WIRING DIAGRAM WITH LOCAL POWER SOURCE
FIG. 18
TYPICAL WIRING DIAGRAM WITH HANSEN HLM6 MONITOR
FIG. 19
GREENRED
REMOTE SENSOR
V+V VINOCOM NC
0
0 V
V
+V
I
COM
CONTROL
0
(RELAY NC)
(RELAY COM)
(SIGNAL)
(POWER)
(COM)
(SHIELD)
(-)
(SIGNAL)
(POWER)
(POWER)
(SHIELD)
(+)
ppm
Power Supply
24V AC/DC
EARTH GRD
Multi-Wire
Cable Shield
(-)
*
*JUMPER INSTALLED.
Do Not Ground
Shield At This End
Multi-Wire
Cable Shield
SET REMOTE SENSOR FOR DC VOLTAGE
A
D
External Power Supply

20
A100g
JULY 2017
PLC 4 PT. ANALOG IN MODULE (CURRENT)
FIG. 20
TYPICAL WIRING DIAGRAM HLM6 TO EXTREME GAS SENSOR
FIG. 21
PLC 4 PT. ANALOG IN MODULE (CURRENT)
GREENRED
V+V VINOCOM NC
0
0 V
Power Supply
24V AC/DC
EARTH GRD
Multi-Wire
Cable Shield
*REMOTE SENSOR
+
-
INPUT #1
INPUT #2
INPUT #3
INPUT #4
ANALOG GND
REMOTE SENSOR
REMOTE SENSOR
REMOTE SENSOR
* Wiring is the same for AC or DC Power Supply.
Voltage selector must match external power supply.
A
D
This manual suits for next models
2
Table of contents
Other Hansen Technologies Gas Detector manuals
Popular Gas Detector manuals by other brands

Evolveo
Evolveo Alarmex Pro ACSALMGAS manual
Bacharach
Bacharach Leakator 10 instructions
Vighnaharta
Vighnaharta TS21 I IR CO2 user manual

Perry Electric
Perry Electric 1GA 51917MET/P Installation and operating instructions
Sens
Sens SG-A1 user manual
Crowcon
Crowcon Vortex FP Compact Installation and operation manual
