Specifications
SaveThis Manual
You will need the manual for the safety warnings and precautions.Keep
your invoice with this manual. Write the invoice number on the inside of the
front cover. Keep the manual and invoice in a safe and dry place for future
reference.
SafetyWarnings and Precautions
WARNING: When using Camera, basic safety precautions should always be
followed to reduce the risk of personal injury and damage to equipment.
Read all instructions before using this product!
1. Avoid damaging Camera. Use only as specified in this manual.
2. Keep children away. Do not let a child under the age of 10 years old use this
Cameraunsupervised.TheCameracontainssmall partsthat can beswallowed
and/or choked upon.
3. Maintain Camera with care. Be sure the Camera has operating batteries
(not included). If damaged, have Camera repaired by a Camera repairman.
DO NOT DISASSEMBLE. Camera has high voltage components and only an
authorized repairman should repair.
4. Check for damaged parts. Before using this Camera, any part that appears
damaged should be carefully checked to determine that it will operate properly
and perform its intended function.
5. Store idle equipment. When not in use, the Camera must be stored in a dry
location out of reach of children.This Camera is not waterproof.Do not expose
to rain.
Warning:The warnings,cautions,and instructions discussed in this instruction
manual cannot cover all possible conditions and situations that may occur. It
must be understood by the operator that common sense and caution are
factors which cannot be built into this product, but must be supplied by the
operator.
SKU 90959 Page 2
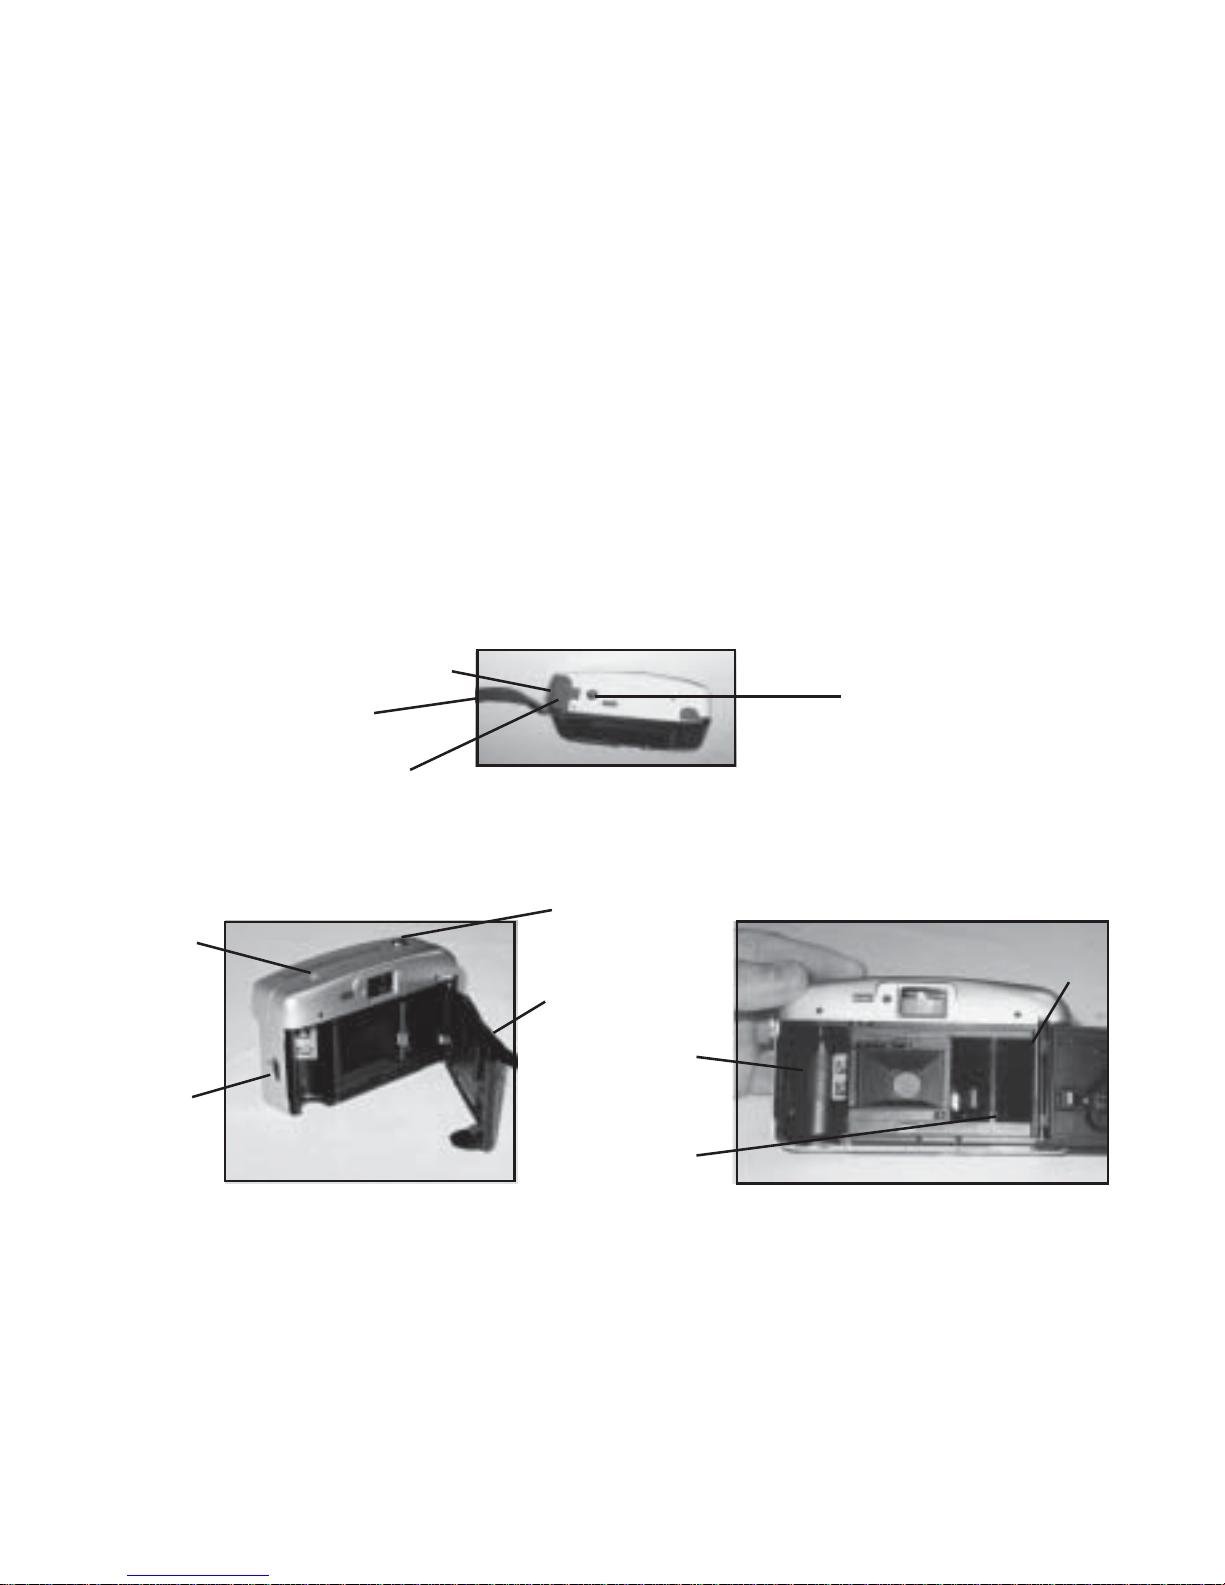
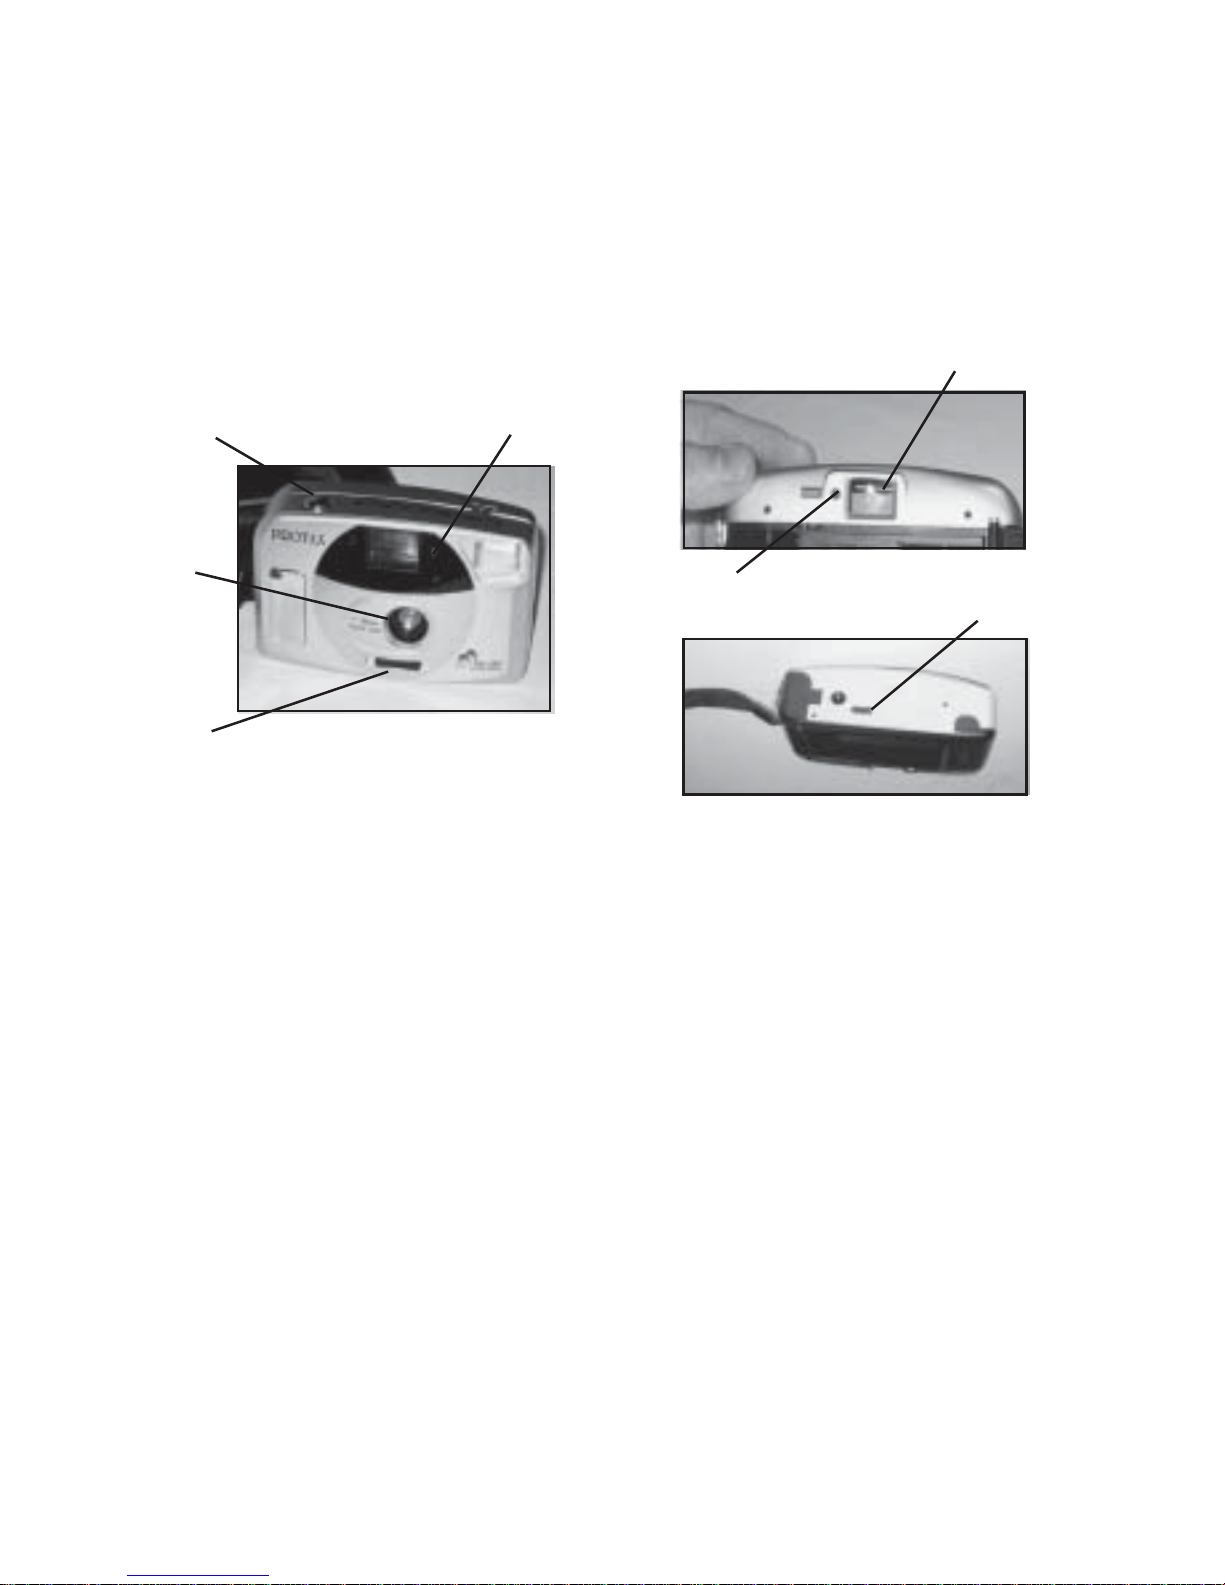
DESCRIPTION
0.445” Diameter
ISO 100 or 400 (with DX-coded Film)
Black Nylon with Hook and Loop Closure
7” Long
Two “AA” Alkaline Batteries (not included)
ITEM
Lens
Film Speed
Carrying Case
Lanyard
Batteries