HARDKERNEL ODROID-7 User manual

1
ODROID-7 USER MANUAL
(Developer edition)
ODROID-7 is open source platform and supported only through forum.
http://odroid.foros-phpbb.com
AndroidTM SDK Platform R2.2
www.hardkernel.com

2
SAFTY NOTICE AND PRECAUTIONS --------------------------------------------------------------- 3
OVERVIEW ------------------------------------------------------------------------------ 6
ODROID-7 DESCRIPTION ------------------------------------------------------------------------------ 7
BOARD DESCRIPTION ------------------------------------------------------------------------------ 9
Front ------------------------------------------------------------------------------ 9
Back ------------------------------------------------------------------------------ 9
FPCB ------------------------------------------------------------------------------ 10
CPU Board ------------------------------------------------------------------------------ 10
Debug Board ------------------------------------------------------------------------------ 10
SYSTEM SOFTWARE ------------------------------------------------------------------------------ 11
Recovery utility ------------------------------------------------------------------------------ 11
U-boot compile HOWTO --------------------------------------------------------------- 11
Kernel compile HOWTO --------------------------------------------------------------- 11
How to install Android SDK --------------------------------------------------------------- 12
How to install Android NDK --------------------------------------------------------------- 12
PARTS DETAIL ------------------------------------------------------------------------------ 13
SAMSUNG S5PC110 ------------------------------------------------------------------------------ 14
Block Diagram for ODROID-7 --------------------------------------------------------------- 14
Key features of Samsung S5PC110 ------------------------------------------------ 14
GETTING STARTED ----------------------------------------------------------------------------- 15
ANDROID -------------------------------------------------------------------------------------------- 17
HOME SCREEN ------------------------------------------------------------------------------- 17
Status and Notifications ---------------------------------------------------------------- 20
USB drive ------------------------------------------------------------------------------- 21
To allow download of applications ------------------------------------------------- 22
Connecting Wifi network ---------------------------------------------------------------- 23
Bluetooth settings ---------------------------------------------------------------- 26
Managing applications ---------------------------------------------------------------- 27
Spare Parts ------------------------------------------------------------------------------- 28
APPENDIX ---------------------------------------------------------------------------------------------- 29
Specifications ------------------------------------------------------------------------------- 29
Manufacturer information ---------------------------------------------------------------- 29
www.hardkernel.com

3
SAFTY NOTICE AND PRECAUTIONS
Please Read Before Proceeding
THE BATTERY IS NOT CHARGED WHEN YOU TAKE THE DEVICE OUT OF THE BOX. DO NOT REMOVE THE BATTERY PACK IN ANY CASE.
YOUR WARRANTY IS INVALIDATED IF YOU OPEN OR TAMPER WITH THE DEVICE’S OUTER CASING.
Limitation of Damages
TO THE MAXIMUM EXTENT PERMITTED BY APPLICABLE LAW, IN NO EVENT SHALL HARDKERNEL BE LIABLE TO USER OR ANY THIRD
PARTY FOR ANY INDIRECT, SPECIAL, CONSEQUENTIAL, INCIDENTAL OR PUNITIVE DAMAGES OF ANY KIND, IN CONTRACT OR TORT,
INCLUDING, BUT NOT LIMITED TO, INJURY, LOSS OF REVENUE, LOSS OF GOODWILL, LOSS OF BUSINESS OPPORTUNITY, LOSS OF DATA,
AND/OR LOSS OF PROFITS ARISING OUT OF, OR RELATED TO, IN ANY MANNER, OR THE DELIVERY, PERFORMANCE OR
NONPERFORMANCE OF OBLIGATIONS, OR USE OF THE WEATHER INFORMATION, DATA OR DOCUMENTATION HEREUNDER REGARDLESS
OF THE FORESEEABILITY THEREOF.
Important Health Information and Safety Precautions
When using this product, the safety precautions below must be taken to avoid possible legal liabilities and damages. Retain and follow all product safety and
operating instructions. Observe all warnings in the operating instructions on the product.
To reduce the risk of bodily injury, electric shock, fire and damage to the equipment, observe the following precautions.
ELECTRICAL SAFETY
This product is intended for use when supplied with power from the designated battery or power supply unit. Other usage may be dangerous and will invalidate any
approval given to this product.
SAFETY PRECAUTIONS FOR PROPER GROUNDING INSTALLATION CAUTION: Connecting to improperly grounded equipment can result in an electric
shock to your device.
This product is equipped with a USB Cable for connecting with a desktop or notebook computer. Be sure your computer is properly grounded (earthed) before
connecting this product to the computer. The power supply cord of a desktop or notebook computer has an equipment-grounding conductor and a grounding plug.
The plug must be plugged into an appropriate outlet which is properly installed and grounded in accordance with all local codes and ordinances.
SAFETY PRECAUTIONS FOR POWER SUPPLY
Use the provided USB cable to charge the battery. The battery must be properly inserted into the device to charge the battery.
Handle battery packs carefully. This product contains a Li-ion battery. There is a risk of fire and burns if the battery pack is handled improperly. Do not attempt to
open or service the battery pack.
WARNING: Danger of explosion if battery is incorrectly replaced. To reduce risk of fire or burns, do not disassemble, crush, puncture, short external contacts,
expose to temperature above 60° C (140° F), or dispose of in fire or water. Replace only with specified batteries. Recycle or dispose of used batteries according to
the local regulations or reference guide supplied with your product.
Note
This product should be operated only with the designated battery pack:
-Take extra precautions
-Keep the battery or device dry and away from water or any liquid as it may cause a short circuit.
-Keep metal objects away so they don’t come in contact with the battery or its connectors as it may lead to short circuit during operation.
-Do not use a battery that appears damaged, deformed, or discolored, or the one that has any rust on its casing, overheats, or emits a foul odor.
-Always keep the battery out of the reach of babies and small children, to avoid swallowing of the battery. Consult the doctor immediately if the battery
is swallowed.
-If the battery leaks:
-Do not allow the leaking fluid to come in contact with skin or clothing. If already in contact, flush the affected area immediately with clean water and
seek medical advice.
-Do not allow the leaking fluid to come in contact with eyes. If already in contact, DO NOT rub; rinse with clean water immediately and seek medical
advice.
-Take extra precautions to keep a leaking battery away from fire as there is a danger of ignition or explosion.
www.hardkernel.com

4
SAFETY PRECAUTIONS FOR DIRECT SUNLIGHT
Keep this product away from excessive moisture and extreme temperatures. Do not leave the product or its battery inside a vehicle or in places where the
temperature may exceed 60°C (140°F), such as on a car dashboard, window sill, or behind a glass that is exposed to direct sunlight or strong ultraviolet light for
extended periods of time. This may damage the product, overheat the battery, or pose a risk to the vehicle.
PREVENTION OF HEARING LOSS
CAUTION: Permanent hearing loss may occur if earphones or headphones are used at high volume for prolonged periods of time.
SAFETY IN AIRCRAFT
Due to the possible interference caused by this product to an aircraft’s navigation system and its communications network, using this device on board an airplane is
against the law in most countries. If you want to use this device when on board an aircraft, remember to turn off your device by switching to Airplane Mode.
ENVIRONMENT RESTRICTIONS
Do not use this product in gas stations, fuel depots, chemical plants or where blasting operations are in progress, or in potentially explosive atmospheres such as
fuelling areas, fuel storehouses, below deck on boats, chemical plants, fuel or chemical transfer or storage facilities, and areas where the air contains chemicals or
particles, such as grain, dust, or metal powders. Please be aware that sparks in such areas could cause an explosion or fire resulting in bodily injury or even death.
EXPLOSIVE ATMOSPHERES
When in any area with a potentially explosive atmosphere or where flammable materials exist, the product should be turned off and the user should obey all signs
and instructions. Sparks in such areas could cause an explosion or fire resulting in bodily injury or even death. Users are advised not to use the equipment at
refueling points such as service or gas stations, and are reminded of the need to observe restrictions on the use of radio equipment in fuel depots, chemical plants, or
where blasting operations are in progress. Areas with a potentially explosive atmosphere are often, but not always, clearly marked. These include fueling areas,
below deck on boats, fuel or chemical transfer or storage facilities, and areas where the air contains chemicals or particles, such as grain, dust, or metal powders.
Avoid applying excessive pressure to the device Do not apply excessive pressure on the screen and the device to prevent damaging them and remove the device
from your pockets before sitting down. It is also recommended that you store the device in a protective case and only use your finger when interacting with the
touch screen. Cracked display screens due to improper handling are not covered by the warranty.
Heed service markings Except as explained elsewhere in the Operating or Service documentation, do not service any product yourself. Service needed on
components inside the device should be done by an authorized service technician or provider.
Damage requiring service Unplug the product from the electrical outlet and refer servicing to an authorized service technician or provider under the following
conditions:
-Liquid has been spilled or an object has fallen onto the product.
-The product has been exposed to rain or water.
-The product has been dropped or damaged.
-There are noticeable signs of overheating.
-The product does not operate normally when you follow the operating instructions.
Avoid hot areas The product should be placed away from heat sources such as radiators, heat registers, stoves, or other products (including amplifiers) that produce
heat.
Avoid wet areas Never use the product in a wet location.
Avoid using your device after a dramatic change in temperature When you move your device between environments with very different temperature and/or
humidity ranges, condensation may form on or within the device. To avoid damaging the device, allow sufficient time for the moisture to evaporate before using the
device.
NOTICE: When taking the device from low-temperature conditions into a warmer environment or from high-temperature conditions into a cooler environment,
allow the device to acclimate to room temperature before turning on power.
Avoid pushing objects into product Never push objects of any kind into cabinet slots or other openings in the product. Slots and openings are provided for
ventilation. These openings must not be blocked or covered.
Mounting accessories Do not use the product on an unstable table, cart, stand, tripod, or bracket. Any mounting of the product should follow the manufacturer’s
instructions, and should use a mounting accessory recommended by the manufacturer.
Avoid unstable mounting Do not place the product with an unstable base.
Use product with approved equipment This product should be used only with personal computers.
Adjust the volume Turn down the volume before using headphones or other audio devices.
Cleaning Do not use liquid cleaners or aerosol cleaners. Use a damp cloth for cleaning, but NEVER use water to clean the LCD screen.
www.hardkernel.com

5
Small Children Do not leave your device and its accessories within the reach of small children or allow them to play with it. They could hurt themselves or others,
or could accidentally damage the device. Your device contains small parts with sharp edges that may cause an injury or which could become detached and create a
choking hazard.
Repetitive Motion Injuries To minimize the risk of repetitive strain injury, when Texting or playing games with your device:
-Do not grip the device too tightly
-Press the buttons lightly
-Take lots of breaks to stretch and relax.
Operating machinery Full attention must be given to operating the machinery in order to reduce the risk of an accident.
Loud Noise This device is capable of producing loud noises which may damage your hearing.
LCD Dead Pixels The limits of LCD manufacturing technology permit a maximum of 5 abnormal or dead pixels which does not affect system performance.
Notes
Some devices and software referred to in the User Guide may not be provided and/or changed.
The product environment referred to in the User Guide may not be the same as your own environment.
The image used for the cover and text of the User Guide may not be the same as the actual guides.
The information in this document is subject to change without notice due to improving the performance of the product.
Hardkernel shall not be liable for any data loss. Please take care to avoid losing any important data and backup your data to prevent any such data loss.
www.hardkernel.com

6
OVERVIEW
Before you get started
Please charge the battery to turn on.
Please connect the power cable when you use the debug board.
You can find valuable information at http://www.hardkernel.com , http://dev.odroid.com and http://odroid.foros-phpbb.com
ADB USB driver for Windows : http://dev.odroid.com/projects/odroid/download/13
System software is stored in Tflash(Micro SDcardd\). Please do not eject the card when the device is on. Android OS is mainly for phone use. As such, this
device is as a phone in the Android OS.
Please note that the ODROID-7 developer edition is a development platform and its specifications are subject to change without notice and it may include
Beta and Pre-Release software and as such not designed for end-users. Wireless devices' RF performance might not meet standard level.
www.hardkernel.com

7
ODROID-7 DESCRIPTION
Menu Home Back Search
Inside Box
www.hardkernel.com

8
Buttons and connectors
Top Bottom
Indicators
Power on : Blue light on Power off
-Charging : Red light illuminate
-Full charged : Blue light illuminate
www.hardkernel.com

9
BOARD DESCRIPTION
Front
Board to board connector for CPU board
WiFi/BT Combo Module : Broadcom(BCM4329)
Audio CODEC : WM8991 is a highly integrated low power hi-fi CODEC from Wolfson
Charger Cotroller : MAX8677A, Charge Li-Polymer battery with smart power path.
DC/DC Converters : MAX1556 for LCD, GPS and sensors. XC9158 for USB host and HDMI.
Back
Acceleration Sensor: Digital 3-axial acceleration sensor from Bosch Sensortec
Battery Gauge : MAX17040
DC Jack : inner diameter 1.3mm, outer diameter 3.5mm
Touchscreen Connector : I2C with IRQ 3.3V interface.
IO(TTA20) : USB and Serial port for system monitoring
Mini HDMI : Standard type-C HDTV, support up to 1920 x 1080 resolution
MicroSD Card Slot : 4Gbyte T-flash(removable) memory card for system area of Boot Loader, Kernel and Android and user storage
www.hardkernel.com

10
FPCB
USB2.1 HS Host : Connect various external accessories such as GPS, camera, keyboard, external HDD, etc
Drivers and Sensors
CPU Board
CPU : Samsung S5PC110 Cortex-A8 1Ghz with 512KB L2 cache, 3D Accelerator : SGX540 (up to 20M triangles/s and 1000M pixels/s)
Memory : OneNAND 512MB Mobile DDR 400Mhz data rate
PMIC : contains 3 Step-down DC/DCs and 9 LODs.
Board to Board connector location data(http://dev.odroid.com/projects/odroid-t/wiki/FrontPage?action=download&value=CPU_MODULE_B2B.ZIP)
This data is useful for designing your own base board. Please consider connector J1 of CPU board should be matching to J1 of Base board.
Board to Board connector pin map http://dev.odroid.com/projects/odroid-t#s-1.2.2.3
Debug Board
TTA20-Male connector : Connect to I/O port of Odroid-7.
RS232C Serial Port : Connect to Host PC RS232C Serial Port via cable.
www.hardkernel.com

11
SYSTEM SOFTWARE
Recovery utility
If your Odroid-T file system is broken or damaged, you can recover the T-flash card with this utility.
http://dev.odroid.com/projects/odroid-t/download
Unplug your T-flash from ODROID-7 and connect it to your PC.
Note: This software is compatible with only Windows-XP. Perform enforcement the compatibility mode with Windows-Vista or Windows-7.
U-boot compile HOWTO
http://dev.odroid.com/projects/odroid-t/wiki/UbootPage
1 Preface
2 Build environment
3 Download and Install tool-chain for u-boot
3.1 Download the cross tool package
3.2 Copy the cross tool package to /usr/local/arm
3.3 Uncompress the cross tool with tar command
3.4 Add Path in your environment file
3.5 Check the tool-chain path to see if it is set up correctly or not.
4 Download source code
5 Compile
6 Debug board setup
6.1 Debug board connection
7 Transfer boot-loader to target board(Odroid)
7.1 For Windows(XP) PC Users
7.2 For Linux (Ubuntu) PC Users
7.3 Where is T-flash(Micro-SD)
8 Others
Kernel compile HOWTO
http://dev.odroid.com/projects/odroid-t/wiki/KernelPage
1 Preface
2 Build environment
3 Source code download
4 Kernel compile
5 Transfer kernel image to target board(Odroid-7)
5.1 For Windows(XP) PC Users
5.2 For Linux (Ubuntu) PC Users
6 How to check zImage update
7 How to be a developer for this project
Android platform compile HOWTO
http://dev.odroid.com/projects/odroid-t/wiki/AndroidPage
1 Preface
2 Build environment
3 Download and Install essential packages
4 Getting source code and extraction
5 Obtain restricted files from Odroid-7
5.1 Case 1: ADB of android-sdk
5.2 Case 2: Extract files from T-Flash(Micro-SD) Card reader
www.hardkernel.com

12
6 Building the code
7 Write the compiled files to T-Flash under Ubuntu (Must have Linux PC)
7.1 Copy Android system to formatted partition (Overwrite)
7.2 Copy android system to new partition (Clean & Write)
8 ramdisk-uboot.img write
9 T-flash sector map
10 Others
11 References
How to install Android SDK
http://odroid.foros-phpbb.com/software-development-f19/how-to-install-android-sdk-t48.htm
Install the Android SDK on Eclipse development platform. The tutorial applies to all platforms: MAC, WIN, LINUX. Because Eclipse is about Java.
1 - Install Eclipse: http://www.eclipse.org/downloads/
To download the Eclipse IDE for Java Developers (92 MB) is sufficient.
Once downloaded, extract the zip file in the folder.
2 - Make sure you have Java installed on the machine, but Eclipse will not work. Download: http://java.sun.com/javase/downloads/index.jsp
3 - Install the Android plugin for Eclipse:
3.1-Add Site to install plugin: Go to the menu Help / Software Updates window appears Avalia go to the Updates tab, Add and add the following site: https: / / dl-
ssl.google.com/android/eclipse /
3.2-Installing the plugin: Once you add the url, you can select and give the Developer Tools installed.
IMPORTANT: Once installed you need to restart Eclipse to implement changes
Android SDK 3.3-download: http://developer.android.com/sdk/index.html
IMPORTANT: Step 3.4 is fundamental or Eclipse will give the following error
3.4-Add the path to the SDK in eclipse: Go to menu Window / Preferences and in the window that appears, add the path section Android.
4 - Now you can create a project for Android with Eclipse.
How to install Android NDK
http://odroid.foros-phpbb.com/software-development-f19/how-to-install-android-ndk-t181.htm
www.hardkernel.com

13
PARTS DETAIL
www.hardkernel.com

14
SAMSUNG S5PC110
Block Diagram for ODROID-7
Key features of Samsung S5PC110
www.hardkernel.com

15
GETTING STARTED
Turn on/off
Slide the power switch right side for 2 seconds to turn on/off the device.
Buttons
Button Press Press & hold
Back Opens the previous screen you were working in. If the onscreen keyboard
is open, closes the keyboard.
Menu Opens a menu with items that affect the current screen or application.
Home Opens the Home screen. If you’re viewing the left or right extended Home
screen, opens the central Home screen. Opens the most recently used applications screen.
Power Turns on/off the screen. Power on / off
Volume Up(L) Increase the volume
Volume Down(R)
Decrease the volume
Touch
The main way to control Android features is by using your finger to manipulate icons, buttons, menu items, the onscreen keyboard, and other items on the
touchscreen. You can also change the screen’s orientation. Touch to act on items on the screen, such as application and settings icons, to type letters and symbols
using the onscreen keyboard, or to press onscreen buttons, you simply touch them with your finger.
Touch & hold
Touch & hold an item on the screen by touching it and not lifting your finger until an action occurs. For example, to open a menu for customizing the Home screen,
you touch an empty area on the Home screen until the menu opens.
Drag
Touch & hold an item for a moment and then, without lifting your finger, move your finger on the screen until you reach the target position. You drag items on the
Home screen to reposition them, as described in “Customizing the Home screen”, and you drag to open the Notifications panel.
Swipe or slide
To swipe or slide, you quickly move your finger across the surface of the screen, without pausing when you first touch it (so you don’t drag an item instead). For
example, you slide the screen up or down to scroll a list.
Double-tap
Tap quickly twice on a webpage or other screen to zoom. For example, you double-tap a section of a webpage in Browser to zoom that section to fit the width of the
screen. You can also double-tap to control some applications.
Rotate the screen
On most screens, the orientation of the screen rotates with the device as you turn it from upright to its right side and back again. You can turn this feature on and off,
as described in “Sound & display settings”.
Note
The Orientation check box in HOME > MENU > Settings > Sound & display needs to be selected for the screen orientation to automatically change.
MicroSD card(Tflash)
MicroSD Card
Always turn off your device before installing or replacing the MicroSD card. Push the MicroSD card inward until it clicks, then release it to eject it from the slot.
The Android OS, application data and user data is stored in the MicroSD card. Make sure not to delete data in the MicroSD card to avoid any malfunction of the
device.
Note
Some MicroSD cards that you purchase from market might not be compatible. Make sure to check the compatibility when purchasing a new MicroSD card.
Battery
Your device comes with a rechargeable Lithium-polymer battery and is designed for use with only manufacturer-specified original batteries and accessories. Battery
performance depends on many factors, including network configuration, signal strength, the temperature of the environment in which you operate your device, the
features and/or settings you select and use, items attached to connecting ports, and your voice, data, and other program usage patterns.
Warning!
To reduce risk of fire or burns:
-Do not attempt to open, disassemble, or service the battery pack.
-Do not crush, puncture, short external contacts, or dispose of in fire or water.
-Do not expose to temperatures above 60oC (140oF).
-Replace only with the battery pack designated for this product.
-Recycle or dispose of used battery as stipulated by local regulations.
Charging the Battery
New batteries are not charged when shipped. Before you start using your device, you need to install and charge the battery. Some batteries perform best after several
full charge/discharge cycles. Plug the supplied AC adaptor to start charging the battery. As the battery is being charged while the device is on, the charging battery
icon is displayed in the status bar of the Home screen. After the battery has been fully charged, the Notification LED shows a solid green light and a full battery
www.hardkernel.com

16
icon displays in the status bar of the Home screen.
USB/HDMI
Connecting TTA20 to USB cable
The provided USB cable is a standard TTA20 to USB which is used for some mobile phones. The USB icon displays on the notification bar when the USB is
connected.
Connecting mini HDMI cable
The mini HDMI cable is an optional accessory. Some cables might not be compatible with the device. Make sure to check the compatibility when you purchase the
cable.
USB HS Host
You can connect external devices such as keyboard, mouse, storage, etc. There might be compatibility issue.
www.hardkernel.com

17
ANDROID
! Note
Some applications might not be compatible with this device.
Hardkernel has no responsibility for applications that you download from the market or any place.
HOME SCREEN
Home Screen
The Home screen is your starting point for using the applications on your device. You can customize the Home screen to display application icons, shortcuts, folders,
and widgets.
Tip
While in any application, press HOME to go back to the Home screen.
Extended Home screen
The Home screen extends beyond the screen width to provide more space for adding icons, widgets, and more. Press HOME, then slide your finger horizontally
across the screen to go to the left or right side of the extended Home screen.
Tip While on an extended Home screen, you can also press HOME to return to the main Home screen.
Applications tab: Touch the tap to open
and see all applications installed on
your device
Notifications and Status panel: Touch
and drag this area to display the data.
Touch an icon to open
the related application
Browser : Tap to open the browser.
www.hardkernel.com

18
Customizing the Home screen
To add a Home screen item
Press HOME, then touch and hold an empty area on the screen.
When the Add to Home options menu opens, select the item you want to add to the Home screen:
-Shortcuts:Add shortcuts such as applications, a bookmarked web page, a favorite contact, or a music playlist.
Tip
To quickly add an application shortcut that is on the Applications tab to the Home screen, touch and hold an application icon. When the icon is
magnified, release the icon on an empty area on the Home screen.
-Widgets: Add a clock, music player, a picture frame, or the Google bar that shows upcoming appointments.
-Folders: Add a folder where you can organize Home screen items.
-Wallpapers: Change the Home screen wallpaper.
To reposition a Home screen item
Touch and hold the item on the screen you want to reposition to activate Move mode.
Note
When Move mode is activated, the item magnifies. Without lifting your finger, drag the icon to the desired position on the screen, then release it. To move an item
from the Home screen to an extended Home screen, touch and hold the item and then drag it to the left or right edge of the screen until the display shifts to the
extended Home screen. Position the item on the screen, then release it.
www.hardkernel.com

19
To remove a Home screen item
Touch and hold the item on the screen you want to remove to activate Move mode.
Note
When Move mode is activated, the item magnifies. Drag the icon to the Applications tab (The Applications tab changes into ). When the icon and
Application tab turn red, release it.
To change the Home screen wallpaper
While on the Home screen, press MENU and then touch Wallpaper. Touch Pictures or Wallpaper gallery. Touch Pictures to use a picture that you have copied to
your device. You can crop the picture before setting it as a wallpaper. Touch Wallpaper gallery to use preset wallpapers that came with the phone. Touch Save or
Set wallpaper.
To create a folder and add items to it
You can create folders on the Home screen to hold application icons or shortcuts. Press HOME, press MENU, and then touch Add > Folders. A new folder appears
on the screen. Touch and hold an application icon or a shortcut on the Home screen to activate Move mode, then drag it on top of the folder. To access the items
inside a folder, touch the folder to open it and then touch the icon of the application or shortcut you want to open.
Tip
To delete a folder, follow the same procedure when you want to remove a Home screen item.
To rename a folder
Touch the folder to open it. Touch and hold the folder’s title bar to open the Rename folder dialog box. Enter the Folder name and then touch OK.
www.hardkernel.com

20
Status and Notifications
On top of the device screen is the status bar. The left side of the status bar displays notification icons while the right side of the status bar displays the device status.
Tip
When the status bar is full, touch to display hidden icons/notifications.
Notification icons
New email message
Music is playing
Problem
More (not displayed) notifications
Storage card is full
Uploading data
Downloading data
Content downloaded
Wifi is on and wireless networks are available
Device connected to computer via USB cable
Status icons
Wifi connected
Bluetooth is on
Connected to another Bluetooth device
Airplane mode
Alarm
Battery status
To open the Notifications panel
When a new notification icon displays in the status bar, touch and hold the status bar, then slide your finger downward to open the Notifications panel.
If you have several notifications, you can scroll down the screen to view more notifications.
Tip
You can also open the Notifications panel on the Home screen by pressing MENU and then touching Notifications. To close the Notifications Panel, touch and hold
the bottom bar of the Notifications panel, then slide your finger up the screen or press BACK.
www.hardkernel.com
Table of contents
Other HARDKERNEL Microcontroller manuals
Popular Microcontroller manuals by other brands
Swatch
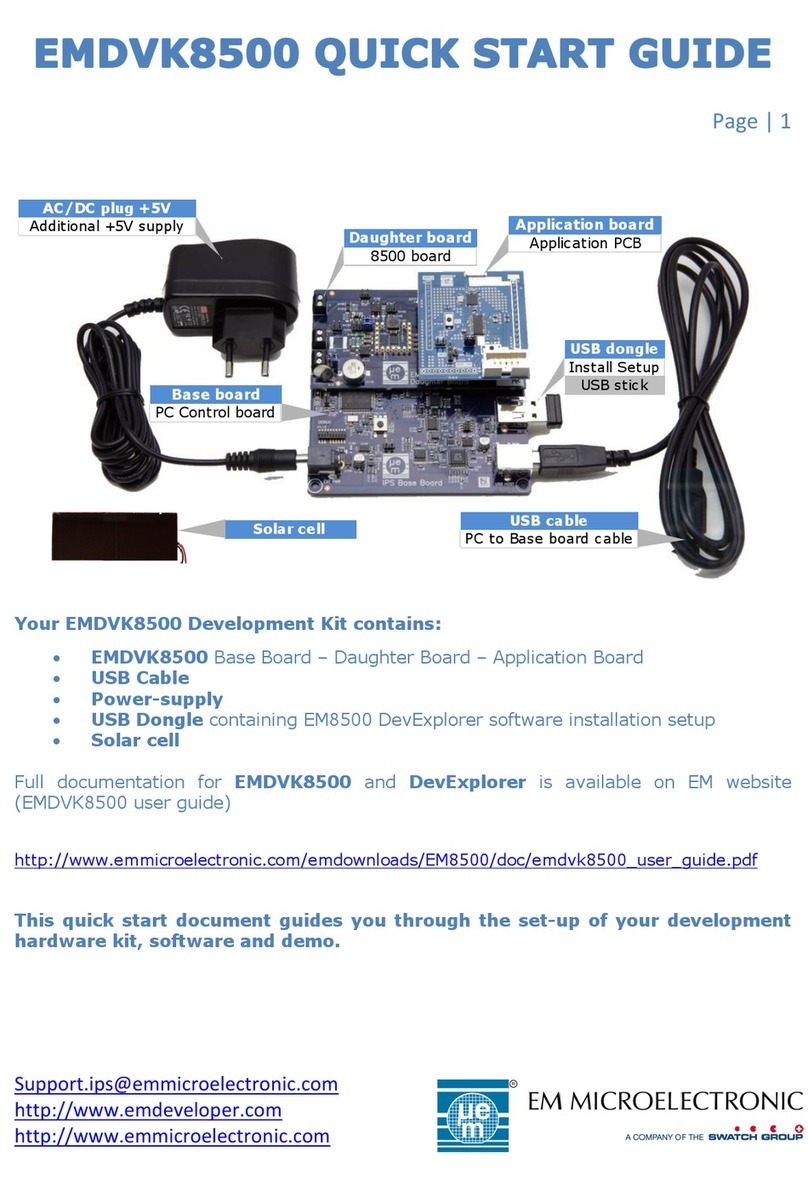
Swatch EM Microelectronic EMDVK8500 quick start guide
Microchip Technology
Microchip Technology AN908 Using
Texas Instruments
Texas Instruments 430BOOST-SENSE1 user guide
NXP Semiconductors
NXP Semiconductors LPC800 user manual
Texas Instruments
Texas Instruments CC2520 user guide
Texas Instruments
Texas Instruments TPS2379 EVM user guide
