Harman Kardon EZ Link DAL 150 User manual

Power for the Digital Revolution.
®
®
DAL 150
INSTALLATION GUIDE
For UseWithVersion 1.02 Software and Microsoft®Windows Media®9 Series

SYSTEM REQUIREMENTS
In order for the DAL 150 EzLink to function correctly, the following is required:
•PC-compatible computer with USB port
•MicrosoftWindows®98SE, Me, XP or 2000 operating system*
•Pentium®processor, 200MHz or higher
•At least 32MB of system memory
•At least 15MB of free hard-disk space
•CD-ROM or DVD-ROM drive
•A/V receiver or processor with a coaxial digital input and PCM- or MP3-decoding
•Windows Media Player 9 Series or earlier versions
*If you wish to use the DAL 150 with a computer that is not running one of the listed operating systems, you will need to upgrade your
operating system to the latest version ofWindows applicable to your computer.

3
INTRODUCTION
Congratulations!As the owner of a DAL 150 EzLink Computer-to-Home-Audio Link, you have an accessory
that will enable you to listen to your library of MP3 files, with playback quality approaching that of CDs, by using
your home audio system.
The DAL 150 is a unique device that accepts compressed-audio MP3 files from your compatible personal computer,
and outputs audio selections in PCM format using a coaxial digital S/P-DIF connection that enables playback using
anyA/V receiver that has a coaxial digital input.When used with a Harman KardonA/V receiver that features
onboard MP3 decoding, you may select native MP3 data output so that high-quality decoding will take place within
theA/V receiver.Please check the owner’s manual to see whether your receiver has a built-in MP3 decoder.
Even if you are familiar with the procedure for adding USB-compatible hardware devices to your computer, we strongly
suggest that you use this brief installation guide to quickly install and start enjoying your DAL 150 EzLink.
If you have any questions during the installation procedure, or if you require technical support at any time,
please contact technical support by visiting ourWeb site at www.harmankardon.com. You may also write to:
Harman Kardon Technical Support Department
250 Crossways Park Drive
Woodbury, New York 11797
Attn: Department DAL 150 EzLink

4
SAFETY INFORMATION
Do Not Open the Cabinet
There are no user-serviceable components inside this product. Opening the cabinet may present a shock hazard,
and any modification to the product will void your warranty.
Installation Location
To ensure proper operation and to avoid the potential for safety hazards,place the unit on a firm and level surface.
Since it is normal for the DAL 150 to become slightly warm during operation, do not place it directly on a
carpeted or other soft surface.
Avoid stringing the cables connected to the DAL 150 across open areas that may present a potential safety
hazard for the user or other persons. Make certain to avoid the possibility of one of the cables being pulled
inadvertently and causing either the DAL 150 or other equipment to fall.
Avoid installation in extremely hot or cold locations, or in an area that is exposed to direct sunlight or heating
equipment. Avoid moist or humid locations.
Cleaning
When the unit gets dirty, wipe it with a clean, soft, dry cloth. If necessary, after disconnecting the unit’s cables, wipe it
with a soft cloth dampened with mild soapy water, then with a fresh cloth with clean water.Wipe dry immediately with
a dry cloth. NEVER use benzene, aerosol cleaners, thinner, alcohol or any other volatile cleaning agent. Do not use
abrasive cleaners,which may damage the finish of metal or other parts.Avoid spraying insecticide near the unit.
Moving the Unit
Before moving the unit, be certain to disconnect any cables that connect with other components.

5
Important Information for the User
This equipment has been tested and found to comply with the limits for a Class B digital device, pursuant to
Part 15 of the FCC Rules.The limits are designed to provide reasonable protection against harmful interference
in a residential installation.This equipment generates, uses and can radiate radio-frequency energy and, if not
installed and used in accordance with the instructions, may cause harmful interference to radio communication.
However,there is no guarantee that harmful interference will not occur in a particular installation. If this equipment
does cause harmful interference to radio or television reception,which can be determined by turning the equipment
off and on, the user is encouraged to try to correct the interference by one or more of the following measures:
•Reorient or relocate the receiving antenna.
•Increase the separation between the equipment and receiver.
•Connect the computer to which the equipment is connected into an
AC outlet on a circuit different from that to which the receiver is connected.
•Consult your dealer or an experienced radio/TV technician for help.
This device complies with Part 15 of the FCC Rules. Operation is subject to the following two conditions:
(1) this device may not cause harmful interference, and (2) this device must accept interference received,
including interference that may cause undesired operation.
NOTE: Changes or modifications may cause this unit to fail to comply with Part 15 of the FCC Rules and
may void the user’s authority to operate the equipment.
This Class B digital apparatus complies with Canadian ICES-003.

6
GENERAL INSTALLATION INSTRUCTIONS
The precise dialog boxes and messages that will appear on your computer screen at various points during the
installation procedure will vary depending upon the version of theWindows operating system that has been installed on
your computer. Since installing a USB device on your computer is a fairly automatic process, you may wish to
proceed by following these general installation instructions.
Step One – Download the Windows Media Player
The DAL 150 works in conjunction with any version of the Windows Media Player through Series 9.To take
advantage of the features of the latest version of this innovative software, download the version that is appropriate
for your computer’s operating system from the MicrosoftWeb site at www.microsoft.com/windows/windowsmedia/
9series/player.aspx. Follow the instructions provided, and reboot your computer, if needed, after completing the
installation.
Step Two – Download the DAL 150 software
After theWindows Media Player had been installed, download the new Version 1.02 edition of the DAL 150 soft-
ware from the Harman KardonWeb site at www.harmankardon.com/dalsoftware.Two downloads are available
there, and it is important to select the “Complete Software” link, not the “Software Upgrade.”
When prompted by your computer to “OPEN” or“SAVE” (in some cases your option may be “RUN” instead of
“SAVE”) the download, click on OPEN.This will begin the process of downloading the files needed to install the
software.After you click on OPEN,a dialog box will open to show that the file is being downloaded to your com-
puter.The time required for the download will vary with the speed of your network connection.
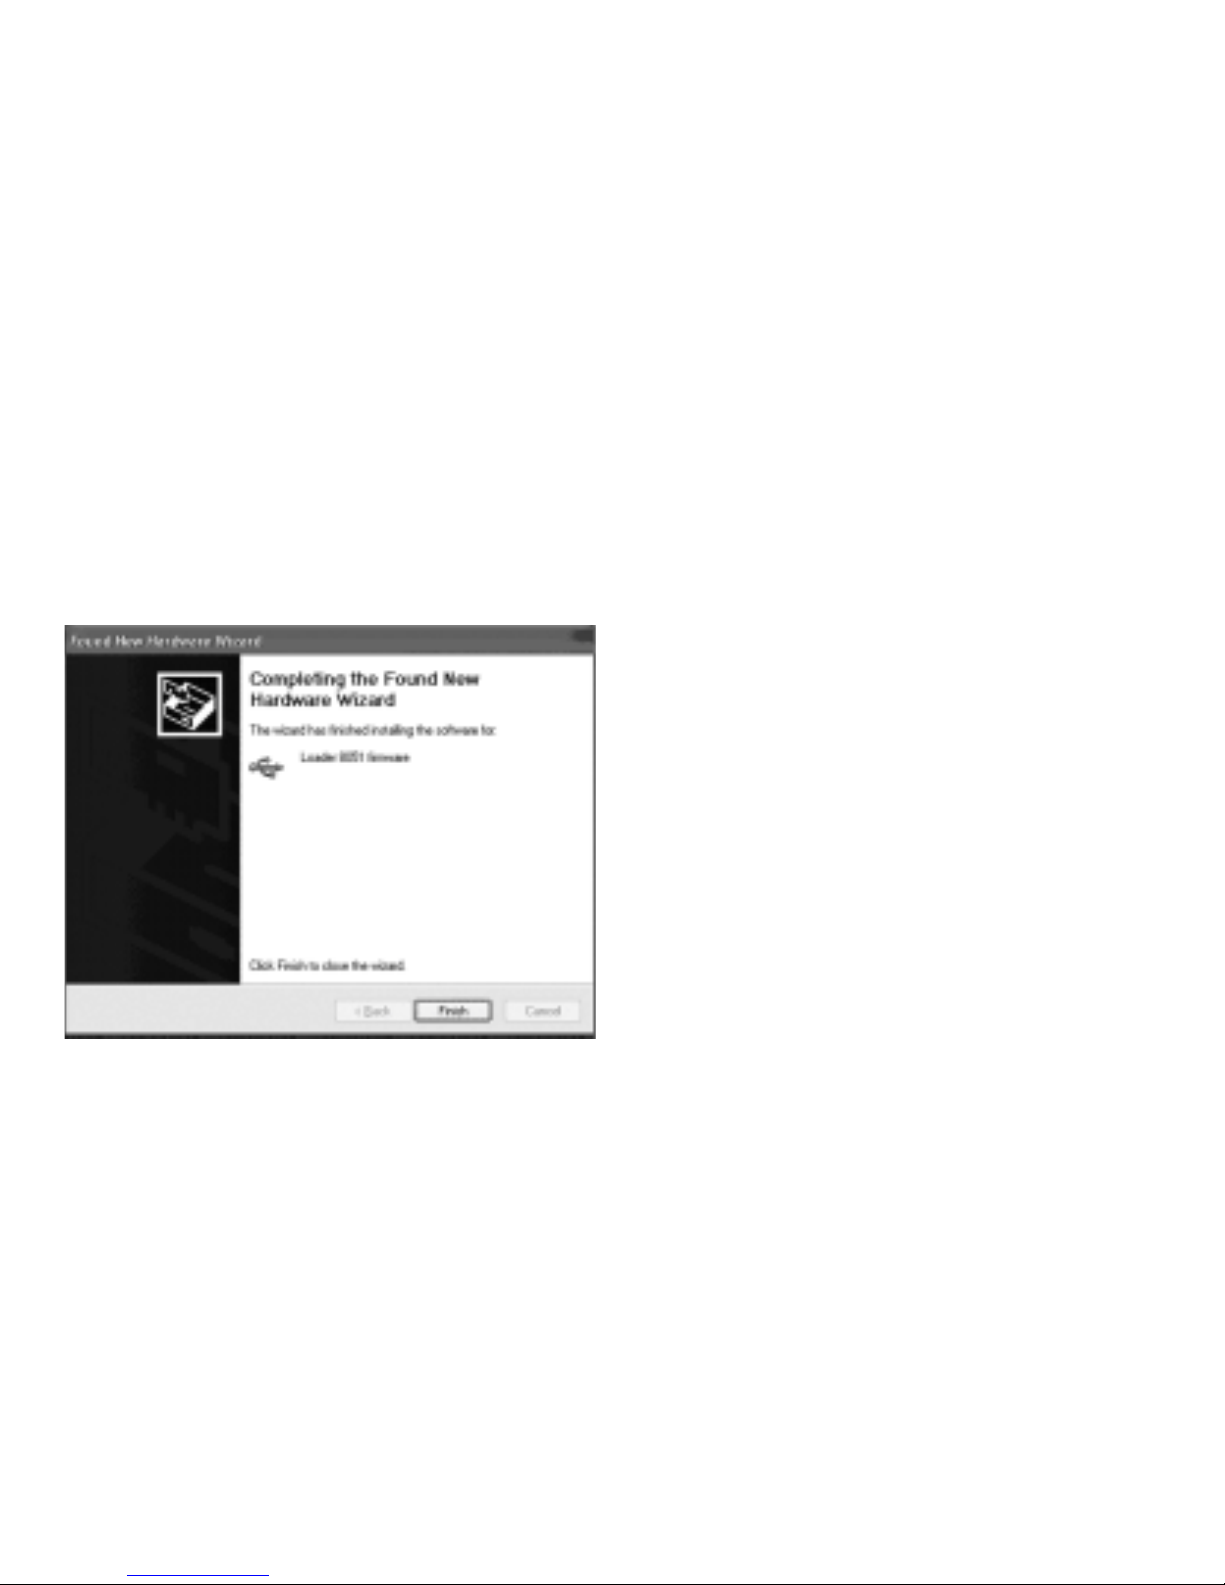
When the download is complete, the first dialog box will close, and the InstallShield Wizard will open.This will
extract the files and save them on your hard drive.We recommend that you click “NEXT” to accept the default
location for the files, but you may choose another drive and/or location if necessary by clicking on the “CHANGE”
button, and then clicking on NEXT when the file location is selected.
A message window will show you the progress of the file extraction,and a final window will open when the
process is complete. Click “FINISH” to close the InstallShield.
You may now close your browser and continue to the next step.

7
Step Three – Connect USB Cable to DAL 150 and PC
Plug the USB cable into the DAL 150 and into an available USB port on either your computer or an optional
powered, external USB hub.
Step Four – Install the Hardware Drivers
At this point, your computer should recognize that a USB device has been attached to it, and one or more screens
will appear to confirm that the “Found New HardwareWizard” has been launched.You may need to click the
“Next” button through several dialog boxes in order to reach a box that asks you to install the software driver.
After the “Found New Hardware”screens open and close, a dialog box will open with the “Found New Hardware
Wizard.”At the bottom of the box,click the choice that reads “Install from a list or specific location” or “Search
for a suitable driver for my device,” depending on the version of Windows installed on your computer. Click the
“Next” button to continue.
If the next screen asks for a place on your computer where the driver files are located, select “Specify a location,”
and click “Next.”
At the next screen, you will be asked to enter the location for the installation files. Using the “Browse” button,
navigate to the C:/HK/DAL150 folder location and click “Next.”When the computer informs you that it has found
the driver file “mgmp3.inf,” click “Next” to continue.
If you are using theWindows XP operating system,you may see a screen warning you that the DAL 150
software has not been verified as compatible. Other versions of Windows may report that the software may not
work correctly.You may confidently proceed.Although there was no Digital Signature for the 8051 firmware
used by the DAL 150 as of the printing of this installation guide, the software has been thoroughly tested for
full compatibility with theWindows 98SE, Me,2000 and XP operating systems and is safe to install.

8
Step Five – PC Installs Software
At the same point during the installation, the computer will indicate that the software program being loaded is
called “Loader 8051 firmware.”The computer may also indicate its location as “C:\HK\MGMP3.INF” (or some
other drive letter associated with the hard drive where the software files are installed) in some versions of the
Windows operating system.If your computer is attempting to install a different software driver, cancel the
installation and go back to the screen that will allow you to specify the location of the correct software driver.
Allow the computer a few minutes to install the software driver without interruption.A dialog box, similar
to the one shown in Figure 1, should appear. Click the “Finish” button to continue the installation.
Figure 1 – Software Driver Installation Complete

9
Step Six – Complete and Verify Installation
A few more “Found New Hardware”screens may appear, and you will know that the installation is complete
when a small “hk” logo appears in theWindows systray or taskbar in the lower right corner of your screen
(see Figure 2). If you do not see this logo,try momentarily unplugging the USB cable from your computer’s
USB port, or from the external hub,and then plugging in the USB cable again.
Figure 2 – “hk” logo in systray
Step Seven – Connect Coaxial Digital Cable to DAL 150 and Home Audio System
Plug one end of the supplied coaxial digital cable into the DAL 150, and plug the other end into any available
coaxial digital input used by your home audio system. If the digital cable supplied is not long enough to
reach your home audio system, you may replace it with a longer cable of up to 100 feet designed for video or
digital audio use, which may be purchased from your local electronics dealer. If you require a connection longer
than 100 feet, there is a possibility of some loss in audio quality due to degradation of the signal as it travels a
longer distance. Do not use RCA-type audio interconnect cables that are not designated for video or digital use.
Try to avoid using a longer USB cable, in order to avoid degradation of the data.
Consult the owner’s guide for your home audio system for information on configuring your audio system to
select the digital input you have selected for playback. Make sure that your audio system has been powered on,
and that you have selected the appropriate source input for your digital audio input.
or

10
OPERATION
Before you play your MP3 selections, you must configure the output of the DAL 150 to match the decoding
capabilities of your home audio system.To do this, double-click on the “hk” icon in your systray to bring up
the dialog box shown in Figure 3.
Choose the correct Output Mode for your system: MP3 to PCM for most systems,or MP3 to MP3 for those
systems that feature onboard MP3 decoding, such as many current Harman Kardon A/V receivers.Then, click
on the “OK” button to enter your selection.
If your home audio system is capable of internal MP3 decoding, either choice has advantages. By choosing the
MP3-to-PCM mode, your audio system will perceive the data stream to be no different than the data it might
receive from your CD player, and you will be able to select available DSP or surround sound processing modes to
increase your audio enjoyment. However, by choosing the MP3-to-MP3 mode, although you will only be able to
play the selections in traditional stereo mode, you will free up your computer’s processing unit from the task of
performing the MP3 decoding.
Launch theWindows Media Player from either your desktop or taskbar shortcut, or by double-clicking on the
“hk” logo in your systray and clicking on the “Open WMP” button.Select the “Media Library” button.
Figure 3 – DAL 150 Dialog Box

11
Click on the “+” button to add MP3 files stored on your computer to the Media Library.
Click on the “Media Guide” button at the right side of the screen to download files directly from the Internet.
As you surf the Internet to visit sites that contain MP3 streams or downloads, they will play through your
home audio system via the DAL 150, as long as the Windows Media Player is in use.
You may create a playlist using the Media Library by clicking on the “New Playlist” and “Add to Playlist”
buttons as shown in the Media Player, or you may simply double-click on any selection stored in the
Media Library to play it.
TheWindows Media Player will search for a USB device for its audio output.You should mute or disconnect any
external speakers connected to another USB output on your computer or hub.When the DAL 150 is in use, the
volume control on your computer and the software volume control inWindows Media Player will not operate.
Volume can be adjusted using your A/V receiver or processor.

12
If theWindows Media Player does not detect the presence of a USB device, it will display an error box.You may,
if you have disconnected your DAL 150 from your computer, click the “OK” button and allow the Player to
continue with playback using your computer’s internal speakers.
An alternative method of accessing the DAL 150 software is to right-click on the“hk” logo in the systray to
bring up the drop-down menu.
UNINSTALLATION
You may at some time find it necessary to uninstall the software for the DAL 150 from your computer. Be sure
to exit all otherWindows applications, including Windows Media Player, before uninstalling the DAL 150. If the
DAL 150 is connected to your computer, then right-click on the “hk” logo in your systray, and then click on
“Uninstall.”A warning dialog box will appear asking you to confirm that you wish to remove the software
decoder from your computer. Click the “OK” button to continue.
If you need to uninstall the device without having the DAL 150 connected to the computer, you will need to
start the uninstallation process by running the program C:\HK\DAL 150\RemoveMp3.exe.
The computer will uninstall the software, and then a dialog box will appear when the uninstallation has
finished.You may unplug the DAL 150 from the USB port or hub, and reboot your computer.This completes
the uninstallation.

TROUBLESHOOTING GUIDE
Your DAL 150 EzLink Computer-to-Home-Audio Link has been designed to operate automatically and with
minimal user involvement once installation has been completed. If you do experience any difficulties,please
consult this troubleshooting guide for assistance.
Symptom Possible Cause Solution
DAL 150 was disconnected from PC needs to reload driver Anytime the DAL 150 is plugged into
PC without uninstall procedure, software into system memory a different USB port from the initial
and PC requires the software if a different USB port was used installation,such as the second port on
a computer with two ports, or switching
from the docking station to the port
directly in the laptop or vice versa,the
Windows operating system will need to
reload the driver in order to associate it
with the new port.When the“Found
New Hardware”dialog box asks for
the location of the driver, browse to
c:\HK\DAL 150.
Unable to uninstall DAL 150 DAL 150 not connected In order to initiate the uninstallation
to computer procedure, you must run the program
C:\HK\DAL 150\RemoveMp3.exe.
Icon still appears in systray – ForWindows 2000 or XP systems,go to
uninstallation procedure the Device Manager and make sure that
not complete both“HK DAL 150”and “Loader 8051
Firmware”have been uninstalled.Try
repeating the uninstallation procedure.
13

14
Symptom Possible Cause Solution
No icon in systray USB port needs to be reset Unplug DAL 150 from USB port or hub,
and then plug it in again.
No sound from home audio system Output mode set incorrectly Double-click on the“hk”logo in the systray,
when an MP3 selection is playing and make sure the correct output mode
has been selected.Make sure to click on
the“OK” button to enter the selection.
Home audio system Since analog audio input jacks look similar
not able to process to coaxial digital audio input jacks, make
selected output mode sure you have plugged the coaxial digital
audio cable into the correct input jack,
and that your home audio system includes
a coaxial digital audio (S/P-DIF) input.
If your home audio system features a
coaxial digital audio input jack,then it is
most likely capable of processing data in
the PCM format.Double-click on the“hk”
logo in the systray, and make sure that the
MP3 to PCM mode has been selected.Enter
the selection by clicking the“OK”button.
If your home audio system features
onboard MP3 decoding,and you have
selected the MP3 to MP3 output mode
for the DAL 150,you may wish to check
the bit rate of your MP3 selection to
ensure that it is not higher than the bit
rate capable of being decoded by your
home audio system.

15
Symptom Possible Cause Solution
No sound from home audio system File format incompatible TheDAL 150 isonlycapable of playing back files
when an MP3 selection is playing with DAL 150 encoded in the MP3 compressed-audio format.
Check that the file extension is“.MP3.” Also,
files downloaded from private sources on the
Internet may not be in the correct format,
despite having a file name ending in .MP3.
After uninstalling the DAL 150, Windows software volume Sometimes the uninstall procedure causes
Windows Media Player does not control turned down the PC’s software volume control to be
play files turned all the way down to protect the
equipment.Double-click on the speaker
icon in the systray to adjust the control.
Noise when streaming MP3 files Internet browser is Click on the“Mute”icon at the bottom
from the Internet distorting files of theWindows Media Player screen.
**Although the DAL 150 is compatible with MP3 files encoded at bit rates up to 320kbps, due to the wide variety of MP3 encoders and hardware environments,
it is possible that some files are incompatible with the DAL 150, even though they were encoded at a lower bit rate.
SPECIFICATIONS
Maximum MP3 Compression Bit Rate: 320kb/sec**
Power Supply:Via USB connection
Dimensions (H xW x D): 7/8" x 3-3/4" x 2-5/8" (22mm x 95mm x 67mm)
Weight: 3 oz. (86g)

250 Crossways Park Drive,Woodbury, NewYork 11797
Fax: 516.682.3523
©2003 Harman International Industries, Incorporated
Part No. 0229Y0G5-OREV1
Microsoft,Windows andWindows Media are either registered trademarks or trademarks of Microsoft Corporation in the United States and/or other countries.
Pentium is a registered trademark of Intel Corporation.
Harman Kardon and Power for the Digital Revolution are registered trademarks, and is a trademark,of Harman International Industries, Incorporated.
Other manuals for EZ Link DAL 150
1
Table of contents