6FRONT PANEL CONTROLS
Front-Panel Controls
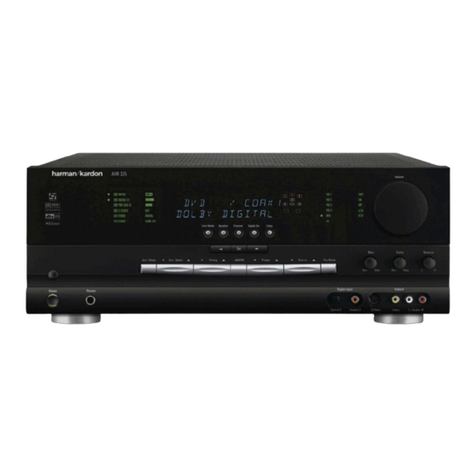
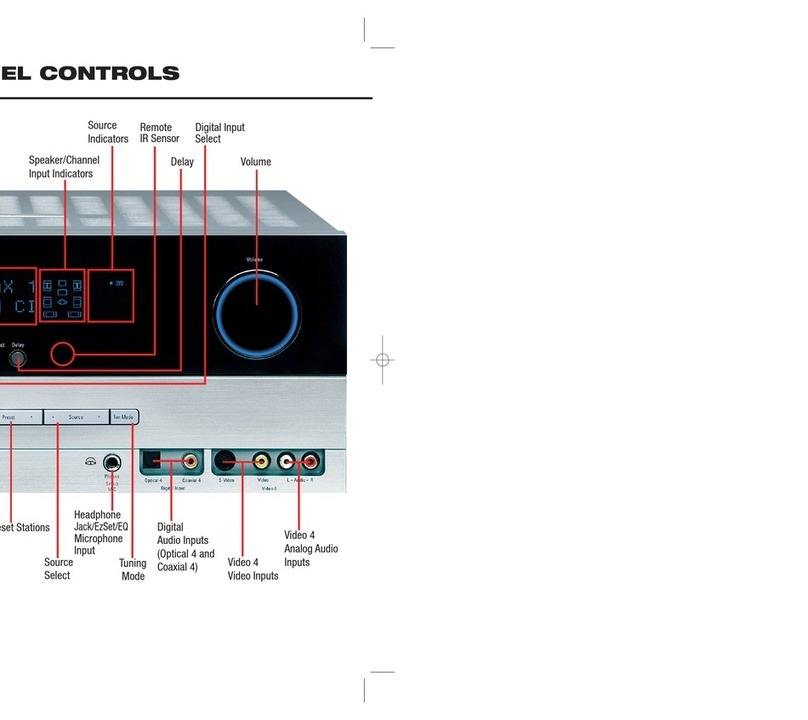
8Video 3 Inputs:These audio/video inputs
may be used for temporary connection of video
games, camcorders, digital still cameras or
portable audio products.To select a source
connected to these jacks, press the Vid 3
Input Selector #.
9Sleep Button: Press this button to place
theAVR in the sleep mode.Once the button is
pressed, Information Display
35
will show
the time remaining before the unit will auto-
matically go into the standby mode.To
decrease the remaining time before the unit
goes into standby, press the button again,and
each press will decrease the time in the follow-
ing order.
)Tape Selector: Press this button to select
the device connected to the Tape In jacks h
as the listening source.
!CD: Press this button to select the device
connected to the CD Input jacks ¶as the
listening source.
@DVD Input Selector: Press this button to
select the device connected to the DVD Input
jacks §as the listening and viewing source.
#Video Input Selectors: Press one of these
buttons to select a source connected to the rear
panel Video inputs ‡°, or the front panel
Video 3 input 8.
$6-Channel Direct Selector: Press this
button to select the output of an optional,
external 6-channel decoder connected to the
6-Ch Direct inputs aas the listening source.
%AM/FM: Press this button to select the
tuner as theAVR 100’s input source.When it is
first pressed the last station tuned will be
heard. Press it again to change between AM
and FM bands.
^Tuning Button: Press the left side of the
button to tune lower frequency stations and the
right side of the button to tune higher frequency
stations.When a station with a strong signal is
reached, the TUNED indicator Nwill illumi-
nate in the Information Display
35
.
To tune manually,tap the button lightly and
note that the tuner will step up one frequency
per button press.When the button is held for a
few seconds you will note that the unit will
quickly search the frequency band. Release it
once the fast tuning starts and the tuner will
automatically scan for the next station with an
acceptable signal and then stop.
&Preset Scan: Press this button to automat-
ically scan through the stations that have been
programmed in theAVR 100’s memory.The
tuner will play five seconds of each station
before moving to the next preset station.To
stop the scan when the desired station is heard,
press the button again. (See pages 24–25 for
more information on the tuner memory system.)
*Preset Stations Selector: Press this but-
ton to select stations that have been entered
into the preset memory. (See pages 24–25 for
more information on tuner programming.)
(Tuner Mode: Press this button to select
the stereo or mono mode for FM tuning. In the
STEREO mode a Stereo indicator Lwill illu-
minate in the information display, and stereo
reception will be provided when stations are
transmitting stereo signals. In the MONO mode
the left and right signals from stereo broadcasts
will be mixed together. Select MONO for better
reception of weak signals.
ÓDolby Digital Selector: Press this button to
select the Dolby Digital surround mode when lis-
tening to a program that carries Dolby Digital
information.(See pages 21–24 for more informa-
tion on surround modes and digital audio.)
ÔDolby Pro Logic Selector: Press this
button to select the Dolby Pro Logic surround
mode when listening to an analog program
that is encoded with surround-sound informa-
tion. (See page 21–23 for more information on
surround modes.)
Dolby 3 Stereo Selector: Press this but-
ton to select the Dolby 3 Stereo listening mode.
This mode is used primarily when a center
channel speaker but no surround speakers, are
installed. (See pages 22 for more information
on surround modes.)
ÒHall Mode Selector: Press this button to
activate the Hall 1 mode as an alternative sur-
round mode when stereo sources are in use.
This mode provides the reverberant atmos-
phere of a medium-sized concert hall.
ÚTheater Mode Selector: Press this button
to activate theTheater mode as an alternate
surround mode when stereo sources are in use.
ÛTest Tone Button: Press this button to
begin the process of setting theAVR 100’s out-
put levels.When this button is pressed, a test
tone will replace the listening source, and circu-
late among the various output channels at a
three second interval.The Information
Display
35
will show the location of the chan-
nel where the test tone noise should be heard.
(See pages 22–24 for complete information on
setting the output levels.)
ÙSurround Off: Press this button to turn off
all surround processing and to listen to a pro-
gram in traditional stereo from the left front
and right front speakers only.
ı
Mute: Press this button to momentarily
silence the speaker and headphone outputs of
theAVR 100.
ˆVolume Control: Turn the knob clockwise
to increase volume, counterclockwise to
decrease the volume. If theAVR is muted,
adjusting volume control will automatically
release the unit from the silenced condition.
˜Delay: Press this button to begin the
sequence of steps required to enter delay time
settings. (See pages 18–19 for more informa-
tion on delay times.)
¯Digital Input Selector: When playing a
source that has a digital output, press this
button to select between the Optical pand
Coaxial oDigital inputs. (See pages 23–24
for more information on digital audio.)
˘Set Button: When making choices during
the setup and configuration process, press this
button to enter the desired setting as shown
in the Information Display
35
,, into the
AVR 100’s memory.
¸Channel Trim Button: Press this button
to trim the output level settings using an nor-
mal input source as the program material.(See
page 26 for complete information on triming
the output levels.)
33
Speaker Select Button: Press this button
to begin the process of selecting the speaker
positions that are used in your listening room.
(See page 16 for more information on setup
and configuration.)
34
Selector Buttons: When you are establish-
ing theAVR 100’s configuration settings, use
these buttons to select between the choices avail-
able, as shown in the Information Display
35
,.
35
Information Display: This display deliv-
ers messages and status indications to help you
operate the receiver. (See page 7 for a complete
explanation of the Information Display.)
36
Remote Sensor Window: The sensor
behind this window receives infrared signals
from the remote control.Aim the remote at this
area and do not block or cover it unless an
external remote sensor is installed.

