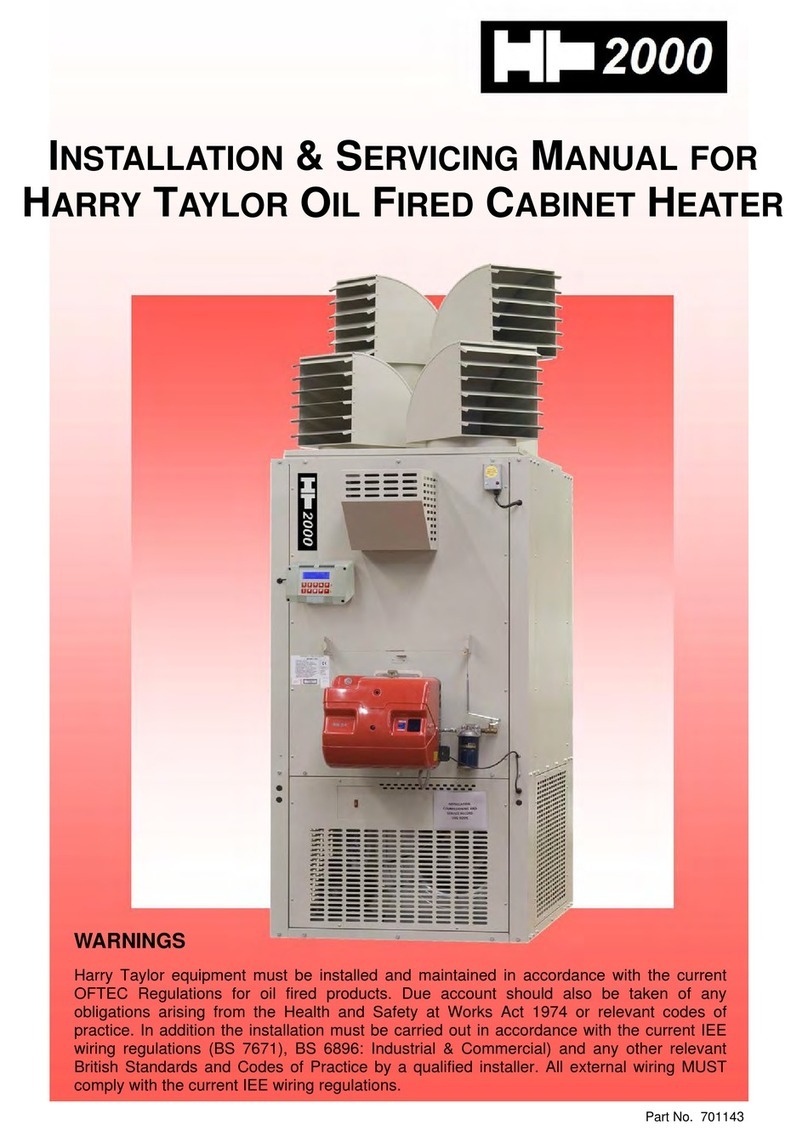
Harry Taylor HT2000 User manual

1
HT
OIL FIRED
CABINET HEATER
I N S T A L L A T I O N C O M M I S S I O N I N G
S E R V I C I N G
U S E R I N S T R U C T I O N S
THIS MANUAL SHOULD BE LEFT WITH THE END USER .
TO ENSURE SERVICE AND MAINTENANCE INFORMATION IS AVAILABLE ON SITE

2
~ C O N T E N T S ~
SECTION 1
PAGE NO
1.0 Compliance Notices 4
1.1 Certificates of Conformity 5
1.2 General Product Information 5
1.3 General Requirements 5
1.4 Delivery & Pre-installation Checks 6
1.5 Warranty 6
2.0 Location & Positioning 8
2.1 Fuel Supply - General 8
2.2 Fuel 9
2.3 Fuel Storage Tank 9
2.4 Single Pipe System - Gravity Feed 9
2.5 Two Pipe System 12
2.6 Pressurised Ring Main System 12
2.7 Pipe work and Fittings 12
2.8 Electrical Supply 12
2.9 Air Supply 13
2.10 Minimum Space Requirements 13
2.11 Air Distribution System 13
2.12 Flue System 14
3.0 Installation 15
3.1 Packaging & Siting 15
3.2 Flooring 15
3.3 Minimum Clearances 15
3.4 Assembly 19
3.5 Flue Installation 19
3.6 Oil Installation and Connection 19
3.7 Electrical Installation & Connection 20
3.8 Air Distribution Installation 20
3.9 Warm Air Registers 20
3.10 Heater Control Installation 20
4.0 Commissioning 21
4.1 Pre-Test 21
4.2 Ignition 22
4.3 Air Delivery System 23
4.4 Hand Over 24
5.0 Servicing 26
5.1 Planned Servicing 26
5.2 Servicing Procedure - Major Component Parts 26
5.3 Servicing – Re-commissioning 28
6.0 Fault Diagnosis By Flow Charts 29
7.0 Wiring Diagrams by Model and Burner Type 32
8.0 Technical Data 38
9.0 Reference Documents - Standards, Codes of Practice 41
9.1 Parts Listing 42

3
SECTION 2 BASIC USER INSTRUCTIONS
10.0 Introduction
10.1 Commissioning/hand over
10.2 Servicing
10.3 Start up procedure
10.4 Stop procedure
10.5 Shutdown procedure
10.6 Ventilation only
10.7 Lockout situations
10.8 Contact Information
I L L U S T R A T I O N S
Page No’s
Exploded view 7
Fuel Systems and Storage 10-11
Flue Systems 16-19
Fan and Motor Configurations 25
Fault Diagnosis Flow Charts 29-31
Wiring Diagrams 32-37

4
1.0 Compliance notices
The following information is relevant to
oil fired Cabinet Heater range . These
heaters are manufactured within a strictly
controlled quality environment within the
parameters of ISO 9001.
The range has been tested and assessed
for compliance with the following
European Directives.
Machinery Directive (89/392/EEC)
Low Voltage Directive (73/23/EEC & 93/68/
EEC)
Electromagnetic Compatibility Directive
(89/336/EEC & 91/31/EEC)
Product Liability Directive (65/374/EEC)
The manufacturer has taken reasonable and
practical steps to ensure that the Cabinet
Heaters are safe and without risk when
properly used. These heaters should
therefore only be used in the manner and
purpose for which they were intended, and
in accordance with the recommendations
detailed herewith.
The heaters have been designed,
manufactured, assembled, inspected, and
tested, with safety and quality in mind, there
are certain basic precautions which the
installer and user should be aware of, and
they are strongly advised to read the
appropriate sections of the information pack
accompanying the heater, prior to installation
or use.
Where proprietary items are incorporated,
detailed information and instructions are
also provided as part of the information pack.
It is the responsibility of the installer, owner,
user, or hirer, of the heaters to ensure that
they arefamiliar with the appropriate
information/manuals, supplied by the
manufacturer, and that they are suitably
aware of the purpose of the manuals and
the safety instructions. In addition, operators
must be suitably trained in the use of the
appliance so as to ensure its continued safe
and efficient use.
The company has a commitment to
continuous improvement, and therefore
reserves the right to amend or change the
specification of the Cabinet Heater range
subject to compliance with the appropriate
European, National, and Local regulations.
Contained within the text of the manual, the
words 'Caution' and 'Warning' are used to
highlight certain points.
Caution is used when failure to follow or
implement the instruction (s) can lead to
premature failure or damage to the heater or
its component parts.
Warning is used when failure to heed or
implement the instruction (s) can lead to not
only component damage, but also to a
hazardous situation being created where
there is a risk of personal injury.
NOTE
ON COMPLETION OF COMMISSIONING
COPIES OF THE COMMISSIONING
REPORT AND HEATER SETTINGS
MUST BE RECORDED AND RETAINED
Warranty claims made without this
condition being fulfilled will not be
processed
The range of Oil fired Cabinet Heaters
conform to the following harmonized
standards;
BS EN 292 - Part 1 : 1991
Safety of Machinery - Basic Concepts,
General Principles for Design Basic
terminology, methodology
BS EN 292 - Part 2 : 1991
Safety of Machinery - Basic Concepts,
General Principles for Design Technical
Principles and Specifications

5
BS EN 60204 - Part 1 : 1993
Safety of Machinery - Electrical Equipment
for Machines Specification for General
Requirements
BS EN 60335 - Part 1 : 1988
Safety of Household and Similar Electrical
Appliances
General Requirements
BS EN 55014 - 1993
Limits and methods of measurement of radio
disturbance characteristics of electrical
motor-operated and thermal appliances for
household and similar purposes, electrical
tools and similar electric apparatus
BS EN 50165 - 1997
Electrical Equipment of non-electric heating
appliances for household and similar
purposes, safety requirements
1.1 Certificates of conformity
Certificates are available from the
Manufacturer
1.2 General product information
The cabinet heaters have an output range
from approximately 29.16 kW to 380 kW, and
are available in a configuration that will allow
for down flow, horizontal, or floor mounting.
The units can suit either ducted applications,
or be used as free blowing units, but each
heater must be connected to its own
individual open flue
Each heater is fitted with a forced draught
burner which has been test fired and pre-set
prior to despatch. The safety functions of the
burner are by way of a fully sequential
control box fitted to the burner.
Note
Neither asbestos nor soft soldered joints are
used in the construction or manufacture of
of cabinet heaters. The materials selected
for use can withstand the mechanical,
chemical, and thermal stresses which they
will be subject to during foreseen normal
use when installed in accordance with the
manufacturers recommendations.
1.3 General requirements
Caution
Ensure that the fuel supply is in accordance
with the manufacturer's recommendations
and is as stated on the appliance data plate.
Installation, commissioning, and
servicing must only be carried out by
appropriately qualified and competent
persons.
Warning
Unauthorised modifications to the appliance,
or departure from the manufacturers
guidance on intended use, or, installation
contrary to the manufacturers
recommendations may constitute a hazard.
Note
To ignore the warning and caution notices,
and to ignore the advice from the
manufacturer on installation, commissioning,
servicing, or use, will jeopardise any
applicable warranty, moreover, such a
situation could also compromise the safe and
efficient running of the appliance itself, and
thereby constitute a hazard.
The installation of the appliance must meet
all the relevant European, national, and local
criteria.
(See sections 3 and 9).
Prior to installation the following points
should be considered;
a) The position of the heater for the optimum
efficient distribution and circulation of warm
air
b) The position of the heater relative to the
route of the flue
c) The position of the heater relative to the
supply of fuel
d) The position of the heater relative to the
electrical services, and if appropriate, any
additional controls.
e) The position of the heater relative to the
supply of fresh air

6
f) The position of the heater relative to
service and maintenance requirements
Caution
The heater must not be installed within an
area where the conditions are unsuitable, e.
g. where the atmosphere is highly corrosive,
has a high degree of salinity, or where high
wind velocities may affect burner operation.
Suitable protection should be provided for
the appliance when it is located in a position
where it may be susceptible to external
mechanical damage from; for example, fork
lift trucks, overhead cranes etc.
1.4 Delivery and pre-installation
checks
The heater is supplied wrapped in heavy
duty protective polythene. On receipt of the
heater, the following checks should be
carried out;
a) The model is as per order
b) That it is undamaged
c) That it is suitable for the fuel supply
d) That it is suitable for the electrical supply
If any of these points are not satisfied then
contact should be made with the Sales Office
as soon as possible. In the case of claims
for damage, this must be signed for as
damaged and be reported in writing within
24 hours of delivery, in order to comply with
insurance criteria
1.5 Warranty
The heater is supplied with a 2 year warranty
made up as follows; first year covering parts
and labour, and second year covering parts
only. In addition to this there is also a 10 year
time related warranty on the combustion
chamber/heat exchanger. The warranty
commences from the date of despatch from
the manufacturer, and is subject to the terms
detailed within the the companies
conditions of business.
Note (i)
The warranty may be invalidated if -
a) The commissioning report and settings
have not been completed recorded and
retained
b) The installation is not in accordance with
the general requirements of this manual
c) The flue arrangement and air supply for
the heater are not in accordance with the
manufacturers
recommendations, codes of practice, or
similar standards
d) Air flow through the heater is not in
accordance with the manufacturers technical
specifications
e) Internal wiring on the heater has been
tampered with or unauthorised service /
repairs undertaken
f) The main electrical supply input to the
heater has been interrupted during the
heating mode
g) The heater has been subject to and
affected by the ingress of water in any form
h) The heater is not operated at the rating(s)
laid down in the manufacturers technical
specifications
i) The heater has not been operated or used
within the normal scope of its intended
application
j) The manufacturer's recommended
minimum service requirements have not
been complied with

7
Note (ii)
All warranty claims must contain the
following information to enable processing to
take place;
(1) Heater model
(2) Heater serial number
(3) Order reference/date of order, together
with full installation details (name and
address)
(4) Details or symptoms of fault
(5) Installers name and address.
Faulty parts must be returned to the
Spares Department, the address of which is
shown on the rear of this manual. Any
such parts will undergo inspection to verify
the claim. Replacement parts supplied prior
to this may be charged, and a credit supplied
upon subsequent validation of the warranty
claim. Consumable items are specifically not
included within the scope of the warranty.
Note (iii)
Notification is required immediately a fault is
suspected.
The manufacturer will not accept
responsibility for any additional damage that
has been caused, expense incurred, or
consequential loss resulting from any failure
of the heater(s).
2.0 Location/positioning
Warning
All of the basic criteria must be satisfied prior
to commencing installation and
commissioning, additionally, the Cabinet
Heater must be positioned and installed so
as to comply with all the relevant standards
and guide lines (see section 9.0), as well as
meeting National and Local Fire Regulations
and Insurance criteria, especially if it is
proposed that the heater is to be installed
within a special risk area (e.g. proximity to
where petrol engined vehicles are stored or
parked, where cellulose spraying takes
place, where woodworking machinery is
operated, etc,).
Indirect fired heaters must not be located in
hazardous areas, however, it is permissible
for the heater to supply air to such areas.
The heater must not be installed within an
environment where there is a high
concentration of chlorides,
fluorides, salts, or other aggressive or volatile
chemicals/compounds. Nor should the heater
be positioned where high winds or draughts
could adversely affect the burner.
The location chosen for the heater must
allow for the fitting of an effective flue
system.
The location must also allow for adequate
clearance for the air supply, return air
circulation, oil supply, electrical supply, whilst
also providing good and safe working
access.
The heater must be installed on a flat and
level surface made from non-combustible
material, which is sufficiently robust to
withstand the weight of the heater
and any ancillary equipment. Any
combustible material adjacent to the heater
or flue system must be so placed or shielded
so that its surface temperature does not
exceed 65oC.
In areas where it is proposed that more than
one heater is to be installed, a general
scheme of circulation should be drawn up
and maintained, thereby offering the best
heat distribution.
All cabinet heaters are fitted with a pressure
relief facility, this is incorporated into the
design of the flue gas exit duct. Care should
therefore be taken in siting service
connections and controls well away from the
pressure relief vent.
Warning
Under no circumstances must the pressure
relief be restricted, blocked, or have the free
exit of exhaust gas impaired or re-directed.
2.1 Fuel supply - general
The oil fired cabinet heaters are all manufactured
and pre-set for use with 35 second gas oil
delivered to the burner via a suitable piped system
from the oil storage tank.
Units are also available for use on Kerosene
and must be ordered specifically for use on
Kerosene 28 seconds oil.
Galvanised or plastic pipe work and
fittings must not be used. (see BS 5410
Part 1 1997)

8
The constraints of the application will, to a
large extent, determine whether it is
preferable to use a single pipe gravity feed
system, or whether the two pipe pumped
system is more appropriate.
Where more than one appliance is to share
a common supply it will be necessary to use
a pressurised ring main system.
All pipe work must be constructed and
installed so that it does not permit the ingress
of air.
The construction, size, and position of the oil
storage tank must take account of the current
regulations, as well as suiting the
requirements of the installation.
Please refer to figures 2 - 8 for additional
information.
Caution
On pumped systems always check that the
pump is correctly set up prior to running, and
always ensure that valves are open allowing
a free flow of oil through the system.
2.2 Fuel
In order to promote trouble free operating it is
necessary that the oil within the storage tank
and oil line does not fall below the cold filter
plugging point (cfpp), In the UK for class D
fuel (also referred to as gas oil),the critical
temperature is -4oC for summer grade.
The cfpp critical temperature for the winter
grade is -12oC. If summer grade fuel is
stored for winter use in areas prone to
severe frosts and low temperatures it will be
necessary to insulate or even heat the
supply tank and pipe work.
Note
The fuel supplier should be contacted prior to
installation so that any requirements
concerning delivery, transport, storage and
use can be addressed before work
commences.
Warning
The inlet pump pressure must not exceed a
maximum of 0.4 bar, this is because beyond
this point gas is liberated from the oil.
2.3 Storage tank
An externally painted steel storage tank to
BS 799 part 5 1987 or a medium density
polyethylene oil tank OFTEC certified to OFS
T-100 may be used. Local, national,
European and fire regulations must also be
complied with.
They must include the following.
A fuel level gauge (not made from glass) a
vent pipe with a diameter greater than that of
the filler and featuring a weatherproof
termination. A sludge valve.
An outlet valve situated at the opposite end
of the tank to the sludge valve.
A filler pipe connection situated at the
opposite end to the outlet valve.
The size of the storage tank must take
account of the estimated consumption and
any quantity price breaks offered by the oil
supplier.
It is preferable to install the tank outside,
however, if this is not practicable and the
tank has to be installed indoors advice must
be sought about its siting, especially so far
as fire regulations are concerned.
If a separate fire resistant chamber cannot
be provided for indoor installations, a
catchment pit with a capacity ten percent
greater than that of the storage tank must be
provided
Storage tanks can if necessary be sited on a
roof, but this is subject to special regulations
as well as local authority approval and
compliance with fire regulations, reference to
BS 5410 part 2 1978 & part 1 1997 is
strongly suggested.
It is advisable to leave the tank unpainted on
the inside, but to paint the outside with a
proprietary grade of anti-corrosive paint.
A galvanised or open topped tank is strictly
not allowed.
All oil storage tanks require a bund
The Control of Pollution Regulation ( Oil
Storage ) 2001 should be consulted prior to
installation
2.4 Single pipe system (gravity feed)
For installations where the oil tank is 200mm
or more above the level of the fuel pump the
principle of gravity feed may be used.
The draw off point for the supply to the
burner must not be positioned any lower than
100mm above the bottom of the tank.
Where a return valve is fitted this must be
tamper proof to prevent inadvertent
operation.

9
1 GATE VALVE
2 IN-LINE FILTER
3 PUMP
4 RELIEF VALVE
5 PRESSURE GAUGE
6 PRESSURE REDUCING VALVE
7 RETURN TO TANK
1 2
3
4 5
66
7
WARNING:
Before starting the burner make sure that the return pipeline is not clogged;
Any obstruction would cause the pump seals to break
H
m
0.5
1.0
1.5
2.0
NOTE:
All burners are despatched suitable for gravity feed installations
FILLER
BURNER
L metres
I.D.
8mm
10.0
20.0
40.0
60.0
I.D.
10mm
20.0
40.0
80.0
100.0
Maximum
4 metres
H
Typical arrangement of oil storage tank and single pipe system
Pressurised oil feed system
Burner oil pump details for heater models 30-180 oil lines

10
BURNER
H
m
0
0.5
1.0
1.5
2.0
3.0
3.5
I.D.
8mm
35.0
30.0
25.0
20.0
15.0
8.0
6.0
I.D.
10mm
100.0
100.0
100.0
90.0
70.0
30.0
20.0
Maximum
4 metres
H
H
Priming the pump: Start the burner and await priming.
Should lock-out occur prior to arrival of the fuel, wait at least 20 seconds
before repeating the operation.
This solution, however, is less safe than the previous one, due to
possibility of leakage of the valve.
Should, however, the return line terminate over the fuel level,
a non return valve is essential.
The return line should terminate within the oil tank at the same level
as the suction line; in this case a non return valve is not required.
The pump suction should not exceed a maximum of 4 metres.
Beyond this limit gas is released from the oil.
BURNER
H
m
0.5
1.0
1.5
2.0
I.D.
8mm
5.0
10.0
20.0
15.0
I.D.
10mm
10.0
20.0
30.0
40.0
H P
The dimension P should not
exceed 4 metres to avoid damage
to the pump seals
Burner oil pump details for heater models 30-180 oil lines
Burner oil pump details 200-380 gravity feed from bottom of tank
BURNER
H
The pump suction must not exceed 4 metres;
beyond this value the pump becomes noisy.
The return valve must terminate at the same level
as the foot valve, otherwise the pump may
become air locked.
Burner oil pump details 200-380 suction feed

11
Caution
If the valve is closed when the pump is
running the oil pressure can be increased
sufficiently so as to cause damage to the
seals within the pump.
The return oil should preferably be
discharged through an elbow onto a tank
plate situated within the tank, this should be
positioned so as not to introduce air or air
bubbles into the draw off pipe.
2.5 Two pipe system
This is used where the oil storage tank is
lower than the pump.
Access for the fuel feed to the burner should
be via a suitable tapping made in the top of
the tank, and the fuel feed pipe should
extend to not less than 100mm above the
bottom of the tank.
A non return valve with a metal to metal seat
should be fitted, especially if the return pipe
work is terminated at a level above the draw
off tube. The non- return valve must be
removable for service and maintenance
purposes, and the return pipe from the pump
must therefore be extended down into the
tank to the same level as the suction pipe.
The presence of a tamper proof isolating
valve fitted within the return pipe is only
required if there is a risk that oil will siphon
out of the tank if the return pipe is
disconnected at the pump during
maintenance or servicing and if the none
return valve has been omitted.
2.6 Pressurised ring main system
This system is used to supply a number of
units from a common storage tank.
A booster pump is used to provide the
pressure to push the oil around the ring main
and back to the tank.
Pressure reducing valves should be fitted
on the delivery pipe to each heater to
ensure that the delivery pressure at the
heater is less than 6 psi.
Caution
The internal by-pass plug must be removed
from the burner pump when used in a
pressurised ring main application.
2.7 Pipe work and fittings
Caution
Galvanised or plastic pipe work and
fittings must not be used. (see BS 5410
Part 1 1997)
All joints must be sealed properly, if
necessary using PTFE tape or other
approved sealing media.
The pipe work must be effectively sealed so
as to prevent the ingress of air.
It is advisable to check all pipe work prior to
installation to ensure that there is no loose
debris or scale present.
Black iron pipes can be hammered to assist
in the removal of these contaminants.
Note
The oil feed to each heater must be fitted
with a fire check valve and isolating valve.
The fire check valve must be operated by
way of a fusible link positioned so that it is
above the burner.
2.8 Electrical supply
Wiring external to the cabinet heater must be
installed in accordance with any local,
national, and European regulations, as well
as meeting the appropriate requirements of
IEE regulations.
The means of connection to the main
electrical supply must allow for complete
electrical isolation of the heater, furthermore,
in the case of a unit wired for a three phase
supply, the supply should only be used to
serve the heater itself and no other plant or
equipment. The position of the isolation
switch must be such that it is adjacent to the
heater and easily accessible at all times. In
addition, the isolator itself must have a
contact separation of not less than 3mm.(as
per BS5991 clause 20.2). The Control fuse
ratings are detailed on the appliance data
plate.
Warning
Ensure that the electric and oil supplies are
turned off before any electrical work is
carried out on the heater.
Ensure that wiring cannot make contact with
any surfaces liable to be subject to high
temperatures or where the insulation of the
wiring could be impaired as a result of such
contact.

12
All cabinet heaters must be earthed.
Caution
The main electrical supply must not be
switched off or disconnected as a method for
stopping the heater, the exception to this is in
an emergency, or during servicing, when the
heat exchanger has been allowed to cool
sufficiently to prevent any damage from
occurring. Claims for damage will not be
considered if they have resulted from
incorrect wiring or the incorrect use of the
heater.
2.9 Air Supply
Consideration must be given to the provision
of air for the purposes of combustion and
ventilation of the heated space, plant room or
enclosure where heaters are to be installed
Note
It is strongly recommended that BS 6230 :
2005 is referred to for further information
concerning ventilation requirements
Where mechanical ventilation is used it is a
requirement that the inlet is of the
mechanical type, and the outlet is either
mechanical or natural.
Recommendations for guidance.
2.9.1 Heaters installed within the
heated space
Where heaters are installed within the space
to be heated (I.e. not a plant room or
enclosure )
Combustion air or heater related ventilation
air
Will not be required if
The design air change rate of the heated
space is 0.5 air changes per hour or greater
The design air change rate may be satisfied
by natural infiltration or by mechanical
ventilation
Combustion and General ventilation
will be required if
The design air change rate of the heated
space is less than 0.5 air changes per hour
Where the heated space has an air change
rate of less than 0.5 air changes per hour
then it will be necessary to provide either
natural ventilation openings to the heated
space (section 2.3.1.1. refers) or the
mechanical ventilation of the heated space
(section 2.3.1.2. refers)
2.9.1.1 Natural Ventilation Openings to
the Heated Space
If the heated space design air change rate is
less than 0.5 air changes per hour then
provision for low level natural ventilation
openings will only be necessary
The minimum free area of the low level
natural ventilation opening shall be
•2cm2for each kW of rated heat input
The low level natural ventilation opening
should be situated on an external wall and be
within 1000 mm of floor level
The table below provides specific data for
each heater model as -
Minimum Free Area of
ventilation opening
High Level Low Level
cm2cm2
30 None 64
35 None 79
45 None 97
60 None 127
75 None 160
90 None 193
120 None 257
135 None 291
180 None 386
200 None 460
235 None 515
285 None 623
350 None 769
380 None 847
Model

13
Minimum Free Area of
ventilation opening
High Level Low Level
cm2cm2
100 None 67
125 None 84
150 None 100
200 None 133
250 None 171
300 None 198
400 None 274
500 None 347
600 None 398
700 None 477
800 None 547
1000 None 682
1200 None 786
1300 None 884
Model
2.9.1.2 Mechanical Ventilation to the
Heated Space
In the event that the heated space has a
design air change of less than 0.5 air
changes per hour and that installer prefers to
mechanically ventilate the heated space
rather than provide ventilation openings
then -
•The heated space needs to be
mechanically ventilated so that the
design air change is 0.5 air changes or
greater.
•It is a requirement that the mechanical
ventilation shall be of the ’input’ type
with either natural or mechanical
extraction.
•Systems of mechanical extraction with
a natural inlet shall not be used
•It is necessary to provide an automatic
means to safely inhibit heater(s)
operation should mechanical air supply
fail for any reason
•
2.9.2. Heaters Installed within a Plant
Room or Enclosure
A plant room means a room housing the
heater plant and probably other items of
building service plant and would generally
have generous space for maintenance
An enclosure is where the heater is installed
within a compartment or confined area where
space is limited
Where heaters are installed within a plant
room or enclosure then provision for both
combustion air and air for general ventilation
will be required by means of high and low
level ventilation openings (sections 2.9.2.1
refers to plant room applications and
sections 2.9.2.2 refers to enclosure
applications).
Alternatively the plant room or enclosure may
be mechanically ventilated (section 2.9.2.3
refers)
2.9.2.1 Natural Ventilation Openings to
Plant Rooms
For plant room applications the minimum free
area of ventilation opening shall be
•At high level 2 cm2for each kW of
rated heat input
•At low level 4 cm2for each kW of rated
heat input
The high level ventilation opening should be
sited on an external wall and positioned as
high as is practical and always within the top
15% of the wall height
The low level natural ventilation opening
should be situated on an external wall and be
within 1000 mm of floor level
The table below provides specific data for
each heater model as -
Minimum Free Area of
ventilation opening
High Level Low Level
cm2cm2
30 64 128
35 79 158
45 97 194
60 127 254
75 160 320
90 193 386
120 257 514
135 291 582
180 386 722
200 460 920
235 515 1030
285 623 1246
350 769 1538
380 847 1694
Model

14
2.9.2.2 Natural Ventilation Openings to
Enclosures
For enclosure applications the minimum free
area of ventilation opening shall be
•At high level 5 cm2for each kW of rated
heat input
•At low level 10 cm2 for each kW of rated
heat input
•
The high level ventilation opening should be
sited on an external wall and positioned as
high as is practical and always within the top
15% of the wall height
The table below provides specific data for each
heater model as -
The low level natural ventilation opening
should be situated on an external wall and be
within 1000 mm of floor level
.
2.9.2.3 Mechanical Ventilation to a Plant
Room or Enclosure
In the event that the installer prefers to
mechanically ventilate the plant room or
enclosure rather than provide ventilation
openings then -
•The plant room or enclosure needs to be
mechanically ventilated at the rate of
4.14 m3/h of fresh air per kW or rated
heat input.
The table below provides specific data for each
heater model as -
•It is a requirement that the mechanical
ventilation shall be of the ’input’ type with
either natural or mechanical extraction.
Where mechanical extraction is selected
then the extraction rate should be 5%-
10% less than the input rate.
•Systems of mechanical extraction with a
natural inlet shall not be used
•It is necessary to provide an automatic
means to safely inhibit heater(s)
operation should mechanical air supply
fail for any reason
MODEL Mechanical Ventilation
Rate for Plant Room
or Enclosure
35 172
45 206
60 274
75 353
80 409
120 567
135 717
180 822
200 987
235 1131
285 1410
350 1627
380 1830
30 139
M3/h
Minimum Free Area of
ventilation opening
High Level Low Level
cm2cm2
30 159 318
35 198 396
45 244 488
60 317 634
75 400 800
90 483 966
120 643 1286
135 726 1452
180 965 1930
200 1152 2304
235 1287 2574
2851558 3116
350 1922 3844
380 2118 4236
Model

15
2.10 Minimum space requirements
The minimum space requirements for single
and multiple heater applications are detailed
in section 3.3 later within this manual.
2.11 Air distribution system
All materials used within the construction of
the delivery and return air ducts must not
represent a fire hazard and should be made
from thermally inert materials. The selection
of materials must take account of the
environment into which the heater and its air
delivery system is expected to work, it must
also take account of the stresses and
loadings placed upon it during its normal
working life. Where interjoist spaces are used
to route ducting these must be lined with fire
resistant insulation material.
In installations where forced recirculation is a
feature, a full and unobstructed return air path
to the heater(s) must be provided, with return
air grilles connected by ducting directly to the
return air inlet on the heater.
The limit for recirculation should not be
greater than 85% re-circulated air to 15%
fresh air.
Where the heater is installed within a
compartment or plant room the return air and
discharge air arrangement must be such that
the air circulation fan does not interfere with
the operation of the flue.
The return air intake and warm air outlet
should therefore be fully ducted to and from
the heater, respectively, within the
compartment or plant room.
If the inlet air is ducted to the outside, then
the lowest edge of the inlet air duct must be at
least 500mm above the outside floor or
ground level, it must also be fitted with an
access point(s) to allow for cleaning and
servicing to occur.
The openings in the structure of the plant
room, through which the ductwork passes
must be of fire resistant material and
constructed to prevent the likelihood of any
fire from spreading.
In ducted applications the ductwork must be
designed so as to give a static pressure within
the limits stated in section 8 of this manual. It
should be noted that if the static pressure is
too high, nuisance shut-down will occur when
the heater goes out on the overheat limit
thermostat, if the static pressure is too low,
the fan motor will overload causing overheat
trip or possible damage to the motor.
Warm air outlets on ducted applications must
be such that they cannot be closed or
become blocked, which again would lead to
an increase in static pressure and nuisance
shut-down. The outlets must not be sited so
that warm air can be discharged onto
combustible materials, if necessary, guard
rails should be used to ensure that effected
areas are kept clear.
Return air intakes must not be located so that
potentially harmful or hazardous
contaminated air can be drawn into the
system.
2.12 Flue system
Warning
It is essential that the products of combustion
are flued to the outside of the building. Each
heater must have its own separate flue, with a
flue diameter of not less than is detailed in
section 8 within this manual. The minimum
vertical length of flue must not be less than
3m. The flue should rise vertically, and the
number of bends should be kept to a
minimum. Flue pipe should be supported at
intervals not exceeding 1.8mtrs
Flue pipes below a height of 2m should be
guarded against the possibility of being
accidentally touched when hot by
personnel
It is strongly advised that BS 5854; 1980, and
BS 5440; parts 1 and 2, are used as
consultative documents when considering flue
requirements.
Care should be taken to ensure that the flue
terminal is not situated in a high-pressure
area, the proximity of
buildings and other obstacles which will
influence this must be taken into account,
preferably at the design stage.
See figures 9 - 19.

16
Provision must be made for the
disconnection of the flue for inspection and
service requirements, and it is strongly
advised that where bends are fitted
inspection covers are included.
The materials from which the flue is
constructed must be non-combustible,
resistant to internal and external corrosion,
and be capable of withstanding the stresses
and loadings associated with normal use.
When designing the flue system the
prevention of the formation and entrapment
of condensation must be a key consideration.
Twin wall or insulated systems are
recommended, as they tend to inhibit the
formation of condensates.
Where condensation is likely traps
should be included to encourage the
condensates to flow freely to a point from
which they may be released, preferably into
a gully.
The condensate pipe from the flue to
the disposal point must be made from
corrosion resistant pipe of not less than the
internal diameter of the drain pipe.
Condensate must not be allowed to drain
back to the heater as this can cause corrosion
and premature failure of components
If the flue passes through a wall, ceiling, or
roof made from combustible material then it
has to be sleeved so as to provide a
minimum of a 25mm void between the
exterior of the flue and the internal wall of the
sleeve. The maximum permitted temperature
of any adjacent combustible material is 65oC.
The position of the flue and its terminal
should be such that it does not impair the
combustion process.
It should terminate in an exposed position so
as to allow the escape and dissipation of flue
gases without risk of their re-entering the
property through windows, ventilation ports,
etc. The flue should extend to at least 1m
above the height of any object within 3.5m of
the terminal.
Flue terminals should be fitted on all flues,
the terminal must be of the approved type,
and have outlet grilles on all sides giving a
total free area of at least double that of the
flue.
Caution
It is imperative that the flue should be
properly sealed where it passes through the
roof, this can best be
achieved by using the approved method of
roof flashing plate and cravat.
Note
It should be noted that claims made under
warranty and attributed to the ingress of
water may not be considered especially if an
approved method of sealing has not been
used, or if the design of the flue has not
made provision for possible condensation
problems.
3.0 Installation
It is strongly advised that the installer reads
Section 2 and Section 3 of this manual prior
to starting any installation work.
It is a requirement that only qualified and
competent personnel may undertake
installation , commissioning , and servicing.
Warning
Always ensure that the appropriate personal
protective equipment is used.
3.1 Packaging/Siting
The heater will usually be supplied wrapped
in heavy gauge polythene, non assembled
parts will be supplied separately.
Prior to installation, the assembly of the
heater should be completed, it is advisable
that this is undertaken in the area where the
heater is scheduled to be sited.
Caution
It is strongly advised that when positioning
the heater the lifting eyes are used, thereby
reducing the risk of inadvertent damage
being occasioned to the heater.
3.2 Flooring
The heater must be installed on a level non-
combustible surface capable of supporting
the weight of the heater and any ancillary
equipment.

17
Not less than
600mm
Not less than
600mm
Greater than 1500mm
Parapet
Flat Roof with parapet
Not less than
600mm
Less than 10 h
Greater than 1500mm
H
1
H
2
2
Less than 10 h
1
Flat roof envelope method
Structure
Not less than
250mm
2
Greater
than 10 h
1
H
1
H
2
Structure
Flat roof where the flue height is more than 10 heights (H) away from all structures
Structure
Not less than
600mm
Less than 1500mm
Flat roof with flue close to parapet

18
Not less than
600mm
Not less than
250mm
Flat roof with no parapet
Not less than
600mm
Less than
1500mm
Structure
Flat roof with structure close to flue outlet
Not less than
600mm
Not greater than
45
°
Not less than
600mm
Pitched roof not greater than 450

19
3.3 Minimum clearances
The following minimum clearances (in
millimeters) are recommended when
installing the heater.
3.4 Assembly
The following sub-assembly parts should be
assembled to allow installation to continue.
(a) Vertical Nozzled Models
For free blowing applications it will be
necessary to complete the final assembly
before continuing with the installation place
the nozzle plate onto the top of the heater,
align holes, and secure.
Fit the nozzles to the spigots, turning the
nozzles to give the required approximate
direction for airflow.
Secure nozzles to spigots, when correctly
positioned by way of self tapping screws, on
completion of commissioning
(b) Horizontal Nozzled Models
Remove packing and secure the 900Duct
Outlet to the heater using the bolts supplied.
Secure the nozzle spigot plate to the duct
outlet using the bolts and prevailing torque
nuts provided. Fit the securing brackets to
each of the outlet nozzles, and lift the
complete heater assembly and position on
the pre-sited purpose built supports. Finish
off the assembly by fitting and securing the
outlet nozzles to the spigots by way of
previously fitted brackets.
3.5 Flue Installation
An integral flue spigot is fitted to all Cabinet
Heaters thereby allowing the flue to connect
directly to the heater. The design of the flue
must ensure that it can be disconnected to
allow for cleaning and servicing,
furthermore, all of the flue section joint
sockets must face upwards, and the seal
between the sections achieved through
mechanical joints or through the use of
approved caulking string and grout. It is
strongly advised that BS 5854 and BS 5440
parts 1 and 2 are referred to, see also figs
9 - 19.
Where condensation is likely to be a
problem provision should be made
at the design stage for trapping and
disposal of condensate.
(see section 2.11).
3.6 Oil Installation/connection
The oil tank must be positioned so that there
is a fall of 7.5mm (+/- 2.5mm) for every
30mm away from the outlet and towards the
sludge/drain valve, which must be sited at
the lowest point in the tank. If the tank is
positioned on supports then there must be an
adequate protective layer between tank and
support to prevent damage or deterioration
through corrosion. It is strongly suggested
that reference is made to BS 5410 ; part 2 ;
1978.
It is also suggested that the installer is
familiar with the detail and requirements
contained within sections 2.1 through to
section 2.6 of this manual prior to
commencing installation.
Warning
Prolonged exposure and contact with gas oil
can result in the natural oils being removed
from the skin, sensitisation can result in
dermatitis. Always ensure that the appropriate
personal protective equipment is used.
Model Size Front Rear Lhs Rhs
30 - 45 500 700 150 150
60 - 90 500 1,000 150 150
120 - 135 600 1,200 150 150
180 600 1,500 150 150
200 900 1,500 150 150
235 2,000 400 400
350 - 380 900 2,000 500 500
900

20
3.7 Electrical Installation/connection
The cabinet heaters are available either
for 415V 50Hz 3PH or 230V 50Hz 1PH
supplies depending upon the model
specified.
It is recommended that reference is made to
the wiring diagrams contained within section
7 of this manual prior to installation or
connection to the supply. The electrical
supply must be as specified and suitable for
the heater, and must be run within conduit to
a point adjacent to the heater, and be
terminated to provide an isolation point that
will prevent remote or inadvertent activation.
Cables, conduit, and fittings that are used to
make the connection between the isolator
and the heater must conform to the
appropriate IEE regulations.
All heaters are supplied fused and pre-
wired, all must be earthed.
Final connections for any additional external
controls must be completed on site, and
must be carried out according to IEE
regulations.
Separate user information is provided for the
time control unit and the burner, and forms
part of the product information pack which
accompanies every heater when
despatched.
Warning
Always isolate from mains electrical supply
before commencing work on the heater.
Always ensure that the appropriate personal
protective equipment is used.
3.8 Air Distribution Installation
The materials selected must be of low heat
capacity, and it is preferable that all warm air
ductwork is thermally insulated.
Where ducting may be subject to
deterioration from exposure to moisture or
high humidity material selection and
insulation are prime considerations. Joints
and seams must be airtight and fastened
securely and designed to remain so, even
when operating at high temperatures.
Adequate support must be designed into the
layout of the ductwork to ensure that the
integrity of the seams and joints is
maintained.
The support must be independent and
separate from the heater and the ducting, to
allow for free movement during expansion
and contraction.
Where ducting passes through walls or
partitions sufficient clearance must be left,
irrespective of any fire stop requirement, to
allow for expansion and contraction. Failure
to adhere to these latter two points can result
in the generation and transmission of excess
noise.
Where ducting is installed in concrete
flooring a permanent membrane must be
used to isolate the ducting from the corrosive
effect of the alkaline salts within the
concrete. Care should be taken to ensure
that soft insulation material does not become
compressed and thereby lose its insulation
effectiveness.
3.9 Warm Air Registers
In order that vertical temperature gradiants are
minimised and even heat distribution, warm air
registers should be selected and located
commensurate with the requirement of the
application to ensure adequate air penetration
to floor level.
To minimise noise levels the registers should
be set away from corners, additionally, a
good seal between the register frame and
the wall is important, particularly on high
level positions, if unsightly staining through
warm air/particulate deposition is to be
avoided.
3.10 Heater Control Installation
Unless specified all Cabinet Heaters are
manufactured and supplied with a facia
mounted SmartCom control as standard
fitted to the heater.
Other manuals for HT2000
5
Table of contents
Other Harry Taylor Heater manuals
Popular Heater manuals by other brands
Western Airconditioning
Western Airconditioning Doppio 4 Technical information manual
Sunpak
Sunpak S34-TSH Installation, operation and maintenance instructions

DeLonghi
DeLonghi DRAGON 4 Instructions for use
Caloritech
Caloritech OKA SERIES Installation, operation and maintenance instructions
Stadler Form
Stadler Form Anna operating instructions

Simplex
Simplex Microstar Operation manual

