Harvest TEC 600SS User manual

Operation Manual
Model 600SS
Moisture Sensor Kit for Small Square Balers
Forage Harvester
600SS-16-OPR-BLE
11/17

2
(intentionally blank)

3
Page
Introduction
4
System Requirements
4
Safety
4
Safety Decals
4
Bluetooth Operation
5-9
Turn On / Off iPad
5
Downloading Hay App
5
Shutting Down the Hay App
6
Device Selection
7
Manual Selection & Recommended Preservative
8
Tab Descriptions
9
Screen Menus
10-
Automatic Mode & Manual Mode
10
Setup Mode
11
Job Records
12-13
Baling Rate Settings
14
Stroke Counter Setup
14
Operation Instructions
15
Automatic Mode
15
Manual Mode
16
Job Records
17
Download Job Records
18
Export Job Records
19-20
Wiring Diagram
21
Pin Outs
22-23
Common Questions
24
Troubleshooting
25
Maintenance, Winter Storage, Status Alerts
25
Parts Breakdown
26-29
Controls and Harnesses
26
Star Wheels and Bale Rate Sensors
27
Optional iPad Mini Mounting Kit (030-2012MK)
28
Optional iPad Display Kit (030-2670DK)
29
Notes
30
Warranty Statement
31
600SS Operation Manual Table of Contents

4
Introduction
Thank you for purchasing a Harvest Tec Model 600SS Moisture Monitor System. This 600SS Moisture
Monitoring System has been designed to be operated through an Apple iPad (not included) using the Hay App.
As well as the option to plug directly into most tractors that have an ISOBUS Monitor. The 600SS Moisture
Monitoring System offers these advantages by operating through an Apple iPad:
1. Large bright, clear, colorful display
2. More durable and can be read in bright sunlight
3. Wireless connection in cab
4. Can be used for multiple other uses than just the applicator display
5. Option to tie-into the tractor ISOBUS system
The 600SS Moisture Monitor kit includes the following parts: Dual Channel Processor (DCP), Moisture
Sensors, Harnesses, Bluetooth receiver and Miscellaneous Hardware. For your convenience a parts break
down for the 600SS Moisture Monitoring System is included in the back of this manual. If you do have
questions please bring this manual into the dealership.
Right and Left sides are determined by facing in the direction of forward travel.
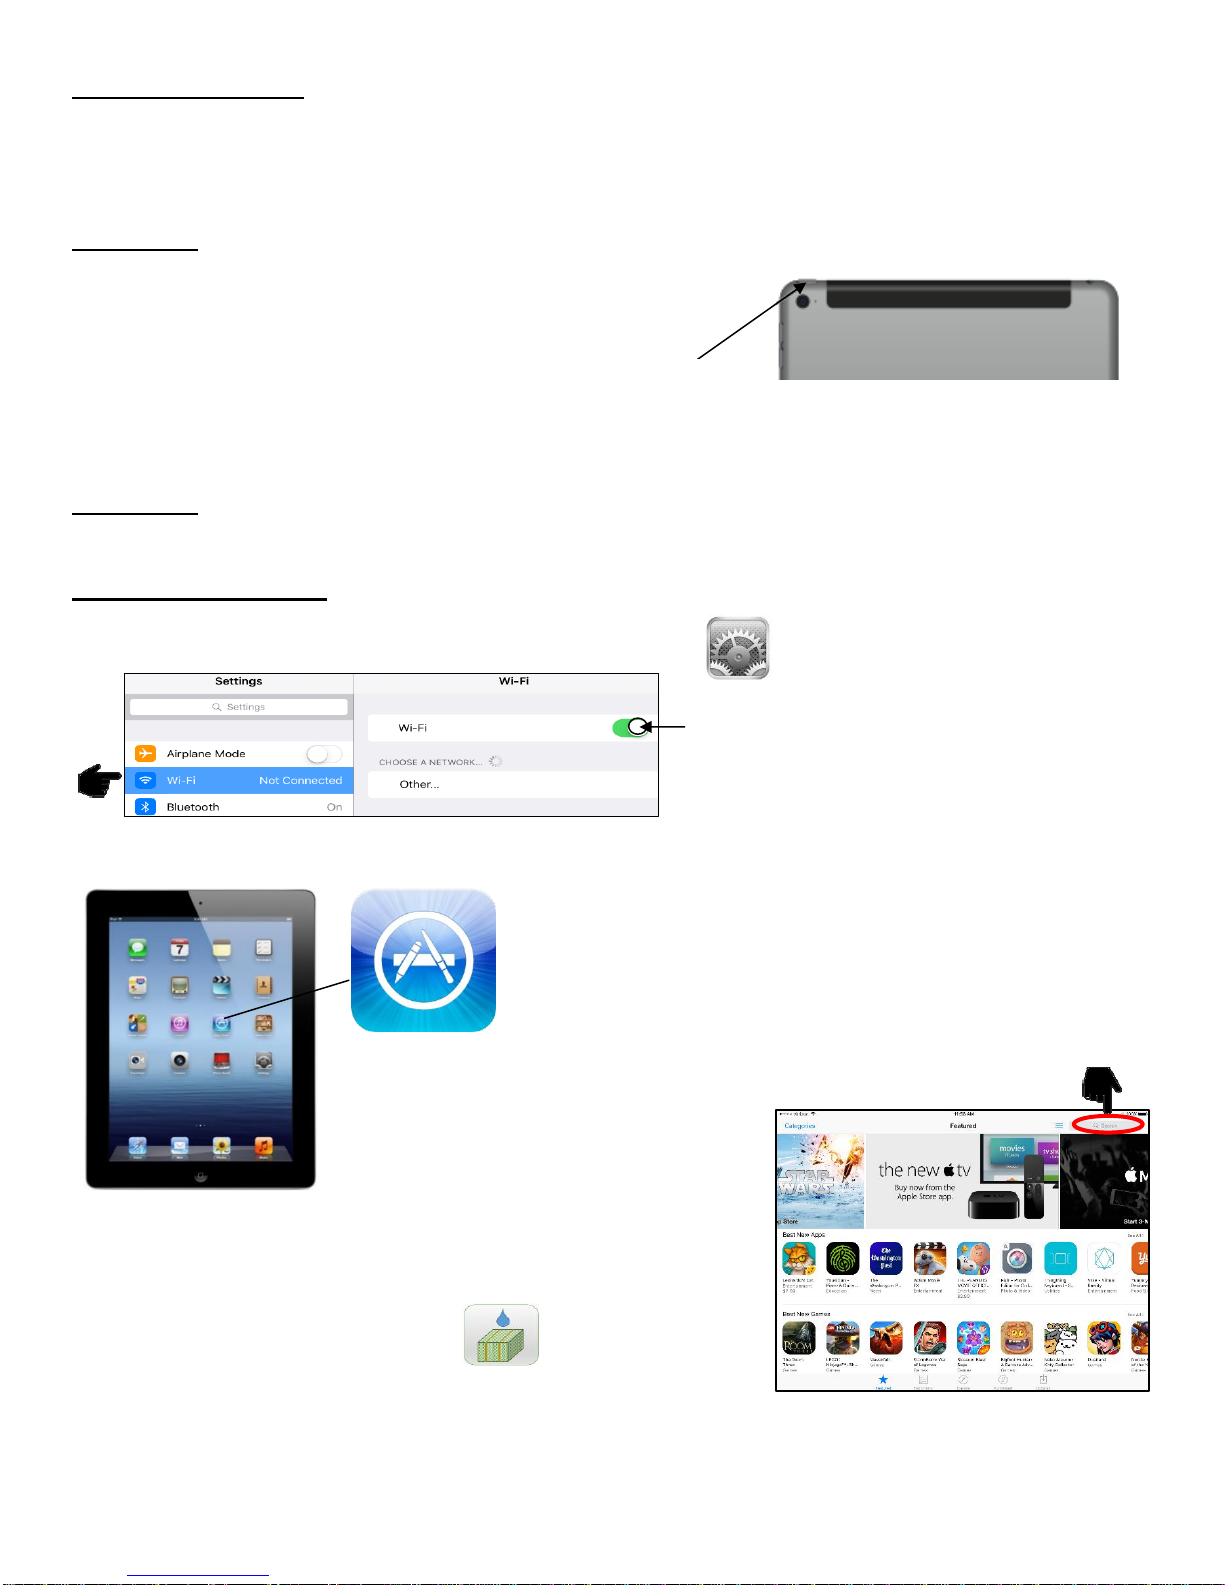
*Requirement to run iPad option are 3rd Generation iPad (2012) or newer with
iOS8 or greater operating system, plus the Hay App.
If choosing to operate the unit though the ISOBUS monitor, part number 006-6670A
will need to be ordered through your local equipment dealer.
Safety
Carefully read all the safety signs in this manual and on the applicator before use. Keep signs clean and
visible. Replace missing or damaged safety signs. Replacement signs are available from your local authorized
dealer. See your installation manual under the replacement parts section for the correct part numbers.
Keep your applicator in proper working condition. Unauthorized modifications to the applicator may impair the
function and/or safety of the machine.
Carefully read and understand all of the baler safety signs before installing or servicing the baler. Always use
the supplied safety equipment on the baler to service the applicator.
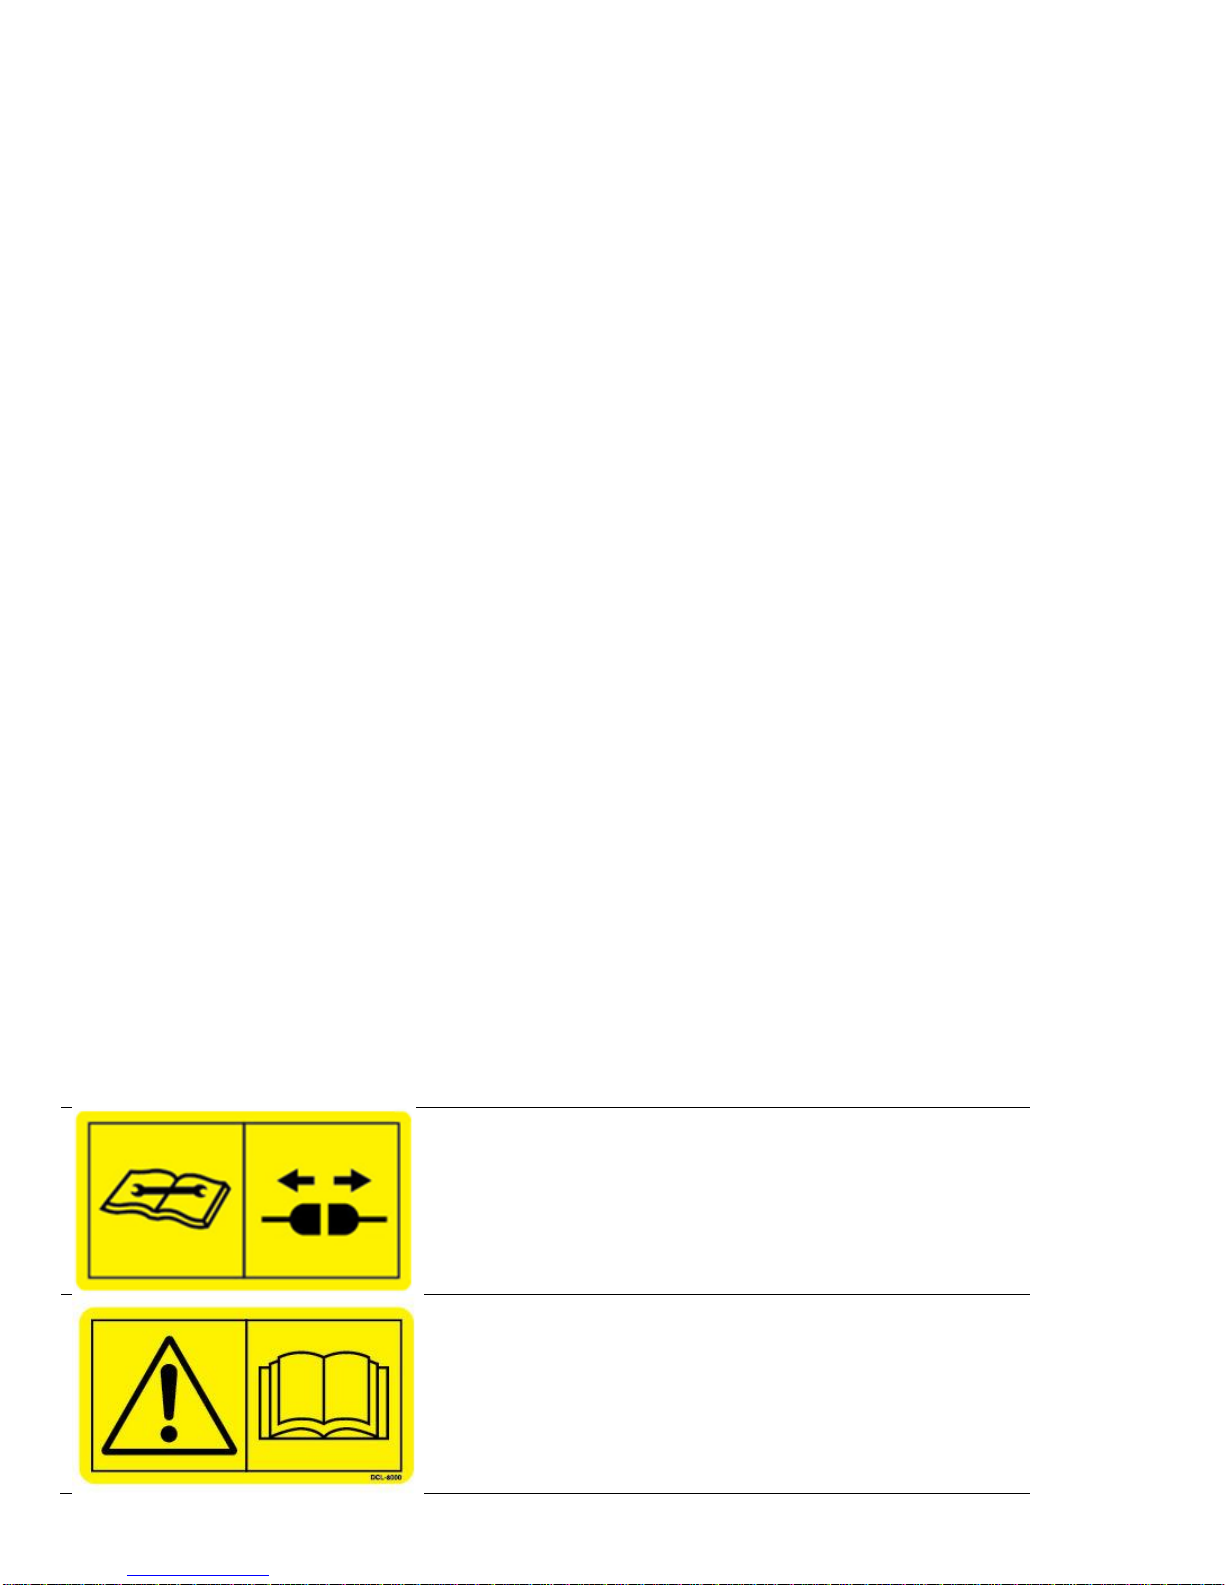
Safety Decals
Number 1
Disconnect power before servicing.
Part no. DCL-8003
Number 2
Read and understand the operator’s manual
before using or working around the equipment.
Part no. DCL-8000

5
Bluetooth Operation
Turn On / Off iPad using the Sleep/Wake button
*(Info from Apple User’s Guide)
Turn iPad on. Hold down the Sleep/Wake button until Apple logo appears. iPad will take a moment to load.
You can lock iPad and put it to sleep when you’re not using it. Locking
iPad puts the display to sleep, saves the battery, and prevents
anything from happening if you touch the screen.
When you are not going to use the iPad for an extended period of time put the unit into sleep mode by pressing
the Sleep/Wake button. Press Sleep/Wake button to wake iPad and then unlock iPad by entering passcode.
Turn iPad off. Hold down the Sleep/Wake button for a few seconds until the slider appears onscreen, then drag
the slider to the right.
Downloading Hay App
1. If iPad does not have Wi-Fi turned on, select the Settings tab then select the Wi-Fi tab (below).
4. Select an available network when detected by the iPad, shown in area above that currently says ‘Other.’
5. Select App Store icon (below) and open. *You will need a Wi-Fi connection available to view App Store.
Download the Hay App in the App Store by searching for
‘Hay App’ in the search bar in the top right corner of screen (right):
*The advertisements displayed on the App Store screen will change.
The app will have the icon as shown:
Note: Operation requires 3rd generation (2012) iPad, iPad Mini, or newer with iOS8 or greater operating system.
Hay App
Sleep/Wake Button
2. Turn Wi-Fi on by sliding button to the right.
*Green bar indicates ON
3. Use same process to turn on Bluetooth function

6
Shutting Down the Hay App
To shut down the Hay App double click the home button (Figure A). This will show the open apps that are
running on your iPad (Figure B).
*Note: By pressing the home button one time to return to the home screen, the Hay App does not shut down.
The system will however, stop applying preservative after 10 seconds.
Slide the app you want to shut down by sliding the app toward the top of the iPad, until the app is no longer
visible (Figure C).
Figure A
Figure B
Figure C

7
Operating the Harvest Tec iPad App
After installation of the Bluetooth Receiver (030-6672A) on to the applicator system, attach the power cord
006-6650TM to supply power.
*Refer to the applicator installation manual for details on connecting the Bluetooth Receiver.
When ready to operate your applicator system, open the Hay App on the iPad by selecting the Hay App icon.
Device Selection
The app will open to the Device Menu screen as shown below. Applicators which are equipped with the
Bluetooth receiver that are within range (20’) of the iPad and have power going to them, will be shown under
the Active Connections section.
The In-Active Connections section will show applicator systems that have been connected in the past, but are
not within range of the iPad or do not currently have power going to them (bottom left).
To remove a baler from the In-Active list, slide the bar displaying the baler name to the left, and select the
Delete button that will appear (bottom right).
After the iPad connects to
the Bluetooth receiver,
select the applicator you
want to connect with.

8
Operating the Harvest Tec iPad App (continued)
Manual Selection
Selecting the Manual button (below) displayed to the right of the baler name will open the operation manual for
your baler.
*You do not need to be connected to a baler to open the manual after a baler has been connected.
When finished reviewing the manual, press the Done button in the top left corner to return to the Device Menu.
Recommended Preservative
To view recommended preservative information, application rates, and frequently asked preservative
questions, select Recommended Preservative (below).
*You do not need to be connected to a baler to open the recommended preservative page.

9
Operating the Harvest Tec iPad App (continued)
Once you have selected the baler you want to connect with from the Device Menu, the applicator main menu
will display (below).
Ensure the iPad Bluetooth function is turned on in the Settings App.
*The applicator system will not appear under the Bluetooth Devices in the Settings App upon initial connection.
You must open the Hay App to view the available devices by selecting the Device Menu. After you have
connected through the Hay App, the system will then appear under the Bluetooth Devices in the Settings App.
Tab Descriptions
Automatic Mode: This mode allows you to use all of the applicator features such as adjusting preservative
application on the go and counting total pounds of product used.
Manual Mode: Allows operator to manually turn pumps on and off. This mode also has moisture content
displayed. Use this mode to prime pumps.
Software Versions: Selecting this tab will display the software currently installed.
Setup Mode: This mode allows the operator to adjust bale rate, application rate settings and select tip output.
Job Records: Keep track of up to 300 jobs with total product used, average moisture content, tons baled, and
baling date.

10
Screen Menus
Use the screen shots below to navigate through the operation screens.
Automatic Mode
Manual Mode
Operation Note:
Pressing the Home Button on the iPad WILL NOT stop the system from reading moisture for 10 seconds.
Select or to stop application
*To close app see the Shutting Down Hay App Section
Bluetooth Connection Indicator
Green
-DCP is connected
Yellow
-DCP connecting
Red
-DCP not connected
*Actual, Target, and # Used will
read 0 with moisture only system
Bluetooth Connection Indicator
Green
-DCP is connected
Yellow
-DCP connecting
Red
-DCP not connected
X
-Pump is OFF
-Pump is ON
*Ensure pumps are shut off with
moisture only system

11
Setup Mode
Turn on Stroke Counter by selecting X,
Adjust min/max by selecting grey areas
Scroll up or down to correct min/max
Indicates Stroke Counter is ON
Select X to turn on options shown
Indicates Crop Eyes are ON
Only used if equipped with GPS
Select grey area to change
Select appropriate GPS unit
*Not used with moisture only
Adjust alarm setting by selecting
grey number area
Select desired alarm setting by
scrolling up or down
Input correct weight, length, time per bale
Select correct weight

12
Job Records
Type desired Field Name,
select Create Job
*When RFV Equipped, Average RFV,
Ave TDN/CA90% info will be added
For Bale details select Bale Button
Use arrows to change jobs shown

13
Job Records (continued)
Select Download when wanting to
download job records to USB Stick
Use arrows to change jobs shown.
Indicates selected jobs
Pressing the Select or Select All tab to
choose which job to download or delete.
The Export allows you to send an
email a file with selected job records
When the Export page is opened the
bale info in each job will be retrieved.
When all bales have been retrived,
Export tab will activate, select a job(s)
If choosing one job to email, select the
Mail tab. Mulitple jobs can be selected
Email will appear w/file attached, enter
address *If two or more jobs selected, email
will appear
Press the Send button in top right corner,
(your iPad notification sound will play)
If choosing to view job on iPad,
recommended to download Excel app
to view job records information
After Excel app is selected, the job
record spreadsheet will open
*iPad can only view 1 job at a time.
To save the job, select Name
from the drop down tab
Enter desired name in center of page
and press Save on the top right corner
After selecting Save, list of saved files in
Excel will appear. Select job to view
You also can view the jobs saved by
selecting Open tab in the Excel app

14
Baling Rate Settings
After pushing the SETUP MODE key in the Main Menu screen, the screen on the left will appear:
1. On the setup mode screen press the BALING RATE key.
2. Press the grey number value to the right of AVG Bale Weight (Lbs).
3. To adjust the weight of your bales, the scroll tool shown will display. Scroll through the values to select
correct information, press DONE when value has been selected. The information will be saved until
updated. Use the same procedure for adjusting bale length and time per bale.
4. Small square balers are equipped with Bale Rate Sensors which can be turned ON by sliding the bar to the
right as shown above. A green bar indicates that the bale rate sensors are on. While a grey bar means the
bale rate sensors are off.
Note: Bale rate sensors are used instead of a fixed time per bale to help determine a real time ton per hour
reading.
Stroke Counter Setup
Turn on Stroke Counter by selecting the X,
Adjust min/max by selecting number areas
Indicates Stroke Counter is ON
1. On the setup mode screen press the COUNTER SETUP key.
2. Turn on the stroke counter by select the X, which will change to an , indicating the sensor is ON
3. Adjust the stroke maximum and minimum level by selecting the grey area on the right of screen
4. Scroll through the values to select correct setting, press DONE when value has been selected
4
1
2
3
1
2
3
5

15
Operation Instructions
Automatic mode will allow you to view the moisture information, baling rate and stroke counts.
Automatic Mode
After pushing the AUTOMATIC MODE key in the Main Menu screen, the following screen will appear:
iPad
1. To pause the unit while in operation select the Pause key.
2. Push the OVERRIDE key to turn on all three pumps at the same time for full output of the system. This
button is not used with a moisture only system.
3. Baling Rate and Application Rate are shown in the middle of the screen. Application rate will read zero with
moisture only system.
4. Volume used and strokes per bale are shown at the bottom of the screen will show accumulated pounds of
preservative used on the go. There will not be any information shown in the # Used section with a moisture
only unit.
5. The graph shows the moisture trend from the past 90 seconds in 3 second intervals.
6. The DCP button shown when using an iPad displays your connection signal with the Bluetooth receiver.
Green –DCP is connected, Yellow –DCP is connecting, Red –DCP not connected.
7. Press the MAIN MENU key to return to the opening screen.
1
8
2
3
5
6
7
4

16
Manual Mode
After pushing the MANUAL MODE key in the Main Menu screen, the following screen will appear:
iPad
1. To pause the unit during operation select the Pause key.
2. Push the OVERRIDE key to turn on all three pumps at the same time for full output of the system. This
function is not used with a moisture only unit.
3. To turn the pump on, select the colored box next to P1 and change the ‘X’ to a check mark. Ensure all
pumps are off with a moisture only unit.
4. The moisture content is shown in the upper right hand corner.
5. Baling rate, stroke counts, and Application rate are shown in the middle of the screen. The Actual reading
will read zero with a moisture only unit.
6. Volume used and strokes per bale shown at the bottom of the screen will show accumulated pounds of
preservative used on the go. This number will reset at power down, but remains in the job record screen. .
# Used will read zero with moisture only unit.
7. This graph shows the moisture trend from the last 90 seconds of baling (one reading every 3 seconds).
8. The DCP button shown displays your connection signal with the Bluetooth receiver.
Green –DCP is connected, Yellow –DCP is connecting, Red –DCP not connected.
9. Pressing MAIN MENU will return you to the opening screen.
2
1
7
8
6
3
5
9
4

17
Job Records
After pushing the JOB RECORDS key in the Main Menu screen, the following screen will appear:
1. The job number will be displayed at the top center. The current job being viewed will always read "Job #:
0". Product used and average moisture content will be reset when the NEW JOB key is pressed. The job
records screen will store up to 300 jobs allowing access previous jobs by using the up and down arrows.
2. Scrolling through previous jobs is done by pressing the UP or Down keys.
3. The field name is located under the up arrow.
4. The accumulated information from the field will be displayed in the middle of the screen. Every time the
NEW JOB key is pressed the accumulated pounds on auto and manual modes will be reset to zero.
After 300 jobs have been stored, the next time the NEW JOB key is pressed the system will start over with
job one and the old job will be replaced.
5. Selecting the Bales button will open the Bale Details Screen.
6. The Bale Detail screen will display the individual bale information onto each line. Including Bale ID#, MC%
(moisture percentage), HI MC% ( high moisture percentage), WT (weight of bale) and Pres (prservative
used per bale).
NOTE: Initial start-up requires pressing the New Job key in the Job Records screen in order for Volume
Used accumulation to be recorded. This only needs to be done once on initial start-up of system and
not every time the system is started for operation.
2
3
1
4
5
6

18
Download Job Records
After pushing the JOB RECORDS key in the Main Menu screen, the following screen will appear:
Prior to downloading job records a USB stick will need to be placed into the USB port on the applicator’s Dual
Channel Processor (DCP). Jobs will not be downloaded if the USB stick is plugged into the monitor.
1. To download the Job Records to a USB stick, select the Download button
2. The list of job records you have created, will display in the middle of the screen
3. When no jobs have been selected the status line will read Empty
4. To download individual job(s), tap the desired job(s) to be downloaded, or press the Select button
5. To select all of the jobs stored, press the Select All Button
6. Move through job records by selecting the up or down arrows
7. The indicates selected jobs to be downloaded
8. When chosen jobs have been selected the status line will read Selected
9. Press Download button to download job records to USB Stick. The status line will read Downloading
10. Delete selected jobs by pressing the Delete button
1
2
5
3
6
7
8
9
4
10

19
Export Job Records (emailing records)
1. To export the Job Records through an email or save to the iPad select the Export button
2. The list of job records you have created, will display in the middle of the screen and the individual bale
information will begin to download automatically. The number of bales will grow until equal to the number of
bales available to export for each job record.
a. For example: When looking at a job record with 62 bales, the bale count will read 0/62 upon initially
opening the page. The number will increase until it reads 62/62.
3. When all bales have been retrieved, the Export tab will become active
4. To export individual job(s), tap the desired job(s) to be exported. The indicated chosen job(s).
5. To select all of the jobs stored to be export, press the Select All Button
6. After selecting the Export tab, a small screen will appear with the mail app icon.
a. If selecting two or more jobs the email will automatically appear (skipping step 7)
7. Select the Mail app to open
8. Enter in the desired email address in the (To:) line of the email that will appear.
Press the send button to email the file to the email you have entered.
1
2
5
3
8
9
5
6
7
4

20
Export Job Records (saving to iPad)
1. To export the Job Records through an email or save to the iPad select the Export button
2. The list of job records you have created, will display in the middle of the screen and the individual bale
information will begin to download automatically. The number of bales will grow until equal to the number of
bales available to export for each job record.
a. For example: When looking at a job record with 62 bales, the bale count will read 0/62 upon initially
opening the page. The number will increase until it reads 62/62.
3. When all bales have been retrieved, the Export tab will become active
4. To export individual job(s), tap the desired job(s) to be exported. The indicated chosen job(s).
5. To select all of the jobs stored to be export, press the Select All Button
6. After selecting the Export tab, a small screen will appear with the Excel app icon.
a. It is recommended to download the Excel App to properly view the job records
i. Only one job can be selected at a time to view on iPad
7. After the Excel app has been selected the job record spreadsheet will open
a. The iPad can only view one job at a time
8. To save the job, select Name from the drop down tab
9. Enter your desired file name
10. Press the save button after entering your file name
11. The list of saved files will appear
12. You can also view the files by selecting the Open tab, when opening the Excel app
1
2
5
3
5
4
6
7
8
9
10
11
12
Other manuals for 600SS
1
Table of contents