HASCO
Hasenclever
GmbH
+
Co
KG
·
D-58467
Lüdenscheid
·
T
el.
+49
2351
9570
·
Fax
+49
2351
957237
·
www
.hasco.com
·
[email protected]mÄnderungen vorbehalten
Alterations reserved
Sous réserve de modification
Gedruckt auf chlorfrei gebleichtem Papier
Printed on chlorine-free bleached paper
Imprimé sur papier blanchi sans chlore
08 03 1 0,1 22 / No. 010171
© by HASCO D-58467 Lüdenscheid
Printed in Germany
Montage préalable du tuyau
Ill. 2
쐽Couper proprement le tuyau.
쐽Raccourcir l’armature métallique
tressée Z 853 /. . . d’env. 2 mm.
쐽Emmancher le raccord et la douille
de serrage Z 861/. . . de telle sorte
que le tuyau repose contre la
douille.
Schlauchvormontage
Bild 2
쐽Schlauch sauber abschneiden.
쐽Metallumflechtung Z 853 /. . .
um ca. 2 mm kürzen.
쐽Kupplung und Quetschhülse
Z 861/. . . so aufstecken, daß der
Schlauch vorne an der Quetsch-
hülse anliegt.
Pre-assembly of hose
Fig. 2
쐽Cut hose neatly to required length.
쐽Remove metal braiding of Z 853 /. . .
by approx. 2 mm.
쐽Assemble coupling, crimping sleeve
Z 861/. . . and hose in such a way,
that front portion of the sleeve is
resting firmly in the sleeve.
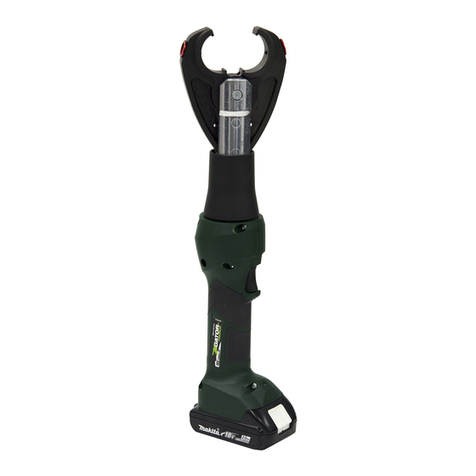
Bild 3 + 4
Schlauchmontage
쐽Quetschwerkzeug Z 865 in Schraub-
stock spannen.
쐽Mit Hilfe des Einstellbolzens (22 ; 23),
Einstellschraube (6) auf Schlauch-
durchmesser stellen.
쐽Vormontierten Schlauch von unten
in das Quetschwerkzeug führen.
쐽Mit Hebelarm (7) die Quetsch-
backen (10) leicht andrücken, daß
diese 3 mm von der Hülsenvorder-
kante angreifen.
쐽Schlauch von unten gegen die
Quetschhülse anschieben.
쐽Die Quetschbacken (10) mit Hebel-
arm (7) schließen.
Auswechseln der Quetschbacken
쐽Splint (19) ziehen und Bolzen (9)
herausdrücken. Dabei auf Anordnung
der Unterlegscheiben achten.
쐽Zylinderschrauben (17) lösen und
Deckscheibe (3) abnehmen.
쐽Kurvenscheibe (2) abheben und
Quetschbacken (10) herausnehmen.
쐽Verschlußschraube (14) lösen und
Wechsel-Quetschbacken aus dem
Hebelarm (7) entnehmen.
쐽
Zusammenbau erfolgt in umgekehrter
Reihenfolge
.
Fig. 3 + 4
Assembly of hose
쐽Clamp crimping tool Z 865 into
a vice.
쐽Apply gauge (22 ; 23) to set the
required hose dia. with adjusting
stop screw (6).
쐽Insert pre-assembled hose from
below into the crimping tool.
쐽Close crimping jaws (10) slowly by
pulling hand lever (7). The jaw grip
should have a distance of 3 mm
from the front face of the sleeve.
쐽Push hose from below against the
crimping sleeve.
쐽
Pull hand lever (7) and close crimping
jaws (10) fully.
Replacing of crimping jaws
쐽Remove pin wire (19) and knock out
bolt (9). Pay attention to the position
of washers.
쐽Remove screws (17) and dismantle
flange (3).
쐽Take off cam plate (2) and pull-out
crimping jaws (10).
쐽Unscrew knurled bolt (14) at end
of hand lever (7) and take out set
of crimping jaws.
쐽Assembly takes place in reverse
order.
Ill. 3 + 4
Montage du tuyau
쐽Placer la pince à sertir Z 865 dans
l’étau.
쐽Avec l’aide du goujon de réglage
(22 ; 23), régler la vis de réglage (6)
au diamètre du tuyau.
쐽Introduire par en bas le tuyau
prémonté dans la pince à sertir.
쐽Serrer légèrement les joues (10) avec
le levier (7), de façon à ce qu’elles
serrent à env. 3 mm de l’arête de la
douille.
쐽Pousser le tuyau par en bas contre
la douille de serrage.
쐽Serrer les joues (10) au moyen du
levier (7).
Changement des joues de serrage
쐽Retirer la goupille (19) et extraire le
goujon (9). Veiller à respecter le bon
ordre des rondelles.
쐽Desserrer les vis cylindriques (17) et
enlever le disque couvercle (3).
쐽Enlever le disque (2) et extraire les
joues (10).
쐽Desserrer la vis de blocage (14)
et enlever les joues amovibles du
levier (7).
쐽Le remontage s’effectue en
respectant la chronologie inverse.
2
34

