Hawkins Futura Nonstick DEEP-FRY PAN User manual

2
IMPORTANT SAFEGUARDS
1. Do not use high heat except to boil liquids. Do
not allow pans to boil dry.
2. Do not use on chulha, industrial burners or any
heat source which cannot be regulated to low and
medium heat or whose flame spreads beyond the
base of the pan.
3. Limit preheating of pan without food on medium
heat to no more than the time specified for each
pan in the chart on page 4.
4. When pan is hot, ensure that it is never without
food.
5. Do not cut on/in pan or scrape it with metal or
sharp edged objects.
6. Clean thoroughly after each use in hot water with
a mild soap or detergent and a dishcloth or
sponge. Do not use abrasive cleaning agents or
scrubbers.
7. Do not put hot pan or glass lid in cold water.
8. Do not wash pan or glass lid in a dishwasher.
9. Do not put pan or glass lid in a hot oven or under
a broiler.
10. The handle(s) of the pan should be parallel to the
kitchen counter – not sticking out.
11. Always give careful attention to a hot pan, hot oil
and flame/heat.
12. Do not leave frying unattended. In case oil or
butter should ever catch fire, have a metal lid
handy to cover the pan. Never pour water on the
fire as this may spread the fire.
13. Do not drop food or other objects from a height on
the pan particularly when it has hot oil or butter.
Place food gently in the pan to avoid splashing.
14. If you have no prior experience of deep-frying, do
not attempt it without supervision. Once you
know the various ways in which to handle the fire,
the hot oil or ghee and equipment safely, these
products can be used by you fearlessly.
15. Read and follow tips for glass lid given on page 1.
16. Read and follow instructions in this Manual.

3
Contents
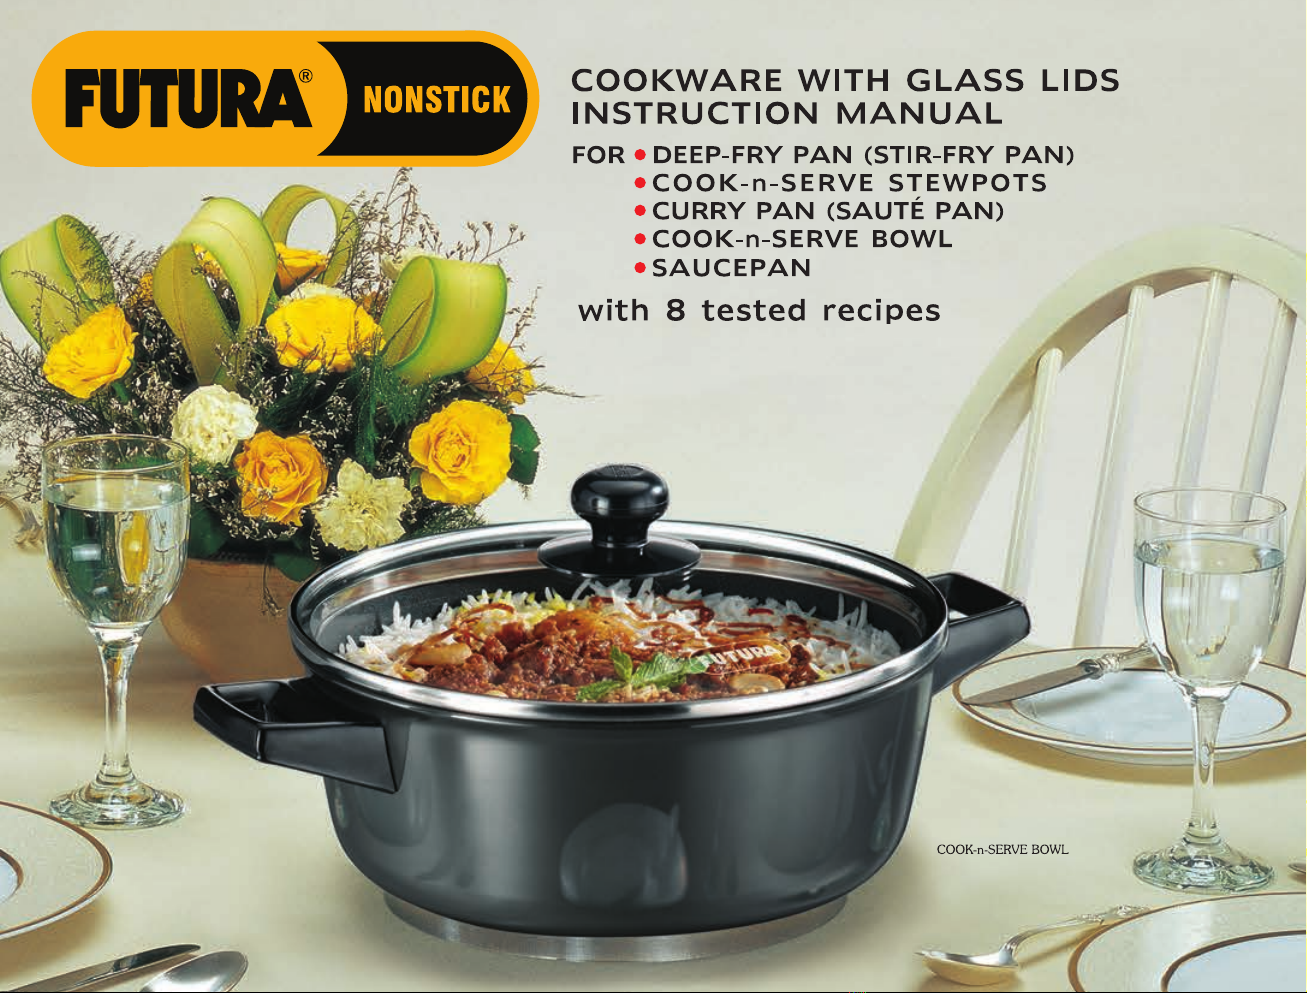
All About Futura Glass Lids
Page
1
Important Safeguards 2
Introduction 3
How to Use 4
How to Clean 7
Easy Tips for Better Cooking 8
Measurements 9
Products and Recipes
Cook-n-Serve Bowl: Mutton Biryani (Rice Layered
with Spicy Mutton)
Sooji Halwa (Semolina Pudding)
10
12
Curry Pan (Sauté Pan): Bengali Fish Curry
Sautéed Vegetables
12
13
Cook-n-Serve Stewpot: Vegetable Pilau 14
Deep-Fry Pan (Stir-Fry Pan): Kadai Paneer (Stir-Fried
Cottage Cheese)
15
Saucepan: Egg Curry
Sukhi Dal (Dry Split Skinned Green Gram)
16
17
Glossary (Meanings and Methods) 18
Translations to Hindi 20
Introduction
Futura Nonstick Cookware
Futura Nonstick Cookware is made with a patented process by
which high quality nonstick coating is fixed on to a hard anodised
surface which makes it most durable. Futura Nonstick Cookware
comes in many useful shapes and sizes to suit your different cooking
needs. All are made from heavy gauge, pure, virgin aluminium for
fast and even heat conduction. All pans are well-balanced with
sturdy, stay-cool handles. The bottom and outer sides are hard
anodised to give you a surface that will not tarnish, pit or corrode and
will stay looking new for years.
All pans except the tava are available with lids – either stainless
steel or heat-proof glass with a stainless steel rim. All lids have a
heat-resistant plastic knob with finger-guard – for easy, safe and
comfortable handling. All pans in this Manual have glass lids and
are also available with a stainless steel lid except the
Cook-n-Serve Bowl.
Using this Manual
This Manual is for all Futura Nonstick Cookware with glass lids
except frying pans (two models) – which have their own Manual. It
contains instructions common to all pans as well as individual
sections on each pan, including a recipe or two. Read both – the
general instructions (pages 4 to 9) and the section on your pan.
Your pan will give you years of easy, great-tasting, healthful,
economical cooking and easy clean-up if you carefully follow the
instructions in this Manual.
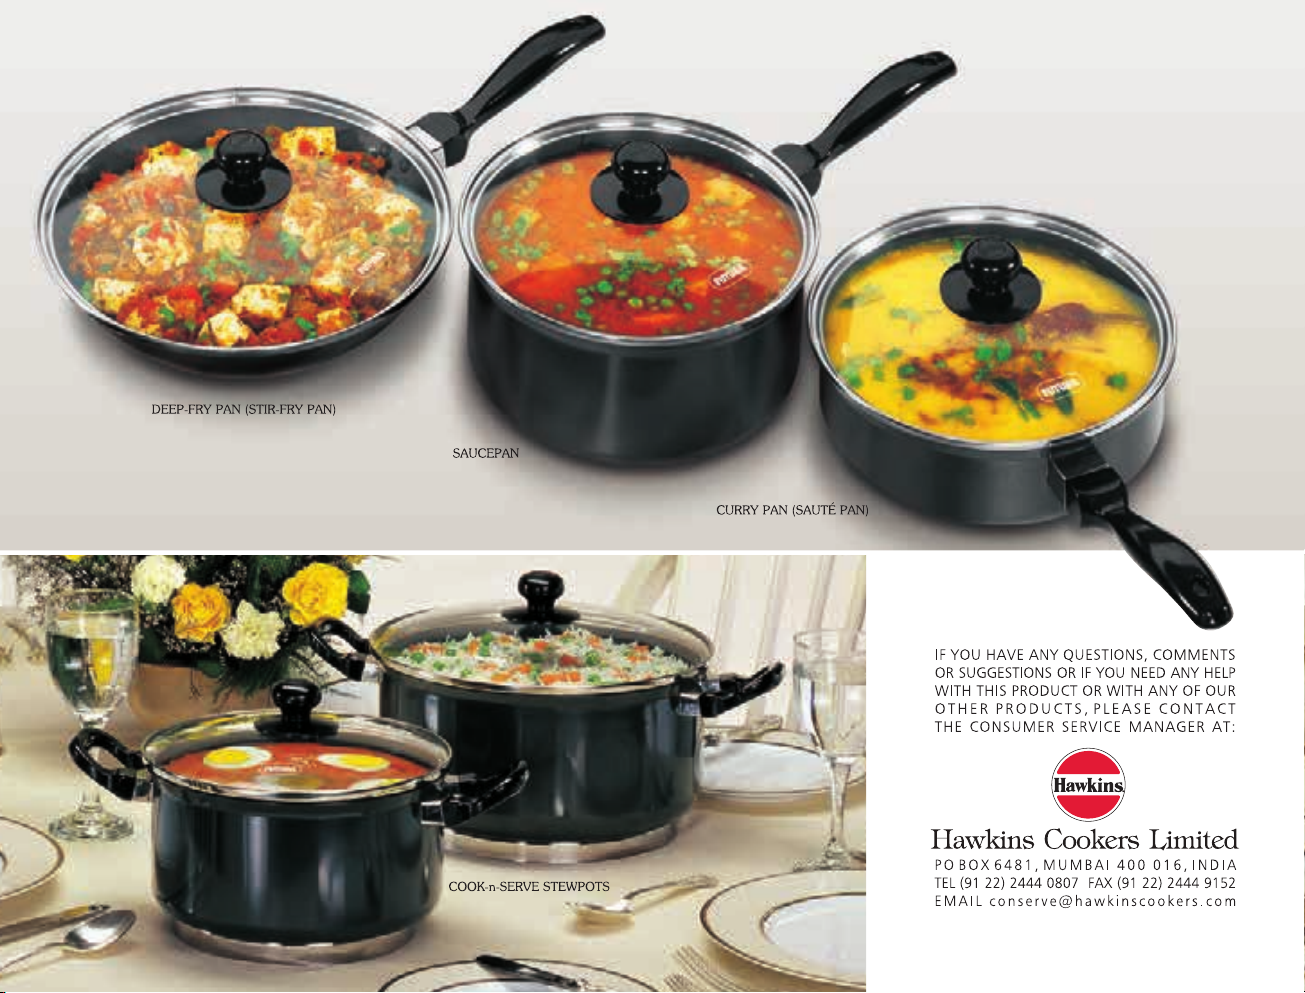
Hawkins Cookers Limited is the proprietor of the trademarks ‘Hawkins’ and ‘Futura’ in India and in various other countries throughout the world. Product designs
registered in India. 2009 Copyright reserved. All Rights Reserved. Edited and published by Neil Vasudeva on behalf of Hawkins Cookers Limited, Maker Tower F 101,
Cuffe Parade, Mumbai 400 005, India and printed in 2009 at __________.

4
How to Use
Before Use
Remove sticker/label. Remove any adhesive with baby or vegetable
oil. Before using pan for the first time, wash in hot water with a mild
soap or detergent, rinse in clear water and dry. Do not wash in a
dishwasher.
Before putting your pan on the heat, assemble and prepare all
ingredients and keep spatula, utensils, serving plate etc. ready in the
cooking area. If you are looking for things once the pan is on
the heat, it can overheat quickly and destroy the nonstick
coating.
Seasoning
It is not necessary to season the pan. If, however, you plan to
cook food which tends to stick without any oil or butter for the first
use or before you have cooked with oil in the pan, seasoning will
assist release of the food. To season: rub 1 teaspoon (5 ml) vegetable
oil over the clean nonstick surface using a paper napkin or clean
cotton cloth. Wipe off oil with a paper napkin or clean cotton cloth.
Wash and dry pan.
Suitable Heat Sources
High temperatures will shorten the life of the nonstick and may
destroy it. Use pan only on domestic gas, electric or halogen stoves in
which the temperature can be regulated to low and medium heat.
Use a burner to suit the size of your pan – gas flames should not lick
the sides of the pan. Because Futura Nonstick Cookware heats so fast
and evenly, low to medium heat is usually all that is required. Use
high heat only to boil liquids and heat oil for deep-frying.
Limit Preheating of Pan
Some foods/recipes may call for preheating of the pan before
adding the food. When preheating a cold empty pan before
beginning to cook, it is critical that THE HEAT IS NO MORE
THAN MEDIUM and the time is strictly limited to no more than
the following:
Product Maximum
Preheating Time
Cook-n-Serve Bowl 5 minutes
3 Litre 4 minutes
Cook-n-Serve Stewpot 5 Litre 4 minutes
2 Litre 3 minutes
Curry Pan (Sauté Pan) 3.25 Litre 4 minutes
Deep-Fry Pan (Stir-Fry Pan) 4 minutes
Saucepan 4 minutes
Even if you have a small quantity of oil or butter or ghee in the pan,
you should observe the limits given in the table above. By 'small quantity'
we mean any quantity up to 4 tablespoons/one-fourth cup/60 ml.
The actual time required for preheating for best cooking results
may be less, depending on the food being cooked and your burner.
Overheating can occur quickly if pan is left on the heat without food
or water so NEVER keep the pan empty on the heat once it is hot.

5
Avoid Overheating: Check Your Burner
If food is smoking or burning, reduce heat. Using medium or
lower heat and limiting the time the empty pan is heating are the
basic techniques to avoid overheating.
The pan can overheat even on medium heat if the burner is
providing excessive heat. To check if your burner can overheat
even on medium heat, place clean pan on medium heat. Heat pan for
the minutes given in the following chart:
Product Heat for:
Cook-n-Serve Bowl 3 minutes
3 Litre 2 minutes
Cook-n-Serve Stewpot 5 Litre 2 minutes
2 Litre 1 minute
Curry Pan (Sauté Pan) 3.25 Litre 2 minutes
Deep-Fry Pan (Stir-Fry Pan) 2 minutes
Saucepan 2 minutes
Press one finger firmly into whole wheat flour (atta). Do not pinch.
Flick from a distance of about 21⁄2inches/6 cm a small, fine, even
dusting of flour on centre of pan and immediately begin counting off
seconds ("one second, two second, three second" etc.) while watching
the flour. The time the flour takes to become dark brown gives a
rough indication of how hot the pan is. As long as flour has not
turned dark brown within 15 seconds, the pan is not overheated.
Follow the steps in the chart alongside to complete the test. Do not
exceed the preheating limit of a pan in any case.
Flour turns
dark brown in
15 seconds or
less?
Pan is…
Action needed
A. Yes Overheated 1. Remove pan from heat at
once.
2. Reduce heat setting.
3. Try again when pan has
cooled.
B. No Not
overheated
1. Continue heating pan.
Repeat flour test at
1 minute intervals.
2. If flour turns dark brown
in 15 seconds or less, pan
is overheated: follow
action as per A.
3. If flour does not turn dark
brown in 15 seconds or
less, stop when
recommended Maximum
Preheating Time for pan is
reached. The heat setting
is all right for preheating.

6
Avoid Scratching, Damage, Breakage
Use wooden, heat-resistant nylon, plastic or rubber
spatula/utensils. Metal utensils will scratch and reduce the life of the
nonstick coating. Do not cut or scrape with metal objects or knives.
If using a metal spatula, try to keep spatula parallel to pan to avoid
digging into the coating. Try to touch the food and minimise contact
with the coating. Do not leave plastic, nylon or rubber utensils on
pan while it is hot.
Do not hit pan or bang its rim. Do not bang pan down on pan
supports. Lift pan from the pan supports – do not drag it across the
pan supports. When storing pan ensure that the nonstick coating is
not gouged or rubbed against any hard or sharp surface. Do not
stack other utensils on the coating without protecting it.
Turning the plastic knob of the lid clockwise will tighten it and
turning it anti-clockwise will loosen it. Do not over-tighten the knob –
it might break. Handles, knobs and glass lids can break under a sharp
or forceful blow. Handle and store glass lids with appropriate care to
avoid hard knocks that may break the glass. Do not drop the lid. To
avoid 'misting' caused by moisture, store the glass lid in a place with
good air circulation/a well-ventilated place and not in the
bubble-wrap pouch in which the lid came packed in the carton.
After use, faint scratches or marks may appear on the nonstick
coating. These are marks of normal wear and tear and do not affect
the performance of the coating. Even if some of the coating is
scraped off, the pan is still safe to use. The coating is non-toxic and
inert; if accidentally and unknowingly ingested, it passes through the
body harmlessly.

7
How to Clean
Wash After Every Use
Taking care to protect your hand from the hot pan with sufficient
paper or cloth, wipe off residual oil with a paper napkin or muslin
cloth from hot pan immediately after cooking. Doing so makes
cleaning very much easier. Allow pan and lid to cool before washing.
Always wash all surfaces of pan and lid thoroughly after every
use in hot water with a mild soap or detergent and a dishcloth or
sponge. Dry glass lid thoroughly with a soft clean cloth. Do not wash
pan in a dishwasher. The glass lid may be washed in a dishwasher
but this may dull the finish. For stubborn spots on the nonstick
surface, soak pan in hot water about 10 minutes and rub with a
non-abrasive plastic scrubber – never use steel wool, coarse or metallic
scouring pads or abrasive detergents. When cleaning the pan, ensure
that the nonstick coating is not gouged or rubbed against any hard or
sharp surface. While cleaning, keep a folded kitchen cloth or a piece
of any other soft material such as rubber or sponge underneath the
pan to avoid damaging the pan.
Wash wooden spatula in hot water with a mild soap or detergent,
rinse and dry immediately – do not soak.
Metallic marks – most often from gas stove pan supports – may
appear on the hard anodised base. To remove metallic marks from
base: apply a kitchen cleanser, such as 'Vim', to the marks and rub with
an abrasive kitchen scrubber, such as 'Scotch-Brite' or fine steel wool.
Avoid "Baked-On" Food/Stains
If pan is not cleaned thoroughly, a thin layer of food or grease
may remain. When the pan is heated next, this food/grease becomes
"baked-on" and very difficult to remove. "Baked-on" food and the
stains from "baked-on" food may be impossible to remove without
damaging the pan.
If you get "baked-on" food/stains, you may try the following
methods (knowing that the pan surface may get damaged):
On the Hard Anodised (Exterior Surface): Make a thick paste
of a cleaning powder such as 'Vim' and apply it to the "baked-on"
food/stain. Wait 5 to 10 minutes. Scour with steel wool using a
circular motion. Wash.
On the Nonstick (Interior Surface): Make a thick paste of a
cleaning powder such as 'Vim' and apply it to the "baked-on"
food/stain. Wait 5 to 10 minutes. Scour with a plastic scrubber using
a circular motion. Wash.

8
Easy Tips for Better Cooking
1. Read the entire recipe before beginning to work. Assemble and
prepare all ingredients. Follow recipe step-by-step.
2. Information on weights and measures is on page 9.
3. Unless otherwise noted, in the recipes:
•All foods are to be appropriately cleaned and washed.
•Onions, potatoes, carrots, garlic and fresh ginger are to be
peeled.
4. For Users Outside India: In the recipes, size descriptions of
ingredients refer to food available in India. Outside India, follow the
weights rather than the size descriptions.
5. All Hindi words used in the recipes are translated to English
and/or explained in the Glossary (Meanings and Methods). If you
come across a word you do not know, check Glossary pages 18 to 20.
6. Time and heat settings in the recipes refer to the large burner of
an efficient domestic gas stove unless otherwise specified. You may
have to adjust these times and settings to suit your stove. For best
cooking results, adjust the heat so that cooking times are the same as
those given in the recipes. You will be helped in making these
adjustments by the steps and indications given in the recipes. Avoid
high temperatures for the best cooking results, conserving fuel and
preserving the life of the nonstick coating.
7. Certain recipes specify "medium-high" heat setting.
By "medium-high" heat we mean a setting between medium and high.
Certain recipes specify "medium-low" heat setting.
By "medium-low" heat we mean a setting between medium and low.
8. Eggs, batters, doughs and fillings should be at room temperature
before beginning to cook.
9. To ensure even cooking, cut foods (such as onions and potatoes)
evenly.
10. Eggs require controlled heat or they may become tough. Eggs
should be cooked on low to medium temperatures. Higher heat
hardens the protein, resulting in rubbery eggs.
11. Do not heat oil till it smokes. It damages the oil and will burn the
food.
12. The nonstick coating of the pan retards browning somewhat in
certain foods. For browner results, try cooking slightly longer. Do not
use high heat.
13. When a recipe calls for boiling, boil lightly not rapidly. Except for
cooking pasta, it is rarely desirable to rapidly boil food. For most
foods, any slight savings in cooking time gained by rapidly boiling the
food is offset by the loss of flavour, texture, nutrients and fuel.

9
Measurements
Volume
All measurements are level, not heaped.
Measurement Equivalent
1 teaspoon 5 ml
1⁄2tablespoon 11⁄2teaspoons
/
7.5 ml
1 tablespoon 3 teaspoons
/
15 ml
1⁄4cup 4 tablespoons
/
60 ml
1⁄3cup 5 tablespoons +
1 teaspoon
/
80 ml
1⁄2cup 8 tablespoons
/
120 ml
3⁄4cup 12 tablespoons
/
180 ml
1 cup 16 tablespoons
/
240 ml
1 litre 1000 ml
Abbreviations
Abbreviation Equivalent Abbreviation Equivalent Abbreviation Equivalent
tsp teaspoon oz ounce mm millimetre
tbsp tablespoon lb pound cm centimetre
ml millilitre ggram °C degree centigrade
Length
Measurement Equivalent
1⁄4inch 6 mm
1⁄2inch 1.3 cm
3⁄4inch 1.9 cm
1 inch 2.5 cm
Weight
Metric Equivalent
28 g (rounded off to 30 g) 1 oz
450 g 16 oz
/
1 lb
1 kg 2.2 lb
The quantities of ingredients in the recipes are given in two measuring systems – U.S. and metric – separated by this mark "
/
".
Use any one of the measurements.

10
Cook-n-Serve Bowl
Capacity: 3 Litre
Maximum Preheating Time on medium heat: 5 minutes
Suitable for:
•Biryani, dum aloo, dum gosht
•Rice, pilau, khichdi
•Stews, curries, korma,kofta
•Halwa
•Cabbage rolls, stuffed vegetables
•Sautéing vegetables, seafood, chicken, meat
•Cooking and serving food
The Mutton Biryani recipe requires the use of one or two bowls
other than the Futura Nonstick Cook-n-Serve Bowl. An additional
ordinary bowl is referred to as a bowl. The Futura Nonstick
Cook-n-Serve Bowl is referred to as The Bowl.
Mutton Biryani
(Rice Layered with Spicy Mutton)
Serves 4
1 x 1 inch
/
2.5 cm piece
(1⁄3oz
/
10 g)
fresh ginger
12 small cloves garlic
4
green chillies
63⁄4cups + 2 tbsp
/
1.6 litres water
1 lb 2 oz
/
510 g mutton leg cut into 11⁄2inch
/
3.8 cm pieces
1 small (21⁄2oz
/
75 g) tomato chopped
1 tbsp + 1 tsp
/
20 ml lemon juice
1 tbsp + 1 tsp
/
20 ml salt
1 tbsp
/
15 ml red chilli powder
2 tsp
/
10 ml cumin powder
2 tsp
/
10 ml garam masala powder
1 tbsp + 1 tsp
/
20 ml coriander leaves chopped
1 tbsp + 1 tsp
/
20 ml mint leaves chopped
3⁄4cup
/
180 ml curd beaten
3 green cardamoms
4 cloves
1 bay leaf
1 x 1 inch
/
2.5 cm stic
k
cinnamon
13⁄4cups (121⁄2oz
/
350 g) Basmati rice
2⁄3cup
/
160 ml vegetable oil
4 cashew nuts halved lengthwise
2 medium (7 oz
/
200 g) potatoes cut into 11⁄2inch
/
3.8 cm long and 1 inch
/
2.5 cm thick pieces
3 medium (12 oz
/
340 g) onions thinly sliced
3 tbsp + 1 tsp
/
50 ml ghee
11⁄2tbsp
/
22.5 ml milk
a pinch saffron dissolved in 1 tbsp
/
15 ml hot water
1⁄4tsp
/
1.3 ml black cumin seeds or cumin
seeds

11
1. Grind into a paste ginger, garlic and green chillies, gradually
adding 2 tbsp
/
30 ml water.
2. In a bowl, rub ginger paste all over mutton pieces. Add tomato,
2 tsp
/
10 ml lemon juice, 1 tbsp
/
15 ml salt, red chilli, cumin and garam
masala powders, coriander and mint leaves and 1⁄2cup
/
120 ml curd. Mix.
Cover and keep aside 4 hours or in refrigerator overnight.
3. Pour 61⁄2cups
/
1.5 litres water in The Bowl. Bring to boil on high
heat – with lid covering The Bowl. Add remaining salt (1 tsp
/
5 ml),
cardamoms, cloves, bay leaf, cinnamon and rice. Stir. Bring to boil. Reduce
heat to medium. Cook till rice is just cooked (about 15 minutes) but not
soft. Immediately transfer rice to a colander and drain. Spread rice thinly
on 2 large plates/thali, dividing rice into 2 equal batches. Dribble
1 tsp
/
5 ml lemon juice over rice (1⁄2tsp
/
2.5 ml on each plate). Mix rice
and lemon juice gently with a fork. Wash and wipe dry The Bowl.
4. In a deep-frying pan, heat oil on high heat about 2 minutes.
Reduce heat to medium. Add cashew nuts. Fry till light golden
brown, turning with a slotted, long-handled spoon to brown evenly.
Remove and drain, leaving oil in the pan. Increase heat to high. Add
potatoes. Fry till light golden brown (about 3 minutes), turning
potatoes to brown evenly. Remove and drain, leaving oil in pan.
Divide onions into 2 batches. Add one batch onions. Fry till golden
brown and crisp, turning onions frequently to cook evenly. Remove
and drain, leaving oil in pan. Fry and drain remaining onions in the
same way. Reserve 3 tbsp
/
45 ml fried onions. Crumble remaining
onions. Add to mutton mixture. Mix.
5. Heat 1 tbsp
/
15 ml ghee in The Bowl on medium heat about
2 minutes. Add mutton mixture. Mix. Increase heat to medium-high. Stir
about 2 minutes. Add remaining water (1⁄4cup
/
60 ml). Stir. Reduce heat
to low. Cover and simmer 15 minutes. Add potatoes. Mix. Cover and
simmer till mutton is cooked (about 30 minutes), stirring at 10 minute
intervals.
6. Remove The Bowl from heat. Add remaining curd (1⁄4cup
/
60 ml)
and lemon juice (1 tsp
/
5 ml). Mix. Transfer the mutton mixture to a
bowl and keep covered. Wipe The Bowl clean with a paper towel.
7. Melt 1 tsp
/
5 ml ghee in The Bowl on medium heat and spread over
base. Remove The Bowl from heat. Place one batch rice evenly on base.
Place mutton mixture evenly on rice. Place remaining rice evenly on mutton.
Dribble milk over rice. Dribble saffron water over rice.
8. In a small pan or a Futura Tadka Pan, heat remaining ghee
(2 tbsp
/
30 ml) on medium heat about 2 minutes. Add cumin seeds.
When cumin seeds begin to darken, immediately dribble over rice in
The Bowl. Cover.
9. Place The Bowl with biryani on a small burner on medium-high
heat 2 minutes. Reduce heat to low*and cook about 20 minutes till
rice is hot and steaming. Sprinkle cashew nuts and reserved onions
over biryani. Cover. Serve hot, accompanied with curd.
*The heat required is very low. Traditional dum cooking requires
slow cooking on very low heat to combine flavours, tenderise and
moisturise food. The low heat setting of the small burner of a gas
stove should give very low heat. If your stove is not capable of
giving very low heat, use a tava between the flame and The Bowl
or use a suitable metallic ring on the pan supports to increase the
distance between the flame and The Bowl. h

12
Cook-n-Serve Bowl (continued)
Sooji Halwa (Semolina Pudding)
Serves 12
3⁄4cup
/
180 ml ghee
11⁄2cups (81⁄2oz
/
240 g) sooji (finely ground)
33⁄4cups
/
900 ml water
2 tbsp (1⁄2oz
/
15 g)raisins
15 almonds blanched, skins
removed and slivered
1 tbsp (1⁄6oz
/
5 g) green cardamoms husks
removed, seeds powdered
13⁄4cups (121⁄2oz
/
350 g) sugar
1. Heat ghee in The Bowl on medium heat about 3 minutes. Add
sooji. Stir fry till light brown (about 15 minutes).
2. Reduce heat to medium-low. Add water, raisins and half each of
almonds and cardamom. Cook till water is absorbed, stirring
constantly.
3. Add sugar. Cook, stirring constantly, till ghee just begins to show
on sides (about 10 minutes).
4. Sprinkle remaining almonds and cardamom. Cover and serve
hot. h
Curry Pan (Sauté Pan)
Capacity 2 Litre 3.25 Litre
Maximum Preheating
Time on medium heat 3 minutes 4 minutes
Suitable for:
•Sautéing vegetables, seafood, chicken, meat
•Stir-frying vegetables, rice, seafood, chicken, meat
•Gravies, curries, sauces
•Rice, pilau
•Halwa
The quantity of the following recipe is for the 3.25 litre
pan. When using the 2 litre pan, reduce the quantity of ingredients
by one-third.
Bengali Fish Curry
Serves 6
21⁄2tsp
/
12.5 ml salt
1⁄2tsp
/
2.5 ml turmeric
12 (1 lb 11 oz
/
760 g) fish steaks 1⁄2inch
/
1.3 cm
thick
2 medium (7 oz
/
200 g) onions chopped
1 x 1 inch
/
2.5 cm piece
(1⁄3oz
/
10 g)
fresh ginger
10 small cloves garlic
2 green chillies
2 cups
/
480 ml water

13
2 tbsp
/
30 ml coriander seeds
2 tsp
/
10 ml poppy seeds
1⁄2+ 1⁄8tsp
/
3 ml mustard seeds
4 dry red Kashmiri chillies
de-seeded
1⁄3cup
/
80 ml mustard oil
1⁄8tsp
/
0.6 ml fenugreek seeds
1⁄8tsp
/
0.6 ml cumin seeds
2 tsp
/
10 ml jaggery
1. Mix 1⁄2tsp
/
2.5 ml salt and turmeric. Rub all over fish. Cover and
keep aside 30 minutes.
2. Grind into a paste onions, ginger, garlic and green chillies,
gradually adding 1⁄4cup
/
60 ml water.
3. Finely grind coriander, poppy and 1⁄2tsp
/
2.5 ml mustard seeds
and 3 red chillies.
4. Heat oil in pan on medium heat about 2 minutes. Add 3 fish
steaks. Fry on both sides till light golden (about 3 minutes on each
side). Remove. Fry remaining steaks in the same way except do not
add oil.
5. To oil remaining in pan, add remaining red chilli (1), fenugreek,
cumin and remaining mustard seeds (1⁄8tsp
/
0.6 ml). When mustard
seeds begin crackling, add onion paste and ground spices. Stir-fry
about 4 minutes till colour darkens slightly. Add remaining salt
(2 tsp
/
10 ml), jaggery and remaining water (13⁄4cups
/
420 ml). Bring
to boil on high heat.
6. Reduce heat to low. Cover and simmer 10 minutes.
7. Add fish steaks. Increase heat to medium. Bring to boil.
8. Reduce heat to low. Cover and simmer 10 minutes. Serve hot
with rice. h
The quantity of the following recipe is for the 2 litre pan.
When using the 3.25 litre pan, the quantity of ingredients may be
increased by two-thirds.
Sautéed Vegetables
Serves 8
1 tbsp + 1 tsp
/
20 ml vegetable oil
11⁄4tsp
/
6.3 ml cumin seeds
1 small (22⁄3oz
/
80 g) onion finely chopped
1 x 3⁄4inch
/
1.9 cm piece
(1⁄4oz
/
7 g)
fresh ginger finely chopped
13⁄4cups (91⁄2oz
/
265 g) peas shelled or frozen
2 green chillies finely chopped
1⁄3cup + 2 tbsp
/
110 ml water
4 large (1 lb 51⁄2oz
/
600 g) potatoes 'boiled' (see page 18 ),
peeled and cut into 1⁄2inch
/
1.3 cm cubes
2 tsp
/
10 ml salt
1⁄4tsp
/
1.3 ml garam masala powder
1. Heat oil in pan on medium heat about 3 minutes. Add cumin
seeds. Stir a few seconds.
2. Add onion and ginger. Stir fry till onion is transparent (about
2 minutes). Add peas, chillies and water. Stir. Cover and cook on
medium-low heat till peas are just tender and water has evaporated
(about 10 minutes), stirring occasionally. (If water remains when peas
are tender, uncover pan and boil away water.)
3. Add potatoes and salt. Stir fry about 3 minutes. Add garam
masala powder. Mix. Serve hot. h

14
Cook-n-Serve Stewpot
Capacity 3 Litre 5 Litre
Maximum Preheating
Time on medium heat 4 minutes 4 minutes
Suitable for:
•Biryani,dum aloo,dum gosht
•Rice, pilau, khichdi
•Stews, curries, korma
•Dal
•Halwa
•Boiling pasta
•Serving food
The quantity of the following recipe is for the 3 litre pan.
When using the 5 litre pan, the quantity of ingredients may be
increased by two-thirds.
Vegetable Pilau
Serves 6
11⁄2tbsp
/
22.5 ml vegetable oil
1 tbsp
/
15 ml cumin seeds
1 bay leaf
1 x 2 inch
/
5 cm stic
k
cinnamon
2 brown cardamoms
3 cloves
1 medium (31⁄2oz
/
100 g) carrot cut into strips 1 inch
/
2.5 cm long and about 1⁄2inch
/
1.3 cm thick
1⁄2cup (21⁄2oz
/
70 g) green beans cut diagonally into
thin strips 1 inch
/
2.5 cm long
3⁄4cup (4 oz
/
115 g) peas shelled or frozen
4 medium (14 oz
/
400 g) potatoes cut into 1⁄2inch
/
1.3 cm cubes
11⁄2cups (102⁄3oz
/
300 g) Basmati rice
21⁄4tsp
/
11.3 ml salt
23⁄4cups
/
660 ml water
1. Heat oil in pan on medium heat about 2 minutes. Add cumin
seeds. Stir a few seconds. Add bay leaf, cinnamon, cardamoms and
cloves. Stir a few seconds. Add carrots, beans, peas and potatoes.
Stir fry a few seconds. Add rice. Stir fry about 2 minutes. Add salt
and water. Stir. Bring to boil.
2. Reduce heat to low. Cover and simmer till rice is cooked and
water is absorbed (about 20 minutes). Lift rice gently with a fork to
mix pilau. Serve hot. h

15
Deep-Fry Pan (Stir-Fry Pan)
Capacity: 2 Litre
Maximum Preheating Time on medium heat: 4 minutes
Suitable for:
•Stir-frying vegetables, rice, seafood, chicken, meat
•Sautéing vegetables, seafood, chicken, meat
•Deep-frying puri,samosa,wada, French fries, pakora
•Upma,poha
•Halwa
Caution:
1. Oil for deep-frying: do not exceed 21⁄2cups
/
600 ml in this pan.
2. Do not leave the ladle in the pan while deep-frying or cooking.
Kadai Paneer (Stir-Fried Cottage Cheese)
Serves 6
1 tbsp
/
15 ml coriander seeds
1 tbsp + 1 tsp
/
20 ml cumin seeds
11⁄4tsp
/
6.3 ml peppercorns
2 tbsp
/
30 ml vegetable oil
2 medium (7 oz
/
200 g) onions chopped
6 dry red chillies deseeded and
torn into small pieces
2 medium (7 oz
/
200 g) tomatoes chopped
2 green chillies chopped
15 small cloves garlic finely chopped
2 tsp
/
10 ml salt
12 oz
/
340 g paneer cut into 11⁄4inch x
3⁄4inch x 1⁄2inch
/
3 cm x
2 cm x 1 cm pieces (see page 19)
2 tbsp
/
30 ml coriander leaves chopped
1. Roast together coriander seeds, cumin seeds and peppercorns
(see Roasting of spices on page 19). Grind roasted spices to a coarse
mixture.
2. Heat oil in pan on medium heat about 2 minutes. Add onions.
Stir-fry till onions are transparent. Add spice mixture and all other
ingredients except paneer and coriander leaves. Stir a few seconds.
Add paneer. Mix. Cover and cook on medium-low heat till liquid has
evaporated (about 5 minutes), stirring occasionally. Add coriander
leaves. Mix. Serve hot. h

16
Saucepan
Capacity: 3 Litre
Maximum Preheating Time on medium heat: 4 minutes
Suitable for:
•Boiling noodles, pasta, eggs
•Soups, sauces, chutneys, gravies, curries
•Rice, pilau
•Dal
Egg Curry
Serves 6
8 eggs
1 x 2 inch
/
5 cm piece
(2⁄3oz
/
20 g)
fresh ginger
15 small cloves garlic
1 green chilli
1⁄4cup + 1 tbsp
/
75 ml vegetable oil
4 medium (14 oz
/
400 g) onions chopped
1 tsp
/
5 ml cumin seeds
3 large (1 lb 2 oz
/
510 g) tomatoes puréed (see page 19)
8 cloves
4 brown cardamoms
4 x 1 inch
/
2.5 cm sticks cinnamon
2 tsp
/
10 ml salt
11⁄2tsp
/
7.5 ml red chilli powder
2 tsp
/
10 ml coriander powder
1 tsp
/
5 ml turmeric
1⁄2tsp
/
2.5 ml sugar
2 tbsp
/
30 ml coriander leaves chopped
21⁄2cups
/
600 ml water
1. To boil eggs: Place eggs in pan and cover with water at least
1 inch
/
2.5 cm above eggs. Bring to boil on medium-high heat.
Reduce heat to low. Cover and simmer 15 minutes. Meanwhile, do
step 2. Pour off water. Pour tap water slowly over eggs till eggs are
cool. Drain. Remove and keep aside eggs. Wash and dry pan.
2. Grind into a paste ginger, garlic and green chilli.
3. Heat 1⁄4cup
/
60 ml oil in pan on medium heat about 2 minutes.
Add onions. Fry till light golden brown. Add cumin seeds and ginger
paste. Stir a few seconds. Add tomatoes. Mix. Remove from heat.
4. In a mixer-blender/grinder, mix tomato mixture till smooth. Wash
and dry pan.
5. Heat remaining oil (1 tbsp
/
15 ml) in pan on medium heat about
1 minute. Add cloves, cardamoms and cinnamon. Stir a few seconds.
Reduce heat to low. Add tomato mixture and remaining ingredients
except eggs and water. Cook about 3 minutes, stirring constantly.
Add water. Stir. Bring to boil on medium-high heat. Reduce heat to
low.
6. Cover and simmer (about 20 minutes). Meanwhile, shell eggs and
cut lengthwise into halves. When gravy is slightly thickened, remove
pan from heat.
7. Add eggs, keeping yolk sides up. Cover and simmer on low heat
just till eggs are hot (about 2 minutes). Serve hot. h

17
Sukhi Dal (Dry Split Skinned Green Gram)
Serves 6
2 cups (14 oz
/
400 g) moong dal
3 tbsp
/
45 ml ghee
1 small (21⁄2oz
/
75 g) onion chopped
2 tsp
/
10 ml salt
1⁄4tsp
/
1.3 ml turmeric
2 tsp
/
10 ml red chilli powder
1 tbsp
/
15 ml coriander powder
1 small (21⁄2oz
/
75 g) tomato chopped
3 green chillies chopped
1 cup
/
240 ml water other than for step 1
1 small (21⁄2oz
/
75 g) onion thinly sliced
3 tbsp
/
45 ml coriander leaves chopped
1. In a bowl, cover dal with water at least 1 inch
/
2.5 cm above dal.
Soak 1 hour. Drain.
2. Heat 11⁄2tbsp
/
22.5 ml ghee in pan on medium heat about
3 minutes. Add chopped onion and stir fry till transparent (about
1 minute). Add dal, salt, turmeric, red chilli and coriander powders.
Stir fry about 3 minutes.
3. Add tomato and green chillies. Mix. Add water. Stir. Bring to
boil.
4. Reduce heat to very low*. Cover and simmer 10 minutes.
5. Scatter sliced onion over dal.
6. In a small pan, heat remaining ghee (11⁄2tbsp
/
22.5 ml) on
medium heat about 1 minute. Pour ghee over dal in pan. Sprinkle
coriander leaves.
7. Cover and cook about 10 minutes, or till dal is cooked. Serve hot
with paratha.
*
The low heat setting of the small burner of a gas stove should
give very low heat. If your stove is not capable of giving very low
heat, use a tava between the flame and the pan or use a suitable
metallic ring on the pan supports to increase the distance
between the flame and the pan. h

18
Glossary (Meanings and Methods)
Batter: A mixture made from flour and a liquid such as water, milk
or egg which is thin enough to pour or drop from a spoon.
Beat: To mix with an instrument such as a spoon, whisk or electric
beater using a regular, rapid, rhythmic movement.
Biryani:A spicy rice dish layered with mutton, chicken, seafood or
vegetables. See recipe page 10.
'Boiled' Potatoes cooked in a Hawkins Pressure Cooker:
Size of the Potato
(Whole, Unpeeled)
Water
Quantity
Pressure
Cooking
Time
(Small – 75 g)
(Medium – 100 g)
(Large – 150 g)
1 cup
1 cup
11⁄2cups
6 minutes
10 minutes
15 minutes
Method: Pour water in cooker. Put grid in cooker. Place potatoes on
grid. Close cooker. Bring to full pressure (first whistle) on high heat.
Reduce heat and cook the required time. Remove cooker from heat.
Release pressure by slight lifting of vent weight. Open cooker.
Colander: A perforated bowl-shaped utensil for draining off liquids
and rinsing food.
Dal:Various dried edible seeds such as lentils; curries made from
these seeds.
Deep-frying: Cooking in hot fat or oil deep enough in a utensil to
cover the food to be cooked.
Dough: A mixture of flour and a liquid such as milk or water which is
stiff enough to knead or roll.
Dum:Cooking in steam and simmering on very low heat in a closed
vessel during the final stages of cooking.
Dum Aloo:A dum cooked dish of small whole potatoes in thick gravy.
Dum Gosht:A dum cooked dish of mutton in thick gravy.
Garam Masala Powder:
Yield: About 21⁄2tbsp
/
37.5 ml
1 tsp
/
5 ml peppercorns
3⁄4tsp
/
3.8 ml cloves
7 x 1 inch
/
2.5 cm sticks cinnamon
4brown cardamoms
seeds taken out and kept,
pods discarded. Measure
3⁄4tsp
/
3.8 ml seeds.
3⁄4tsp
/
3.8 ml black cumin seeds or
cumin seeds
1. Roast together all ingredients in a small, heavy skillet (pan) on
medium heat. Stir constantly until the spices darken by a few shades
and give out their distinct aromas (about 5 minutes). Remove from
heat, spread on a plate and allow to cool.
2. Grind to a powder. Store in an air-tight jar.
Garlic: A clove of garlic is one of the small curved segments which
make up one whole garlic bulb. Small cloves specified in the recipes
weigh about 1 g and measure about 2 cm from tip to tip and about
1 cm at the widest part. If you have larger cloves, adjust the quantity
appropriately. Large cloves can be five times larger than small cloves.
This manual suits for next models
6
Table of contents
Other Hawkins Kitchen Utensil manuals


