Hayear HY-1070 User manual

HAYEAR
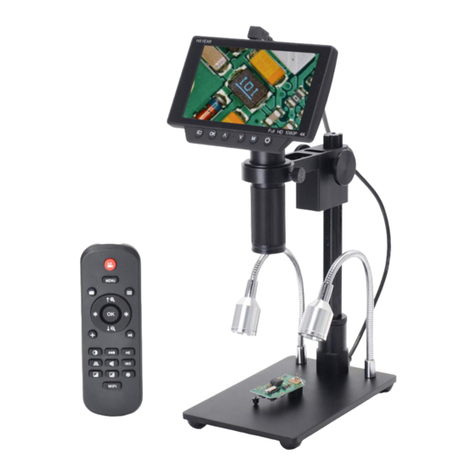
HY-1070 Digital Microscope Camera

Table of Contents
Foreword....................................................................................................2
Basic Parameters............................................................................................2
Parts of HY-1070........................................................................................... 3
◆Main Device..........................................................................................3
◆Remote Control.......................................................................................4
Connection and Output..................................................................................... 5
Direction....................................................................................................6
◆Individual Use....................................................................................... 6
◆HDMI Output...................................................................................... 15
◆USB Output........................................................................................ 16
Software Installation............................................................................ 16
Software Operation..............................................................................19
*Icon Definition...........................................................................19
*Interface Definition and Function....................................................... 19
*Operating Steps.......................................................................... 22
*Function.................................................................................. 22
Thanks....................................................................................................................................................25

Foreword
HY-1070 is a multifunctional digital microscope individually designed, developed and manufactured by Shenzhen Hayear
Electronics Co., Ltd. It realizes Full HD, high object distance, multifunction and multi-output at the same time. With help of
the Hayear measuring software, it can easily meet many different requirements in many fields, such as industrial overhaul and
teaching demonstration. And it’s appearance design combines more ergonomic consideration, provides users with better
experience. We sincerely wish this product can release your eyes and improve your work quality. Thanks for your support.
For your better use of this product, we hope you can keep this instruction well. Any damage caused by non-compliance with
this manual shall be null and void.
Failure to comply with warnings and instructions may result in electric shock, fire and serious injury.
Failure to comply the instruction may cause the device permanent damage.
Storage and transportation: the improper transport may harm the device, make sure it was in well package in the packing box
when transport to avoid damage.
Waste disposal: the electronic device is not household garbage, it needs to dealt with in accordance with relevant laws and
regulations
In order to provide our guest with a better customer experience, the product may have minor change during perfecting. the
description in this instruction is only for reference, please kindly understand it.
◆Safety
1.Keep the device in clean and dry environment, keep it far from oil, water, gas and any thing that may cause corrosion.
2.This product is not suitable for the disable, psychiatric and people with allergies.
3.Please keep away from the surrounding when operating.
4.Do not operate frequently, there is limited adjustment among the components, keep the device in balance to make sure it
can work at its best.
Basic Data
Image Sensor
16 Megapixel SONY CMOS 1/2.3 HD Sensor
Video Output
4K/2K/1080P Full HD (via HDMI) ;1080P (via USB)
Video Format
MP4
Magnification
Standard Magnification 150X (Max up to 300X)
Photo Resolution
16M 4608x3456, 14M 4320x3240,12M 4032x3024, Min 640x480
Photo Format
JPEG
Focus Range
5cm to 15cm
Frame Rate
4K 24@fps1080P 60@fps 720P 120@fps Max 240f/s (VGA)
Video Output
HDMI/USB
Storage
TF card storage, max to 64G
PC Support
Support Windows XP/7/8/10 system, including PC measuring software(gift)
WiFi
Microscope support WIFI connection (the connection range is about 15 meters)
Stand Size
17*12*20cm
Screen Size
5.1 inch (854x480)
Package Including
1*table stand, 1*power supply, 1*USB line, 1*HDMI line, 1*manual, 1*remote control,
Package Size
28*22*17cm/1.9Kg

HY-1070 Parts Instruction
◆Main Device
*Focus fixed screw: it can be used to adjust the compactness between the pulley and stand column to fix the focus
How to increase the lens magnification?
Standard working with 150x lens 2x attachment objective lens
HY-1070 Standard working with 150x lens, if you add a 2x attachment objective lens then the original
magnification also will double, that means it’s a 300x lens.

◆Remote Control
*Freeze screen: freeze screen image, can be operated under the standby, video and capture mode.
* Digital magnification & digital reduction: digital zoom can up to 8X
* Luminance+ & luminance-: exposure from +2.0 to -2.0
* Lock/unlock: lock the file when recording to avoid delete by mistake.
* Sharpness+ & sharpness-: there are three sharpness: high, medium and low, two buttons can switch the sharpness
but the sequence is different.
* Contrast ratio+ & contrast ratio-: the principle is same as sharpness.
* Inverse color: please take the below pictures as reference
normal inverse
* Black & white: please take the below pictures as reference
normal black & white

connection and output
Besides of the output to the microscope screen itself, HY-1070 still has 3 kinds output as HDMI, USB and TF card
storage. The below is an aerial view of the different ports of the main device, we will expand it in the later chapters.
①TF card storage ( to storage photo or video)
②USB output (output to the PC via USB line)
③HDMI output (output to the HDMI monitor via HDMI line)
④Microscope power supply
⑤USB power supply for microscope
⑥Base double lamp power supply
⑦USB DC in( provide power to microscope and LED light)
⑧LED light adjustment (control the brightness of the light)
⑨turn on/off button
⑩menu button
⑪button down
⑫button up
⑬confirm button
⑭mode switch(capture/video/view)
*Battery: The product is reserved for battery installation slot with battery interface, and the interface size is 3.5mm. The
product is not equipped with batteries; You can buy it on your own.
*The product design battery is polymer battery, battery size: 42x30x5mm, working voltage 3.7v-4.2v, current 500ma-
2000ma (the larger the current, the longer the standby time); The USB port can also be powered by a charger.

Direction
◆Individual Use
*Power on
1. According to the connection and output chapter connect ④⑤⑥⑦ lines to the corresponding position,
keep the power cord and switch on power.
2. Press on the “on/off” button on the main device. (usually the microscope will on automatically when power on)
3. Adjust the base double lamp brightness, angle, adjust the distance and manual focus to catch the needing image.
4. Press on the “up/down” button to adjust digital zoom.
*switch mode
1. Short press on the “M” button to switch the mode. (also you can press on the remote control “MODE” button)
2. definition of the image under different mode:
:video standby mode
: capture mode
: video mode
: image playback mode
:video playback mode (when the file is video, press on the “OK”
button to play video file)
:lock the file being recorded
Language select (take English as an example)
Press on the MENU button to enter the main menu, press on the ↓ button to enter the language setting , again
press on the ↓ button, when the English option highlight then press on the OK button to confirm.
Line setting
Under the capture mode, press on the MENU button to enter the main menu, select the line setting and press on
the OK button to enter the line setting.

Press on the OK button to select the option you need to set.
When the option you need to set is highlight, press on the ↑ or the ↓ button to set it.
Image size setting
Under the capture mode, press on the MENU button to enter the main menu, press on the ↓ button to select the
image size setting and click OK button to enter, and then press on the ↑ or the ↓ button to set the image size you need.
Quality setting
Under the capture mode, press on the MENU button to enter the main menu, press on the ↓ button till the
quality setting highlight then press on the OK button, and then press on the ↑ or the ↓ button to set what you need.
Sharpness setting
Under the capture mode, press on the MENU button to enter the main menu, press on the ↓ button till the
sharpness setting highlight then press on the OK button to enter, and then press on the ↑ or the ↓ button to set what you
need.

ISO setting
Under the capture mode, press on the MENU button to enter the main menu, press on the ↓ button till the ISO
setting highlight then press on the OK button to enter, and then press on the ↑ or the ↓ button to set what you need.
TV mode setting
Press on the MENU button to enter the main menu, press on the ↓ button till the TV mode setting highlight
then press OK button to enter, and then press on the ↑ or the ↓ button to select NTSC or PAL mode.
White balance setting
Press on the MENU button to enter the main menu, press on the ↓ button till white balance setting highlight
then press on the OK button to enter, and then press on the ↑ or the ↓ button to set.
Colour setting
Press on the MENU button to enter the main menu, press the ↓ button till the colour setting option highlight
then press on the OK button to enter, and then press on the ↑ or the ↓ button to set the colour you need.

EV setting
Press on the MENU button to enter the main menu, press on the ↓ button till the EV setting option highlight
then press on the OK button to enter, and then press on the ↑ or the ↓ button to set the EV you need.
Metering
Press on the MENU button to enter the main menu, press on the ↓ button till the metering option highlight then
press on the OK button to enter, and then press on the ↑ or the ↓ button to select the metering you need.
Date/Time
Press on the MENU button to enter the main menu, press on the ↓ button till the date/time option highlight
then press on the OK button to enter, when the option is blue you can press on the ↑ or the ↓ button to set, after
finishing an option press on the OK button to save and then set the other option, after finishing all setting, press on the
MENU button to save setting and return the to main menu.
Auto power off setting
Press on the MENU button to enter main menu, press on the ↓ button till the auto power off setting option
highlight and press OK button to enter, and then press on the ↑ or the ↓ button to select the auto power off time.
Keypad Tone
Press on the MENU button to enter the main menu, press on the ↓ button till the keypad tone option highlight
and then press on the OK button to enter, and then press on the ↑ or the ↓ button to choose open or close the keypad
tone.

Screensavers setting
Press on the MENU button to enter the main menu, press on the ↓ button till the screensavers setting option
highlight then press OK button to enter, and then press on the ↑ or the ↓ button to select setting.
Frequency setting
Press on the MENU button to enter the main menu, press on the ↓ button till the frequency setting option
highlight then press on the OK button to enter, and then press on the ↑ or the ↓ button to select 50Hz or 60Hz.
TF card format setting
Press on the MENU button to enter the main menu, press on the ↓ button till the TF card format setting option
highlight then press on the OK button to enter, and then press on the ↑ or the ↓ button to select “cancel” or “OK”
option, when select “cancel” and press on the OK button then it will return to main menu, when select “OK” and
press on the OK button then the TF card will be format.
Noting: all data will be deleted when use format, please make sure there is a copy when use this function
System setting
Press on the MENU button to enter the main menu, press on the ↓ button till the default setting option
highlight then press on the OK button to enter, and then press on the ↑ or the ↓ button to select “cancel” or “OK”
option, when select “cancel” and press on the OK button then it will return to main menu, when select “OK” and
press on the OK button then it will restore to factory settings.

Resolution setting
Under the video mode, press on the MENU button to enter the main menu, press on the ↓ button till the
resolution setting option highlight then press on the OK button to enter, and then press on the ↑ or the ↓ button to
select the resolution you need.
HDR Setting
Under the video mode, press on the MENU button to enter the main menu, press on the ↓ button till the HDR
setting option highlight then press on OK button to enter, and then press on the ↑ or the ↓ button to select open or
close.
Date label setting
Under the video mode, press on the MENU button to enter the main menu, press on the ↓ button till Date label
setting option highlight then press on the OK button to enter, and then press on the ↑ or the ↓ button to select open
or close
*Video setting menu
1. under the video standby mode, press on the "M" button on the main device till the menu appears on the
screen( or press on the MENU button via the remote control)
2. Press on the up/down button to select the data you need to set, then press on the OK button to enter setting.
3. After finishing setting, press "M" button to return to video standby mode.

*System setting menu
1. Under the video standby mode, long press the "M" button on the main device till the menu is
displayed on the screen and press the "M" button again. (or use the remote control to press the
"MENU" button twice).
2. Press on the "up/down" button to select the data to be set, and press "OK"
to enter the content to be set.
3.After finish setting, press "M" button to return to video standby mode.
*Capture setting menu
1. Under the capture mode long press "M" button. ( when use the remote control just press the "MENU" button
under the capture mode )
2. Press on the "up/down" button to select the data to be set, and press "OK"
to enter the content to be set.
*Capture (three ways)
1. Short press on the "M" button to enter the capture mode. click "OK" to take photos.
2. Just press on capture button.
3. When use the remote control, press on the capture button.
* Video record step
1. Under the video standby mode, press "OK" to start recording
2. Press "OK" again to stop recording
PS: When recording, press the lock/unlock button on the remote control to lock the file. When the memory card is full,
the locked video file will not be covered by the new file.
PC terminal connection Settings
When connect the microscope camera to the computer via the USB port , there are two options on the camera side, one
is for storage, one is the camera.
When you need the camera works as storage, select storage option then it can read the TF card.
When you need the microscope works as a camera, select the camera then it is an USB camera.

WIFI connect setting
First use
Step1: download APP
You can download it as follows:
IOS users search for "WiFi Camera" in the APP Store to download
Android users search for "WiFi Camera" in application stores to download
First step: open the WIFI function through remote control, WIFI function can be only open by remote control, then it
will display the account and password, the account is: HY-1070d9eea30d21c0 password:12345678
Second step: open the WIFI on the mobile phone, you can check the WIFI network HY-1070 then click to connect, it
will show a tick when connect success, open the WiFi Action Camera APP to connect Camera.
This is the image of a successful connection.

1. You can adjust the Settings for photo and video resolution, white balance, exposure and so on. The image below is
the default resolution.
HDMI output
First, make sure the connected monitor is hd monitor, otherwise the resolution can not reach 1080P
Second, power on the microscope and connect it to the hd monitor, make sure there is power on when using
since there is no built-in battery.
Third, turn on the microscope, put the observation on the platform and adjust the working distance, the video
signal will switch when you connect the microscope to other device, therefore the screen itself can not work
under the HDMI output.
Under the HDMI output, the microscope can take picture, but can not record video.
FAQ
1. Why these is no image on the monitor?
Check if all the lines connected properly and power switch is turn on.
2. Why the image vague?
Please adjust the focal distance, lighting angle, check if there is dirt on the lens.
3. Why the remote control can not work?
There is no battery in the package, check if you has installed it.
4. Why there is no image on monitor when playback?
Maybe the video is not kept intact, or the video file is too large, and the system needs run time.
5. Why isn't the photograph clear?
Please check whether the photo setting is the highest pixel.
6. Why it shows the TF card error?
First make sure it is a certified memory card, then format it and try again.

USB Output
HAYEAR User Manual
Overview
Hayear is an application for imaging a dynamic image processing , it has the following characteristics:
1. Support a variety of cameras, can switch at any time to use.
2. using GPU rendering for image previewing, support for live image display of high-resolution and high frame rates.
3. Support dynamic image measurement function.
4. The software interface is easy to operate.
User Interface
1. Toolbar:Take pictures/Recording video/Browse files.
2. Sidebar tab:Switching the rightmost control panels, currently provides camera control and measurement
functions.
3. Control panel:Specific camera control and measurement operations.
4. Status bar:Display camera information, Change user interface view, Toggle measure result panel.
5. Main menu:Open setting dialog, show software information, etc.
Capture Images
You can capture pictures and videos:
1. Take a picture: Click “Snap” button to take a picture. Click the right arrow beside the “Snap” button to set picture
file format and resolution.
2. Recording:Click “Record” button to start video recording, Click again to stop recording. When recording ,there
will be an animation indicator over the image.
3. Browse:Click “Browse” button to open the folder where pictures and video stored.

Camera Control
Device Control:
Support different cameras, preview resolution
and output format.
The highest resolution is 1920x1080.
Exposure and Gain:
If the connected camera can not support some
functions such as brightness target value, then the
corresponding parameter can not be set up
White balance:
If the connected camera can not support some
functions such as brightness target value, then the
corresponding parameter can not be set up
Red, Green and Blue gain:
If the connected camera can not support some
functions such as brightness target value, then the
corresponding parameter can not be set up
Normal camera parameter adjustment.
Reset camera parameters.
Open camera property dialog, generally
supported by the DirectShow cameras
Measurement
Icon
Function
Description
Move
Move or adjust the measurement tool.
Point
Setup > Video Overlay > Marker
Line
Measure length of a line.

Vertical
Rectangle
Measure perimeter and acreage of a rectangle.
Polygon
Measure perimeter and acreage of a polygon.
Circle
Measure a circle, the circle is determined by center point and
radius.
Two Points Circle
Measure a circle, the circle is determined by two points.
Three Points Circle
Measure a circle, the circle is determined by three points.
Arc
Measure length of arc.
Angle
Measure angle.
Calibrate
Scale Bar
Text
Delete all measurement tools.
Stitch
How to calibration?
The way to calibration
1. Calibration: select pixel, 100%, max resolution
2. Click on the “option” to select “calibration”

3. Calibration: Magnificatior, Actual Length, Meter
4. After select “ calibration”, choose the unit and multiplying power you need, then you can calibrate.
How to set cross hair on measure software?
1. First step: select setup
2. Second step: select video overlay
3. Third step: select the Cross in Type

Software Installation
Download the software:
http://www.hayear.com
The “HAYEAR”can support only the Windows system, the users can also download by the link on the official website.
The operating systems:
Windows 7、Windows8、Windows10、Linux
The operating environment:
Microsoft.Net Framework 4.0 , Microsoft Visual C++ 2010
If there is no the two complete runtime library, there will be an error when installing the software.
If you are unable to enter the link or download the files, please contact with the customer service.
After downloading successfully, open the zipped files and install the software.
FAQ
1. Why there says “missing files”during installation or initiator procedure?
Please confirm that in the system there are Microsoft. Net Framework 4.0 and Microsoft Visual C++ 2010 Runtimes.
2. The software works fine, but the software can not recognize the microscope.
First, please make sure that you connect the camera and the PC properly and choose “PC camera”on the 5 inch
monitor. Second, if there is still no image, please check the “Device Manager”of your PC, delete the “USB
Camera”in the “Imaging devices”and rescan . Let the system identifies again. After all, in the “Imaging
devices”there will show another name, which is “HY-1070 Camera”. Then restart the software.
3.Why there is a measurement error?
First, if you want to get a more precise result, you need to use a more precise calibration. Second, during the whole
process, make sure the magnification is always the same as the one when you set the calibration. Since the camera is
continuously magnifying, you’d better keep the same object distance also.
Table of contents
Other Hayear Digital Camera manuals
