HDigit Snooze User manual


2
English
DANGEROUS VOLTAGE
Dangerous Voltages, which may be of sufcient
magnitude to constitute a risk of electric shock to
persons, are present within this product’s enclosure.
ATTENTION
The owner’s manual contains important operating
and maintenance instructions, for your safety, it is
necessary to refer to the manual.
WARNING: TO PREVENT FIRE OR
SHOCK HAZARD, DO NOT EXPOSE
THIS APPLIANCE TO DRIPPING OR
SPLASHING.
NOTE: This unit will become warm when
used for a long period of time. This is normal
and does not indicate a problem with the unit.
Safety Precautions
To achieve the utmost in enjoyment and performance, and in order to
become familiar with its features, please read this manual carefully
before attempting to operate the unit, this will assure you years of
reliable, trouble free performance and listening pleasure.
Important Notes
These safety and operating instructions should be retained for future
reference.
The apparatus should not be exposed to dripping or splashing and
also no objects lled with liquids, such as vases, should be placed on
apparatus.
Avoid installing the unit in the locations described below:
• Places exposed to direct sunlight or close to heat radiating
appliances such as electric heaters.
• On top of other stereo equipment that radiates too much heat.
• Places blocking ventilation or dusty places.
• Places subject to constant vibration.
• Humid or moist places.
No naked ame sources such as lighted candles should be placed on or
near the unit.
The apparatus should be used in moderate temperatures.
Operate turning controls and switches as instructed in the manual.
Before turning on the power for the rst time, make sure the power cord
is properly installed.
For safety reasons, do not remove any covers or attempt to gain access
to the inside of the product. Refer any servicing to qualied personnel.
Do not attempt to remove any screws, or open the casing of the unit;
there are no user serviceable parts inside, refer all servicing to
qualied service personnel.

3
English Snooze
Some Do’s And Don’ts On the Safe Use Of Equipment
This equipment has been designed and manufactured to
meet international safety standards but, like any electrical
equipment, care must be taken to obtain the best results and
to assure safety.
DO read the operating instructions before you attempt to use
the equipment.
DO ensure that all electrical connections (including the
main plug, extension leads and inter-connections between
the pieces of equipment) are properly made and in
accordance with the manufacturer’s instructions. Switch off
and disconnect the main plug before making or changing
connections.
DO consult your dealer if you are ever in doubt about the
installation, operation or safety of your equipment.
DON’T remove any xed cover as this may expose
dangerous voltages.
Overheating will cause damage and shorten the life of the
equipment.
DON’T allow electrical equipment to be exposed to dripping
or splashing, or objects lled with liquids, such as vases, to
be placed on the equipment. DON’T place hot objects or naked
ame sources such as lighted candles or night lights on, or close to
equipment. High temperatures can melt plastic and lead to res.
DON’T use equipment such as personal stereos or radios so that
you are distracted from trafc safety requirements.
DON’T listen to headphones at high volume level, doing so may
damage your hearing.
DON’T leave equipment switched on while it is unattended unless
it is specically stated that it is designed for unattended operation.
Switch it off using the switch on the equipment and make sure that
your family knows how to do this. Special arrangements may need
to be made for inrmed or handicapped people.
DON’T continue to operate the equipment if you are in any doubt
if it is working normally or if it’s damaged in any way. Switch it off
and disconnect the main plug and consult your dealer.
ESD Remark: In case of malfunction due to electrostatic
discharge just reset the product (reconnection of power source may
be required) to resume normal operation.
NOTE: Do not open any covers and do not repair by yourself.
Qualied personnel must carry out repair work.
4
English
Safety Information
Overviews
DAB Mode
How to Get Started?
How to Show the Signal Strength?
How to View Station Information?
How to Update Station List?
How to Set DRC (Dynamic Range Control) Value?
FM Mode
How to Change to FM Mode?
How to View Station Information?
How to Have Only Strong Stations Available?
How to Set Audio to‘Forced Mono’?
Setting Station Presets (DAB and FM Mode)
Selecting a Preset Station (DAB and FM Mode)
Volume Control
Ststem Setup
How to Set Sleep?
How to Set Time?
How to Set Alarm?
How to Set Backlight?
How to Set Language?
How to Factory Reset?
How to Get SW Version?
Specications
Contents
2-3
5-6
7
8
8
8
9
10
10
11
11
12
12
13
14
14
15
16
17
17
17
18

5
English Snooze
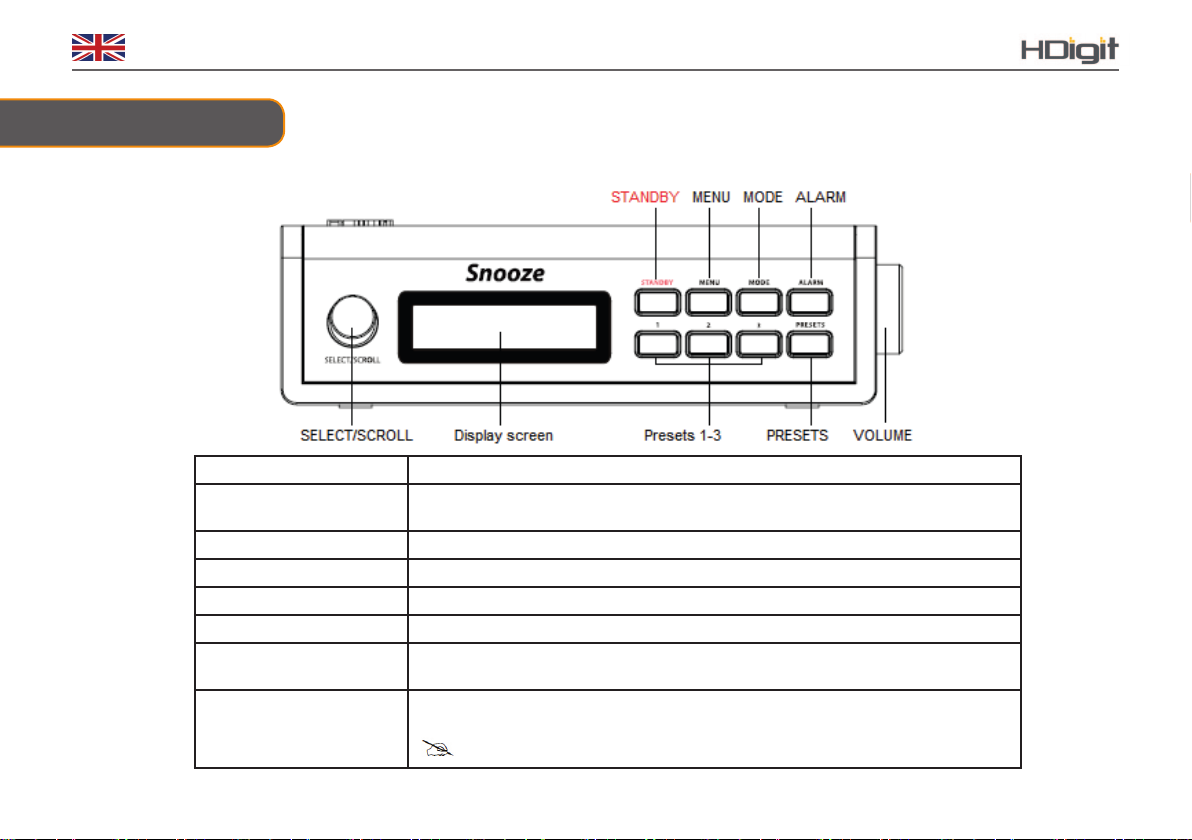
Unit Overview
Note: Please leave ‘Upgrade socket’ for
professional use only.
DIGITAL RADIO FRONT VIEW DIGITAL RADIO SIDE VIEW
6
English
Unit Overview
DIGITAL RADIO TOP VIEW
Control DAB +, DAB and FM mode
STANDBY Press to turn the digital radio on/o.
(when alarm sounds, press to turn alarm o).
MENU Press to enter menu options.
MODE Press to switch between DAB and FM mode.
ALARM Press to enter alarm setting.
PRESETS Press and hold to activate preset store function, press to recall presets.
Presets 1-3 Press and hold to activate the function of stored Preset stations 1-3.
Press to activate the function of accessing your appointed Preset stations 1-3.
SELECT /SCROLL All mode: turn to browse options. Press SELECT to conrm.
FM mode: when frequency appears, turn to manual scan, and press to auto-scan.
Note: In the following chapters, we refer to this knob as SELECT
Unit Overview

7
English Snooze
DAB Mode
Unit Overview
How to Get Started?
1. Place your radio on a suitable shelf or table, connect the power adapter between your radio and the
main supply, extend the telescopic antenna, and press STANDBY to switch it on.
Note: Your radio has a built-in rechargeable battery, it will automatically start charging after
power connected and will automatically stop charging when charging completed. The Battery
Standby time is 20 hours and it can be perfectly used for a elektrosmog free healthy sleep.
2. For initial use, it will automatically run a full scan and save all the detected stations into its memory.
Note: In use, your radio will automatically run to your last listening station when it is turned on.
3. Once the scanning is done, the DAB/DAB+ stations will be displayed in alphanumeric order and the rst station in
the list will be selected.
4. If no stations are detected, press MENU→turn SELECT to‘Full scan’→press SELECT to conrm.
5. Want to change to another program? Wait until the scanning is completed or while playing a DAB/DAB+
program, turn SELECT to cycle through stations→press SELECT to conrm your preferred program.
Note: If no DAB/DAB+ signal found in your area, relocating your radio may be necessary.

8
English
How to Show the Signal Strength?
1. While playing a DAB/DAB+ program, pressing INFO, the display will show a line of signal
bars, which indicate the strength of the current station.
Note: Stations with signal strength below the minimum signal level may not provide a stable
stream of audio.
How to View Station Information?
Note:Want to watch the scrolling text from a particular station? Or its signal strength, program
type, time, date, etc.? Follow the instructions below, it can be pretty easy!
While playing a DAB/DAB+ program, press MENU→turn SELECT to ‘Display’→press
SELECT to conrm, turn SELECT to cycle through info options such as station signal strength,
program type, multiple names, program frequency, signal error rate, time and date, etc.
How to Update Station list?
Note: For DAB radio, it’s a good idea to carry out a scan every time to make sure that you have
the most up to date station list stored in the memory of your radio.
Press MENU→turn SELECT to ‘Full scan’→press SELECT to conrm. Your radio will scan all
the DAB/DAB+ channels and add any new stations available to the station list.

9
English Snooze
How to Set Manual Tune?
Note: Sometimes, you might want nd the radio station manually, and by following these steps, it can be
easily achieved.
1. Press MENU→turn SELECT to < Manual tune > →press SELECT to conrm, the display will show the
channel number and frequency list.
2. Turn SELECT to scroll through the channels and press SELECT to select the radio channel.
Note: If there is a multiplex corresponding to this channel and frequency, the display will
show a tuning meter with the signal strength and the multiplex name after a few seconds.
3. Press SELECT to exit these steps.
How to Set DRC (Dynamic Range Control) Value?
You can set the level of compression of stations to eliminate the dierences in dynamic range or sound level
between radio stations.
1. Press MENU→turn SELECT to < DRC >, press SELECT to conrm.
Note: a. Setting DRC to o means no compression;
b. Setting DRC to low indicates minimum compression;
c. Setting DRC to high shows maximum compression.
2. Turn SELECT to browse options: o/low/high.
3. Press SELECT to conrm your preferred option, and it is done!

10
English
How to Cut Inactive Stations?
Note: By doing this, all inactive stations can be removed from the station list.
1. Press MENU→turn SELECT to < Cut >, press SELECT to conrm.
2. Turn SELECT to‘Yes’, press SELECT to conrm, then it is done!
[Cut? <No> Yes]
FM Mode
How to Change to FM Mode?
1. Press MODE to change it from DAB Mode.
2. For initial use, it will start at the beginning of the FM frequency range (87.50MHz). Otherwise, the FM
station that was last listened to will be selected.
3. To manually adjust frequency, while frequency is showing, turn SELECT to adjust the frequency by
0.05MHz per step.
4. To automatically scan active stations, while frequency is showing, simply press SELECT
11
English Snooze
How to View Station Information?
Note: If you want see the radio text of your station, or its program type, audio type, time, date etc., follow the
two steps below, it can be pretty easy!
While playing an FM program, press MENU→turn SELECT to ‘Display’→press SELECT to conrm, turn
SELECT to cycle through info options such as radio text (not available for all programs), program type,
multiple names, audio type, time and date, etc.
How to Have Only Strong Stations Available?
PBy default, FM scans stop at any available station. This may result in a poor signal-to-noise ratio (hiss) from
weak stations.
PTo change the scan settings to stop only at stations with good signal strength, please follow these 2 steps:
1. Press MENU, while your radio shows < Scan setting >, press SELECT to conrm.
2. Turn SELECT to browse options:‘All stations’ and‘Strong stations only’, and then press SELECT to
conrm‘Strong stations only’, and it is done!

12
English
How to Set Audio to‘Forced Mono’?
PBy default, all stereo stations are reproduced in stereo. For weak stations, this may result in a poor
signal-to-noise ratio (hiss).
PTo play weak stations in mono, please follow the 2 steps below:
1. Press MENU→turn SELECT to < Audio setting >, press SELECT to conrm.
2. Turn SELECT to browse options: ‘Stereo allowed’ and ‘Forced mono’, then press SELECT
to conrm ‘Forced mono’, and it is done!
Setting Station Presets (DAB and FM Mode)
Note: To carry out this setting, make sure no other setting is selected.
Your radio can store 20 DAB/DAB+ and 20 FM presets.
Shortcut for storing the current station to preset 1-4:
Press and hold one of PRESETS buttons 1-4 until it says‘Preset X stored’.
Normal way of storing the current station to preset 1-20:
1. Press and hold the PRESETS button until it says‘Preset Store < 1: (empty) >’,turn SELECT to your
preferred preset number, press SELECT to conrm, it will tell you ‘Preset XX stored’, and it is done!.

13
English Snooze
Selecting a Preset Station (DAB and FM Mode)
To select a stored DAB/DAB+ or FM station:
1. Enter corresponding mode by pressing MODE.
2. Press one of PRESETS buttons 1-3 to directly recall preset stations which are stored at 1-3, or
3. Press the PRESETS button to recall→turn SELECT to view preset station list, press SELECT to conrm,
and your radio will try to access the station you have selected immediately.
Volume Control
Adjust the radio volume to the desired level by turning the VOLUME knob on the right side of your radio
14
English
System setup
How to Set Sleep?
Note: You might want your radio to turn itself o after a certain time, and by following the steps below, it can be
easily achieved.
1. Press MENU→turn SELECT to < Sleep >, press SELECT to conrm.
2. Turn SELECT to dene the sleep period: o/15/30/45/60/90 minutes, press SELECT to conrm the one you prefer.
3. Want to check how much time has elapsed? Select < Sleep > option again, and then press SELECT.
4. The radio will automatically put itself into standby mode after reaching the sleep setting.
5. To continue enjoying your program, press STANDBY.
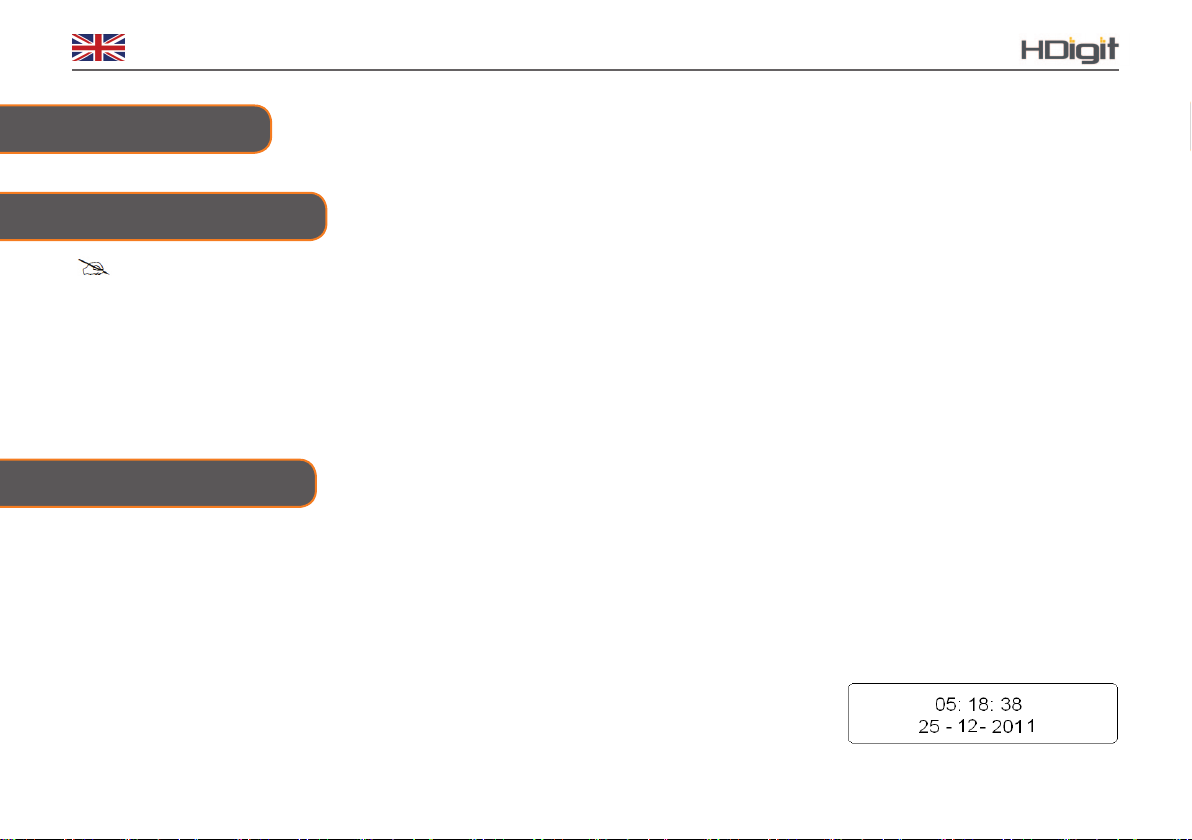
How to Set Time?
1. Press MENU→turn SELECT to < Time >, press SELECT to conrm.
2. Here, turn SELECT to cycle through a range of time settings:
P<Set time/date>: Manually set-up both Time and Date
P<Auto update>: ‘Update from DAB’ or ‘No update’
P<Set date format>:‘Set 24 hour’ or ‘Set 12 hour’
P<Set 12/24 hour format>: ‘DD-MM-YYYY’ or ‘MM-DD-YYYY
•To browse time setting
1. Simply press the STANDBY button.
15
English Snooze
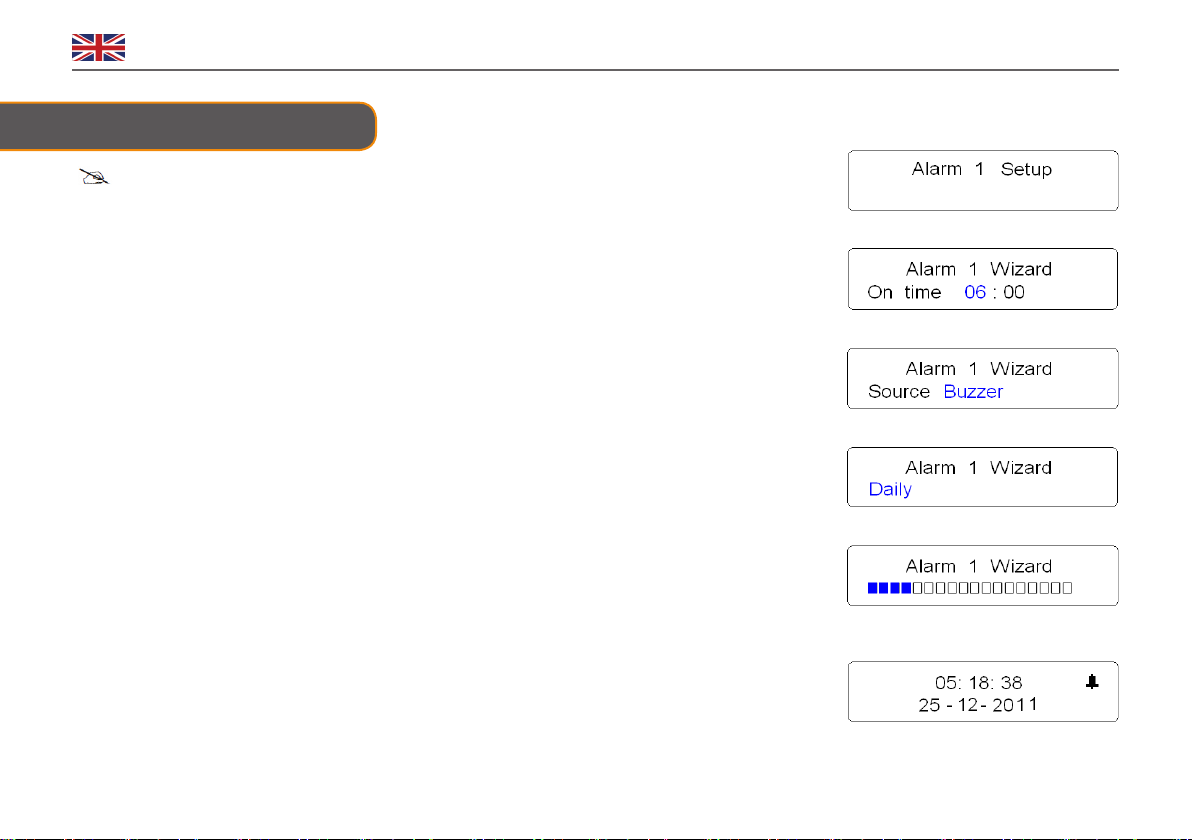
How to Set the Alarm?
Note: When setting the alarm, make sure to set the time rst.
1. Press MENU→turn SELECT to < Alarms >, press SELECT to conrm.
2. or use the direct key on the front panel. Turn SELECT to view ‘Alarm 1’ or ‘Alarm 2’, press
SELECT to conrm selection of alarm setting, here, let’s take setting alarm 1 as an example.
3. Turn SELECT to ‘Alarm On’, press SELECT to conrm.
4. Turn SELECT to change alarm hours, press SELECT to conrm, then turn SELECT to change
minutes, and press SELECT to conrm.
5. Now, when it comes to setting the alarm source, turn SELECT to view options: Buzzer/DAB/
FM, and press SELECT to conrm your preferred option.
6. Now, when it comes to setting the snooze time , turn SELECT to view options: 5/10/15/30
minutes, and press SELECT to conrm your preferred option.
7. Now, when it asks you to set alarm frequency, turn SELECT to view option: Daily/Weekdays/
Weekends, and press SELECT to conrm the option you desire.
8. Then turn SELECT to adjust alarm volume level, and then press SELECT to conrm.
PNow, the alarm setting is done!
16
English
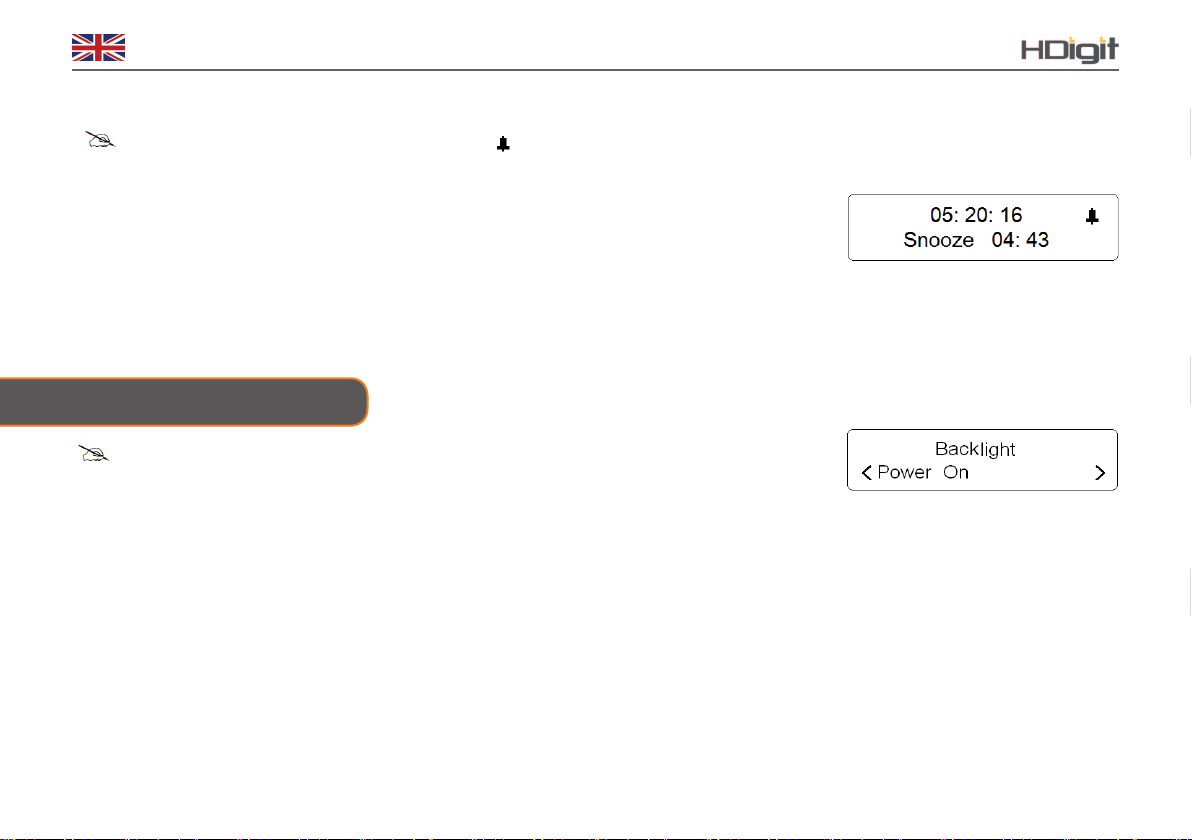
How to Set Backlight?
Note: Here, a high backlight level can allow you to very easily view the station information. Setting to
low backlight level can allow you to feel comfortable when you do not want the light bothering you.
For‘Power On’ condition
1. Press MENU→turn SELECT to < Backlight >, press SELECT to conrm.
2. When the cursor is pointing to ‘Power On’, press SELECT to conrm.
3. Turn SELECT to cycle through the options:‘High’,‘Medium’ and ‘Low’, then press SELECT to conrm
the one you want, setting to ‘High’ is recommending for ‘Power On’ condition.
For‘Standby’ condition
1. The principle setting for‘standby condition’ is the same as the‘power on condition’settings,
however, setting to ‘Low’ is recommended for‘Standby condition’.
• Play Snooze function: When the alarm sounds, touch the metal grill on top unit to postpone it.
Note: a. While in SNOOZE function,the alarm icon ( ) will be shown on screen , and shows how long
it will last, during this time, you also can press STANDBY to stop snooze and have your radio play.
b. After reached the SNOOZE time, it should sound again.
•To cancel Alarm temporarily: When the alarm sounds, press STANDBY to cancel it.
•To cancel Alarm permanently: Besides performing a ‘Factory Reset’, the alternative way is:
Refer to steps 1-3 above on setting the alarm, enter your target alarm setting mode, then change
alarm status from‘On’ to ‘OFF’ , and proceed step by step until your setting is saved.
17
English Snooze
How to Set Language?
The default language is English. To change, please follow the 2 steps below:
1. Press MENU→turn SELECT to < Language >, press SELECT to conrm.
2. Turn SELECT to your selected language option, and then press SELECT to conrm.
How to Factory Reset?
Sometimes, you might want delete all the settings your radio currently has, and to have your radio
return to its factory default setting mode, do the following steps, it’s pretty easy!
1. Press MENU→turn SELECT to < Factory Reset >, press SELECT to conrm.
2. Turn SELECT to < Yes >, press SELECT to conrm.
How to Get SW Version?
Note: The help desk may ask you for the software version of your product.
1. Press MENU→turn SELECT to < SW version >, press SELECT to conrm.

18
English
Specications
Specications:
Power Requirements:
Frequency Range
Rated Output Power:
Speaker:
Headphone Jack:
Dimensions:
This symbol on the product or in the instructions means that your electrical and electronic equipment should be disposed at the end
of its life separately from your household waste. There are separate collection systems for recycling in the EU.
For more information, please contact your local authority or the retailer where you purchased the product.
DAB/DAB+FM
AC/DC Adapter: Input: 100-240Vac, 50-60Hz Output: 9V/600mA
(FM) 87.5-108MHz (DAB/DAB+) 174 – 240MHz
2.5Wrms x 2
4ohm
32ohm
200 x 63 x 132mm

19
English Snooze

www.hdigit.ch
Instruction Manual
DAB/DAB+/FM
Table of contents
Languages:
Other HDigit Radio manuals


