10
Inactive Standby
You can set the radio to change to standby mode after a preselected period of time with this
feature. Once selected from the system options you will have the following options:
OFF >2>4>5>6 (Hours)
Cycle through the options with the tune +/- buttons and press the dial to select an op-
tion. Each number value is a period in hours. The radio will continue to play for the selected
duration until you select ‘OFF’. An asterisk in the top right corner will indicate which is the
currently selected option.
Language
With this option you can choose what language the radio uses to display the menu options in.
Choose from the following options:
English>Français>Deutsch>Italiano> Español
Cycle through the options using the +/- buttons and press the dial to select an option. The
asterisk in the top right corner indicates current selection.
Reset
Selecting this option from the ‘System’ menu will reset the radio and clear any presets saved.
Use this option if the DAB signal is still poor after re-scanning for stations or any possible
faults.
SWVer.
This will display the current software version in use.
DAB/FM Preset
Storing A Preset
Once a station has been tuned in, if you want to save it in the quick preset bank (Button 1,2,
3,4 or 5 which can be found on the top of the device), press and hold the preferred button for
3 seconds until the ‘stored message’ is displayed on the LCD
If you need to save more than 5 presets, press and hold the ‘Preset* button for 3 seconds,
then use the ,Tune+/-, buttons to cycle through the available preset slots. Once you have
found the desired slot, press the ‘Select/Snooze’ button to save the station to that preset
number.
The radio has a total of 20 preset slots (10 for DAB and 10 for FM). This includes the 5
‘Quick Access’ buttons.
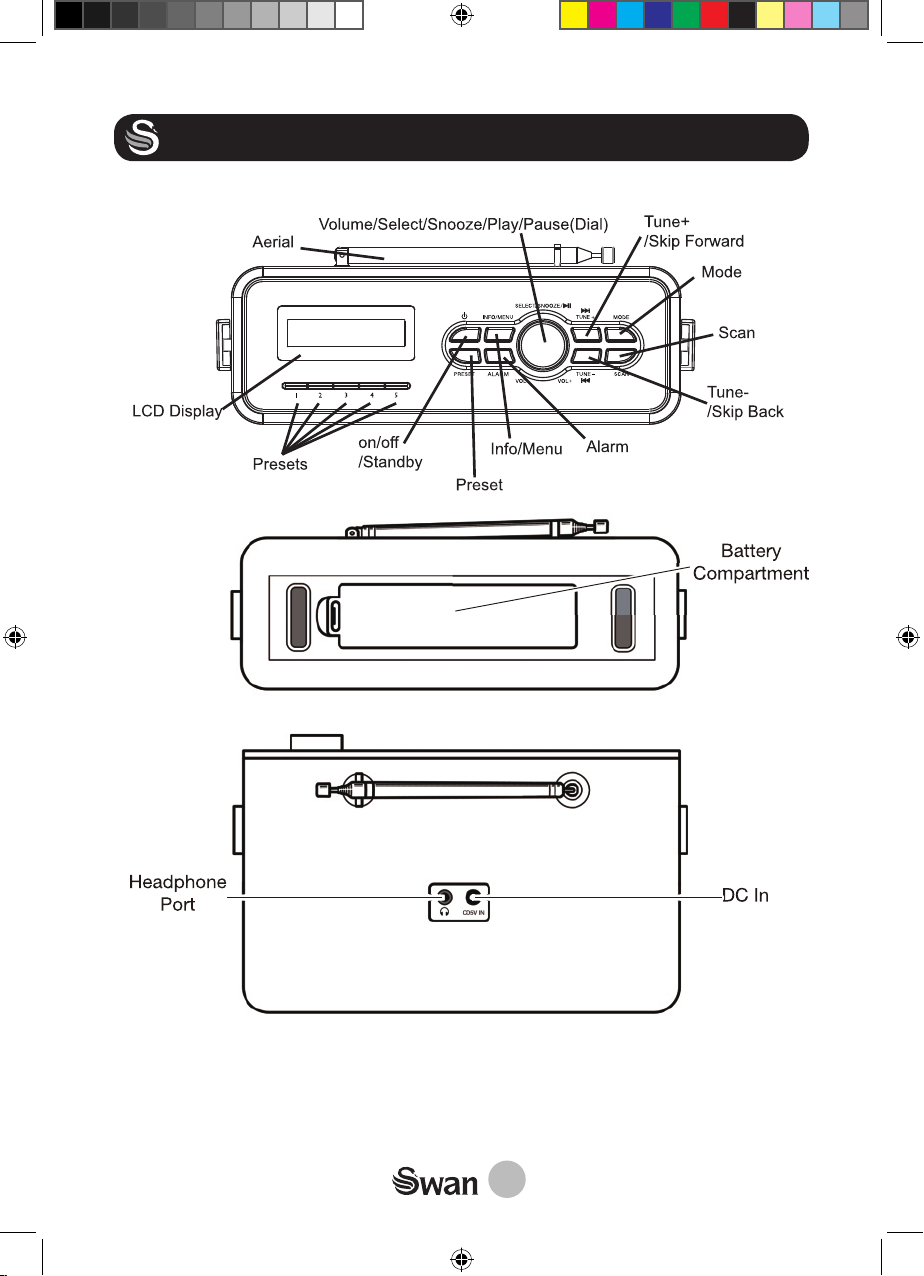
GET TO KNOW YOUR RADIO!
SRA43010_IM.indd 10 03/08/2020 09:15