HDigit FM / Internet Radio User manual

1
English
FM / Internet Radio with Audio Media Streaming and AUX IN
Instruction Manual
2
English
The lightning ash with arrowhead symbol within an
equilateral triangle is intended to alert the user to the
presence of uninsulated “dangerous voltage” within
the product’s enclosure that may be of sufcient
magnitude to constitute a risk of electric shock to
persons.
The exclamation point within an equilateral
triangle is intended to alert the user to
the presence of important operating and
maintenance (servicing) instructions in the
literature accompanying the appliance.
WARNING: TO REDUCE THE RISK OF
FIRE OR ELECTRIC SHOCK, DO NOT
EXPOSE THIS APPLIANCE TO RAIN OR
MOISTURE.
IMPORTANT SAFETY INSTRUCTIONS
To reduce the risk of electrical shock, re, etc:
1. Read these instructions.
2. Keep these Instructions.
3. Heed all Warnings.
4. Follow all instructions.
5. Do not use this apparatus near water.
6. Clean only with dry cloth. For stubborn stains, use a soft cloth
dampened with a weak solution of mild detergent and water.
Dry the apparatus immediately afterwards with a clean cloth.
Do not use abrasive cloths, thinners, alcohol, or other chemical
solvents, because they may damage the nish or remove the
panel lettering.
7.Do not block any ventilation openings. The ventilation shall
not be impeded by covering the ventilation openings with items,
such as newspapers, tablecloths, curtains, etc.
8.Do not install near any heat source such as radiators, heat
registers, stoves, or other apparatus (including ampliers) that
produce heat.

3
English Orbiter
9. Do not defeat the safety purpose of the polarized or
grounding - type plug. a polarized plug has two blades with
one wider than the other. A grounding type plug has two
blades and a third grounding prong. The wide blade or the
third prong are provided for your safety. If the provided
plug does not t into your outlet, consult an electrician for
replacement of the obsolete outlet.
10. Protect the power cord from being walked on or pinched
particularly at plugs, convenience receptacles, and the point
where they exit from the apparatus. If the power cord is
damaged, it must be repaired by a qualied repairer.
11. Only use attachments/accessories specied by the manu-
facturer.
12. Use only with the cart, stand, tripod, bracket or table
specied by the manufacturer, or sold with the apparatus.
When a cart is used, use caution when moving the cart/appa-
ratus combination to avoid injury from tip-over.
13. Unplug this apparatus during lightning storms or when
unused for long periods of time.
14. Refer all servicing to qualied service personnel.
Servicing is required when the apparatus has been damaged
in any way, such as when the power-supply cord or plug is
damaged, liquid has been spilled or objects have fallen into
the apparatus, the apparatus has been exposed to rain or
moisture, does not operate normally, or has been dropped.
15. The apparatus shall not be exposed to dripping or
splashing and no objects lled with liquids, such as vases,
shall be placed on the apparatus.
16. Please read Rating Labels on the back of the Sender and
Receiver for power input and other safety information.

4
English
Safety Information
Package Content
Internet Radio Quick start Guide
Front Controls Overview
Back Controls Overview
Connecting to Network
Shift to Wired Network
Choosing a Station
Searching and Adding Radio Stations
Local Stations
Local Radio Setup
Station Updates
Setting Station Preset as My Favorite
Selecting a Favorite Station
My mediaU
Music Player Mode
FM Mode
AUX Mode
Conguration
Network Settings
Setting Clock
Setting Alarm
Language
Dimmer
Sleep Timer
Buer
Weather
DLNA Setup
Set Equaliser
Software Updates
Reset to Default
Changing Volume
General Operations
Browse Weather Information
Browse Financial Information
Get Radio Version and Mac/IP Address
Troubleshooting
Specication
Contents
2
5
6
7
8
9
10
12
12
13
13
14
14
14
15
16
17
18
19
19
20
20
22
22
22
23
23
24
24
24
24
25
25
25
25
25
26
27
5
English Orbiter
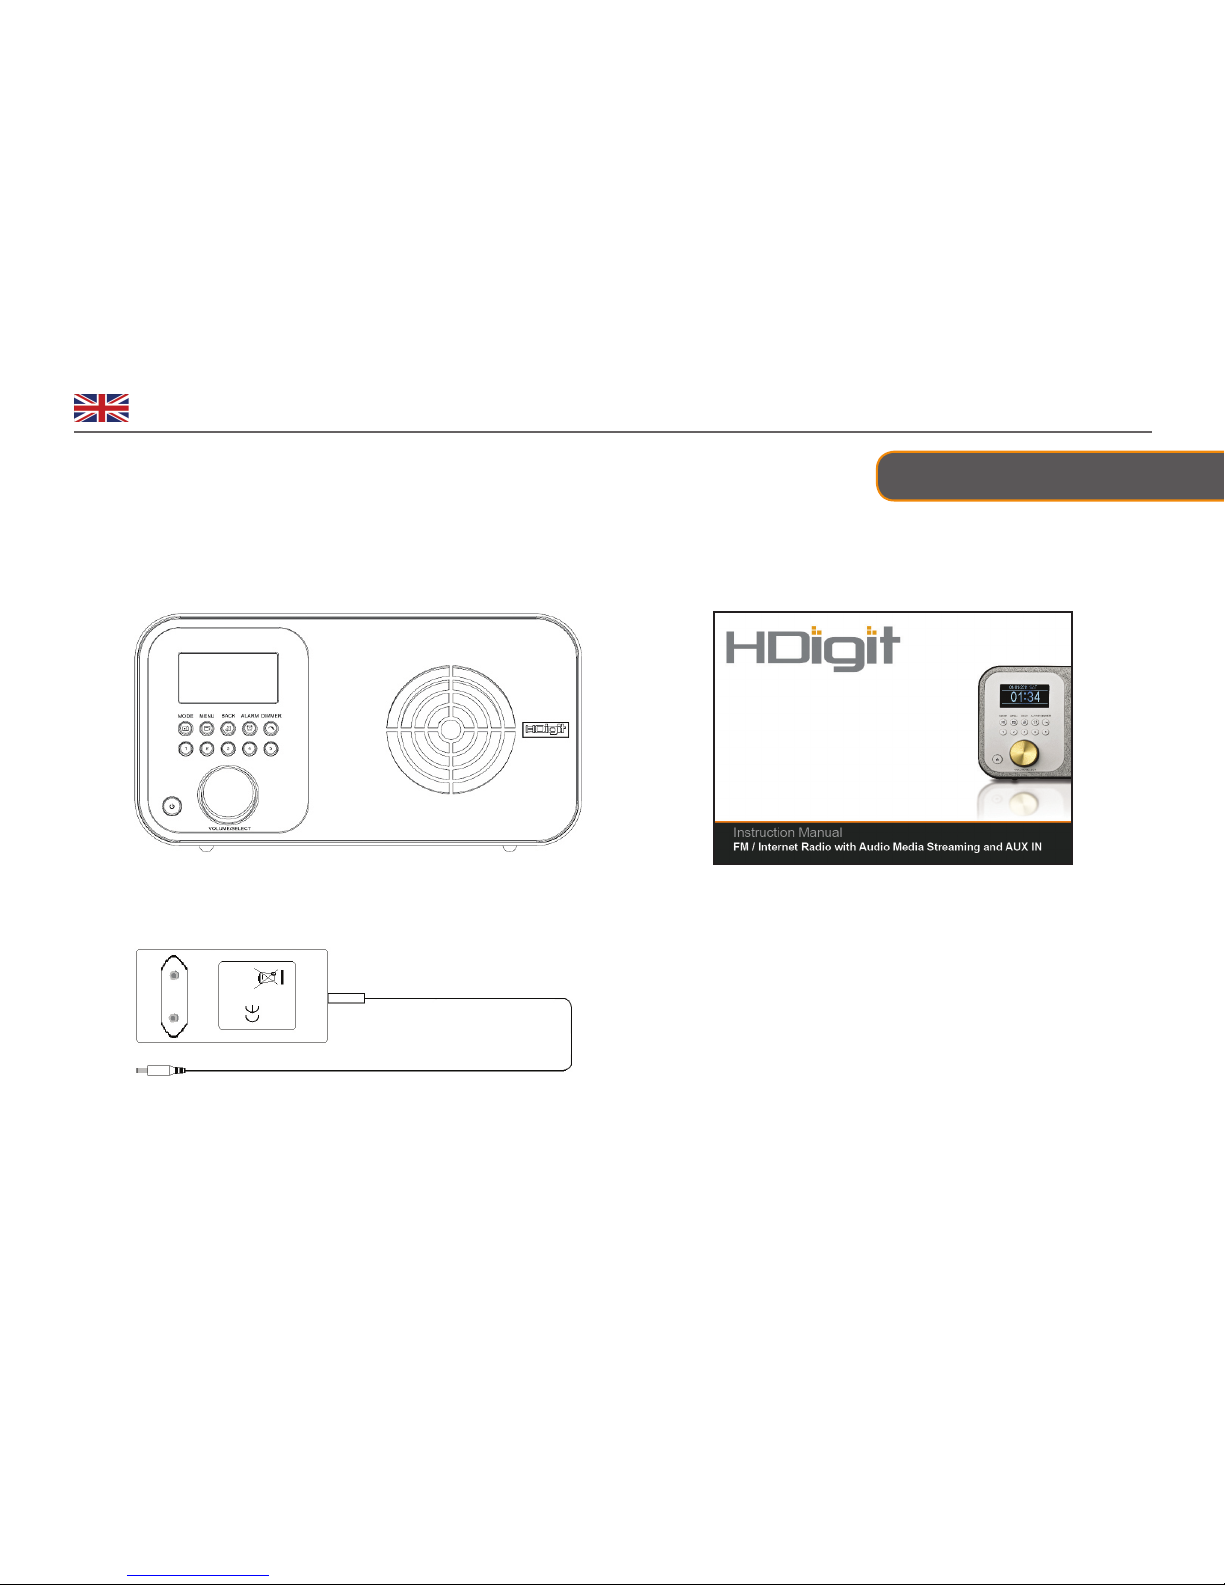
Package Contents
Main Unit
Adapter
Instruction Manual

6
English
Internet Radio Quick start Guide
What you need before you can use your Internet radio
Thanks for your purchase! We feel sure that it will provide you with years of enjoyment and reliable service.
LAN Setting:
• Make sure the Internet facility is ready and the network setting is available for LAN (ADSL or Cable Modems are highly recommended).
• To nd the Radio’s LAN MAC address, Please do as follows:
1.Press MENU, and then rotate the to <Information Center>, press to conrm.
2.Rotate the to ‘System Information’, press to conrm.
3.Rotate the to ‘Wired Info’, press to conrm.
Wireless LAN Setting:
• A broadband Internet connection.
• A wireless access point (Wi-Fi) connected to your broadband Internet, preferably via a router.
• If your wireless network is congured to use Wired Equivalent Privacy (WEP) or Wi-Fi Protected Access (WPA) data encryption then you
need to know the WEP or WPA code so you can get the Internet Radio to communicate with the network.
• If your wireless network is congured for reliable stations, you will need to enter the Radio’s MAC address into your wireless access point. To
nd the Radio’s MAC address, use menu items as follows:
1.Press MENU, and then rotate the Scroll knob to <Information Center>, press to conrm.
2.Rotate the to ‘System Information’, press to conrm.
3.Rotate the to ‘Wireless Info’, press to conrm.
Before you continue, make sure that your wireless access point is powered up and connected to your broadband Internet, or your LAN cable
is connected. To get this part of the system to work, reading the instructions supplied on wireless access point and LAN connection is highly
recommended!

7
English Orbiter
Internet and FM mode use only:
Press and hold one of the preset buttons
1-5 to save Preset station.
Press one of the preset buttons 1-5 to load Preset station.
Press to enter alarm settings.
MODE
MENU
BACK
ALARM
DIMMER
PRESET 1-5
VOLUME SELECT
Front Controls Overview
Display Screen
Alarm Dimmer
Mode Menu Back
Preset Buttons 1-5
Standby/On
Volume/Select Knob Infrared receive point Loudspeaker
Press to shift to another mode.
Press to turn on/o Radio When alarm sounds, press to turn alarm o
Press for Main menu and other options. FM mode: when
frequency is displayed, press and hold to enter
“TURN TO TURN” for manual tuning of frequency.
Press to go back to previous item.
Press to enter dimmer settings.
a. Turn to browse options, press to conrm .
b. FM mode: when frequency is displayed, press to search active station
c. When alarm sounds, press it to postpone alarm.
Note: in the following chapters, this knob shall be referred to as ---- the scroll knob.

8
English
Back Controls Overview
Power Cord socket:
AUX IN socket:
Headphone socket:
LAN socket:
R/L audio socket:
For power adapter connection
Connects to the external audio device
A 3.5mm Headphone Socket used for either headphones or an earpiece
Inserting a plug will automatically mute the internal loudspeaker
Unique design for LAN cable

9
English Orbiter
Step 1 - Power up Radio
Firstly, connect your Internet Radio adapter and ensure the
Power LED lights up. In use, the Radio can be
switched on or o by pressing .
Connecting to Network
Step 2 – Access to Network
→
In some cases, it may nd more than one network. Rotate the Scroll knob to cycle through the name
list, press this knob when the name of your favor network is displayed.
If your network is not congured to request a password (WEP/WPA), the radio will connect to the
network and display:
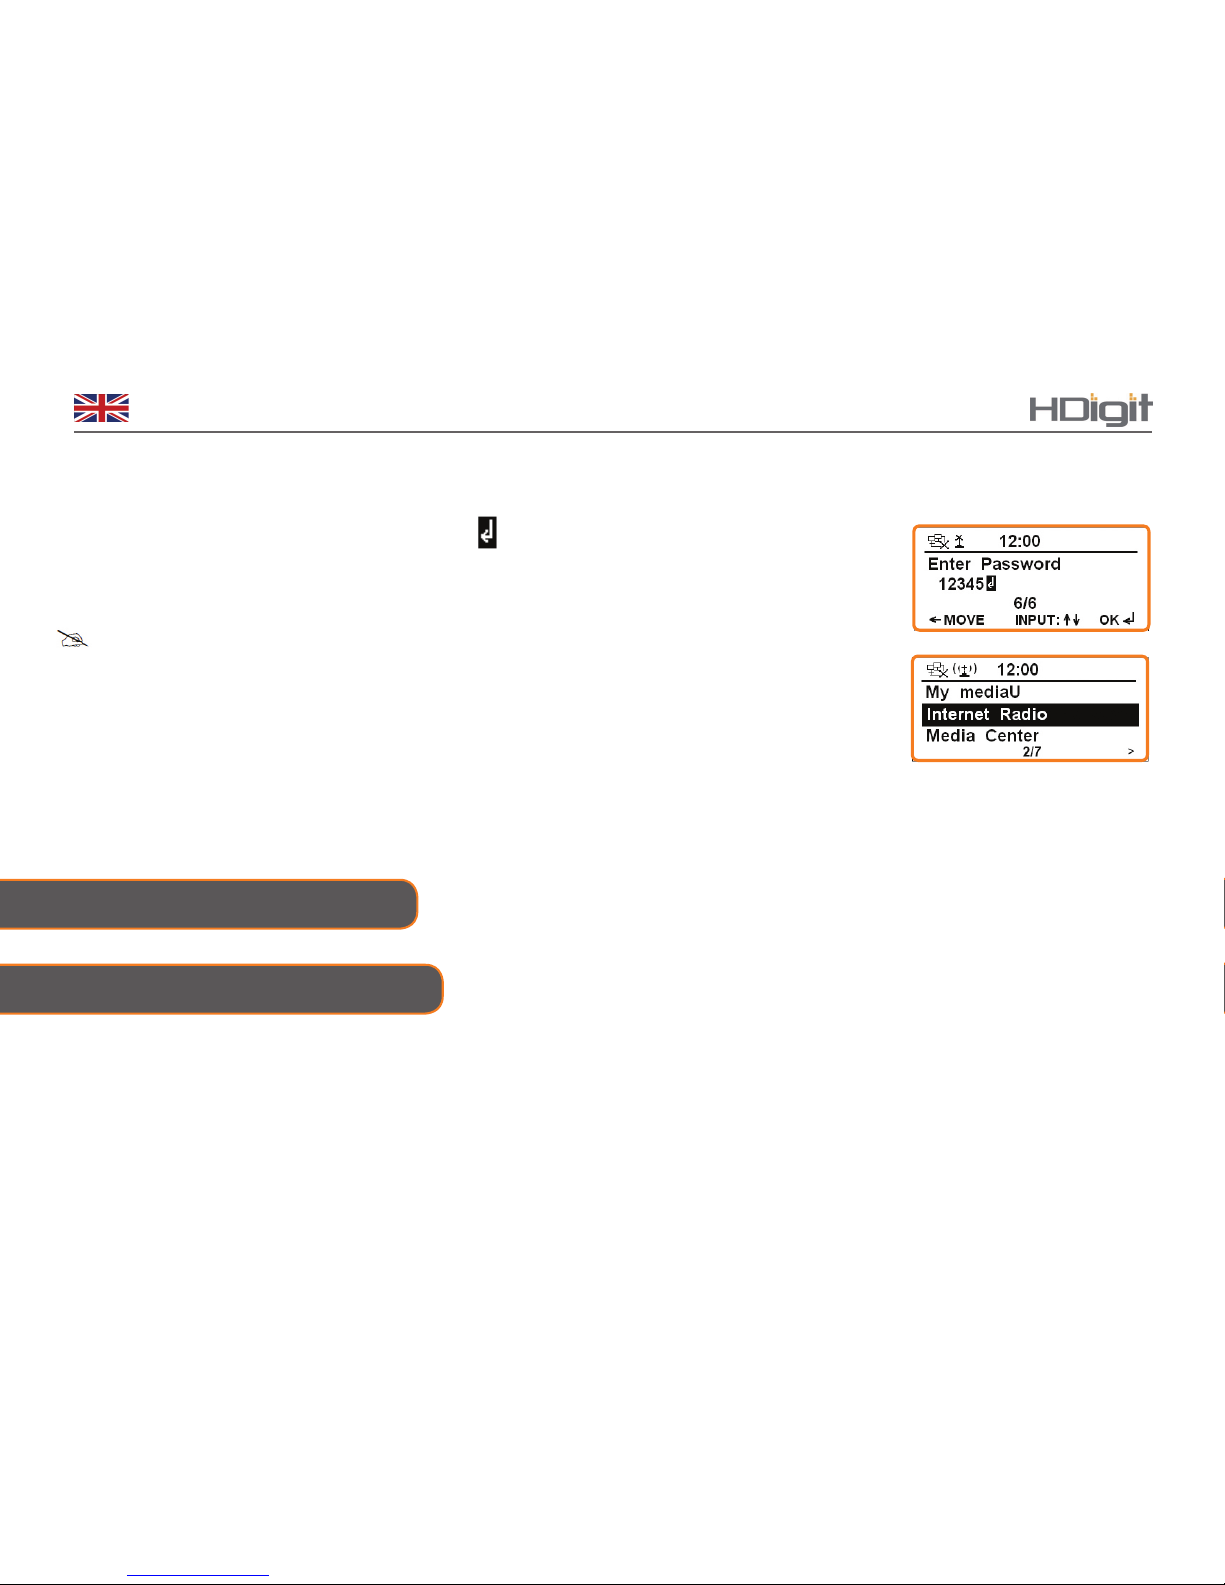
If a WEP/WPA key (password) is required, the Radio will display the following:
Rotate the Scroll knob to your favour Router, press to conrm.
Your radio will ask you to input the WEP/WPA code and display the password entry screen.
a. Rotate the Scroll knob to cycle through the alphanumeric character list, when your desired charac-
ter is displayed, press this knob to select and then choose the next character.
Note: if your password is a serial of number, turning the Scroll knob counterclockwise is a shortcut to
select it.
10
English
b. If you nd the wrong character has being input, press BACK to return to that character.
c. After the input is done, when the cursor points to , press the Scroll knob to try accessing
the Internet.
It should now successfully connect to your network.
Note:a. WEP/WPA pass codes are case-sensitive.
b. Radio will automatically save the WEP/WPA code, therefore, there is no need to re-enter unless you
perform a <Reset to Default>.
Or, if it fails to access, please do the following:
A. Check your Router, see if it is working normally or not.
B. Relocating your radio to a stronger signal position is highly recommended!
C. Make sure your password is input correctly.
Shift to Wired Network
Step 1 – Choose LAN Setting
Note: make sure the LAN cable is already connected to the LAN socket.
• To enter the LAN Setting, press MENU →< Conguration > →< Network > → < Manual Conguration >
→< Wired >→ < DHCP (On) > →Connecting to Network…, after that, it will say connected.
11
English Orbiter
• If your radio fails to access the network, please do the following:
a. Check your Router, see if it is working normally or not.
b. Check your LAN cable, make sure it hasn’t been damaged,
c. Make sure the port of the cable inserted into the LAN socket is rmly connected.
Step 2 – Enter Internet Radio mode
Step3 – Shift to Wireless Network
Continue the steps above, after your radio has access to the wired network, press MENU →
< Internet radio >, press the SCROLL knob to conrm.
Or, press MODE repeatedly until < Internet Radio > is displayed, stop pressing.
Note: to make this order work, you can either do a ‘Reset to Default’, or follow the steps below:
1. Press MENU → < Conguration > →< Network > → < Manual Conguration > → < Wireless >, press
the SCROLL knob to conrm.
DHCP (On) and DHCP (O)
Input your assigned SSID
You might want to delete your current router setting, follow this path as your radio demonstrated.
DHCP:
Enter SSID:
Manage:
2. When the cursor points to < DHCP > →DHCP (On), press the SCROLL knob to conrm, and then step by step to access
the wireless network. Now, setting to wireless is OK!

12
English
After your radio is connected to the network, you are ready to select a station.
1. When the cursor is pointing to < Internet Radio >, press
the Scroll knob to conrm.
2. Rotate the Scroll knob to <Radio station/Music>,
ress to conrm.
Note: There are seven options available for selecting a station: Global Top 20, Genre, Country/Location,
Australia, Canada, United Kingdom and USA.
3. Rotate the Scroll knob to your selected option, press to conrm, and then step by step to your favorite
Choosing a Station
Searching and Adding Radio Stations
→
1. Press MENU → ‘Internet Radio’ → ‘Service’.
2. Press the Scroll knob to conrm, rotate this knob to the option you want, press to conrm.

13
English Orbiter
Local stations
Local Radio Setup
Note: make sure your radio is already connected to the network.
1. Press MENU →‘Internet Radio’ →‘Local Radio’, press the SCROLL knob to conrm.
Note: ‘Local Radio’ can be changed according to your current location, for instance, it can be local US, or local UK, etc. Simply, it’s a
very easy way for you to nd your local programs.
2. Turn the SCROLL knob to your favourite item, press it to conrm, and then step to step to the program you desire.
Manual Setup
1. Press MENU → < Conguration > → < Local Radio Setup > → < Manual Setup >, press the SCROLL knob to
conrm.
2. Follow your radio’s instructions to choose the region and the country you like in turn, your radio will ask ‘Save as local
Radio’, press the SCROLL knob to conrm.
Auto Detect
Note: this setting is designed for detecting the local radio program you have set as above.
1. Refer to above Manual Setup step1, turn the SCROLL knob to ‘Auto Detect’, press to conrm.

14
English
Occasionally, your radio will show you that it is receiving an updated station list. It does it automatically and periodically,
ensuring your radio always has the latest station directory on-board.
Note: My Favorite is unique designed for storing your favorite Internet programsLocation, Australia, Canada, United Kingdom
and USA.
To store the current station:
When your desired Internet program is playing, press and hold one of PRESET 1-5 for 2 sec., until is displayed.
Station Updates
Setting Station Preset as My Favorite
Selecting a Favorite Station
Press MENU →‘Internet Radio’ →‘My Favorite’, press to conrm, and then select your favourite stations.
You can also do this by following the 2 steps below:
1. If it isn’t in Internet mode, press MODE to convert to it.
2. Press the relative PRESET 1-5 to your favorite, in order to avoid overwriting the current station, make sure you do not
hold PRESET 1-5 down.

15
English Orbiter
My mediaU
My mediaU enables synchronization of your radio program with the web, before executing this order, you need to
follow the 4 steps below:
1. Visit www.mediayou.net, click ‘join now’ to create a new account.
Note: please save your registered ‘E-mail address’ and ‘Password’.
2. Using you registered account to log in, click the column of ‘my mediaU’, and then add programs to ‘My Favorite
Station’, ‘Favourite Location/Genre’ and ‘My Local Station (City)’, etc.
3. Click the column of ‘Device’ on this web, and then input your radio Device name and Serial Number, do not forget to
click the Save button to save it.
Note: a. Device name is up to you, you can name it whatever you like.
b. Serial Number is radio’s Mac address, to obtain it, please refer to Page 3.
4. Turn o your radio, letting it reconnect to the web is a must.
5. Turn on your radio by pressing . Press MENU button on your radio, and then turn the Scroll knob to < My mediaU >.
6. Press the Scroll knob to conrm.
7. Rotate the Scroll knob to your selected option, press to conrm, and then
step by step to your favorite program.
16
English
Music Player Mode
Setting up a Music Server
P In order for your radio play music les from a computer, the computer must be set up to share les or media.
P UPnP media sharing allows devices like this radio to play music from a shared media library, navigating through tag
menus such as Artist, Album or Genre.
P If you are running a suitable server system such as a PC with Windows Media Player 10 or later (WMP), and your music
library is well-tagged, then it is recommended to use media sharing.
P Only the UPnP server needs to be set up.
Sharing Media with Windows Media Player
The most common UPnP server is Windows Media Player 10 or later. Alternatively, other UPnP platforms and servers may be
used. To set up WMP for media sharing, perform the following steps:
1. Ensure that the PC is connected to the network.
2. Ensure that the radio is powered on and connected to the same network.
3. In WMP, add to the media library the audio les and folders you want to share
with your radio (Library > Add to Library…).
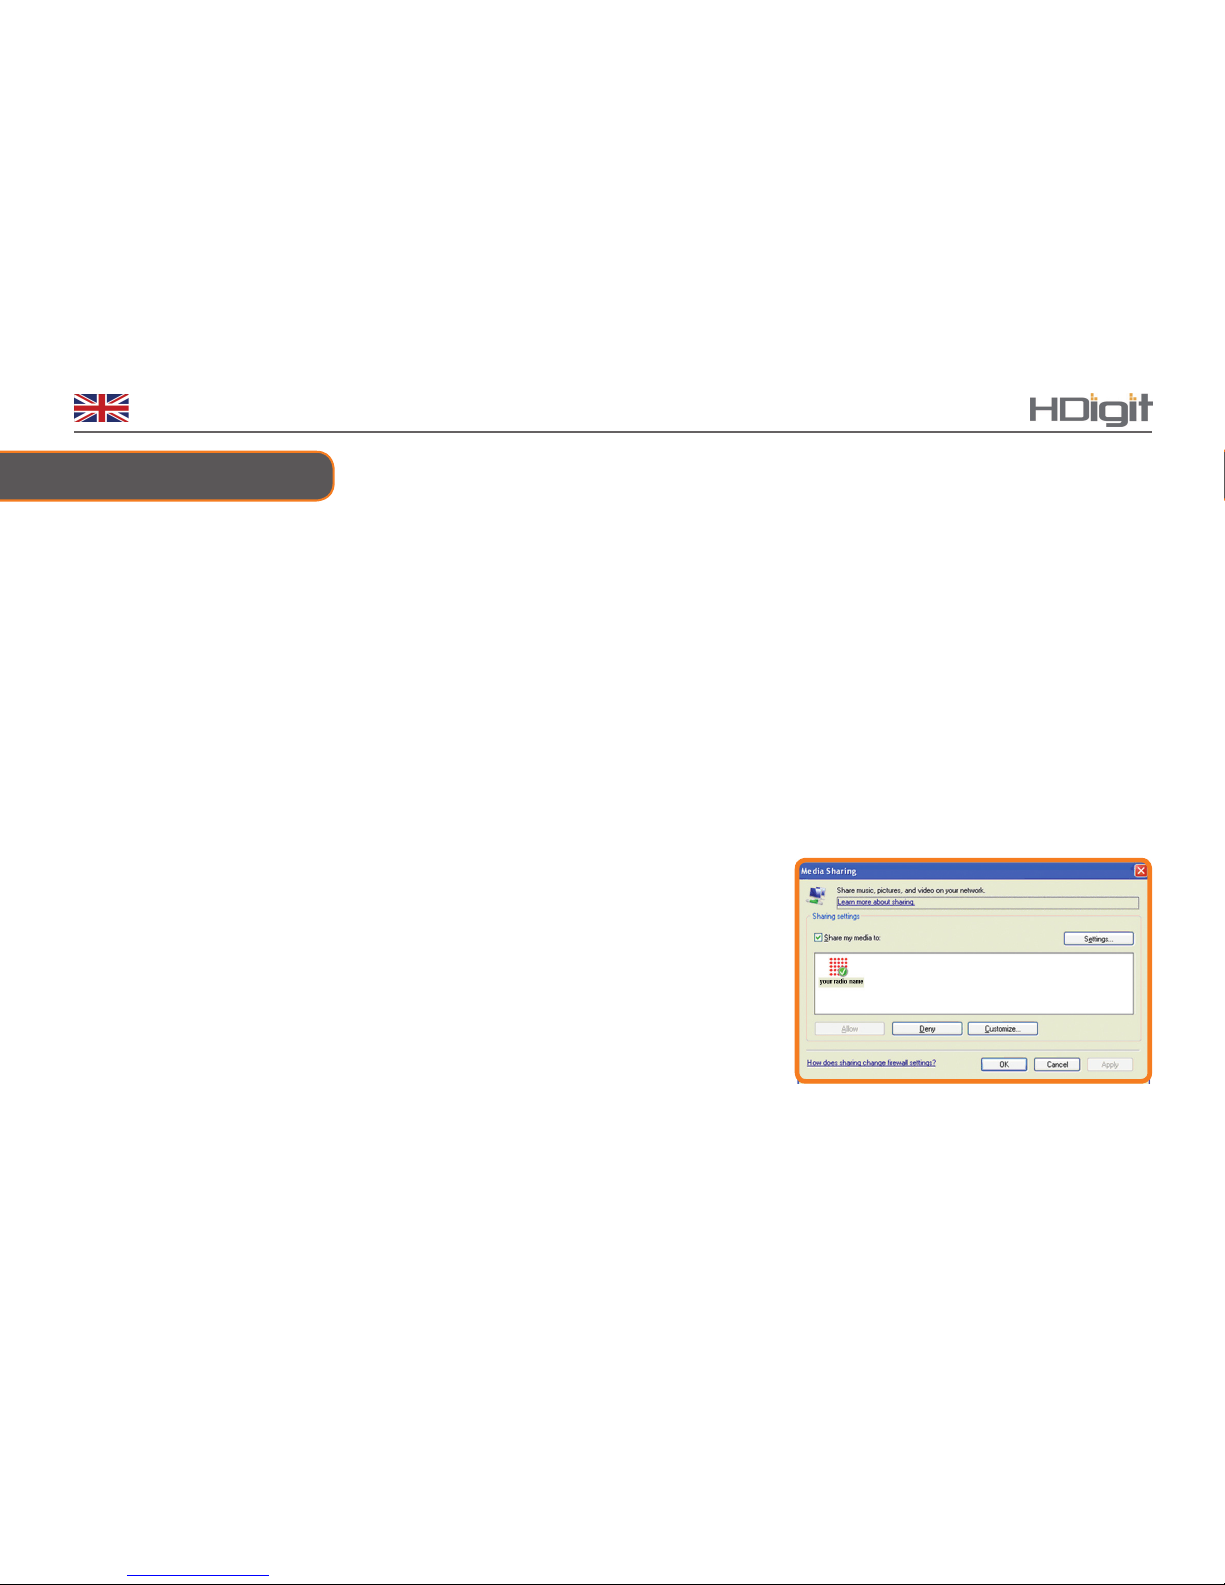
4. In WMP, enable media sharing (Library > Media sharing…).
5. Make sure that the radio has access to the shared media by selecting it and
clicking Allow. You can also set a name for the shared media in Settings…
Click OK to close the dialogue boxes.
6. The PC is now ready to stream the music from the radio. The WMP UPnP service runs in the background; there is no need to
start WMP explicitly.
17
English Orbiter
FM Mode
PLAY SHARED MEDIA
1. Switch your radio on and press MODE repeatedly until <UPnP> is displayed, or alternatively,
Press MENU →< Media Center > →< UPnP>, press the Scroll knob to conrm.
2. Rotate the Scroll knob to your favour UPnP option, press to conrm, and then step by step to the program you like.
General Operation
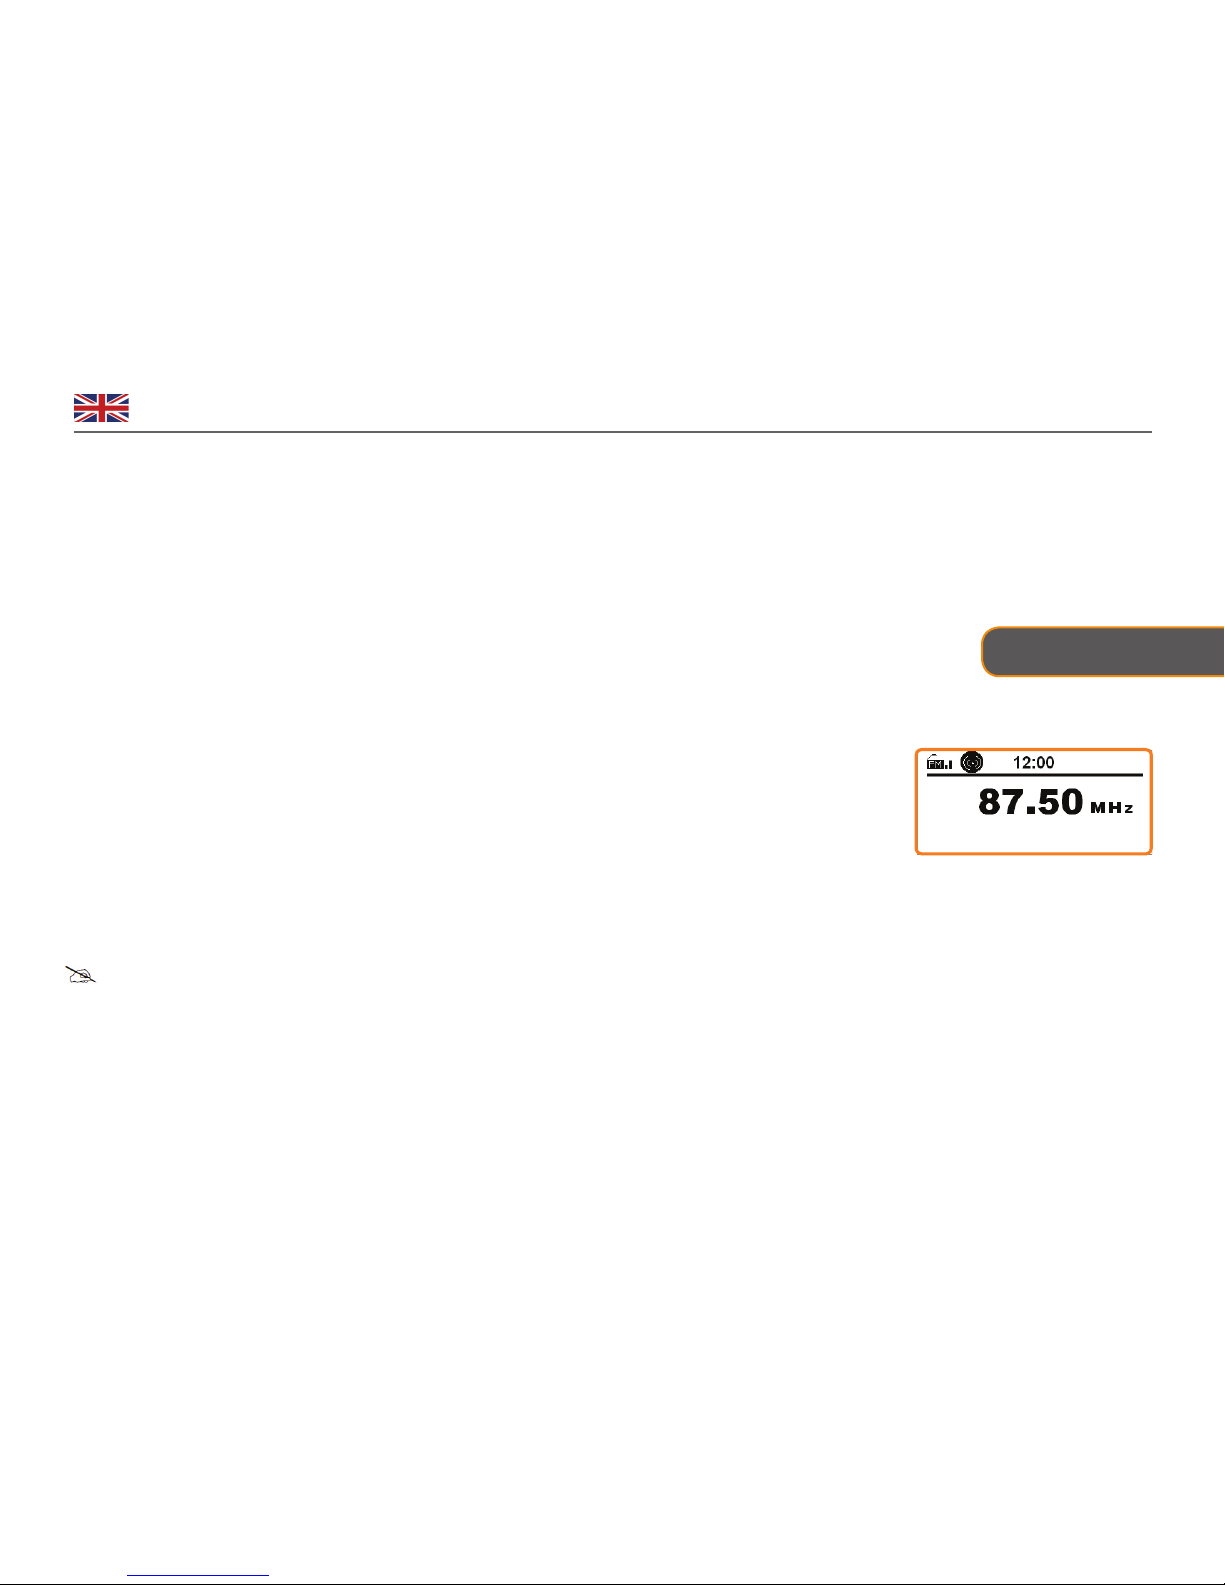
1. Press MODE to convert the radio from Internet mode into FM mode.
For initial use, it will start at the beginning of the FM frequency range (87.50MHz). Otherwise, the
last FM station listened to will be selected.
3. To search for an FM program automatically, when frequency is displayed, simply press the
SCROLL knob, the unit will display the frequency changing until it stops on the next station.
4. To search for an FM program manually, when frequency is displayed, press and hold MENU till
your radio says ‘TURN TO TURN’, and then turn the SCROLL knob, the frequency will be changed
0.05MHz per step accordingly.
Note: for some FM stations, there is RDS (Radio Data System) available. RDS is a communications
protocol standard for embedding small amounts of digital information in conventional FM radio
broadcasts.

18
English
1. It can be activated by pressing MODE repeatedly until <AUX> is displayed, stop pressing.
2. Connect one end of the audio cable to the headphone (or auxiliary out) socket of your
source device, connect the other end to AUX IN socket on the rear of your radio.
3. To gain optimal volume levels, adjusting the output volume level on both the source device and radio itself is
recommended. Then your radio will transform into a high quality digital audio speaker system.
Note: AUX enables quick and easy connection to an MP3 player or other external sound sources.
AUX Mode
Station Preset
Note: your radio can also provide you with 5 preset stations.
To store the current station:
While playing your desired FM program, press and hold one of the PRESET 1-5 for 2 sec., until the preset number shows up in front of
frequency.
Select a Preset
1. If it isn’t in FM mode, press MODE to convert to it.
2. Press the relevant PRESET 1-5 for your favorite, in order to avoid overwriting current station, make sure you do not hold the relevant
PRESET 1-5 down.
How to perform Audio Setting?
P By default, all stereo stations are reproduced in stereo. For weak stations, this may result in a poor signal-to-noise ratio (hiss).
P To play weak stations in mono, follow below steps:
1. Press MENU → < Conguration > → < FM Setup > → < Mode >, press it to conrm.
2. Turn the SCROLL knob to < Set Mono >, press it to conrm.

19
English Orbiter
Conguration
Network Settings
Note: this setting allows you:
a. Wired Network Conguration →Enable (access to wired network) /Disable
b. Wireless Network IP Properties →Enable (access to wireless network →Router) /Disable
c. Manual Conguration: Wired/Wireless.
d. Check Network when Power ON → Enable/Disable
1. Press MENU, and then rotate the Scroll knob to
<Conguration> press to conrm.
2. Rotate the Scroll knob to <Network>, press to conrm.
3. Rotate the Scroll knob to the option you wanted, press to conrm, then step by step to set it.
→
→

20
English
Setting Clock
Setting Alarm
1. Press MENU, and then rotate the Scroll knob to <Conguration>, press to conrm.
2. Rotate the Scroll knob to <Date &Time>, press to conrm.
Note: before you set Date and time, you also can do the following items rst if you like.
a. Set Time Format →12/24 Hour
b. Set Date Format →1. YY/MM/DD 2. DD/MM/YY 3. MM/DD/YY
c. Daylight Saving Time (DST) →On/O
d. View GMT time
3. When the cursor is pointing to <Set Date and Time>, press to conrm.
1. Press ALARM to enter alarm setting, or press MENU →< Conguration >
→ <Alarm>, press Scroll knob to conrm.
2. Rotate Scroll knob to <Alarm Volume>, press to conrm.
3. Rotate Scroll knob to adjust alarm volume level, press to conrm.
4. Rotate Scroll knob to choose one alarm, press to conrm, it will ask you to set alarm status
to turn on or o.
5. Rotate Scroll knob to ‘Turn on’, press to conrm, the alarm icon is displayed, and cong-
Other manuals for FM / Internet Radio
1
Table of contents
Other HDigit Radio manuals


