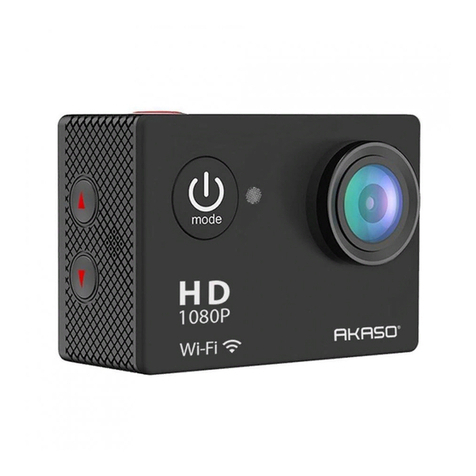
HDKing F02SA User manual

User Manual
Model No.: F02SA
V2.2

Hello
Thank you for purchasing this camera. Please read the manual carefully before using,
and keep it in a safe place for future reference.
The screenshots and illustrations used in this manual are to explain the operation of
this camera in more detail and intuitively.
Operation Guide
This camera comes with built-in 64GB EMMC (32GB/128GB optional), no need to
insert an extra Micro SD card before using.
Product Features
> Real 4K video resolution
> Multiple shooting modes, such as Timelapse, Slow motion, Burst, Timer etc.
> Back 2” touch screen + Front 1.4”LCD screen
> Support Gyro stabilization
> Support 2.4G remote controller
> Support Wi-Fi connection
> Built-in 3.7V/1950mAh Li-ion battery
> Support Voice control
> Support 2 LED flashlight
Product Diagram

1. OK /Confirm Button 2. Mode Button 3. Power Button
4. Microphone 5. Microphone for Voice control 6. Lens
7. Speaker 8. Back screen 9. Front screen
10. Fill light 11. Magnetic interface 12. Working indicator
13.Charging indicator 14. Reset 15.1/4”Tripod mount screw
Indicator
Working
Indicator
1. LED flashing while video recording; LED flash once while
taking a single photo
2. LED off when camera turns off
Charging
Indicator
1. LED is on during charging
2. LED is off after battery fully charged
Button Instruction

Power Button
1. Press and hold the Power button to turn on the camera.
2. When camera is on, short press Power button to turn on
Wi-Fi.
3. When Wi-Fi is on, short press Power button to turn off Wi-Fi.
4. When in setting mode or playback mode, short press Power
button to scroll down the menu.
5. When camera is on, press and hold the Power button to turn
off the camera.
6. When camera is off,
1)Short press the Power Button once: Slightly light
2)Short press the Power Button twice: High Bright
3)Short press the Power Button three times: High light
flashing
4)Short press the Power button four times: Turn off the
fill light.
M (Mode) Button
1. In real-time preview interface of back screen(2”), short press
M button to switch between Video mode - Picture Mode -
Playback - Video Setup - Photo Setup.
2.Press and hold M button around 3seconds to switch between
front screen (1.4”) and back screen (2”).
3.In real-time preview interface of front screen(1.4”), short press
M button to switch between video and picture modes.
OK Button
1. When in video mode:
1)Short press OK button to start recording, press again to
stop recording;
2)Press and hold OK button to enter into video modes setting
menu, including Normal, Seamless, V-Timelapse,
SlowMotion, FastMotion and Wi-Fi
2. When in picture mode:
1)Short press OK button to take a picture;
2)Press and hold OK button to enter into photo modes setting
menu, including Single, Burst, P-Timelaspe, CountDown,
LongExp. and Wi-Fi.
3. When in playback mode:
1) Press OK button to enter into the file preview list, short
press Power/Mode button to scroll and short press OK button to
confirm the selected videos or pictures.
2)During the playback, short press OK button to pause/play
the video.

R Button
(Reset)
Short press with your nail to turn off the camera when freezing,
then you can restart the camera.
Photo Mode
Photo preview interface Photo setting menu
1. Photo mode
2. Number of captured photos
3. Remaining photo quantity of the memory storage
4. Battery power icon
5. Photo playback
6. Photo resolution display(Click this icon to enter into photo mode settings)
7. Settings (Click this icon to enter into video settings menu and general setting menu)
8. Photo preview interface (Swipe to left or right to switch into video mode)
9. Photo setting menu
10. General setting menu
11. Exit
Delete the Videos/Photos
When camera is on, press “M” button to switch between Video - Photo - Playback -
VideoSetup - PhotoSetup, press OK button to confirm to enter into playback mode. (Or
you can click the playback icon to enter into playback mode directly).

Video playback preview interface Photo playback preview interface
Delete the files: When “Video/Photo playback preview interface”, click the icon , and
click the file you would like to delete, then click the icon again, it pops up the following
screenshot, then click the option to delete the files.
Delete interface
WIFI App Connection
The camera allows full control, live previewing and playback of photos/videos on most S
mart phones and Tablets.

a. Download the App “Super Cam”from “Google Play” or from the Apple “App Store”.
b. Short press the Power button (or click the wifi icon on quick menu) of
the camera to turn on WIFI, the "Waiting for WI-FI Connection…" appears on the screen.
c. Activate WIFI in the General Setup Menu of your mobile phone.
d. Go to the WIFI settings on your Phone, you will see “ActionCam_xxxxxx” in the list of
available Wireless networks.
e. Connect your phone to the “ActionCam_xxxxxx” via WIFI.
The default WIFI Password for the device is: 1234567890.
Connecting... Connected
You can also scan the following QR code to install the app:

App interface
1. Mobile phone
2. Connection
3. Camera
4. WiFi SSID
5. Gallery
6. Home

7. APP Version
Live-view interface Playback interface Setting interface
1. Exit
2. Photo Mode
3. Confirm/Shutter
4. Playback
5. Video Mode
6. Settings
Brief introduction
a. Video Recording
Click the icon , it will light red during recording;
b. Photo Capturing
Click the icon , it will flash red once when taking a single picture
c. Playback
Click the icon to playback the videos or photos online, click Edit to download or
delete the videos or photos
d .Settings
Click the icon to change some settings such as resolution, white balance etc..

Computer download photos / videos
When the camera is connected to computer, and used as a removable disk, the
removable disk will be added in "My Computer" window. The captured photos or videos
will be stored in the " JPG/VIDEO " directory in the removable disk. You can enter this
directory to copy files to your computer's hard disk.
Note: Do not disconnect the USB connection during the download of the file.
If the PC camera function is activated, you are not able to see the removable disk option
of the camera.
Voice Control
Only 8 languages are supported. When camera is on, the voice command can be
executed only when the voice control entry language is same with OSD language.
Please refer to the voice control entry as follows:
Chinese
English
Deutsch
Français
开始录影
Video Start
Videoaufnahme starten
Enregistrer vidéo
录影停止
Stop Video
Videoaufnahme stoppen
Arrêter vidéo
打开 WIFI
Turn on WiFi
WIFI an
Activer WIFI
WIFI 关闭
WiFi off
WIFI aus
Couper WIFI
拍照
Take photo
Foto machen
Prendre photos
关闭相机
Shutdown DV
ausschalten
Eteindre
Español
Italiano
日本語
Pусский
Graba vídeo
Avvia Video
ビデオスタート
Начать запись
Termina vídeo
Arresta Video
ビデオストップ
Видео остановлено

Activa WIFI
Attiva WIFI
WiFi を開く
Включите WIFI
Apaga WIFI
Disattiva WIFI
Wifi を閉じる
WIFI выключен
Toma la Foto
Scatta la Foto
写真を撮る
Фотографировать
Apágate
Spento
電源オフ
Выключите камеру
Specification

The contents covered in this manual is based on the latest information at the time of
writing the manual. Due to the differences of technical development and production
batches, it may be slightly different from your actual use. Please take the actual product
features prevail.
Sensor
IMX386
Lens
170 degree wide-angle
Display screen
Back screen: 2.2 inches; Front screen: 1.4 inches
Gyro
Support
Voice control
Support
MIC
Support
Fill light mode
Support
Storage
Built in 64G EMMC(optional 32G / 128G)
RTC
Support
Remote control
Support
Power input
Shrapnel contact, 5v1.5A
Language
English, simplified Chinese, traditional Chinese, German,
French, Italian, Spanish, Portuguese, polish, Dutch, Russian,
Japanese
Photo
20MP, 16MP, 14MP, 10MP, 8MP, 5MP, 2MP
Video
4K 60fps, 4K 30fps, 2.7K 60fps, 2.7K 30fps, 1080P 120fps,
1080P 60fps, 1080P 30fps, 720P 240fps, 720P 120fps, 720P
60fps
Image format
JPEG
Video format
MOV
Video compression
format
H.264
Distortion Calibration
Support
Diving mode
Support
Data connection
USB2.0
Speaker
Support
Battery capacity
Built-in 3.7V,1950mAh
Recording time
About 140 minutes on 4K@30fps
Charging time
About 4-5hours
WIFI
Support, 2.4G
App
Support Android/iOS App
Operating system
Windows XP/7/8 SP3/Vista and Mac 10.5 or above
Working temperature
-10℃~+55℃
Storage temperature
-20℃~+70℃
Relative humidity
5% ~95% (no frost)
Application
Extreme sports, outdoor sports, cycling, diving, family safety,
etc.

FCC Caution:
This device complies with part 15 of the FCC Rules. Operation is subject to the following two conditions:
(1) This device may not cause harmful interference, and (2) this device must accept any interference
received, including interference that may cause undesired operation.
Any changes or modifications not expressly approved by the party responsible for compliance could void
the user's authority to operate the equipment.
NOTE: This equipment has been tested and found to comply with the limits for a Class B digital device,
pursuant to Part 15 of the FCC Rules. These limits are designed to provide reasonable protection against
harmful interference in a residential installation. This equipment generates, uses and can radiate radio
frequency energy and, if not installed and used in accordance with the instructions, may cause harmful
interference to radio communications. However, there is no guarantee that interference will not occur in a
particular installation.
If this equipment does cause harmful interference to radio or television reception,
which can be determined by turning the equipment off and on, the user is encouraged to try to correct the
interference by one or more of the following measures:
-- Reorient or relocate the receiving antenna.
-- Increase the separation between the equipment and receiver.
-- Connect the equipment into an outlet on a circuit different
from that to which the receiver is connected.
-- Consult the dealer or an experienced radio/TV technician for help.
The device has been evaluated to meet general RF exposure requirement. The device can be used in
portable exposure condition without restriction.
Table of contents
Other HDKing Action Camera manuals

