Hearex Premier User manual

Hearex Premier User Guide
www.myhearex.com
Digital Hearing Solutions ™


Congratulations on your new Hearex™ Premier. Thanks to advances in
digital technology you can now enjoy the benets of improved hearing at a
fraction of the cost associated with prescription hearing aids.
To receive the most benet from your Hearex™ Premier, please read this
user guide in its entirety. If you have any questions or need assistance
please contact us at [email protected]
Welcome

Table of Contents
What’s In The Box? ...............................................................................................
Getting To Know Your Device ................................................................................
Choosing the Proper Dome ...................................................................................
Changing the Dome ..............................................................................................
Changing the Sound Tube ...............................................................................
Insert Battery / Turn On ..................................................................................
Putting On Your Device ........................................................................................
Adjusting the Volume ...........................................................................................
Adjusting the Hearing Program ............................................................................
Program Settings .................................................................................................
Telecoil Mode .......................................................................................................
Care and Maintenance ...................................................................................
Troubleshooting / Tips ....................................................................................
Replacement Accessories ...................................................................................
First Time Users ..................................................................................................
Warranty and Service ..........................................................................................
Technical Specications ......................................................................................
Contact Us...........................................................................................................
5
6
7
8
9-10
11-12
13
14
15
16
17
18-19
20-21
22
23
24
25
26
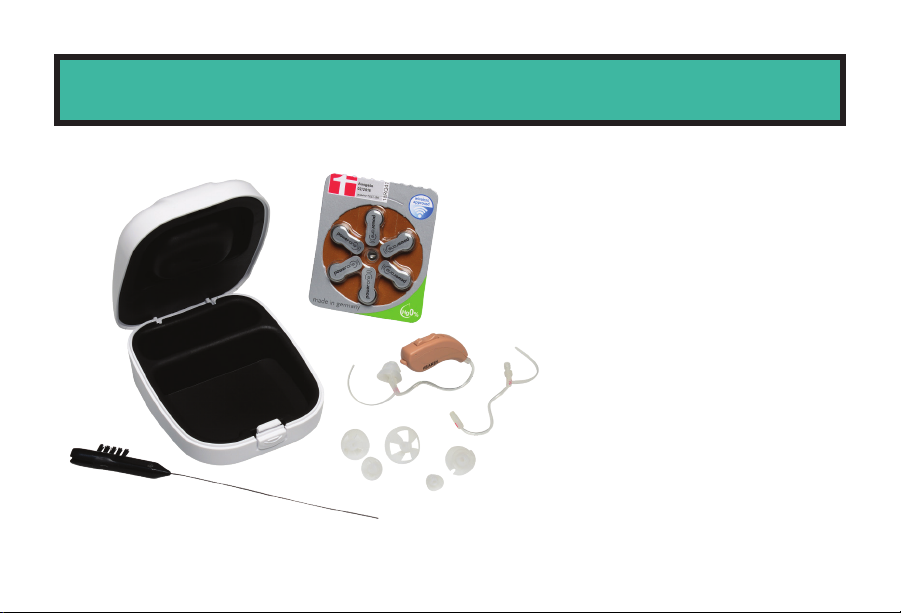
5
1 Hearex™ Premier Amplier
1 Protective Hard Case
1 Blister Pack of size 312
batteries (6 batteries)
6 Ear Domes
(2 styles x 3 sizes)
2 Sound Tubes (Size 1 & 2)
1 Cleaning Brush/Wire
combo
What’s In The Box?
6
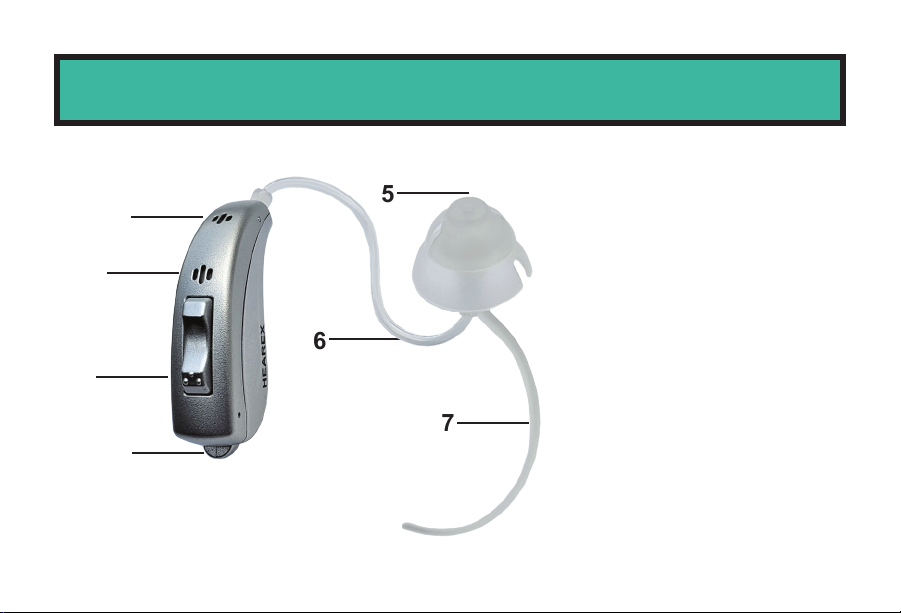
1 - Front Microphone
2 - Rear Microphone
3 - Rocker Switch
4 - Battery Door
5 - Ear Dome
6 - Sound Tube
7 - Stabilizer Bar
1
Getting To Know Your Device
2
7
4
5
3
6
7
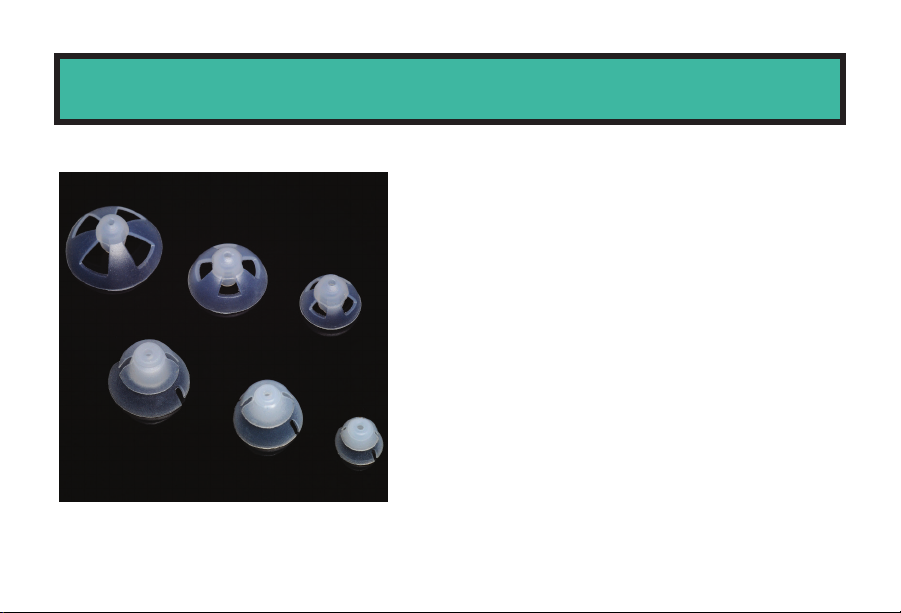
Included with your Hearex™ Premier are
six ear domes. There are two styles to
choose from oered in three sizes. The
Open Dome (Top of Image) is
recommended for mild-moderate hearing
loss. The Hybrid Dome (Bottom of Image)
is recommended for moderate hearing
loss. For a more severe hearing loss,
Fully Closed Domes (Not Included) are
recommended and are available at
www.myhearex.com. See following page
for instructions on changing the dome.
Choosing the Proper Dome
8
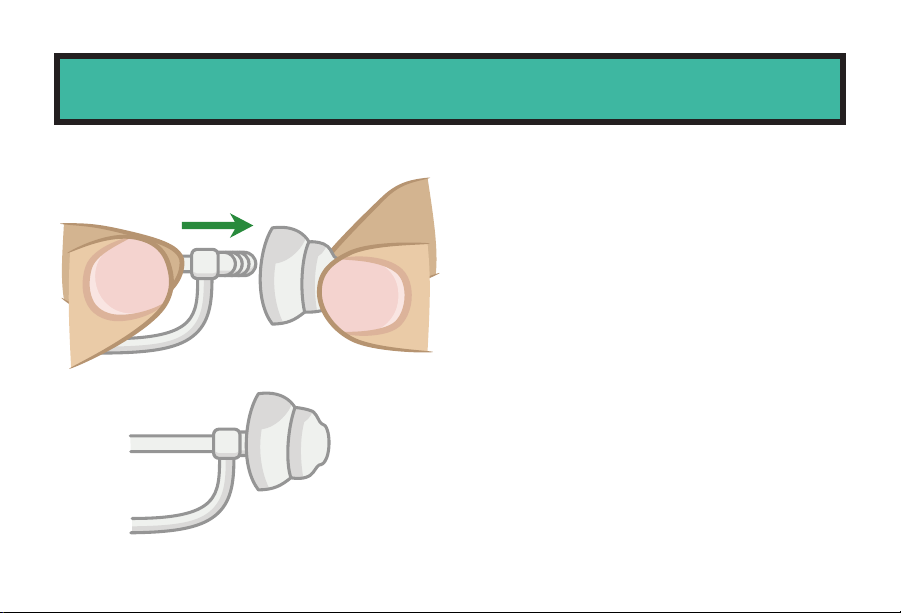
1. Remove the dome from the sound
tube.
2. Grasp new dome between your
thumb and forenger.
3. Gently push the dome over the
anges on the sound tube.
4. Ensure the dome is properly
seated and secure.
It is recommended that domes be
replaced every 2 - 3 months.
Changing the Dome
3B
3B

9
BLUE = LEFT EAR
RED = RIGHT EAR
The sound tubes are labeled with
either blue or red to indicate which
ear they are meant for. Included
with your device are size #1 and #2
sound tubes. These sizes are
suitable for most people but may not
be the right t for you. If you require
a dierent size tube please visit
www.myhearex.com.
For optimum performance, replace
sound tubes every 3 months.See
following page for installation
instructions.
Changing the Sound Tube

10
1. Insert the sound tube into
the recessed jack on the base
of the device.
2. Rotate clockwise until sound
tube is securely fastened.
3. Do not over-tighten.
4. Removal is the reverse of
installation.
Changing the Sound Tube
Table of contents


