HeatTrak HR20-60 User manual

User Guide
RESIDENTIAL MATS

We know you will undoubtedly join the over 100,000 satised HeatTrak
customers who have tossed their shovels for a more ecient and safer way
of removing snow and ice. If you have any questions about anything you
read or about our products in general, please do not hesitate to contact
one of our HeatTrak Specialists at (888) 586-4904.
Enjoy your snow day.
Thank you for purchasing
HeatTrak Snow & Ice Melting Mats.
EN
CAUTION:
NEVER COVER MATS;
DO NOT USE INDOORS;
DO NOT USE INSIDE
PET HOUSES;
FOR SNOW MELTING ONLY
DOWNLOAD
a digital copy
of this guide at
heattrak.com/guide
Important Note about Decorative Concrete:
If your walkway or patio is a form of decorative concrete, also known
as stained concrete, it most likely has a sealer on the top surface that
could degrade when exposed to large amounts of heat. As a result,
discoloration of the concrete may occur. To eliminate this possibility, it
is advisable to place a small layer of insulation under the heat mats to
prevent the heat from penetrating the sealer. Examples of insulation
could be thin pressure treated plywood (tip – Home Depot and Lowes
will cut it for free); outdoor carpet strips; or 1⁄4″ thick polyethylene or
neoprene foam insulation (available through multiple online resources).

3
1. LAYING OUT THE HEATTRAK SNOW & ICE MELTING MATS:
• Clear all pre-existing ice and snow from the area where you will be using the
HeatTrak Mats.
• Make sure the surface is free of any sharp objects such as rocks, glass or loose
nails, which could cause damage to the bottom of the mats.
• Lay the mats at on the surface they are to be used. One side of the mat is smooth
and shiny. The other has a ″gritty″ texture. Make sure the side with the ″gritty″ texture
faces up. The mats may not immediately lie at because of the way they were rolled in
the box. If this is the case, simply ex the mat in the opposite direction of the bend and
place back down. When the mats are turned on, the heat will eventually cause them to
lie at.
• When laying down the mats, be sure the cables are o to the far side of the
walkway or stair case so no one trips on the cables accidentally.
Save these instructions in case you need to look at them again.
Installation Instructions
• The HR model mats are designed with watertight connector
cables so that multiple stair and walkway mats can be
connected together. NOTE: Entrance mats (HDM models) are
designed to be stand-alone mats and do not connect to other
mats. If you purchased an Entrance mat, proceed to Section 4.
• Like Christmas lights, these mats can only be daisy-chained
up to a certain length. This length depends on how many stair
and walkway mats you are connecting together. The best way
to determine how many mats can be connected together is
by adding up the total amps of each mat, which can be found
on the small labels around the male connectors.
• The Power Unit which connects your mats to your outdoor
outlet is designed to safely handle up to 15-amps; however
HeatTrak recommends not exceeding 14-amps.
2. CONNECTING THE MATS TO EACH OTHER:
EN

4
Example I
If you connect three
20" x 60" walkway mats
(2.5-amps each) with five
10" x 30" stair mats (0.7A
each) you only have 11-
amps, so you’re ok.
If you connect eighteen 10" x 30"
stair mats you will have a total
of 12.6-amps, so you’re also ok.
Example II
• If the mats you are connecting will exceed 14-amps then disconnect
some of the mats and put them on a dierent Power Unit. Remember,
no more than 14-amps per Power Unit. Additional Power Units are
available at www.HeatTrak.com, model number HR-P.
• Most outdoor outlets are rated to handle up to 15-amps. Some newer outlets can
handle up to 20-amps. If you have connected up to 14-amps of heating mats, even if
you only used one Power Unit, you cannot plug anything else into that outdoor outlet,
unless you know that the amp rating on your outdoor outlet is greater than 15-amps.
• Similarly, if there are other items plugged into that outdoor outlet (Christmas lights, etc.),
you may not be able to connect the full number of mats to your Power Unit. If you have
any questions, please consult with a certied electrician.
• Connecting the Mats: to connect mats together, nd the
female connector of mat #1, and connect it to the male
connector of mat #2. Align the 2 connectors, and rmly
push the connectors together so they are ush with each
other. If the male and female ends feel like they do not
connect together, ip the male end of the cord 180 degrees
and try again.
• Once the male and female cords are securely connected,
slide the locking sleeve over the seam to ensure a
water-tight seal.
EN
IMPORTANT:
Now that you have read the above section, it is important
for you to know the rating of your outdoor outlet.
5
EN
5. USING THE LIGHT TESTER:
• The Power Unit you purchased comes with a detachable
clear module pre-inserted at the end of the 6 ft cable. This
module is called the Light Tester. It is designed to let you
know whether electricity is owing through the mats or not.
• This Light Tester will illuminate when electricity is owing
properly. As an example, plug the Power Unit into an outlet and
make sure the Power Unit is on. The Light Tester will illuminate.
• To use the Light Tester, remove the Light Tester from the
Power Unit cable and insert it into the female connector of
the last mat in your system.
• After the Light Tester is inserted into the last mat, connect
the female cable of the Power Unit to your rst mat in the
system. Then plug the Power Unit into an electrical outlet
and make sure the Power Unit is on.
• If all the mats in your system are connected properly, the
Light Tester at the end of your system will illuminate. If it
does not illuminate, then one or more of your mats are not
connected properly. If this is the case, see below:
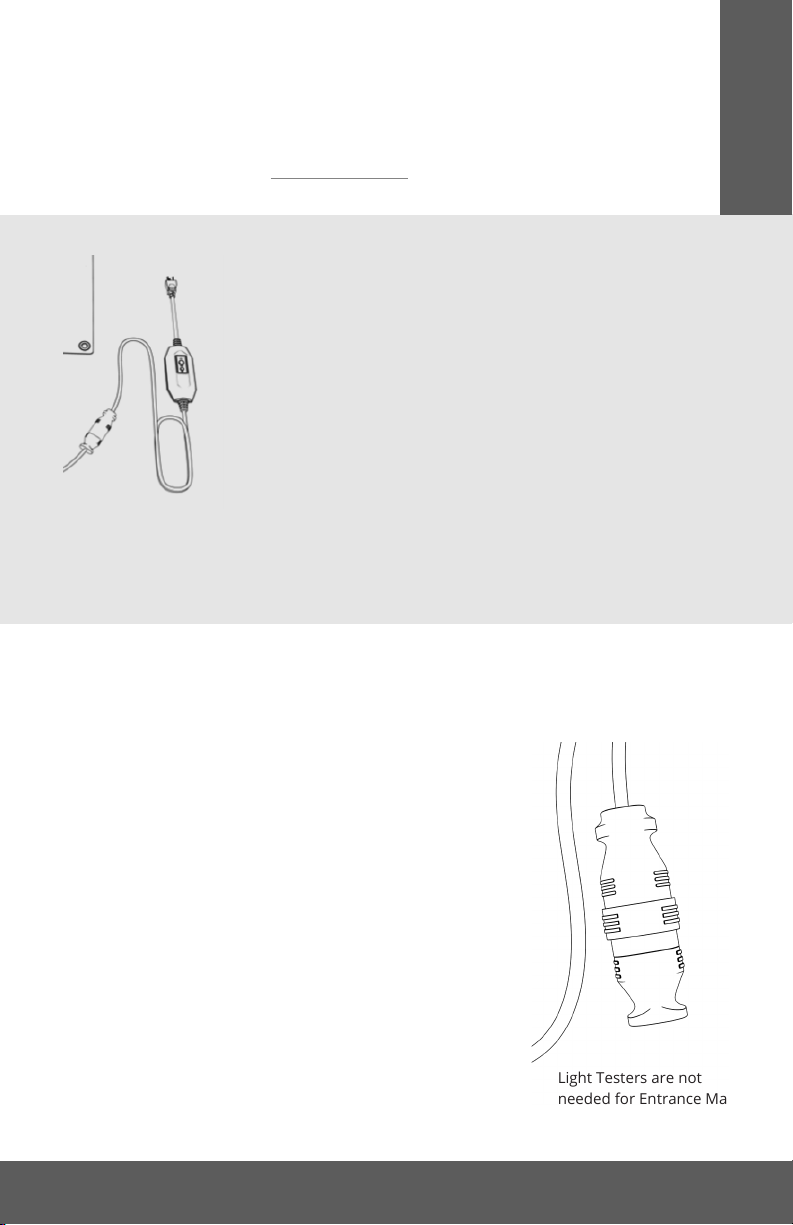
Light Testers are not
needed for Entrance Mats.
3. USING A CABLE EXTENDER:
HR-EXT20: You may require a Cable Extender if you get into a situation where the small
male connector of a walkway mat needs to connect to the small female connector of
a stair mat. The 20″ long Cable Extender will allow you to make this connection. This
Cable Extender is available at www.HeatTrak.com (Part No. HR-EXT20).
• Every grouping of mats requires a Power Unit (Part No.
HR-P) to connect the mats to the electrical outlet on the wall.
• The Power Unit connects to either the rst or last mat in
your system. DO NOT CONNECT THE POWER UNIT TO THE
ELECTRICAL OUTLET UNTIL ALL OF THE MATS ARE PROPERLY
CONNECTED TO EACH OTHER AND THE POWER UNIT IS
CONNECTED TO THE LAST MAT.
• To connect the Power Unit, use the same method described
above for connecting the male and female connectors. But
rst, read Section 5 below regarding the Light Tester.
• If you have an Entrance Mat, you do not need a Light Tester
and can skip to section 6 of this guide.
4. CONNECTING THE POWER UNIT:
This manual suits for next models
15
Table of contents
Languages:


