SETTING THE TIME AND DAY
Press , the time display will flash.
Press again, the day display will flash.
Press to store and exit.
Press to select Auto or Manual mode.
Auto mode:
In Manual mode, press to set the desired
Manual mode:
In Auto mode, press to override the current
In Auto mode, press and the temperature
AUTO / MANUAL MODE
LOCKING THE KEYPAD
To lock the keypad, press and hold for 5 seconds.
TEMPORARY OVERRIDE
will
Use to adjust.
Use
Use to adjust.
SETTING THE OPERATING SCHEDULES
Default Settings
For 7 day programmable mode (default)
For 1 day programmable mode
MONDAY - SUNDAY
PROGRAM
07:00
09:30
16:30
22:30
22 C
C
C
C
O
16O
22O
16O
SETPOINTTIME
Press , the time for (Program 1) will flash.
Use to adjust the time for Program 1.
Use to adjust the setpoint for
Program 1.
Press , the setpoint for
Program 1
will flash.
Press , the time for (Program 2) will flash.
Use to adjust the time for
Program 2.
Use to adjust the setpoint for
Program 2.
Repeat above steps for
program 3
and
Program 4
.
This mode is normally used to set the program for an
Press , the setpoint for
Program 2
will flash.
Press , the time for (Program 1) will flash.
Use to adjust the time for Program 1.
Use to adjust the setpoint for
Program 1.
Press , the setpoint for
Program 1
will flash.
Press , the time for (Program 2) will flash.
Use to adjust the time for
Program 2.
Use to adjust the setpoint for
Program 2.
Repeat above steps for
program 3
and
Program 4
.
Press , the setpoint for
Program 2
will flash.
Use to adjust.
Press , the day you want to program will flash.
Press
temperature.
programmed temperature unitl the next programmed
period. will flash in this case.
You will see . To unlock, repeat the steps above
and will disappear.
display will flash.
Your thermostat will maintain the new setpoint until the
next programmed period.
To cancel the override setting, press .
flash on the screen.
SETTING THE OPERATING SCHEDULES
Default Settings
For 5+2 day programmable mode
Changing programs for Monday- Friday
Changing programs for Saturday- Sunday
period of Program 2 and Program 3, Press
Press again to cancel.during programing.
Note:
For Saturday-Sunday, if you want to clear the time
MONDAY - FRIDAY SATURDAY - SUNDAY
PROGRAM
07:00 07:00
09:30 09:30
16:30 16:30
22:30
22 C
C
C
C
O
16O
22O
16O
22:30 C
C
C
C
22O
16O
22O
16O
SETPOINT
TIME TIME SETPOINT
Press , the time for (Program 1) will flash.
Use to adjust the time for Program 1.
Use to adjust the setpoint for
Program 1.
Press , the setpoint for
Program 1
will flash.
Press , the time for (Program 2) will flash.
Use to adjust the time for
Program 2.
Use to adjust the setpoint for
Program 2.
Repeat above steps for
Program 3
and
Program 4
.
Press , the setpoint for
Program 2
will flash.
to press , the time for (Program 1) will flash.
Use to adjust the time for
Program 1
.
When Monday-Friday programs have been set, continue
Press , the setpoint for
Program 1
will flash.
Press , the time for (Program 2) will flash.
Use to adjust the setpoint for
Program 1.
Use to adjust the time for
Program 2.
Use to adjust the setpoint for
Program 2.
Repeat above steps for
Program 3
and
Program 4
.
Press , the setpoint for
Program 2
will flash.
to confirm.
to adjust.
ADJUSTING THE PARAMETER VALUES
Note:
Only modify these parameters if it is essential.
ACCESSING PARAMETERS
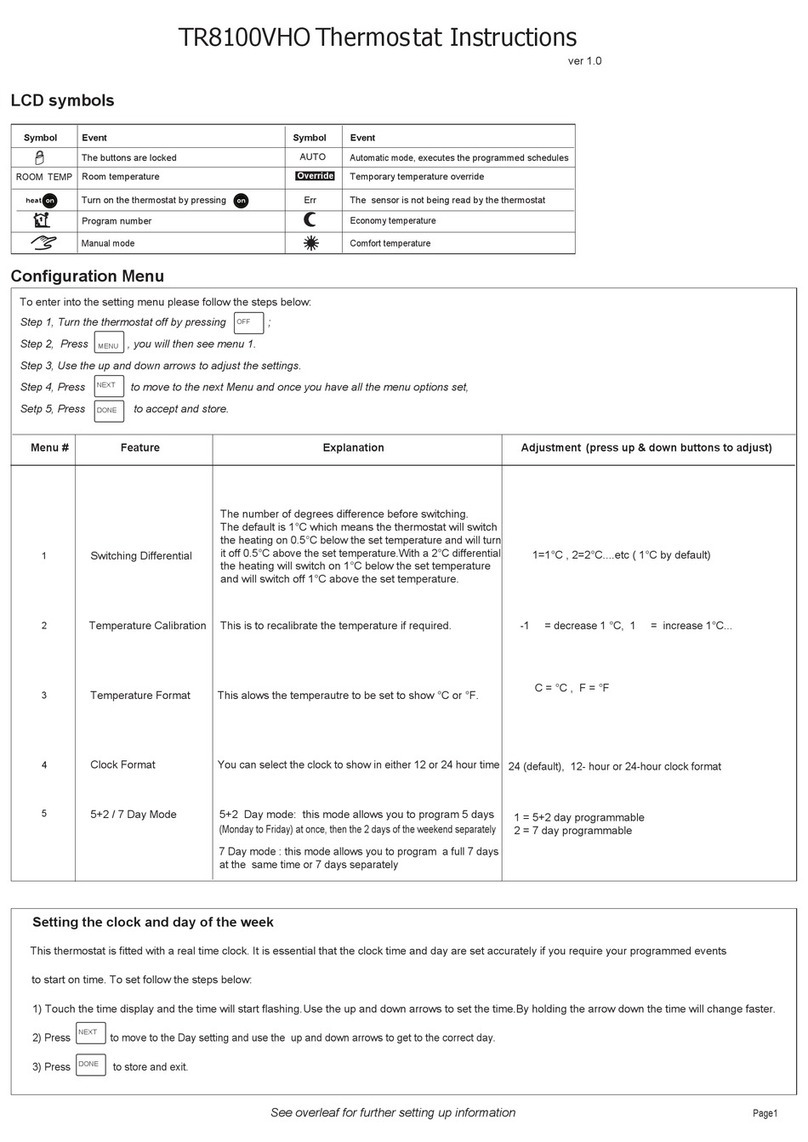
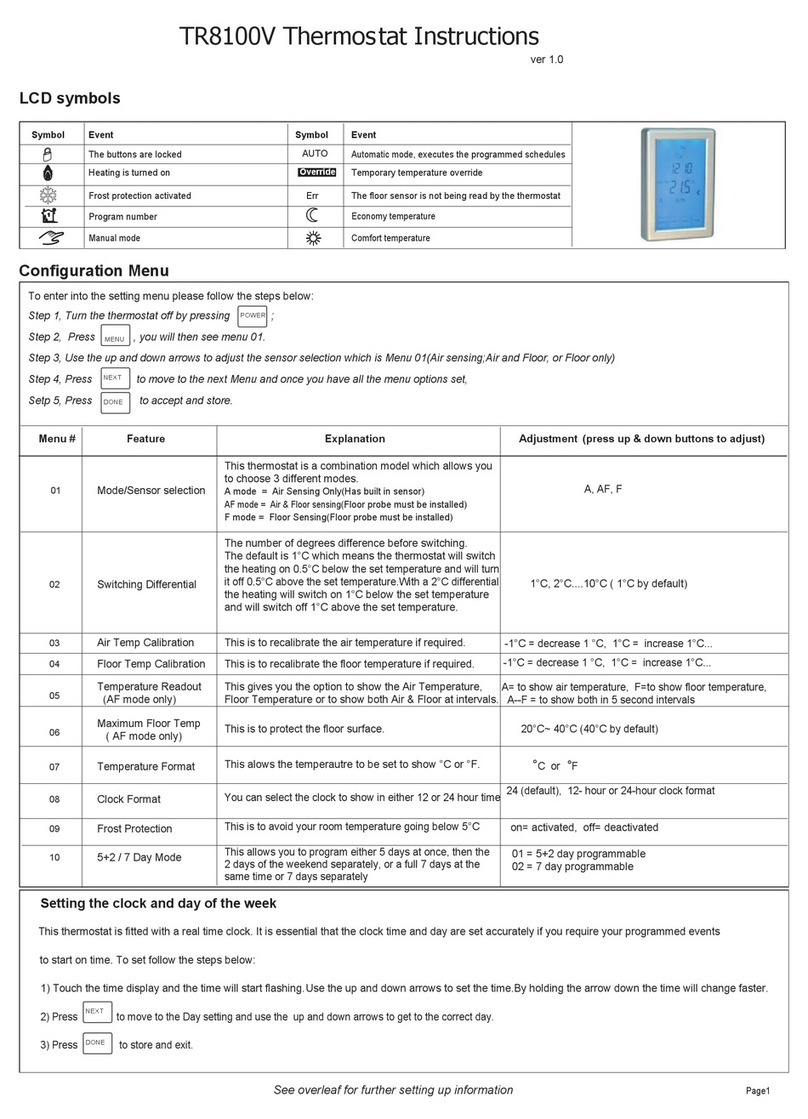
Turn the thermostat off by pressing .
After turning the thermostat off, press .
Use or to adjust.
Press to move to next menu.
Press to store and exit.
01. Sensor selection
A =Air Sensing Only(Has built in sensor)
- 1°C = decrease 1°C , 1°C = increase 1°C ...
- 1°C = decrease 1°C , 1°C = increase 1°C ...
03. Floor Temp Calibration
02. Air Temp Calibration
01 = 5+2 Day Program ,02= 1 Day Program
03 = 7 Day Program (default ).
3= NTC 3K, 10 = NTC10K(default),......
05. Backlight Timer
06. Clock Format
07. Frost protection
08. Program type
09. Sensor type
12 / 24 Hour clcok format ( 24 Hour clock by default)
0.5°C ~ 5°C(3°C by default)
5 ~ 99 seconds ( 30 seconds by default)
04. Auto Exit Time
AF =Air & Floor sensing(Floor probe must be installed)�
F =Floor Sensing(Floor probe must be installed)�
0,10,20,30,40,50,60, ON ( 30 seconds by default)�
individual day.
HT3
Programmable Thermostat
