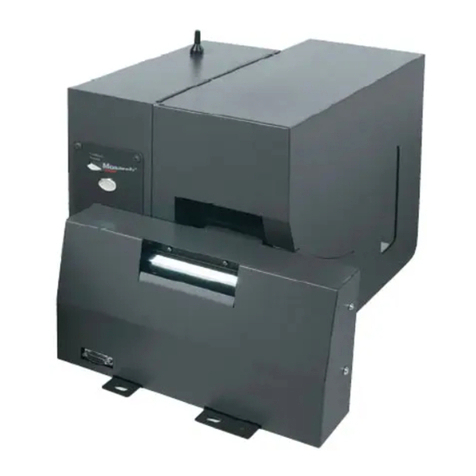
Hedman DI-100 User manual

198552HF 4/00
HEDMAN
DI-100
Document Imprinter
Service Manual

DI-100 Document Imprinter
Service Manual
4/00 i
TABLE OF CONTENTS
1. INTRODUCTION ..............................................................................................1
1.1 WHAT’S EXPECTED OF THE TECHNICIAN .............................................................. 1
1.2 SERVICE LEVEL .................................................................................................1
1.3 ADDITIONAL SERVICE SUPPORT..........................................................................1
1.4 SAFETY TERMS .................................................................................................2
1.5 SAFETY PRECAUTIONS.......................................................................................3
1.6 FREQUENTLY-USED TERMS................................................................................4
1.7 REPACKING INSTRUCTIONS ................................................................................5
2. SPECIFICATIONS & REQUIREMENTS...........................................................6
2.1 PHYSICAL SPECIFICATIONS.................................................................................6
2.2 ELECTRICAL REQUIREMENTS..............................................................................6
2.3 OPERATING REQUIREMENTS...............................................................................7
2.4 NECESSARY TOOLS ...........................................................................................7
3. OPERATION.....................................................................................................8
3.1 DI-100 DESCRIPTION ........................................................................................8
3.2 SEQUENCE OF OPERATION.................................................................................8
3.3 OPERATING INSTRUCTION ................................................................................10
3.4 OPERATING TIPS .............................................................................................12
3.4.1 ENDORSING SMALL DOCUMENTS ...............................................................................12
3.4.2 CALCULATING PIECES FED PER MINUTE ...................................................................12
3.4.3 FINDING A NON-IMPRINTED DOCUMENT....................................................................12
3.4.4 FEEDING VARIOUS SIZED DOCUMENTS .....................................................................13
4. POWER CONNECTION .................................................................................14
4.1 SAFETY .......................................................................................................... 14
4.2 LINE VOLTAGE ................................................................................................14
4.3 LINE FUSES ....................................................................................................16
4.4 POWER CORD .................................................................................................17
5. MAINTENANCE .............................................................................................18
5.1 CLEANING....................................................................................................... 18
5.2 ADJUSTING BELT TENSION ...............................................................................19
5.3 REPLACING A FUSE......................................................................................... 20
6. TROUBLESHOOTING ...................................................................................22
6.1 OPERATION TROUBLESHOOTING .......................................................................22
6.2 MECHANICAL TROUBLESHOOTING .....................................................................23
6.3 ELECTRICAL TROUBLESHOOTING ......................................................................24

DI-100 Document Imprinter
Service Manual
ii 4/00
7. PROCEDURES............................................................................................... 25
7.1 BASE..............................................................................................................25
7.2 CIRCUIT CARD ................................................................................................28
7.3 CONTROL PANEL .............................................................................................29
7.4 COUNTER .......................................................................................................30
7.5 DOCUMENT DETECTOR .................................................................................... 31
7.5.1 TESTING THE DETECTOR..............................................................................................31
7.5.2 OPTIMIZING THE DETECTOR POSITION......................................................................32
7.5.3 REPLACING THE DETECTOR ........................................................................................33
7.6 DOCUMENT EMITTER .......................................................................................34
7.7 FEED MOTOR ..................................................................................................35
7.8 FEED ROLLS ...................................................................................................38
7.9 FEED TIMING BELT........................................................................................... 40
7.10 FOAM ROLLS................................................................................................. 42
7.11 FUSES ..........................................................................................................43
7.12 MEDIA FEED SWITCH .....................................................................................44
7.13 PADDLE WHEEL ............................................................................................45
7.14 PAPER GUIDES.............................................................................................. 48
7.15 PLATEN GAP (WIDENING)...............................................................................50
7.16 POWER ENTRY CASING ..................................................................................51
7.17 POWER SWITCH ............................................................................................52
7.18 SEPARATORS ................................................................................................54
7.19 SIGNATURE MOTOR .......................................................................................56
7.20 SIGNATURE TIMING BELT................................................................................58
7.21 TIMING BELT .................................................................................................58
7.22 TRANSFORMER..............................................................................................62
8. SYSTEM DIAGRAM .......................................................................................63
9. ILLUSTRATED PARTS GUIDE...................................................................... 64

DI-100 Document Imprinter
Service Manual
4/00 1
1. INTRODUCTION
1.1 What’s
Expected of
the Technician
This service manual assumes the Service Technician is
skilled at installing and operating the DI-100.
1.2 Service Level
This service manual contains procedures which will:
1. Identify faulty or worn parts and assemblies.
2. Provide procedures for the removal and replacement of
faulty or worn parts and assemblies.
Every effort has been made to include accurate and
complete servicing instructions. Both HEDMAN and the
manufacturer assume the availability of experienced
personnel who are familiar with servicing machines.
Although the procedures contained in this service manual
present the manufacturer’s recommended methods for
testing and repairing the DI-100, certain servicing
techniques may be implied.
1.3 Additional
Service Support
Before servicing the DI-100, read the Operating Manual. If
you need additional support, contact the Customer Service
Center of The HEDMAN Company at (800) 872-2788.
Please be prepared to state your name, company and serial
number of the machine.

DI-100 Document Imprinter
Service Manual
2 7/01
1.4 Safety Terms
The following highlighted blocks are used throughout this
guide to emphasize important information. Pay very
careful attention to this information.
WARNING
USED TO ALERT YOU TO ACTIONS OR
CONDITIONS WHICH MAY PRESENT HAZARDS
OR CAUSE INJURY TO PERSONNEL.
CAUTION
USED TO ALERT YOU TO ACTIONS WHICH MAY
DAMAGE DOCUMENTS OR EQUIPMENT.
NOTE
Used to identify unusual or unexpected
conditions or to point out the need for alternate
procedures. A NOTE may also be used for
emphasis when a WARNING or CAUTION are not
required.
TIP
A suggestion to enhance the DI-100’s
productivity.

DI-100 Document Imprinter
Service Manual
4/00 3
1.5 Safety
Precautions
Observe the following safety precautions and warnings at
all times while operating, cleaning, servicing or repairing
the DI-100. Failure to so may result in physical injury or
damage to the DI-100. Neither HEDMAN nor the
manufacturer assumes any liability for your failure to
comply with these requirements.
WARNING
READ ALL WARNINGS AND CAUTIONS.
WARNING
ONLY QUALIFIED PERSONNEL SHOULD
PERFORM SERVICE AND REPAIRS.
WARNING
NEVER CLEAN, CLEAR OR DISASSEMBLE THE
DI-100 WITHOUT FIRST UNPLUGGING THE
POWER CORD.
WARNING
KEEP LOOSE CLOTHING, TIES, SCARVES AND
HAIR AWAY FROM ALL MOVING PARTS.
WARNING
DO NOT PLACE FINGERS BETWEEN OR NEAR
MOVING PARTS.

DI-100 Document Imprinter
Service Manual
4 7/01
1.6 Frequently-
Used Terms
leading edge The edge of the document that
enters and exits the DI-100 first.
trailing edge The edge of the document that
enters and exits the DI-100 last.
imprint position The point at which the document
is imprinted.
imprint saddle Contains a plastic relief of the
imprint; 2 imprint saddles are in
the rounded imprint saddle
holder - as one is imprinting, the
other is being inked.
operator side The side of the DI-100 where
most of the controls are located.
input end The end of the DI-100 where the
document enters the DI-100.
output end The end of the DI-100 where the
document exits the DI-100.

DI-100 Document Imprinter
Service Manual
4/00 5
1.7 Repacking
Instructions
If it is necessary to return the DI-100 to HEDMAN, pack it
in the original shipping container and material. If the
original container is not available, the DI-100 and its
accessories should be carefully packed so that they will not
be damaged in transit.
NOTE
If the DI-100 is packed correctly, your Shipping
Carrier is liable for any shipping damage.
Use the following instructions to pack the DI-100 with
commercially available materials.
1. Double wrap the machine in plastic.
2. Use a heavy duty, double-walled container of 350-
pound test material.
3. Surround the DI-100 on ALL sides with at least 4 to 5
inches of shock absorbing packaging material. This will
provide firm cushioning and prevent movement inside
the container.
4. Seal the top and bottom of the shipping container with
strong tape or banding.
5. Clearly and legibly mark the shipping container
FRAGILE.
6. Ship the DI-100 prepaid and insured.

DI-100 Document Imprinter
Service Manual
6 7/01
2. SPECIFICATIONS & REQUIREMENTS
2.1 Physical
Specifications
Size
19½" (49.53 cm) W x 10" (25.43 cm) H x
19" (48.26 cm) D
The receiving tray is not measured.
Weight
Machine alone: 50 pounds (22.68 kg )
Shipping weight: 57 pounds (25.85 kg)
Speed
19"(45.72 cm) per second
2.2 Electrical
Requirements
CAUTION
ONLY OPERATE THE DI-100 ON A GROUNDED
POWER LINE TO AVOID MICRO-PROCESSOR
DAMAGE CAUSED BY POWER SURGES.
Power
The DI-100 is rated for continuous operation using a
variety of supply voltages. Possible line voltages are
240V, 220V, 120V and 100V at 50-60 Hz

DI-100 Document Imprinter
Service Manual
4/00 7
2.3 Operating
Requirements
Document Size
Maximum length: 14" (35.56 cm)
Minimum length: 31/8" (10.92 cm)
Maximum width: 14" (35.56 cm)
Minimum width: 27/8" (7.3 cm)
Weight: 20# - 125# stock
Range of Imprint Placement
Approximately 9" (22.86 cm) from the leading edge
toward the trailing edge.
Approximately 6½" (16.51 cm) left or right from the
center of the document.
Range of Accuracy
±1/8"
2.4 Necessary
Tools
• hex key - 1/8"
• hex key - 3/16"
• hex key - 5/64"
• wrench - 9/16"
• holt driver - size 6
• holt driver - size 10
• screw driver - or similar tool
• pliers
• ring puller
• super glue
• V-O-M

DI-100 Document Imprinter
Service Manual
8 7/01
3. OPERATION
3.1 DI-100
Description
The DI-100 is a document imprinter used for signing,
endorsing and validating cut-sheet documents.
3.2 Sequence of
Operation
1. Documents to be imprinted are stacked in the FEED
TRAY.
2. The SEPARATOR separates the stack into single
pieces as the FEED ROLL feeds them through the DI-
100.
3. A DC MOTOR drives the PADDLE WHEEL, FEED
ROLL and BACKUP PLATEN. Power to the motor is
supplied by, and can be interrupted by, the MEDIA
FEED SWITCH.
4. The leading edge of each document is sensed when it
breaks a beam of infrared light near the SADDLE
HOLDER. This beam is supplied by the DOCUMENT
EMITTER and sensed by the DOCUMENT
DETECTOR. The DOCUMENT DETECTOR
transmits this information to the MICROPROCESSOR.
5. Sensing the leading edge of a document triggers the
MICROPROCESSOR to start a time delay routine. The
length of time is determined by the selected imprint
position using the IMPRINT POSITION CONTROL.
6. When the time delay is finished, the SIGNATURE
MOTOR rotates the SADDLE HOLDER if the
IMPRINT KEY is turned on. The SIGNATURE
MOTOR rotates 180 degrees when the first IMPRINT
SADDLE imprints the document and the second
IMPRINT SADDLE is inked. Two IMPRINT
SADDLES are always required.
7. The SADDLE HOLDER reaches its correct position
when the integral infrared light of the PULSE WHEEL
PHOTOCELL detects the PULSE SLOTS on the
PULSE WHEEL.

DI-100 Document Imprinter
Service Manual
4/00 9
8. The POWER INTERLOCK SWITCH and the
EXECUTIVE MICROSWITCH detect the position
(locked or unlocked) of the EXECUTIVE KEY.
Turning the EXECUTIVE KEY to the unlocked
position (clockwise) interrupts the power supplied to
the DI-100. Turning the EXECUTIVE KEY to the
locked position (counterclockwise) supplies power at
the POWER INTERLOCK SWITCH and engages the
EXECUTIVE MICROSWITCH. Under this condition,
the SIGNATURE MOTOR rotates the SADDLE
HOLDER to position the IMPRINT SADDLES for
accurate imprinting.
If the EXECUTIVE KEY is in the locked position
when the POWER SWITCH is turned on, power is
supplied at the POWER INTERLOCK SWITCH but
the SIGNATURE MOTOR does not rotate the
SADDLE HOLDER.
9. The FEED indicator (light) flashes on and off as
documents feed through the DI-100.
10. The IMPRINT light flashes on and off as the IMPRINT
SADDLES rotate. This indicator is linked to the
PULSE WHEEL.
11. The COUNTERS count documents as they are
imprinted.
12. Documents exit the DI-100 and stack on the
RECEIVING TRAY.

DI-100 Document Imprinter
Service Manual
10 7/01
3.3 Operating
Instructions
Use the following instructions to eliminate operator errors:
1. Load the SADDLES for the desired function. Two
IMPRINT SADDLES are required.
2. Adjust the gap between the SEPARATOR and the
FEED ROLL to feed one document at a time.
3. Place a stack of documents in the FEED TRAY.
NOTE
NCR, pin-fed and perforated paper require fine
adjusting in order to feed properly.
a. Lift the PAPER WEIGHT and center one document
against the SEPARATOR and the FEED ROLL and
move the PAPER GUIDES against both sides of the
document without binding it. Once that document is
ready to be fed, place a stack of documents in the
FEED TRAY.
b. Load a stack of documents no more than 1½"high
at one time in the FEED TRAY. Lower the PAPER
WEIGHT if necessary.
c. Although it is possible, loading documents while
the
DI-100 is feeding is not recommended.
4. Feed several documents before imprinting to make sure
the documents are feeding straight, smooth and one at a
time.
a. It is best to center the document with the
SEPARATOR and the FEED ROLL. To adjust the
imprint position, move the SADDLE
HOLDER.
b. Place the DOCUMENT STOPS on the
RECEIVING TRAY far enough from the machine
to allow the documents to fall freely out of the
machine. If the DOCUMENT STOPS are too close
to the machine, documents will back up into the
machine, confuse the PHOTOSENSOR and cause a

DI-100 Document Imprinter
Service Manual
4/00 11
jam. Always let the documents fall freely from the
machine and into the RECEIVING TRAY.
c. Place a single sheet of paper in the RECEIVING
TRAY to prevent exiting documents from catching
on the bottom of the DOCUMENT STOPS.
5. Turn the IMPRINT KEY to IMPRINT and the
EXECUTIVE KEY to LOCKED.
NOTE
Turn the EXECUTIVE KEY slowly. If the SADDLE
HOLDER does not index, turn the key slower.
6. Set the IMPRINT POSITION.
7. PRESS MEDIA FEED ON.
NOTE
Always imprint several test documents until the
imprint position is exactly where desired. If the
IMPRINT POSITION is placed beyond the trailing
edge, the document is counted but not imprinted.

DI-100 Document Imprinter
Service Manual
12 7/01
3.4 Operating Tips
3.4.1 Endorsing Short
Documents
Turn short documents 90º to feed the long way. Make sure
proper IMPRINT SADDLES are used for imprinting.
3.4.2 Calculating Pieces
Fed Per Minute
1. Add 1” to the length of the document. Example. If
document is 11”, add 1”to get 12”
2. Divide the sum into 20 to get documents fed per
second.
3. Multiply this number by 60 to get documents per
minute.
3.4.3 Finding A
Non-Imprinted
Document
If a certain number of documents are fed into the DI-100
and the COUNTER displays one less:
1. Feed the same stack of documents again without
imprinting.
2. Watch for the one document missing an imprint.
3. Once found, stop feeding the stack and feed the single
document, imprint and resume counting.

DI-100 Document Imprinter
Service Manual
4/00 13
3.4.4 Feeding Various
Sized Documents
Place the documents between the PAPER GUIDES. Justify
the documents to the right with the leading edge as shown
below in Figure 3.1.
Figure 3.1 -- Right Justified Documents

DI-100 Document Imprinter
Service Manual
14 7/01
4. POWER CONNECTION
WARNING
READ THE FOLLOWING INFORMATION ABOUT
LINE VOLTAGE, FUSES AND THE POWER CORD
BEFORE PLUGGING THE DI-100 INTO AN
OUTLET.
4.1 Safety
The DI-100 can connect to any power distribution system,
including the European IT Power System. Because the
European IT Power System does not have a grounded
neutral leg, the DI-100 uses protective fusing in both the
neutral and hot supply lines of power.
WARNING
A BLOWN FUSE IN THE NEUTRAL LEG COULD
MEAN INTERIOR PARTS OF THE DI-100 REMAIN
AT A HAZARDOUS VOLTAGE. ALWAYS UNPLUG
THE POWER CORD BEFORE REMOVING THE
COVERS FROM THE DI-100.
4.2 Line Voltage
The DI-100 is rated for continuous operation using a
variety of supply voltages. Possible line voltages are 240V,
220V, 120V and 100V at 50 to 60 Hz. The manufacturer
configures the DI-100 to operate with the voltage requested
by the customer.
CAUTION
VERIFY THE CORRECT VOLTAGE SETTING
BEFORE PLUGGING THE DI-100 INTO AN
OUTLET.
Read the selected voltage through the VOLTAGE
SELECTOR WINDOW at the input end of the DI-100.

DI-100 Document Imprinter
Service Manual
4/00 15
(Refer to Figure 4.1.) To select a different voltage, use the
following instructions:
NOTE
The detachable POWER CORD may have to be
changed to match the particular power-source
output.
1. Unplug the POWER CORD.
2. Use a small screwdriver or similar tool to push up on
and release the FUSE DRAWER LOCKING TAB.
3. Pull the FUSE DRAWER out of the POWER ENTRY
CASING.
4. Pull the VOLTAGE SELECTOR out of the FUSE
DRAWER.
5. Rotate the VOLTAGE SELECTOR until the correct
voltage is on the same side as the VOLTAGE
SELECTOR WINDOW.
6. Place the VOLTAGE SELECTOR in the FUSE
DRAWER and verify the correct voltage selection.
7. Place the FUSE DRAWER in the POWER ENTRY
CASING.
Figure 4.1 -- Power Entry
CORD
POWER
FUSE DRAWER
SELECTOR
WINDOW
VOLTAGE
LOCKING TAB
SELECTOR
VOLTAGE
FUSE DRAWER
POWER
SWITCH
FUSE
INLET
ENTRY
APPLIANCE
CASING
POWER

DI-100 Document Imprinter
Service Manual
16 7/01
4.3 Line Fuses
The FUSE DRAWER, located on the input end, contains
two LINE FUSES. (Refer to Figure 4.1.) The neutral and
hot lines of power are fused. Both LINE FUSES must be in
place for the DI-100 to operate properly.
CAUTION
VERIFY THAT THE LINE FUSE VALUE IS
CORRECT FOR THE VOLTAGE SETTING.
UNPLUG THE DI-100 BEFORE STARTING THIS
PROCEDURE.
Use the following instructions to verify that the installed
LINE FUSES have the proper fuse value:
1. Unplug the POWER CORD.
2. Use a small screwdriver or similar tool to push up on
and release the FUSE DRAWER LOCKING TAB.
3. Pull the FUSE DRAWER out of the POWER ENTRY
CASING. The attached LINE FUSES are inside.
4. Determine the proper fuse value as well as the
condition of the LINE FUSE. The fuse value is shown
on the metal tip of the LINE FUSE. The chart below
lists the selected voltage in the left column followed by
the proper fuse value in the right column.
Selected Voltage Line Fuse Value
100V 1.0A (250V time delay)
120V 1.0A (250V time delay)
220V 0.5A (250V time delay)
240V (or 230V) 0.5A (250V time delay)
5. Replace the LINE FUSE if necessary. Both LINE
FUSES must be in place for the DI-100 to operate
properly.
6. Install the FUSE DRAWER in the POWER ENTRY
CASING.

DI-100 Document Imprinter
Service Manual
4/00 17
4.4 Power Cord
The DI-100 comes with a three-wire POWER CORD. The
POWER CORD grounds the DI-100 when connected to an
approved three-contact electrical outlet.
1. Plug the POWER CORD into the APPLIANCE INLET
on the non-operator side. (Refer to Figure 4.1.)
2. Plug the POWER CORD into a grounded outlet.
WARNING
TO PREVENT ELECTRICAL SHOCK, ONLY PLUG
THE POWER CORD INTO A GROUNDED OUTLET.
Table of contents
Other Hedman Printer manuals

