Hedson DRESTER RDX 8012 User manual

DRESTER RDX 8012
“DRESTER DYNAMIC TRIPLE 8000”
ENGLISH
DEUTSCH
FRANÇAIS
SVENSKA
ITALIANO
ESPAÑOL
INSTR: 11141 REV: 030429/Bom GODK: SID: 1/37

2
**********ENGLISH**********
CONTENTS
PAGE:
3 APPLICATION
3 ASSEMBLY
3 PLACING THE UNIT
3 COLLECTING TRAY
3 PREPARATIONS BEFORE INSTALLATION
4 INSTALLATION
5 PREPARATIONS FOR USE
5 OPERATING MANUAL
5 Operating instructions for the “Drester Dynamic Triple”
6 What to do when you run out of solvent
6 Recycling foreign solvent
7 PERMITTED SOLVENTS
7 SAFETY INFORMATION
7 SERVICE
7 WARRANTY
7 TECHNICAL DATA

3
APPLICATION
The DRESTER RDX 8012 is the Docking Unit that, when connected to the DRESTER 8000 Gun Cleaner and DRESTER 120
Recycler forms the closed system called the “DRESTER DYNAMIC TRIPLE 8000”. This brings safe handling of both clean and
contaminated solvent. The system eliminates heavy lifting and handling of solvent drums. It minimises solvent losses, and speeds
up the work.
This manual describes the DRESTER RDX 8012 Docking Unit, how to install it, and how to operate the complete “DRESTER
DYNAMIC TRIPLE 8000” system. The DRESTER 8000 Gun Cleaner is described in detail in manual no. 6901. The DRESTER
120 Recycler is described in detail in manual no. 11213. The descriptions below also apply to the DRESTER 3600 Gun Cleaner.
ASSEMBLY
The DRESTER RDX 8012 Docking Unit is supplied complete in a box. The unit does not require any further assembly. The
Docking Unit is installed in accordance with the instructions below with the aid of the enclosed accessories.
Note: Air lines for compressed air and associated couplings (for 1/4” internal thread) must be supplied by the purchaser.
PLACING THE UNIT
The DRESTER RDX 8012 is placed on the right side of the DRESTER 8000. The DRESTER 8000 with RDX 8012 are
equipment Category 2 (ref. ATEX-directive 94/9 EC) and may therefore be placed in locations classified as Zone 1 (ref. ATEX-
directive 1999/92 EC). If the DRESTER 8000 with RDX 8012 are installed in locations classified as Zone 2 (or in unclassified
locations), the area within a radius of 1 m from the DRESTER 8000 with RDX 8012 is to be classified as Zone 1, and within a
radius of an additional 2.5 m from the unit as Zone 2 (total classification: 3.5 m around the machinery and 1 m above it). Within
this area, all equipment such as electrical items must be approved for the Zones described. Equipment that generates naked flames
or sparks (e.g. welding or grinding equipment) may not be used in this area. Smoking is not permitted.
If in any doubt, contact the local fire service authorities for advice.
Always ensure that the unit is correctly grounded.
This manual is part of the equipment and must be kept accessible at all times.
COLLECTING TRAY
To prevent accidental leakage of solvent that runs onto the floor from spreading into a drain water system, the DRESTER 8000
with RDX 8012 must be installed in a location where floor and walls can hold the accidental leakage.
PREPARATIONS BEFORE INSTALLATION
General
To ensure an effective, trouble-free installation of the DRESTER DYNAMIC TRIPLE 8000, the following preparations should be
made:
DRESTER 8000 Gun Cleaner
Install the Gun Cleaner according to manual no. 6901. Please note that the DRESTER 8000 must be equipped with bottom plate
8195, NOT the 6642 Collecting Tray.
DRESTER 120 Recycler
Install the Recycler according to manual no. 11213. Note that the electrical installation must be carried out by a qualified
electrician.
Compressed air connection
By the Recycler, compressed air of 3–10 bar must be available.
By the Gun Cleaner, compressed air of 7–12 bar must be available.
If the supply of compressed air is between 7 and 10 bar, the system may be connected to the same outlet.
The compressed air supplied to the units must be clean and dry, otherwise it may cause damage to the pneumatic components of
the unit, which will invalidate any warranty claims.
Combined or separate
If the Recycler is to be installed at some distance from the Gun Cleaner, the “PIPING KIT 10810” will be required for installation.
Apart from components, this kit also includes manual no. 11161, which describes such an installation.
Air lines and couplings
Note: Air lines for compressed air and associated couplings (for 1/4” internal thread) must be supplied by the purchaser.
Solvents
60 litres of solvent are required to prime the “DRESTER DYNAMIC TRIPLE 8000” system.

4
INSTALLATION
(see illustration enclosure 11142)
At the Gun Cleaner
1. Remove the Gun Cleaner’s front cover. Remove the suction hoses with their plugs from the pumps, as well as the black ø6 mm
suction hose for manual cleaning (see Picture 1).
2. Place the Docking Unit on the right side of the Gun Cleaner so that the “DRESTER RDX” label is facing the front.
Run the Docking Unit’s short hoses (black and white) forward between the Gun Cleaner’s stand and the wash basin (see
Picture 2).
3. Run the Docking Unit’s long hoses (black and white) backwards in the corresponding manner (see Picture 3).
4. Connect the Docking Unit’s short hoses to the Gun Cleaner’s pumps (see Picture 4):
The black hose to the lower pump.
The white hose to the upper pump.
5. Cut off about 200 mm from the Gun Cleaner´s solvent return hose from the wash basin, then insert it in the Docking Unit (see
Picture 5).
6. Insert the suction hose (black, ø 6 mm enclosed in a bag) for manual cleaning through the centre plug of the Docking Unit.
The other end is then connected to the coupling on the side of the wash basin (see Picture 6).
7. Fit the maximum level indicator hose (transparent, ø6 mm) onto the brass tube (see Picture 7).
8. Fit the two gas return hoses (transparent, ø6 mm) onto the brass tubes (see Picture 8).
9. Connect the grounding cable (see Picture 9).
10.Cut the black ø8 mm hose (coming from the safety valve’s middle fitting on the side of the wash basin) where the arrow
indicates (see Picture 10).
11.Fit the control valve onto the hose (see Picture 11). Place the yellow hose alongside the transfer hoses.
12.Connect the black hose from the Docking Unit’s pumps to the upper outlet fitting on the left side of the control valve (see
Picture 12).
Fit the Docking Unit’s cover and the Gun Cleaner’s front cover. The installation at the Gun Cleaner is now completed.
At the Recycler
1. Picture 13 shows the enclosed valve components.
2. Fit the console with the control valve on the right side of the Recycler (see Picture 14).
3. Remove the plug from the solvent inlet and fit the 90º-coupling. If necessary, use the enclosed bushing (1/4 -3/8”).
Then fit the brass connector (see Picture 15).
4. Connect the solvent hose (black with protective metal hose, see Picture 16).
5. Connect the distillate hose (see Picture 17).
6. Picture 18 shows the distillate container with level indicator.
7. Place the distillate container underneath the Recycler and insert the distillate hose (see Picture 19).
8. Connect the suction hose for clean solvent (white with protective metal hose, see Picture 20).
9. Trim the hoses from the Gun Cleaner to the correct length (see Picture 21).
10.Connect the hoses from the Gun Cleaner. Note the colour-coding: white for clean solvent, and black for
contaminated solvent (see Picture 22).
11.Connect the yellow air line (see Picture 23).
12.Connect clean, dry compressed air of 3–10 bar to the control valve inlet (see Picture 24).
13.Tie the hoses together using the supplied cable ties (see Picture 25).
The installation at the Recycler is now completed and the “DRESTER DYNAMIC TRIPLE 8000” is ready to be taken into use
(see Picture 26).
Warning:
Make sure that all parts of the system are grounded (machines and drums).

5
PREPARATIONS FOR USE
Gun Cleaner – topping up with solvent
1. Open the lid of the Gun Cleaner.
2. Top up with 40-45 litres of solvent poured directly into the Gun Cleaner.
3. Close the lid.
Recycler – topping up with solvent
1. Remove the three clips from the cover of the distillate container and remove the cover. Take care to avoid damaging the
level indicator float.
2. Fill the distillate container with 12 litres of clean solvent, i.e. up to 100 mm from the top edge.
3. Refit the cover and secure it with the three clips.
Operating manual
This manual and the manuals for the Gun Cleaner and the Recycler must always be kept available and in legible condition by the
system. Pin up the plastic-covered operating manual (no. 11151) so that it is clearly visible in the immediate vicinity of the
Recycler. If necessary, it must also be translated into other languages spoken by the employees.
Service personnel
It is essential that the personnel gets special training in the system´s use. Only personnel who have undergone such training may
use the system.
Starting up for the first time
The system can now be taken into operation. Follow the “Operating instructions for the Drester Dynamic Triple” below and check
that there are no leaks from any of the connections.
OPERATING MANUAL
This operating manual applies to the complete DRESTER DYNAMIC TRIPLE system.
The DRESTER 8000 Gun Cleaner and DRESTER 120 Recycler are described in detail in their own manuals (nos. 6901 and
11213).
Operating instructions for the ”Drester Dynamic Triple”:
1. FIRST CHECK
* Check that the green lamp is lit and that the oil temperature has dropped to 50°C.
(This means that the Recycler is cold, ready to start and may be opened.)
* Check the plastic bag in the Recycler.
(This is a single-use disposable bag and must be replaced after each use. If the bag is full of solvent, check that the
distillate container under the Recycler is empty and then go directly to step 4.)
2. TRANSFERRING SOLVENT
* Start the pumps of the RDX Docking Unit.
(Open the control valve on the right side of the Recycler)
* Turn off the pumps when they start to pump air.
(Turn off the control valve after about 2–3 minutes)
3. SECOND CHECK
* Check that the level indicator of the distillate container is all the way down.
(If not, start the pumps again and let them run for a few more minutes. If the level indicator still does not drop to its lowest level,
then the feed hose is may be blocked or a pump faulty, in which case you should contact an authorised Drester retailer.)
* Check that the plastic bag in the Recycler is full of solvent.
(Roughly up to the level of the ring clamp holding the bag. If not, start the pumps again and let them run for a few more
minutes.
If the bag still is not full, then the feed hose may be blocked or a pump faulty, in which case you should contact an
authorised Drester retailer.)
4. CLOSE THE COVER AND START THE RECYCLER
* Note: Information about settings for time and temperature can be found in the manual for the Recycler, no. 11213, section 5.5.

6
What to do when you run out of solvent:
NO CLEAN SOLVENT IN GUN CLEANER
Do not top up with clean solvent, instead make a transferpumping and start the Recycler.
(See “Operating instructions for the Drester Dynamic Triple” above.)
NO RECIRCULATING SOLVENT IN GUN CLEANER
If the pump for the automatic cleaning cycle only pumps air and no solvent, there is not enough solvent in the Docking Unit. If
this is the case, pour 10 litres of solvent straight into the Gun Cleaner. Check that the level indicator can move freely and that it
sits at a height of 10–70mm. (See Picture below left)
The maximum level indicator on the Gun Cleaner shows when the solvent level is too high in the Docking Unit (by showing
different heights of the red fluid columns, see Picture below right). If this is the case, do not top up with more solvent, since the
recycler will then be overfilled at the next transfer.
Recycling foreign solvent:
To recycle solvents that are not part of the system, follow the steps listed below:
1. Change the plastic bag in the Recycler
2. Move the distillate container to the side.
3. Place an empty drum that will hold at least 12 litres underneath the Recycler (see Picture below).
4. Fill the Recycler with dirty solvent (no more than 12 litres).
5. Close the lid of the Recycler and start the timer. Note: Information about settings for time and temperature can be found
in the manual for the Recycler, no. 11213, section 5.5.
When the distillation cycle is complete, put the distillate container back in place.

7
PERMITTED SOLVENTS
The machine can be used with all thinners and solvent mixtures, such as acetone, toluene, xylene, isobutanol (2-methylpropan-1-
ol) listed as Group IIA according to IEC 79-20 (EN 60079-20).
SAFETY INFORMATION
In order to maintain the high safety standard of the machine, you should ensure the following:
- that the system is installed in the manner prescribed in this manual
- that the machine is used in the manner prescribed in this manual
- that the machine is maintained in the manner prescribed in this manual
- that only original spare parts are used
- that this manual and the manuals for the Gun Cleaner and the Recycler are kept available and in legible condition nearby the
system.
Always wear protective gloves and goggles (solvent-resistant) when you work with the system, as well as additional personal
protective equipment when appropriate.
Personnel suffering from chronic respiratory problems or allergies to solvents must not operate the system.
A fire extinguisher must always be kept nearby when working with solvents.
SERVICE
Check daily that there are no leaks.
The DRESTER RDX Docking Unit must be removed, opened and cleaned out once a year. The authorised Drester retailer can
advise you further on this matter.
WARRANTY
Hedson Technologies AB will replace all faulty parts on the DRESTER RDX 8012 with new parts in accordance with the
“Warranty Terms for Hedson Technologies AB No. 7.2-8”. This warranty only remains valid if the machine is used in the
prescribed manner, and it does not cover the cost of repairs. Always state the machine’s serial number and year of manufacture if
making a claim under warranty. These can be found on the machine’s silver-coloured rating plate.
TECHNICAL DATA
Manufacturer HEDSON TECHNOLOGIES AB
Hammarvägen 4
SE-232 37 Arlöv
Sweden
+46-40-53 42 00
Type of machine DRESTER RDX 8012 Docking Unit
Solvent capacity Max. 80 litres
Compressed air needed Clean, dry air at 3–10 bar
Pump capacity 10 l/minute
Liquid pressure 2 bar
Weight 21 kg
Overall dimensions Height: 700 mm, max. diameter: 500 mm
Sound pressure level < 70 dB(A)

8
**********DEUTSCH**********
INHALTSVERZEICHNIS
SEITE:
9 VERWENDUNGSZWECK
9 MONTAGE
9 AUFSTELLUNG
9 AUFFANGWANNE
9 VORBEREITUNG ZUR INSTALLATION
10 INSTALLATION
11 VORBEREITUNG ZUM BETRIEB
11 BETRIEBSANLEITUNG
11 Handhabung des Systems „ Drester Dynamic Triple“
12 Maßnahmen bei Lösemittelmangel
12 Destillation von Fremdlösemittel
13 ZULÄSSIGE LÖSEMITTEL
13 SICHERHEITSINFORMATIONEN
13 WARTUNG
13 GARANTIE
13 TECHNISCHE DATEN

9
VERWENDUNGSZWECK
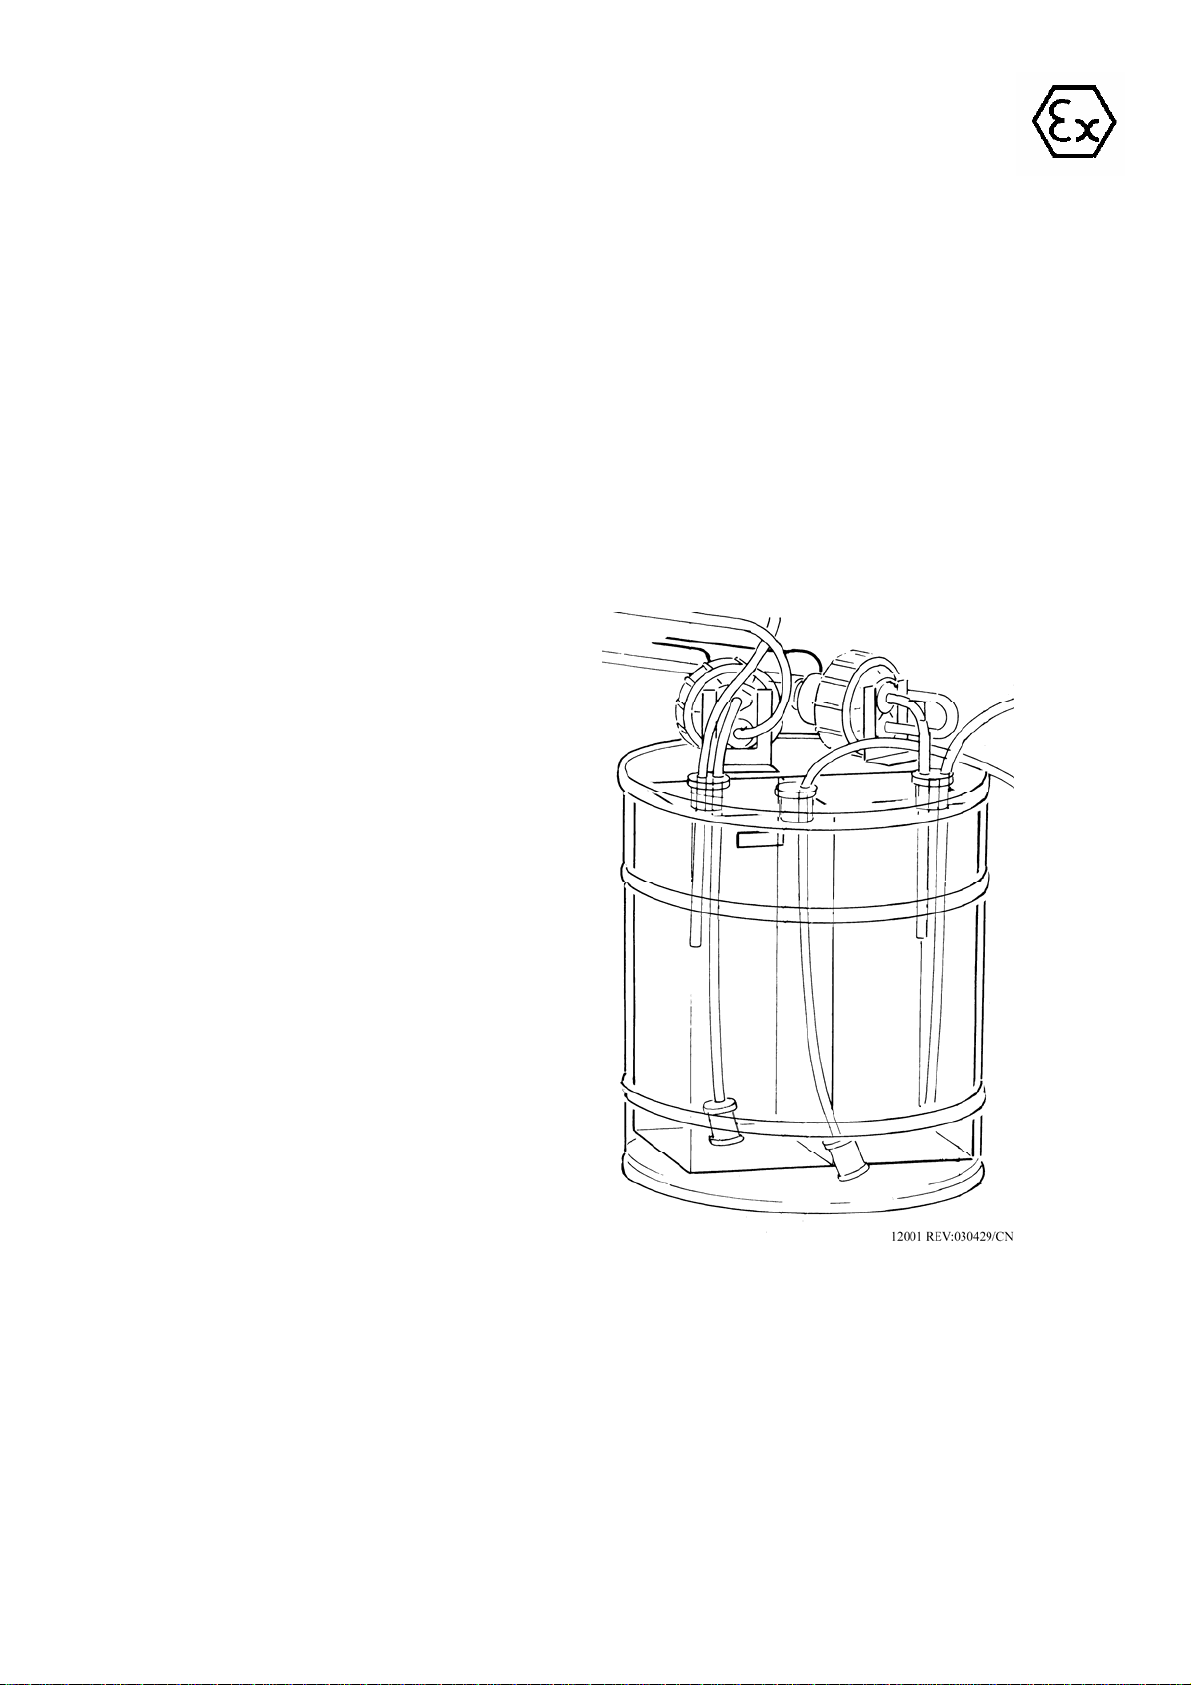
DRESTER RDX 8012 ist die Docking-Einheit, die mit dem DRESTER 8000 Pistolenreiniger und mit dem DRESTER 120
Destillationsgerät zu dem Kreislaufsystem ”DRESTER DYNAMIC TRIPLE 8000” zusammengeschlossen wird. Dadurch werden
Lösemittel, sowohl Frischware als auch verschmutzte Ware, sicher gehandhabt. Schweres Tragen und offenes Umfüllen entfallen
weitgehend. Dadurch werden Zeit, Mühe und Lösemittel gespart.
Diese Betriebsanleitung beschreibt die Docking-Einheit DRESTER RDX 8012, wie sie installiert wird und wie das ganze System
DRESTER DYNAMIC TRIPLE 8000 betrieben wird. Der DRESTER 8000 Pistolenreiniger wird im Detail in der
Betriebsanleitung Nr. 6901 beschrieben. Das DRESTER 120 Destillationsgerät wird im Detail in der Betriebsanleitung Nr. 11214
beschrieben. Die vorliegende Beschreibung ist auch für den Pistolenreiniger DRESTER 3600 zu verwenden.
MONTAGE
Die Docking-Einheit DRESTER RDX 8012 wird komplett in einem Karton geliefert. Sie erfordert keine weitere Montage. Sie
wird, wie unten beschrieben, mit den mitgelieferten Zubehörteilen installiert.
Hinweis: Druckluftanschlussschlauch mit dazu gehörenden Kupplungen (Innengewinde ¼”) müssen vom Betreiber gestellt
werden.
AUFSTELLUNG
DRESTER RDX 8012 muss rechts neben der DRESTER 8000 stehen. DRESTER 8000 mit RDX 8012 entspricht der
Gerätekategorie „2“ (ATEX-Richtlinie 94/9 EG) und darf demnach in einem Arbeitsraum Zone 1 (ATEX-Richtlinie 1999/92 EG)
aufgestellt werden. Sollte DRESTER 8000 mit RDX 8012 in einen Arbeitsraum Zone 2 (oder in einem unklassifizierten Bereich)
aufgestellt werden, ist der Aufstellungsplatz im Umkreis von 1m zum DRESTER 8000 mit RDX 8012 wie Zone 1 und weitere
2,5 m um das Gerät wie Zone 2 zu betrachten (Klassifizierung insgesamt: 3,5 m um das Gerät und 1 m darüber). In diesem
Bereich muss alle Ausstattung wie z.B. elektrische Betriebsmittel für die entsprechende Zone zugelassen sein. Offenes Feuer oder
andere wirksame Zündquellen (z.B. Schweißgeräte, Schleifmaschinen usw.) sind verboten. Ebenso das Rauchen. Im Zweifelsfall
berät die Feuerwehr bzw. die zuständige Berufsgenossenschaft.
Auf guten Potentialausgleich (Erdung) der Geräte achten.
Diese Benutzerinformation ist Bestandteil des Geräts und ständig verfügbar aufzubewahren.
AUFFANGWANNE
Um zu vermeiden, dass bei einer Leckage Lösemittel unabsichtlich auf den Boden und infolgedessen ins Wassersystem gelangt,
muss DRESTER 8000 mit RDX 8012 in einem Raum aufgestellt werden, in dem dies durch z.B. undurchlässige Wände und
Fußböden verhindert wird.
VORBEREITUNG ZUR INSTALLATION
Allgemeines
Um eine zeitsparende und reibungslose Installation durchführen zu können, sind folgende Vorbereitungen zur Installation der
DRESTER DYNAMIC TRIPLE 8000 erforderlich:
Pistolenreiniger DRESTER 8000
Pistolenreiniger gemäß Betriebsanleitung Nr. 6901 installieren. Bitte beachten, dass die DRESTER 8000 mit der Bodenplatte
8195 versehen sein muss und NICHT mit der Auffangwanne 6642 ausgestattet sein darf.
Destillationsgerät DRESTER 120
Destillationsgerät gemäß Betriebsanleitung Nr. 11214 installieren. Dabei beachten, dass die elektrische Installation nur durch eine
Elektrofachkraft erfolgen darf.
Druckluftanschluss
Für die Steuerluft wird in der Nähe des Destillationsgerätes ein Druckluftanschluss von 3-10 bar benötigt.
Für die Betriebsluft des Pistolenreinigers ist in seiner Nähe ein Druckluftanschluss von 7-12 bar erforderlich.
Liegt die Druckluftversorgung zwischen 7 und 10 bar, kann das System an einem einzigen Anschluss betrieben werden.
Die Druckluft muss frei von Schmutzpartikeln und Feuchtigkeit sein. Anderenfalls ist mit Störungen der Funktion zu rechnen. In
diesem Fall erlöschen alle Garantieansprüche.
Zusammen oder getrennt
Wenn das Destillationsgerät entfernt von Pistolenreiniger installiert werden soll, wird „PIPING KIT 10810“ benötigt. Dieses Kit
enthält außer Komponenten auch die Benutzerinformation Nr. 11161, in der die Ferninstallation beschrieben wird.
Luftschlauch und Kupplungen
Hinweis: Druckluftanschlussschlauch mit dazuhörenden Kupplungen (Innengewinde ¼”) müssen vom Betreiber gestellt werden.
Lösemittel
Zum Auffüllen des Systems DRESTER DYNAMIC TRIPLE 8000 werden 60 Liter Lösemittel benötigt.

10
INSTALLATION
(siehe Bildbeilage 11142)
Am Pistolenreiniger
1. Vorderwand des Pistolenreinigers demontieren. Original-Saugschläuche von den Pumpen mit Stopfen sowie den schwarzen
φ6mm Saugschlauch für manuelle Reinigung demontieren (siehe Bild 1).
2. Docking-Einheit rechts vom Pistolenreiniger aufstellen, dass die Aufschrift „DRESTER RDX“ frontseitig sichtbar ist.
Kurze Schläuche (schwarz und weiß) der Docking-Einheit zwischen Untergestell und Reinigungskammer des
Pistolenreinigers nach vorn ziehen (siehe Bild 2).
3. Lange Schläuche (schwarz und weiß) der Docking-Einheit in gleicher Weise nach hinten ziehen (siehe Bild 3).
4. Kurze Schläuche der Docking-Einheit an die Pumpen des Pistolenreinigers anschließen (siehe Bild 4):
Schwarz an die untere Pumpe.
Weiß an die obere Pumpe.
5. Den Lösemittel-Rücklaufschlauch des Pistolenreinigers etwa 200 mm kürzen und in die Docking-Einheit einsetzen (siehe Bild
5).
6. Den in einer Tüte beigefügten längeren Saugschlauch für manuelle Reinigung (schwarz, φ6mm) in den mittigen Stopfen der
Docking-Einheit und in die jetzt freie Kupplung an der Seite der Reinigungskammer hineinstecken (siehe Bild 6).
7. Schlauch des Max-Niveauindikators (farblos φ6mm) auf Messingstutzen aufschieben (siehe Bild 7).
8. Die zwei Gaspendelschläuche (farblos φ6mm) auf Messingstutzen aufschieben (siehe Bild 8).
9. Erdungskabel anschließen (siehe Bild 9).
10.Den schwarzen 8 mm-Schlauch (mittlerer Anschluss des Sicherheitventils an der Seite der Reinigungskammer) beim Pfeil
durchtrennen (siehe Bild 10).
11.Steuerventil dazwischen montieren (siehe Bild 11). Anhängenden gelben Schlauch zu den Transferschläuchen legen.
12.Schwarzen Schlauch für die Pumpen der Docking-Einheit in oberen linken Ausgang des Steuerventils stecken (siehe Bild 12).
Den Deckel auf die Docking-Einheit setzen und die Vorderwand des Spritzpistolenreinigers montieren. Die Installation am
Pistolenreiniger ist damit beendet.
Am Destillationsgerät
1. Bild 13 zeigt die mitgelieferte Ventilkomponenten.
2. Konsole mit Druckluftventil an der Seite des Destillationsgeräts montieren (siehe Bild 14).
3. Stopfen am Lösemitteleinlauf demontieren und Winkelkupplung montieren. Falls nötig, die beigelegte Gewindekupplung 1/4 -
3/8” benutzen. Danach Messinganschluss an Winkelkupplung montieren (siehe Bild 15).
4. Lösemittelschlauch (schwarz mit Metallschutzschlauch) anschließen (siehe Bild 16).
5. Destillatschlauch montieren (siehe Bild 17).
6. Bild 18 zeigt Destillatfass mit Niveauanzeiger.
7. Destillatfass unter das Destillationsgerät stellen und Destillatschlauch einstecken (siehe Bild 19).
8. Saugschlauch für sauberes Lösemittel (weiß mit Metallschutzschlauch) anschließen (siehe Bild 20).
9. Schläuche vom Pistolenreiniger auf passende Länge kürzen (siehe Bild 21).
10.Schläuche vom Pistolenreiniger montieren. Auf die Farben achten: Weiß für sauberes Lösemittel und schwarz für
verschmutztes Lösemittel (siehe Bild 22).
11.Gelben Luftschlauch anschließen (siehe Bild 23).
12.Den Eingang des Steuerventils an saubere und trockene Druckluft, 3-10 bar, anschließen (siehe Bild 24).
13.Schläuche mit beigefügtem Kabelbinder verbinden (siehe Bild 25).
Die Installation am Destillationsgerät ist damit beendet und die „DRESTER DYNAMIC TRIPLE 8000“ ist einsatzbereit (siehe
Bild 26).
Achtung:
Kontrollieren, dass alle Teile des Systems (Geräte und Fässer) vorschriftsmäßig geerdet sind.

11
VORBEREITUNG ZUM BETRIEB
Pistolenreiniger - Einfüllen von Lösemittel
1. Klappe des Pistolenreinigers öffnen.
2. 40-45 Liter Lösemittel direkt in den Pistolenreiniger füllen.
3. Klappe des Pistolenreinigers schließen.
Destillationsgerät - Einfüllen von Lösemittel
1. Am Deckel des Destillatfasses 3 Federbleche entfernen und den Deckel abnehmen. Darauf achten, dass der Schwimmer des
Niveauanzeigers nicht beschädigt wird.
2. 12 Liter sauberes Lösemittel in das Destillatfass einfüllen (d.h. bis auf 100 mm von der oberen Kante gemessen).
3. Den Deckel aufsetzen und die 3 gelösten Federbleche wieder anbringen.
Betriebsanleitung
Diese Betriebsanleitung sowie die Betriebsanleitungen für den Pistolenreiniger und das Destillationsgerät müssen immer in gut
lesbarer Form beim System vorhanden sein. Die Betriebsanweisung in Plastik (Nr. 11152) muss gut sichtbar in der Nähe vom
Destillationsgerät angebracht werden. Ggf. muss sie in die Sprache der Beschäftigten übertragen werden.
Bedienungspersonal
Es wird empfohlen, für den folgenden Ablauf betriebliche Zuständigkeiten zu schaffen. Nur hierfür eingewiesene Personen
dürfen diese Tätigkeiten ausführen.
Erstmalige Inbetriebnahme
Das System kann jetzt in Betrieb genommen werden. Dabei entsprechend der Betriebsanleitung Handhabung des Systems
„Drester Dynamic Triple“ vorgehen. Alle Verbindungen bei jedem Schritt auf Dichtheit kontrollieren.
BETRIEBSANLEITUNG
Diese Betriebsanleitung gilt für das komplette System DRESTER DYNAMIC TRIPLE. Der DRESTER 8000 Pistolenreiniger
und das DRESTER 120 Destillationsgerät werden weiter im Detail in ihrer entsprechenden Betriebsansleitungen Nr. 6901 und
11214 beschrieben.
Handhabung des Systems „Drester Dynamic Triple“:
1. ERSTE KONTROLLE
* Kontrollieren, ob das grüne Licht leuchtet und die Öltemperatur bis auf 50°C abgekühlt ist.
(Dies bedeutet: Das Destillationsgerät ist kalt, einsatzbereit und darf geöffnet werden)
* Den Plastikbeutel im Destillationsgerät kontrollieren
(Dieser Einmalbeutel muss für jeden Destillationsvorgang gewechselt werden. Sollte der Beutel voll Lösemittel sein,
sicherstellen, dass das Destillatfass unter dem Destillationsgerät leer ist. In diesen Fall weiter bei Punkt 4)
2. UMPUMPEN DES LÖSEMITTELS
* Die Pumpen der Docking-Einheit RDX starten
(Druckluftventil auf der rechten Seite des Destillationsgeräts öffnen)
* Die Pumpen abschalten, wenn sie anfangen, Luft zu pumpen
(d.h. Druckluftventil nach etwa 2-3 Minuten schließen)
3. ZWEITE KONTROLLE
* Kontrollieren, ob der Niveauanzeiger des Destillatfasses ganz unten ist.
(Falls nicht, die Pumpe noch einmal starten und einige Minuten laufen lassen. Wenn der Niveauanzeiger danach immer noch
nicht ganz unten ist, kann der Förderschlauch verstopft oder die Pumpe defekt sein. In diesem Fall mit dem Kundendienst
Kontakt aufnehmen)
* Kontrollieren, ob der Beutel im Destillationsgerät mit Lösemittel gefüllt ist.
(Niveau ca. bis am Klemmring des Beutels. Ist dies nicht der Fall, die Pumpe noch einmal starten und einige Minuten laufen
lassen. Ist der Beutel immer noch nicht gefüllt, kann der Förderschlauch verstopft oder die Pumpe defekt sein. In diesem Fall
mit dem Kundendienst Kontakt aufnehmen)
4. DAS DESTILLATIONSGERÄT SCHLIESSEN UND STARTEN
* Hinweis: Einstellung von Zeit und Temperatur siehe Betriebsanleitung des Destillationsgerätes, Nr. 11214 Abschnitt 5.5.

12
Maßnahmen bei Lösemittelmangel:
SAUBERES LÖSEMITTEL FEHLT IM PISTOLENREINIGER
Kein neues Lösemittel einfüllen, sondern das Destillationsgerät in Betrieb setzen.
(Siehe Handhabung des Systems „Drester Dynamic Triple“ )
UMLAUFLÖSEMITTEL FEHLT IM PISTOLENREINIGER
Sollte die Pumpe für die automatische Vorwäsche am Pistolenreiniger nur Luft und kein Lösemittel pumpen, ist zu wenig
Lösemittel vorhanden. 10 Liter Lösemittel direkt in den Pistolenreiniger einfüllen. Kontrollieren, dass der Niveauanzeiger frei
beweglich ist, und 10-70 mm hoch steht (siehe Bild unten links).
Einen zu hohen Pegel des Lösemittels zeigt der Max-Niveauindikator am Pistolenreiniger an (unterschiedlicher Stand der
Flüssigkeitssäulen, siehe Bild unten rechts). Es darf dann kein Lösemittel mehr eingefüllt werden. Sonst wird das
Destillationsgerät beim nächsten Umpumpen überfüllt.
Destillation von Fremdlösemittel:
1. Plastiktüte im Destillationsgerät wechseln.
2. Destillatfass an die Seite ziehen.
3. Ein anderes Fass mit einem Füllvolumen von mindestens 12 Litern unter das Destillationsgerät stellen (siehe Bild unten).
4. Fremdlösemittel einfüllen, max. 12 Liter.
5. Destillationsgerät schließen und mit dem Timer starten. Hinweis: Einstellung von Zeit und Temperatur siehe
Betriebsanleitung des Destillationsgerätes, Nr. 11214 Abschnitt 5.5.
Wenn der Destillationsvorgang beendet ist, soll das Destillatfass unter das Destillationsgerät zurückgestellt werden.

13
ZULÄSSIGE LÖSEMITTEL
Waschverdünnung, Mischungen von Lösemitteln wie z.B. Aceton, Toluol, Xylol, Isobutanol (2-Methylpropan-1-ol) die laut IEC
79-20 (EN 60079-20) der Gruppe IIA zugeordnet sind.
SICHERHEITSINFORMATIONEN
Um die Sicherheit des Systems zu gewährleisten, müssen folgende Punkte befolgt werden:
- Das System muss laut Vorgabe installiert werden.
- Das System muss bestimmungsgemäß betrieben werden.
- Die Wartung des Systems muss laut Vorgaben ausgeführt werden.
- Es darf nur Originalersatzteile verwendet werden.
- Diese Betriebsanleitung, sowie die Betriebsanleitungen für den Pistolenreiniger und das Destillationsgerät,
muss immer in gut lesbarer Form beim System vorhanden sein.
Beim Bedienen des Systems müssen lösemittelfeste Schutzhandschuhe benutzt werden.; ggf. weitere Persönliche
Schutzausrüstung.
Personen mit chronischen Atembeschwerden und allergischen Reaktionen gegen die verwendeten Lösemittel dürfen nicht an dem
Gerät beschäftigt werden.
Ein Handfeuerlöscher muss immer im Aufstellungsraum vorhanden sein.
WARTUNG
Regelmäßig kontrollieren, dass keine Leckage vorhanden ist.
Die Docking-Einheit DRESTER RDX ist jährlich mindestens einmal zu demontieren und zu reinigen. Anfragen beantwotet der
Drester-Distributor jeder Zeit gerne.
GARANTIE
Für DRESTER RDX 8012 übernimmt Hedson Technologies AB eine Garantie für fehlerhafte Teile laut „Warranty Terms for
Hedson Technologies AB Nr. 7.2-8”. Die Garantie erlischt bei unsachgemäßem Gebrauch sowie bei Fremdeinwirkungen und
deckt keine Reparaturarbeiten. Bei Garantieansprüchen sind stets die Seriennummer und das Baujahr anzugeben. Diese Angaben
befinden sich auf dem silbernen Fabrikschild des Geräts.
TECHNISCHE DATEN
Hersteller HEDSON TECHNOLOGIES AB
Hammarvägen 4
SE-232 37 Arlöv
Schweden
+46-40-53 42 00
Gerätetyp Docking-Einheit DRESTER RDX 8012
Fassungsvermögen Lösemittel Max. 80 Liter
Druckluftanschluss Trockene, saubere Luft von 3-10 bar
Pumpenförderleistung 10 l/min, wenn aufgefüllt
Lösemitteldruck 2 bar
Gewicht 21 kg
Maße Höhe: 700 mm, Max. Durchmesser: 500 mm
Schalldruckpegel < 70 dB(A)

14
**********FRANÇAIS**********
SOMMAIRE
PAGE :
15 DOMAINES D’UTILISATION
15 MONTAGE
15 EMPLACEMENT
15 RÉCIPIENT COLLECTEUR
15 PRÉPARATIONS AVANT L’INSTALLATION
16 INSTALLATION
17 PRÉPARATIONS AVANT LA MISE EN SERVICE
17 MODE D’EMPLOI
17 Mode d’emploi du système « Dynamic Triple Drester »
18 Mesures en cas d’absence de solvant
18 Distillation de solvants étrangers
19 SOLVANTS AUTORISÉS
19 CONSIGNES DE SÉCURITÉ
19 ENTRETIEN
19 GARANTIE
19 CARACTÉRISTIQUES TECHNIQUES

15
DOMAINES D’UTILISATION
DRESTER RDX 8012 est une unité d’amarrage qui, connectée au laveur de pistolets DRESTER 8000 et au recycleur DRESTER
120, constitue le système en circuit fermé « DYNAMIC TRIPLE DRESTER ». Ce système garantit une manipulation fiable et de
toute sécurité aussi bien des solvants neufs que des solvants usagés. Les astreignantes opérations de levage du solvant sont
éliminées ce qui facilite et accélère le travail. En outre, les pertes de solvant sont réduites au minimum.
Ce mode d’emploi décrit l’unité d’amarrage DRESTER RDX 8012, son installation et de quelle manière le système « DYNAMIC
TRIPLE DRESTER » est utilisé. Le laveur de pistolets DRESTER 8000 est décrit en détail dans le manuel n° 6901. Le recycleur
DRESTER 120 est décrit en détail dans le manuel n° 11215. Les descriptions ci-après concernent également le laveur de pistolets
DRESTER 3600.
MONTAGE
L’unité d’amarrage DRESTER RDX 8012 est livrée complète dans un carton. Elle ne nécessite aucun montage supplémentaire.
L’installation de l’unité d’amarrage s’effectue à l’aide des accessoires fournis à la livraison, conformément aux descriptions du
présent manuel. Remarque: Les tuyaux d’air comprimé et les raccords (filetage femelle 1/4” ) doivent être fournis par l’acheteur.
EMPLACEMENT
DRESTER RDX 8012 doit être placé à droite de DRESTER 8000. DRESTER 8000 avec RDX 8012 constitue un équipement de
Catégorie 2 (cf. directive ATEX n° 94/9/CE) et peut donc être placé dans un espace de travail classé comme Zone 1 (cf. directive
ATEX n° 1999/92 CE). Si DRESTER 8000 avec RDX 8012 est installé dans un espace de travail classé comme Zone 2 (ou non
classé), le lieu de l’installation est classé comme Zone 1 dans un rayon d’1 mètre autour de DRESTER 8000 avec RDX 8012, et
comme Zone 2 dans un rayon supérieur de 2,5 mètres (soit, pour le classement, un rayon total de 3,5 mètres autour de la machine
et 1 mètre au-dessus). Tous les équipements se trouvant dans ce rayon, p.ex. les installations électriques, doivent être homologués
pour les zones respectives. Aucun feu ouvert ou équipement pouvant produire des étincelles (par exemple une unité de soudage,
une ponceuse, etc.) ne sont autorisés. Il est également interdit de fumer.
En cas de doute, contacter les services pompiers locaux.
Vérifier que la machine est correctement mise à la terre.
Ce manuel fait partie de l’équipement et doit être conservé de manière à être toujours accessible.
RÉCIPIENT COLLECTEUR
Afin d’empêcher qu’une éventuelle fuite de solvant ne se répande sur le sol et n’atteigne une bouche d’égout, DRESTER 8000
avec RDX 8012 doit être placé dans un local dont les murs et le sol tolèrent les fuites de solvant.
PRÉPARATIONS AVANT L’INSTALLATION
Généralités
Les préparations suivantes sont nécessaires pour que l’installation du DYNAMIC TRIPLE DRESTER 8000 s’effectue
efficacement et sans problème :
Laveur de pistolets DRESTER 8000
Installer le laveur de pistolets conformément aux instructions figurant dans le manuel n° 6901. Remarque: DRESTER 8000 doit
être équipé du fond plat 8195 et non PAS du fond collecteur 6642.
Recycleur DRESTER 120
Installer le recycleur conformément aux instructions figurant dans le manuel n° 11215. Remarque : L’installation électrique ne
peut être effectuée que par un électricien agréé.
Raccordement de l’air comprimé
Le recycleur nécessite un raccord d’air comprimé de 3-10 bars (air de commande).
Le laveur de pistolets nécessite un raccord d’air comprimé de 7-12 bars (air d’entraînement).
Si le raccord d’air comprimé est de 7 à 10 bars, le système peut être connecté à un seul et même raccord.
L’air comprimé doit être sec et propre, faute de quoi les composants pneumatiques de la machine risquent d’être endommagés,
auquel cas la garantie de la machine sera annulée.
Ensemble ou séparément
Si le recycleur doit être installé à une certaine distance du laveur de pistolets, le kit de tuyaux « PIPING KIT 10810 » est
nécessaire à l’installation. Outre les composants, il contient le manuel n° 11161, dans lequel l’installation est décrite.
Tuyaux pneumatiques et raccords
Remarque : Les tuyaux d’air comprimé et les raccords correspondants (filetage femelle 1/4”) doivent être fournis par l’acheteur.
Solvant
Le remplissage du système DRESTER DYNAMIC TRIPLE 8000 nécessite 60 litres de solvant.

16
INSTALLATION
(voir l’annexe des illustrations 11142)
Sur le laveur de pistolets
1. Démonter la plaque frontale du laveur de pistolets. Démonter les tuyaux d’aspiration d’origine des pompes (y compris leurs
bouchons) ainsi que le tuyau d’aspiration noir de φ6mm pour le nettoyage manuel (voir l’illustration 1).
2. Placer l’unité d’amarrage à droite du laveur de pistolets de manière à ce que l’autocollant « DRESTER RDX » soit visible à
l’avant. Passer les tuyaux courts (noirs et blancs) entre le support et la cuve du laveur de pistolets (voir l’illustration 2).
3. De la même manière, tirer vers l’arrière les tuyaux longs (noirs et blancs) de l’unité d’amarrage (voir l’illustration 3).
4. Connecter les tuyaux courts de l’unité d’amarrage aux pompes du laveur de pistolets (voir l’illustration 4):
Tuyau noir sur la pompe inférieure.
Tuyau blanc sur la pompe supérieure.
5. Raccourcir d’environ 200 mm le tuyau de retour du solvant sur le laveur de pistolets avant de le passer dans l’unité
d’amarrage (illustration 5).
6. Passer le tuyau d’aspiration (tuyau noir de φ6mm) destiné au nettoyage manuel avec du solvant propre (livré dans un sachet) à
travers le bouchon du milieu sur l’unité d’amarrage (voir l’illustration 6) et brancher l’autre bout du tuyau au raccord sur le
côté de la cuve.
7. Brancher le tuyau de l’indicateur de niveau maximal (tuyau transparent de φ6mm) sur le tuyau en laiton (voir l’illustration 7).
8. Brancher les deux tuyaux de retour de gaz (tuyaux transparents de φ6mm) sur les tuyaux en laiton (voir l’illustration 8).
9. Brancher le fil de terre (voir l’illustration 9).
10.Sectionner le tuyau noir de φ8 mm (relié au raccord central de la valve de sécurité, sur le côté de la cuve ) à la hauteur de la
flèche (voir l’illustration 10).
11.Monter la valve de commande sur le tuyau sectionné (voir l’illustration 11). Placer le tuyau jaune près des tuyaux de transfert.
12.Brancher le tuyau noir des pompes de l’unité d’amarrage sur le nippel de sortie supérieur gauche (voir l’illustration 12).
Remonter le capot de l’unité d’amarrage ainsi que la plaque frontale du laveur de pistolets. L’installation sur le laveur de pistolets
est maintenant terminée.
Sur le recycleur
1. Composants pneumatiques livrés avec la machine (illustration 13).
2. Monter la console avec la valve d’air comprimé sur la paroi droite du recycleur (voir l’illustration 14).
3. Démonter le bouchon sur l’admission du solvant et monter le raccord en T. En cas de besoin, utiliser le manchon fourni à la
livraison (1/4 - 3/8”). Monter ensuite le raccord en laiton sur le raccord en T (voir l’illustration 15).
4. Brancher le tuyau du solvant (noir avec boyau protecteur métallique, voir l’illustration 16).
5. Monter le tuyau du distillat (voir l’illustration 17).
6. Récipient collecteur avec indicateur de niveau (illustration 18).
7. Placer le récipient collecteur sous le recycleur et y mettre le tuyau du distillat (voir l’illustration 19).
8. Brancher le tuyau d’aspiration du solvant propre (blanc avec boyau protecteur métallique, voir l’illustration 20).
9. Couper les tuyaux en provenance du laveur de pistolets à la longueur appropriée (voir l’illustration 21).
10.Monter les tuyaux du laveur de pistolets. Noter les couleurs. Blanc pour le solvant propre et noir pour le solvant sale (voir
l’illustration 22).
11.Brancher le tuyau d’air jaune (voir l’illustration 23).
12.Connecter l’entrée de la valve de commande à de l’air comprimé sec et propre d’une pression de 3-10 bars (voir l’illustration
24).
13.Attacher les tuyaux à l’aide du collier de serrage fourni à la livraison (voir l’illustration 25).
L’installation sur le recycleur est maintenant terminée et le système DYNAMIC TRIPLE DRESTER 8000 est prêt à être mis en
service (voir l’illustration 26).
Avertissement !
Contrôler que tout le système est mis à la terre (machines et récipient).

17
PRÉPARATIONS AVANT LA MISE EN SERVICE
Laveur de pistolets – Remplissage du solvant
1. Ouvrir le couvercle sur le laveur de pistolets.
2. Verser 40 à 50 litres de solvant directement dans le laveur de pistolets.
3. Refermer le couvercle.
Recycleur – Remplissage de solvant
1. Retirer les trois rondelles à ressort du couvercle du récipient collecteur et enlever le couvercle. Veiller à ne pas endommager le
flotteur de l’indicateur de niveau.
2. Remplir le récipient de 12 litres de solvant propre, c.-à-d. jusqu’à environ 100 mm du bord supérieur.
3. Remettre en place le couvercle et les trois rondelles à ressort.
Mode d’emploi
Ce manuel ainsi que les manuels se rapportant au laveur de pistolets et au recycleur doivent toujours être à proximité du système
et en bon état de visibilité. La carte plastifiée résumant le mode d’emploi (n° 11154) doit être placée sur le mur, le plus près
possible du recycleur, et être bien visible. En cas de besoin, les instructions doivent être traduites dans d’autres langues que
parlent les employés.
Personnel d’entretien
Il est recommandé de faire suivre au personnel une formation sur le fonctionnement du système. Seules les personnes ayant suivi
cette formation sont autorisées à utiliser le système.
Première mise en service
Le système peut maintenant être mis en service. Suivre les consignes du Mode d’emploi du système « Dynamic Triple Drester » et
contrôler que tous les raccords sont étanches.
MODE D’EMPLOI
Ce mode d’emploi concerne le système complet DYNAMIC TRIPLE DRESTER. Le laveur de pistolets DRESTER 8000 et le
recycleur DRESTER 120 sont décrits en détails dans leurs modes d’emploi respectifs (n°s 6901 et 11215).
Mode d’emploi du système « Dynamic Triple Drester » :
1. PREMIER CONTRÔLE
* Contrôler que le voyant vert est allumé et que la température de l’huile est tombée à 50 °C.
(Ceci indique que le recycleur est froid, prêt à être mis en marche et peut être ouvert.)
* Contrôler le sac en plastique dans le recycleur.
(Ce sac étant à usage unique, il doit être remplacé après chaque distillation. Si le sac est plein de solvant, contrôler que le
récipient collecteur sous l’unité est vide. Passer ensuite directement au point 4.)
2. POMPAGE DE TRANSFERT DU SOLVANT
* Démarrer les pompes de l’unité d’amarrage RDX.
(Ouvrir la valve de l’air comprimé sur le côté droit du recycleur.)
* Arrêter les pompes quand elles commencent à pomper de l’air.
(Fermer la valve de l’air comprimé après environ 2 à 3 minutes.)
3. DEUXIÈME CONTRÔLE
* Contrôler que l’indicateur de niveau dans le récipient collecteur est tout en bas.
(Sinon, démarrer de nouveau la pompe et la laisser tourner quelques minutes. Si l’indicateur de niveau ne descend toujours pas,
soit le tuyau d’alimentation est bouché, soit la pompe est défectueuse. Dans ce cas, contactez votre distributeur Drester.)
* Contrôler que le sac dans le recycleur est rempli de solvant.
(Le solvant doit être environ au niveau de la bague de serrage du sac. Sinon, démarrer de nouveau les pompes et les laisser
tourner quelques minutes. Si le sac ne se remplit toujours pas, soit le tuyau d’alimentation est bouché, soit la pompe est
défectueuse. Dans ce cas, contactez votre distributeur Drester.)
4. FERMER LE COUVERCLE ET DÉMARRER LE RECYCLEUR
* Remarque : Pour savoir comment régler la minuterie et la température, consulter la section 5.5 du manuel n° 11215 se rapportant
au recycleur.

18
Mesures en cas d’absence de solvant:
PAS DE SOLVANT PROPRE DANS LE LAVEUR DE PISTOLETS
Ne pas ajouter de solvant. Démarrer le recycleur.
(Voir le Mode d’emploi du Système « Dynamic Triple Drester »)
PAS DE SOLVANT EN CIRCULATION DANS LE LAVEUR DE PISTOLETS
Si la pompe de prélavage automatique pompe uniquement de l’air mais pas de solvant, cela signifie qu’il n’y a pas suffisamment
de solvant dans l’unité d’amarrage. Verser 10 litres de solvant directement dans le laveur de pistolets. Contrôler que l’indicateur
de niveau se déplace librement et qu’il se stabilise à une hauteur de 10-70 mm (voir l’illustration ci-dessous).
L’indicateur de niveau maximal sur le laveur de pistolets indique si le niveau de solvant dans l’unité d’amarrage est trop élevé
(différents niveaux sur les colonnes de liquide, voir l’illustration en bas à droite). Dans ce cas, il ne faut pas ajouter de solvant, car
le recycleur sera trop rempli lors du prochain transfert.
Distillation de solvants étrangers :
S’il est nécessaire de distiller du solvant étranger au système, respecter les étapes suivantes :
1. Remplacer le sac en plastique du recycleur.
2. Déplacer le récipient collecteur sur le côté.
3. Placer un bidon vide d’une contenance d’au moins 12 litres sous le recycleur (voir l’illustration ci-dessous).
4. Verser le solvant (12 litres au maximum) dans le recycleur.
5. Fermer le recycleur et démarrer la minuterie. Remarque : Pour savoir comment régler la minuterie et la température,
consulter la section 5.5 du manuel n° 11215 se rapportant au recycleur.
Une fois le cycle de distillation terminé, remettre en place le récipient collecteur sous le recycleur.

19
SOLVANTS AUTORISÉS
Les diluants de nettoyage, les mélanges de solvants, p.ex. l’acétone, le toluène, le sylène, l’isobutanol (2-méthylpropan-1-ol) qui,
selon la norme CEI 79-20 (EN 60079-20) appartiennent au groupe IIA.
CONSIGNES DE SÉCURITÉ
Respecter les points suivants pour conserver au système son haut niveau de sécurité :
- Installer le système de la manière prescrite dans ce manuel.
- Utiliser le système de la manière prescrite dans ce manuel.
- Effectuer l’entretien du système de la manière prescrite dans ce manuel.
- N’utiliser que des pièces de rechange d’origine.
- Ce manuel ainsi que les manuels se rapportant au laveur de pistolets et au recycleur doivent toujours se trouver à proximité du
système et être en bon état de lisibilité.
Lors de travail avec le système, toujours utiliser des gants et des lunettes de protection (tolérant les solvants). En cas de besoin,
utiliser d’autres équipements de protection.
Les personnes souffrant de problèmes respiratoires chroniques ou de réactions allergiques aux solvants ne doivent pas utiliser la
machine.
Un extincteur d’incendie doit toujours être disponible en cas de travail avec des solvants.
ENTRETIEN
Contrôler tous les jours qu’aucune fuite ne s’est produite.
Démonter et nettoyer au moins une fois par an l’unité d’amarrage DRESTER RDX. Pour plus de renseignements, contacter votre
distributeur Drester.
GARANTIE
Hedson Technologies AB remplace tous les éléments défectueux de DRESTER RDX 8012 par des composants neufs,
conformément aux conditions énoncées sous « Warranty Terms for Hedson Technologies AB Nr. 7.2-8 ». La garantie n’est
valable que si la machine a été utilisée de la manière prescrite et ne couvre pas les travaux de réparation. En cas de demande en
garantie, le numéro de série de la machine et son année de fabrication doivent toujours être indiqués. Ces informations sont
disponibles sur la plaque signalétique de couleur métallique apposée sur la machine.
CARACTÉRISTIQUES TECHNIQUES
Fabricant HEDSON TECHNOLOGIES AB
Hammarvägen 4
SE-232 37 Arlöv
Suède
040-53 42 00
Type de machine Unité d’amarrage DRESTER RDX 8012
Volume de liquide dans la machine Max. 80 litres
Raccordement de l’air comprimé Air sec et propre, 3-10 bar
Capacité de pompe 10 l/min
Pression du liquide 2 bar
Poids 21 kg
Dimensions Hauteur : 700 mm, diamètre maximal: 500 mm
Niveau sonore < 70 dB (A)

20
**********SVENSKA**********
INNEHÅLLSFÖRTECKNING
SIDA:
21 ANVÄNDNINGSOMRÅDE
21 MONTERING
21 PLACERING
21 UPPSAMLINGSKÄRL
21 FÖRBEREDELSER INFÖR INSTALLATIONEN
22 INSTALLATION
23 FÖRBEREDELSER FÖR IDRIFTTAGANDE
23 BRUKSANVISNING
23 Handhavande av system ”Drester Dynamic Triple”
24 Åtgärder vid lösningsmedelsbrist
24 Destillation av annat lösningsmedel
25 TILLÅTNA LÖSNINGSMEDEL
25 SÄKERHETSINFORMATION
25 SERVICE
25 GARANTI
25 TEKNISKA DATA
Table of contents
Languages: