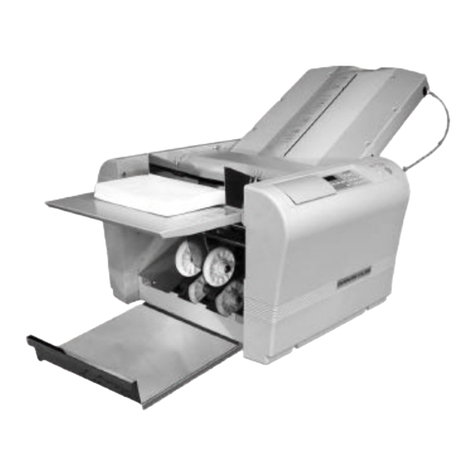
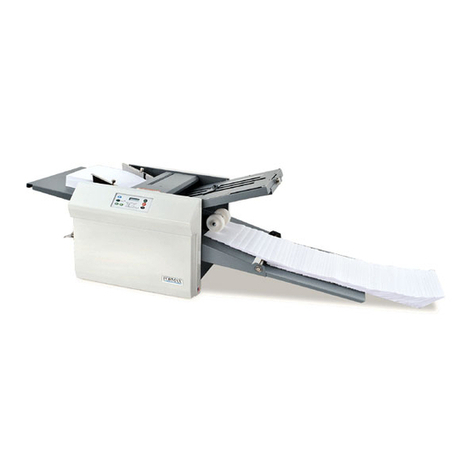
Hefter Systemform TF MEGA-M User manual

Be sure to read this manual prior to use. Please leave this
manual at the site of use for easy reference.
TF MEGA-M
FOLDER
Instruction Manual

KONFORMITÄTSERKLÄRUNG
Bezeichnung des Produkts :
HEFTER Falzmaschine
Modell :
TF MEGA-M
den nachfolgend aufgelisteten Richtlinien entspricht:
Richtlinien :
Niederspannungsrichtlinie 2006/95/EG unter EN60950-1:
2006
Richtlinie über die elektromagnetische Verträglichkeit
89/336/EWG und 2004/108/EG unter EN 55014-1: 2006,
EN 55014-2: 1997+A1: 2001, EN 55011: 2007+A2: 2007,
EN 61000-3-2: 2006, EN 61000-3-3: 1995+A2: 2005
Ge
DICHIARAZIONE DI CONFORMITÁ
Nome del prodotto :
Piegatrice HEFTER
Modello :
TF MEGA-M
è conforme ai requisiti definiti dalle norme sotto elencate:
Direttiva Bassa Tensione :
Direttiva relativa alle apparecchiature a bassa tensione
2006/95/CE in base a EN 60950-1: 2006
Direttiva di compatibilità elettromagnetica 89/336/CEE e
2004/108/CE in base a EN 55014-1: 2006, EN 55014-2:
1997+A1: 2001, EN 55011: 2007+A2: 2007, EN 61000-3-2:
2006, EN 61000-3-3: 1995+A2: 2005
It
DECLARATION OF CONFORMITY
GEORG HEFTER MASCHINENBAU e.K., Hefter Systemform Division, Am Mühlbach 6, 83209 Prien am Chiemsee, Germany,
declares that the following product,
Name of product : Hefter Folder
Models : TF-MEGA-M
complies with the provisions defined by the regulations listed below.
Regulation : Low Voltage Directive 2006/95/EC under EN 60950-1: 2006
Electromagnetic Compatibility Directive 89/336/EEC and 2004/108/EC under EN 55014-1: 2006,
EN 55014-2: 1997+A1: 2001, EN 55011: 2007+A2: 2007, EN 61000-3-2: 2006,
EN 61000-3-3: 1995+A2: 2005
En
DECLARACIÓN DE CONFORMIDAD
Nombre del producto :
Plegadora HEFTER
Modelos :
TF MEGA-M
cumple con lo dispuesto por los reglamentos que se
indican a continuación.
Reglamentaciones :
Directiva sobre baja tensión 2006/95/CE, según EN60950-1
: 2006
Directiva sobre compatibilidad electromagnética
89/336/CEE y 2004/108/CE según EN 55014-1: 2006,
EN 55014-2: 1997+A1: 2001, EN 55011: 2007+A2: 2007,
EN 61000-3-2: 2006, EN 61000-3-3: 1995+A2: 2005
Sp
DECLARATION DE CONFORMITE
Nom du produit :
Plieuse HEFTER
Modèle :
TF MEGA-M
est conforme aux dispositions définies par les réglementations
suivantes :
Réglementations :
Directive Basse tension 2006/95/CE en application de
EN60950-1 : 2006
Directive sur la compatibilité électromagnétique
89/336/CEE et 2004/108/CE en application des normes
EN 55014-1: 2006, EN 55014-2: 1997+A1: 2001,
EN 55011: 2007+A2: 2007, EN 61000-3-2: 2006,
EN 61000-3-3: 1995+A2: 2005
Fr
Die Firma GEORG HEFTER MASCHINENBAU e.K., Bereich
Hefter Systemform, mit Sitz in: Am Mühlbach 6, 83209 Prien am
Chiemsee, Deutschland, erklärt hiermit, dass das folgende Produkt
GEORG HEFTER MASCHINENBAU e.K., Hefter Systemform
Division, située à Am Mühlbach 6, 83209 Prien am
Chiemsee, Allemagne, déclare que leproduit suivant ;
GEORG HEFTER MASCHINENBAU e.K., Hefter Systemform
Division, con domicilio en Am Mühlbach 6, 83209 Prien am
Chiemsee, Alemania, declara que el producto siguiente :
GEORG HEFTER MASCHINENBAU e.K., Hefter Systemform
Division, sita a Am Mühlbach 6, 83209 Prien am
Chiemsee, Germania, dichiara che il seguente prodotto,
Disposal of Old Electrical & Electronic Equipment
This symbol (the symbol of the crossed out wheeled bin) indicates that in European
countries this product should not be disposed of as household waste.
Please recycle where facilities exist by checking with your local authority or supplier for
recycling advice.
By ensuring this product is disposed of correctly through proper treatment, recovery and
recycling, you will help prevent potential negative effects on the environment and human
health.
En
Entsorgung von alten elektrischen und elektronischen Ausrüstungsteilen
Dieses Symbol (das Symbol mit dem durchgekreuzten fahrbaren Müllbehälter) zeigt an,
dass dieses Produkt in europäischen Länden nicht als Haushaltsmüll entsorgt werden
darf. Bitte informieren Sie sich bei Ihren örtlichen Behörden oder bei Ihrem Händler
hinsichtlich einer Empfehlung für die Entsorgung und führen Sie die betreffenden Teile
dort, wo solche Einrichtungen vorhanden sind, einem Recycling-Prozess zu.
Indem Sie sicherstellen, dass das betreffende Produkt durch richtige Behandlung,
Rückführung und Recycling entsorgt wird, tragen Sie dazu bei, möglichen negativen
Auswirkungen auf die Umwelt und die menschliche Gesundheit vorzubeugen.
Ge
Elimination du matériel électronique et électrique usagé
Ce symbole (une poubelle marquée d’une croix) indique que dans les pays européens, ce
produit ne doit pas être éliminé comme des ordures ménagères.
Recyclez-le dans les sites adaptés qui vous seront indiqués par les autorités locales ou
renseignez-vous auprès de votre fournisseur.
En veillant à ce que ce produit soit éliminé correctement avec un traitement, une collecte
et un recyclage adaptés, vous contribuez à éviter son action nocive potentielle sur l’
environnement et la santé humaine.
Fr
Smaltimento di attrezzature elettriche ed elettroniche consumate
Questo simbolo (il simbolo della pattumiera con rotelle barrata) indica che nei paesi
europei questo prodotto non deve essere buttato nei ri¿uti domestici.
Per favore smaltire in luogo addetto al riciclo, dove esistente, chiedendo informazioni alle
autorità locali o a chi fornisce consulenza a proposito.
Garantendo uno smaltimento adeguato di questo prodotto (trattamento, recupero e riciclo
corretto), aiuterete a prevenire effetti negativi sull’ambiente e sulla salute dell’uomo.
It
Eliminación de residuos de aparatos eléctricos y electrónicos
Este símbolo (un cubo de basura tachado) indica que en los países europeos este
producto no deberá eliminarse como si se tratara de un residuo doméstico. Solicite
asesoramiento sobre reciclaje a las autoridades locales o a su distribuidor, y siga la
normativa en materia de gestión medioambiental y reciclaje de este tipo de residuos.
Si toma las medidas pertinentes para que este producto se elimine mediante un
tratamiento, recuperación y reciclaje adecuados, contribuirá a evitar posibles efectos
negativos en el medio ambiente y la salud humana.
Sp

Introduction
Thank you for purchasing a HEFTER SYSTEMFORM product.
Be sure to read this manual prior to using the product.
After reading, leave the manual at the site of use for easy reference whenever questions related to the
product arise in the future.
Symbols
In this manual, several symbols are used to indicate important warnings. Please make sure to read
instructions accompanied by these symbols. These symbols have the following
meanings.
Describes instructions which must be followed in use.
Be sure to read the instructions to avoid problems due to incorrect operations.
Indicates supplementary or useful information.
Describes names of related items and supplementary instructions.
Trademark
The product name and company name used in this manual are trademarks or registered trademarks
of the respective companies.

i
Safety Precautions
Safety Precautions
In this manual, operations and handling of the unit which are hazardous are described using the
following marks to prevent personal injury or property damage to the user and others.
Ignoring this mark could result in the possibility of
serious injury or even death.
Ignoring this mark could result in the possibility of injury
or physical damage.
This mark indicates a “Warning” or “Caution”.
$JUDSKLFPD\EHVKRZQLQVLGHWKHPDUNWRGHVFULEHWKHZDUQLQJRUFDXWLRQPRUHVSHFL¿FDOO\
This mark indicates a forbidden action.
$JUDSKLFPD\EHVKRZQLQVLGHWKHPDUNWRGHVFULEHWKHIRUELGGHQDFWLRQPRUHVSHFL¿FDOO\
This mark indicates actions that must be performed.
$JUDSKLFPD\EHVKRZQLQVLGHWKHPDUNWRGHVFULEHWKHDFWLRQWREHSHUIRUPHGPRUHVSHFL¿FDOO\
Power Supply
Ɣ 7KLVXQLWVKDOOEHLQVWDOOHGQHDUWKHVRFNHWRXWOHWZKHUHWKHSOXJRQWKHSRZHUVXSSO\FRUGLVHDVLO\
accessible.
Ɣ 0DNHVXUHWKHSRZHUVXSSO\XVHGLVDOZD\VZLWKLQWKHIROORZLQJUDQJH
Power supply : 220-240 V AC, 50 Hz
Ɣ :KHQ\RXSRZHURWKHUDSSOLDQFHVIURPWKHVDPH$&RXWOHWPDNHVXUHWKDWWKHFRPELQHGSRZHU
consumption does not exceed the power supply capacity.
Rated current (Rated power) : 0.4 A
8VHRQO\WKHSRZHUVXSSO\YROWDJHVSHFL¿HGRQWKHPDLQQDPHSODWH
8VLQJRWKHUYROWDJHVFRXOGUHVXOWLQD¿UHRUDQHOHFWULFDOVKRFN
Make sure that the combined power consumption of the appliances to be
connected does not exceed the capacity rating of the power outlets or plug
receptacles.
Exceeding the capacity rating could cause the power outlets, plug receptacles, or power extension
FRUGVWRRYHUKHDWDQGFDWFKD¿UH

ii
Safety Precautions
Operating Environment
Operate this unit in the following environment.
Ɣ ZKHUHWKHWHPSHUDWXUHUDQJHLVEHWZHHQDQG&WR&LQVWRUDJH
Ɣ ZKHUHWKHKXPLGLW\UDQJHLVEHWZHHQDQG5+WR5+LQVWRUDJHKRZHYHUQR
FRQGHQVDWLRQ
Ɣ ZKLFKLVQRWVXEMHFWWRGLUHFWVXQOLJKW
Ɣ ZKLFKLVUHDVRQDEO\IUHHIURPGXVW
Ɣ ZKLFKLVVXEMHFWWROLWWOHRUQRYLEUDWLRQ
Ɣ ZKLFKLVIUHHIURPDLUERUQHVDOW
Ɣ ZKHUHWKHUHDUHQRKDUPIXOFKHPLFDOV
Ɣ ZKHUHWKHXQLWLVQRWH[SRVHGWRZDWHU
Keep this unit and the power cord away from heaters and heater vents.
([FHVVLYHKHDWFRXOGPHOWWKHFRYHURUSRZHUFRUGFRYHULQJDQGUHVXOWLQD¿UHRUDQHOHFWULFDOVKRFN
Do not place metal objects or vessels containing liquids on top of the unit.
7KHHQWU\RIDQ\PHWDOREMHFWRUOLTXLGFRXOGUHVXOWLQD¿UHRUDQHOHFWULFDOVKRFN
Do not insert any metal or easily-combustible object inside this unit.
7KLVFRXOGUHVXOWLQD¿UHRUDQHOHFWULFDOVKRFN
'RQRWXVHÀDPPDEOHVSUD\VLQVLGHRUQHDUWKHXQLWHJZKHQFOHDQLQJWKH
unit).
6XFKÀDPPDEOHJDVPD\LJQLWHDQGFDXVHD¿UHRUFRPEXVWLRQ
Do not install this unit in a location where there is excessive humidity or where
contact with water is possible.
3RRUFKRLFHRIORFDWLRQFRXOGUHVXOWLQGHWHULRUDWLRQRIWKHLQVXODWLRQD¿UHRUDQHOHFWULFDOVKRFN
,QVWDOOWKLVXQLWRQDOHYHOVWDEOHVWDQGRUÀRRUZLWKVXI¿FLHQWVSDFHDURXQGLW
Failure to do so could result in the unit overturning and causing injury.
Disconnect the power plug from the power outlet before attempting to move
this unit.
)DLOXUHWRGRVRFRXOGUHVXOWLQSRZHUFRUGGDPDJHD¿UHRUDQHOHFWULFDOVKRFN
Always disconnect the power plug from the power outlet when the unit is not
to be used for an extended period.
)DLOXUHWRGRVRFRXOGUHVXOWLQD¿UHGXHWROHDNDJHFXUUHQWLIWKHLQVXODWLRQVKRXOGGHWHULRUDWH

iii
Safety Precautions
Maintenance / Other
Do not damage the power cord or power plug.
Do not scratch, alter, bend, twist, pull or place heavy objects on the power cord or power plug.
7KLVFRXOGUHVXOWLQGDPDJHD¿UHRUDQHOHFWULFDOVKRFN
Do not touch the power switch with wet hands.
Otherwise electric hazards may occur.
Do not remove the cover or back panel.
7KLVXQLWFRQWDLQVKLJKYROWDJHFRPSRQHQWVWKDWFRXOGFDXVHDQHOHFWULFDOVKRFN
Do not disassemble, modify or repair this unit.
7KHUHLVDGDQJHURI¿UHHOHFWULFDOVKRFNRULQMXU\
&RQWDFW\RXUGHDOHUZKHQUHSDLUVDUHQHFHVVDU\
If any foreign object such as metal or liquid should enter this unit, immediately
turn the unit off at the power switch and disconnect the power plug from the
power outlet.
)DLOXUHWRGRVRFRXOGUHVXOWLQD¿UHRUDQHOHFWULFDOVKRFN
&RQWDFW\RXUGHDOHULPPHGLDWHO\
Before cleaning this unit, turn the unit off at the power switch and disconnect
the power plug from the power outlet.
Accidental operation of the unit during cleaning could result in injury.
Remove any dust that accumulates on the power plug prongs and the surface
of the plug from which the prongs extend.
$FFXPXODWHGGXVWFRXOGUHVXOWLQD¿UH
Always grip the plug when disconnecting the power plug from the power
outlet.
)RUFLEO\SXOOLQJRQWKHSRZHUFRUGFRXOGFDXVHGDPDJHUHVXOWLQJLQD¿UHRUDQHOHFWULFDOVKRFN
Do not touch or insert foreign objects into any rotating part during operation.
This could result in injury.

iv
Safety Precautions
WARNING / CAUTION Labels
"WARNING" and "CAUTION" labels are pasted on the machine to ensure user safety.
Do not remove or change them.
When the labels become dirty or are lost, be sure to contact your dealer for a new one.
When changing a fuse, make
sure that the fuse rating is same
as that indicated on this label.
Do not put neither hands nor
fingers inside during operation!
Keep away long hair, ties,
jewelry and loose clothing!

v
Safety Precautions
Contents
Safety Precautions .....................................i
Power Supply ...................................................... i
Operating Environment .......................................ii
0DLQWHQDQFH2WKHU...........................................iii
:$51,1*&$87,21/DEHOV ...........................iv
Chapter 1
BEFORE OPERATION
1. Features.............................................1-2
2. Setting Up the Machine....................1-3
&RPSRQHQWV..........................................
5HPRYLQJWKH3UHVV5HOHDVH/HYHU......
/RFNLQJWKH%HDULQJ6XSSRUW/HYHUV..... 4
$WWDFKLQJWKH3DUWV................................
3. Names and Functions ......................1-7
4. Describing Control Panel.................1-9
5. Handling Paper ...............................1-10
3DSHU8VHG .........................................
3UHFDXWLRQVRQ6WDFNLQJ3DSHU...........
6. Emergency Stop .............................1-12
Chapter 2
BASIC OPERATION
1. Standard Folding of Standard
Paper..................................................2-2
6WDQGDUG3DSHU .....................................
6WDQGDUG)ROGLQJ...................................
2SHUDWLRQ3URFHGXUHV ...........................
Chapter 3
ADVANCED OPERATION
1. Single Folding of Standard Paper...3-2
6LQJOH)ROGLQJ7KLFN3DSHU ...................
'RXEOH)ROGLQJ7KLFN3DSHU.................. 4
'RXEOH)ROGLQJ%7KLQ3DSHU ..............
2. Custom Folding of Standard
Paper................................................3-11
3. Standard Folding of Non-Standard
Size Paper........................................3-15
4. Cross Folding..................................3-19
&URVV)ROGLQJ6WDQGDUG6L]H3DSHU....
&URVV)ROGLQJ1RQ6WDQGDUG6L]H
Paper................................................... 4
5. Correcting Folding Misalignment..3-27
&RUUHFWLQJ)ROGLQJ0LVDOLJQPHQWDORQJ
9HUWLFDO/HQJWKRI3DSHU...................... 7
&RUUHFWLQJ)ROGLQJ0LVDOLJQPHQWDORQJ
Sides of Paper.....................................
Chapter 4
TROUBLESHOOTING
GUIDE
1 Correcting Deformed Folding.................4-2
2. Removing Jammed Paper................4-3
:KHQ3DSHU+DV-DPPHG1HDUWKH
3DSHU)HHG5LQJ ...................................
:KHQ3DSHU+DV6OLSSHGDWWKH3DSHU
Feed Section .........................................
:KHQ3DSHU+DV&RLOHG$URXQGWKH
5XEEHU5ROO ........................................... 4
:KHQ3DSHU+DV-DPPHGDWWKH)LUVW
Folding Plate .........................................
:KHQ3DSHU+DV-DPPHGDWWKH
Second Folding Plate ............................ 7
:KHQ3DSHU+DV-DPPHG1HDUWKH
Stacker ..................................................
3. Error Messages.................................4-9
4. Troubleshooting..............................4-10
Chapter 5
CLEANING THE UNIT
1. Cleaning Each Section.....................5-2
&OHDQLQJWKH5XEEHU5ROO......................
&OHDQLQJWKH3DSHU)HHG5LQJV............
&OHDQLQJWKH3DSHU6HSDUDWRU............... 4
&OHDQLQJWKH3DSHU6HQVRU................... 4
&OHDQLQJWKH(MHFWLRQ*DWH6HQVRU.......
&OHDQLQJWKH3DSHU(MHFWLRQ%HOWV.........
Chapter 6
APPENDIX
1.
6SHFL¿FDWLRQ .....................................6-2

vi
Safety Precautions
Memo

Chapter 1
BEFORE OPERATION

1-2
&KDSWHU%()25(23(5$7,21
1. Features
7KH7)0(*$0LVGHVLJQHGWRIROGSDSHULQWRVL[SRSXODUIROGLQJSDWWHUQVDQGLVFDSDEOHRIIROGLQJ
XSWRDSSUR[LPDWHO\VKHHWVRISDSHUSHUPLQXWHZKHQVLQJOHIROGLQJ$VL]H¿QHTXDOLW\SDSHU
JPð
Single fold Double fold Irregular accordion fold Letter fold Accordion fold Gate fold
7KH')LVDOVRDEOHWRFUHDWHFURVVVLQJOHIROGDQGFURVVOHWWHUIROGDVVKRZQLQWKH¿JXUH
Cross fold Cross single fold
Cross letter fold
1RWHWKDWWKH¿QLVKRIFURVVIROGLQJLVQRWDVDFFXUDWHDVWKDWRIWKHVL[IROGLQJSDWWHUQV
mentioned above.

1-3
&KDSWHU%()25(23(5$7,21
2. Setting Up the Machine
2-1. Components
[1] [2] [3]
[4] [5] [6] [7]
1R 1DPH Qty. 5HPDUN
>@ First folding plate Attached to the right upper section on the operator's side.
>@ Second folding plate Attached to the right lower section on the operator's side.
>@ Instruction manual This manual
>@ *XLGHSODWHXQLW 8VHGZKHQIROGLQJ%VL]HWKLQSDSHULQWRIRXU
>@ &URVVIROGLQJOHYHU Used when cross folding paper.
>@ Power cord
2-2. Removing the Press Release Lever
The press release levers are attached to the unit at shipment to prevent the rubber roll from becoming
distorted. Be sure to remove them when setting up the machine.
The two types of press levers are attached to either side of the rubber roll.
Press release lever (A)
Operator’s side
Rubber roll
Press release lever (B)
Press release lever (A)
Press release lever (B)
Rubber roll
Non-operator’s side
The machine will be damaged if it is used without removing the lever.
>@ >@ >@

1-4
&KDSWHU%()25(23(5$7,21
1To remove the press release lever (A) on the non-operator's side, push it inwards
and pull it out.
Press release lever (A) Press release lever (A)
2To remove the press release lever (A) on the operator's side, push it inwards and
pull it out.
3To remove the press release lever (B) on the non-operator's side, push it inwards
and pull it out.
Press release lever (B) Press release lever (B)
4To remove the press release lever (B) on the operator's side, push it inwards and
pull it out.
2-3. Locking the Bearing Support Levers
The bearing support levers are released at shipment to prevent the rubber roll from becoming
distorted. After removing the press release levers, be sure to lock the bearing.
Bearing support lever
Operator’s side
1Turn the bearing support lever on the
operator's side in the direction of the
arrow.
The bearing will be locked.
Bearing support lever
Non-operator’s side
2Turn the bearing support lever on the
non-operator's side in the direction
of the arrow.
The bearing will be locked.

1-5
&KDSWHU%()25(23(5$7,21
Because the bearing support lever presses down the rubber roll, if it is not locked, thick
paper may not be folded properly.
2-4. Attaching the Parts
1Attach the second folding plate.
Second folding plate
Lock lever
UNLOCK
LOCK
0RYHWKHORFNOHYHURIWKHVHFRQGIROGLQJ
SODWHWRWKHSRVLWLRQRI81/2&.
Slider
,QVHUWWKHIROGLQJSODWHWRWKHPDFKLQH
along the slider.
0RYHWKHORFNOHYHUWRWKHSRVLWLRQRI
/2&.
First folding plate
2$WWDFKWKH¿UVWIROGLQJSODWH
It only needs to be inserted because the
¿UVWIROGLQJSODWHLVQRWSURYLGHGZLWKDORFN
lever.

1-6
&KDSWHU%()25(23(5$7,21
3Make a ground connection using
the earth wire attached to the power
plug.
Ɣ 0DNHVXUHWKDW\RXPDNHDJURXQG
connection before connecting the
power plug to the wall socket.
Ɣ ,IHDUWKOHDNDJHRFFXUVZLWKRXWD
ground connection, a short circuit
PD\FDXVH¿UHDQGHOHFWULFVKRFN
Guide plate unit
4Place the cross folding lever on the
magnet under the top cover.

1-7
&KDSWHU%()25(23(5$7,21
3. Names and Functions
[1]
[4]
[5]
[6]
[7]
[8]
[9]
[10]
[11]
[12]
[13]
[14]
[17]
[2]
[3]
[18]
Paper feed table (operator’s side)
[15]
[16]
Under the main cover

1-8
&KDSWHU%()25(23(5$7,21
No. Name Function
>@ First folding plate *XLGHSODWHIRUGHFLGLQJDSDSHUIROGLQJSRVLWLRQ)LUVWIROGLQJ
is made using this plate.
>@ Fine adjustment knob Used when adjusting a paper folding position.
>@ 5RXJKDGMXVWPHQWNQRE Used when deciding a paper folding position.
>@ &RQWUROSDQHO Used when operating the machine. Error messages are also
GLVSOD\HGRQWKH/&'GLVSOD\
>@ Second folding plate *XLGHSODWHIRUGHFLGLQJDSDSHUIROGLQJSRVLWLRQ6HFRQG
folding is made using this plate. This plate is not used when
folding paper into two.
>@ Power switch Turns on and off the power.
>@ Paper set lever :KHQORZHUHGWKHSDSHUIHHGWDEOHLVUDLVHG
>@ Paper receiving tray 5HFHLYHVIROGHGSDSHUHMHFWHGRXW
>@ Paper receiving stopper Stops paper ejected out from the machine.
>@ Stacker rollers Ejects folded paper from the machine.
>@ Support paper feed plate Supports paper stacked on the paper feed table.
>@ Side guide +ROGVSDSHUVWDFNHGRQWKHSDSHUIHHGWDEOH
>@ Paper feed table Used to stack paper to be folded.
>@ Top cover Prevents the user from touching the moving parts.
>@ Paper feed ring Feeds paper into the machine.
>@ 5XEEHUUROO 6HQGVSDSHUWRWKH¿UVWIROGLQJSODWH
>@ Paper feed pressure adjustment
knob
Adjusts paper feed pressure.
>@ Slant correction paper feed knob &RUUHFWVPLVDOLJQPHQWDORQJVLGHVRISDSHU

1-9
&KDSWHU%()25(23(5$7,21
4. Describing Control Panel
[4]
[1]
[3] [2]
No. Name Function
>@ &RXQWHU/&'GLVSOD\ &RXQWVXSWKHQXPEHURIIROGHGSDSHURUGLVSOD\VWKHVWDWXVRI
the machine. Up to four digit number is displayed.
>@ Stop button :KHQSUHVVHGWKHPDFKLQHVWRSV
>@ Start button :KHQSUHVVHGWKHPDFKLQHVWDUWVIROGLQJRSHUDWLRQV
>@ &FOHDUEXWWRQ :KHQWKHPDFKLQHLVVWRSSHGZLWKSDSHURQWKHSDSHUIHHG
table, pressing the button for more than two seconds makes the
FRXQWHGQXPEHUUHWXUQWR
:KHQDPLVIHHGKDVRFFXUUHGSUHVVLQJWKLVEXWWRQFOHDUVWKH
message.
>@ Table of stacker rollers position Used as a reference to check an appropriate position of the
stacker rollers depending on a paper size and folding pattern.
[5]

1-10
&KDSWHU%()25(23(5$7,21
5. Handling Paper
5-1. Paper Used
Ɣ Make sure that the printing ink on the paper has dried completely prior to use.
Ɣ ,IXVHGZLWKRXWWKHLQNFRPSOHWHO\GULHGWKHIROGLQJUROOHURUSDSHUPD\EHFRPHGLUW\
Ɣ 3DSHUSULQWHGZLWKVSHFLDOLQNPD\FDXVHWKHVZHOOLQJDQGGHIRUPDWLRQRIWKHUXEEHU
rolls, leading to folding misalignment.
Ɣ If curled paper is used, depending on the environmental condition (temperature,
KXPLGLW\SDSHUTXDQWLW\SDSHUW\SHDQGSDSHU¿EHULWPD\QRWÀRZVPRRWKO\
into the folding plate or may not be folded properly. Flatten the paper prior to use.
Ɣ :KHQIROGLQJ%VL]HSDSHULI\RXXVH¿QHTXDOLW\SDSHURIJPðRUWKLFNHUWKH
paper may not be able to be ejected.
Ɣ Fan paper well prior to use.
5-2. Precautions on Stacking Paper
Ɣ Do not stack paper on the paper feed
table with the left and right sides of
the paper unaligned or some sheets
protruding out.
Ɣ Do not stack paper on the paper feed
table with the lead and tail edges
unaligned or some sheets protruding
out.
If the paper is protruding at the lead
or tail edge, paper will not be fed
stably, resulting in problems such
as paper feed error and folding
misalignment.
Table of contents
Popular Folding Machine manuals by other brands

Ricoh
Ricoh BOOK FOLDER BF90+ Operating instruction

Magnum
Magnum MFM-FS Product instruction manual

Belt Stacker
Belt Stacker 61 Operator's manual

FROST
FROST BY200 Assembly & operating instructions

Martin Yale
Martin Yale intimus 2020VS Installation, maintenance & operating instructions

Martin Yale
Martin Yale P7200 Setup and operation