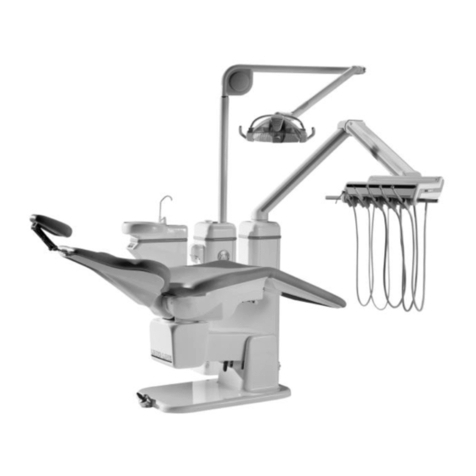
Heka Dental Unicline S Owner's manual

KA-0110-EN-IFU UnicLine S-REV 3.2 –date:20171611 –Soft.: 21.0
OPERATING AND TECHNICAL INSTRUCTIONS
KEEP THIS MANUAL WITH DENTAL DELIVERY SYSTEM AT ALL TIMES
Manuals for OEM equipment are included in the shipping boxes.
Installation, Service, and Maintenance by authorized Heka Dental dealers only.

2
Table of Contents
1.0 Introduction....................................................................................................... 6
1.1 Device Description............................................................................................. 6
1.2 Indications for Use ............................................................................................ 6
1.3 Contraindications.............................................................................................. 6
1.4 Warnings & Precautions ................................................................................... 6
1.5 Cautions............................................................................................................ 8
1.6 Use of instruments............................................................................................ 9
1.7 Regulatory Classification .................................................................................. 9
1.8 Symbols .......................................................................................................... 10
1.9 UnicLine S Labelled Diagram.......................................................................... 12
1.11 Optional Equipment and Instruments............................................................. 13
1.12 Diagram of the Display ................................................................................... 13
2.0 Operating introductions .................................................................................. 14
2.1 Starting UnicLine S ......................................................................................... 14
3.0 Foot control ..................................................................................................... 15
3.1 Standard foot control ...................................................................................... 15
3.2 Standard variable foot control ........................................................................ 16
3.3 Universal variable foot control ........................................................................ 17
3.4 Wireless Standard foot control........................................................................ 18
Pairing of the foot control..........................................................................19
3.5 Wireless standard variable foot control .......................................................... 20
Programming and pairing of the foot control .............................................21
3.6 Wireless Variable universal foot control, ........................................................ 22
Programming and pairing of the foot control .............................................23
4.0 Instrument table display................................................................................. 24
4.1 Console top keyboard ..................................................................................... 25
4.2 Cleaning.......................................................................................................... 25
5.0 Instruments..................................................................................................... 26
5.1 Turbine............................................................................................................ 26
5.2 Micro Motor with fiber optics........................................................................... 27
5.3 Ultrasonic Scaler ............................................................................................. 29
5.4 Light polymerization instrument ..................................................................... 30
5.5 3, 6 & 7 –function Syringes ........................................................................... 32
5.6 Intraoral camera ............................................................................................. 33
6.0 Sterile water system ....................................................................................... 34
7.0 Spittoon........................................................................................................... 35
How to operate the spittoon ......................................................................35
Activating the rinsing position function.....................................................35
Activating the glass-filling function ...........................................................35
Activating the bowl rinse function.............................................................35
Adjustment of water pressure to Cup and Bowl.........................................36
Dismantling the glass bowl .......................................................................36
7.1 Turnable fountain ........................................................................................... 36
8.0 Suction tubing on the telescopic arm .............................................................. 37
Selective suction.......................................................................................37
Removing the suction valve top.................................................................37
Removing suction holders.........................................................................37

3
Removing the suction hose filter ...............................................................37
Adjustment of the telescopic arm ..............................................................37
General information about the telescopic arm’s display.............................37
9.0 Metasys automatic Separator ......................................................................... 38
Daily preventive maintenance ...................................................................38
Replacement of the collection tank............................................................38
9.1 Metasys Amalgam Separator.......................................................................... 39
Daily Care ................................................................................................39
Weekly Care..............................................................................................39
Replacement of the amalgam collection tank.............................................39
10 Cleaning & Disinfection .................................................................................. 40
10.1 Cleaning & Disinfection for external clinical contact surfaces ........................ 40
10.2 Cleaning & Disinfection for the dental chair upholstery ................................. 41
10.3 Cleaning & Disinfection for external surfaces ................................................ 41
10.4 Automatic Suction-Cleaning System ............................................................... 42
Display .....................................................................................................42
Filling liquid on ........................................................................................42
10.5 Instrument Flush ............................................................................................ 43
Remember! Flush the spittoon with clean water after every cleaning. ..................... 43
Bottled Water............................................................................................43
11 Maintenance ................................................................................................... 44
Removing the instrument support.............................................................44
Instruments..............................................................................................44
Suction hoses ...........................................................................................44
Spittoon....................................................................................................44
Foot control ..............................................................................................44
Water Supply............................................................................................44
11.1 Annual maintenance....................................................................................... 45
Information about the PCB and electronics ...............................................45
Motorised instrument with fibre optics, including motor tubing ................45
Ultrasonic scaler.......................................................................................45
Light curing instrument............................................................................45
3-7 way syringe ........................................................................................45
11.2 Annual maintenance (checklist) ...................................................................... 46
12.0 - 16.0 Technical Sections, - only for authorised technicians ......................... 48
12.0 Technical data ................................................................................................ 48
Fuses .......................................................................................................48
12.1 Installation Requirements ............................................................................... 49
12.2 Classification of Equipment ............................................................................ 50
12.3 Regulatory Standards Compliance ................................................................. 51
12.4 Wireless foot control, technical specifications ................................................. 52
Specification.............................................................................................52
Radio Part ................................................................................................52
Batteries...................................................................................................52
12.5 Hydraulic diagram.......................................................................................... 54
13.0 Menu Structure ............................................................................................... 55
Main Menu. ..............................................................................................55
Suction Cleaning. (Option) ........................................................................55
Water Supply. (Option)..............................................................................56
Time/Clock...............................................................................................56

4
Parameters. ..............................................................................................56
Sterile Pump, Flow rate 0-100 % (Option)..................................................56
Setup Code...............................................................................................56
Aspirator program. ...................................................................................57
Instruments..............................................................................................57
Spittoon Levels. ........................................................................................58
Glass flow.................................................................................................58
Setup Chair. .............................................................................................59
Setup Foot ctrl..........................................................................................59
Setup Timing. ...........................................................................................60
Setup Installed. ........................................................................................60
Setup Features. ........................................................................................61
Time/Date ................................................................................................62
Versions. ..................................................................................................63
13.1 Menu overview................................................................................................ 64
14.0 Brief Description of error diagnostics.............................................................. 65
14.1 Error codes shown in telescope display ......................................................... 65
14.2 Special conditions for the connection Chair to UnicLineS ............................... 67
15.0 Summary of Communications ......................................................................... 68
15.1 Block Diagram ................................................................................................ 68
General information..................................................................................69
Base controller .........................................................................................69
Console Controller ....................................................................................70
Telescope..................................................................................................70
Telescope Sensor ......................................................................................70
Telescope Display .....................................................................................70
Instrument Controller...............................................................................71
Instrument table Display ..........................................................................71
16.0 Components & Performance Specification ...................................................... 72
Components & Performance Specification, cont. .......................................73
16.1 Probability of Occurrence & duration of contact for parts............................... 74
17.0 Warranty Terms & Conditions. ....................................................................... 75
17.1 Servicecard. .................................................................................................... 77
18.0 EMC Informations. .......................................................................................... 78
20.0 Disposal of the Dental Delivery System.......................................................... 82

5
Preface
A functionally beautiful and simple Nordic design.
Our goal with the UnicLine S has been to develop a functionally beautiful Nordic
design in solid materials like aluminium and glass - while at the same time creating a
pleasant and relaxed environment for both the patient and dentist.
The lighting has also been a major focus area in the development of the UnicLine S.
For example, it allows the dentist and assistant to see the settings for the active
instrument from the corners of their eyes at any time, which helps them maintain
focus on the patient’s oral cavity rather than shifting their attention back and forth.
It’s what we call ergonomic lighting, which simply means working with the
appropriate lighting.
Yours sincerely
Thomas Steen Nielsen
Heka Dental A/S are ISO 13485 certified.

6
1.0 Introduction
1.1 Device Description
The UnicLine S is an electrically powered Dental Delivery System consisting of a
patient chair, cuspidor, instrument console arm and surgical lamp. It contains a foot
control that allows the dentist to engage the features using only the foot. Instrument
status is viewable in a single place using a multi-display feature. The accessories are
spring balanced for ease of use and the extra-long silicone connection hoses have
been designed for use in any position. The new UnicLine S is designed to ensure
patient comfort and safety in any of the chair positions. The handles, instrument
support, and upholstery are easy to remove and clean.
The UnicLine S is intended for dental treatment performed by dental professionals.
This operating instruction describes how to use the UnicLine S Dental Delivery
system.
Please read this manual carefully before using the Dental Delivery system.
This manual is the primary source of information in the event of faults or
malfunctions.
Please refer to OEM documentation for information about OEM products.
1.2 Indications for Use
The UnicLine S is an electrically powered Dental Delivery System intended to supply
power to and serve as a base for other dental devices and accessories. The device
consists of a patient chair, cuspidor, instrument console arm and surgical lamp. The
device is intended for operation and use in a clinical setting by legally qualified
professionals.
1.3 Contraindications
There are no known contraindications for the use of this device.
1.4 Warnings & Precautions
Heka Dental accepts no liability for direct or consequential injury or damage resulting
from improper use, arising in particular through the non-observance of the operating
instructions, or improper preparation and maintenance.
WARNING: Use for intended purposes only. Failure to observe the operating
instructions may result in the patient or user suffering serious injury or the product
being damaged, possibly beyond repair. Before using this product, make sure you
have studied and understood the operating instructions.

7
WARNING: For use by qualified and trained personnel only.
WARNING: Do not install where there is a risk of explosion. The UnicLine S Dental
System is not intended for operation in oxygen rich environments or in the presence
of flammable anaesthetics or gases.
WARNING: Clean, disinfect, and sterilize new or repaired handpieces and
instruments before first use and between each patient use. Only use sterilized
handpieces and instruments during treatment. Non-sterilized handpieces and
instruments may cause bacterial or viral infections. Always sterilize handpieces and
instruments after operation.
Please see the section on approved cleaning agents and methods
for a detailed description of cleaning methods and maintenance for the
UnicLine S. See enclosed OEM instructions for cleaning and maintenance of
any OEM equipment and instruments.
WARNING: Always operate high-speed handpieces with water coolant. Operating a
high-speed handpiece without water coolant can cause thermal injury to the patient.
WARNING: Do not use this device for dental implant procedures.
WARNING: The water used by the Unic unit's instruments and cup-filler is only
intended for rinsing.
WARNING: The mains tap must be switched off when the Dental Delivery System is
not in use.
Electromagnetic Compatibility (EMC)
Changes or modifications to this product not expressly approved by Heka Dental A/S
may result in increased emissions or decreased immunity performance of the product
and could cause EMC issues with other equipment. This product is designed and
tested to comply with applicable regulation regarding EMC and shall be installed and
put into service according to the EMC information stated below:
WARNING: Use of portable phones or other portable or mobile radio frequency (RF)
emitting equipment near the product may cause unexpected or adverse operation.
WARNING: The use of accessories, transducers and cables other than those supplied
may result in increased emissions or decreased immunity performance of the
product. The product shall not be used adjacent to, or stacked with, other equipment.
If adjacent or stacked use is necessary, the user shall be responsible to test to verify
normal operation in the configuration in which it is being used. Detailed information
on electromagnetic interference related to the UnicLine S begins on page 71 of this
manual. See page 74 for recommendations for distances to be maintained between
the UnicLine S and other electronic devices.

8
1.5 Cautions
CAUTION: This device is only to be sold by or on the order of a dentist.
CAUTION: Position the equipment with sufficient area from walls or obstructions to
easily operate and disconnect the device (refer to the UnicLine S Mounting
Instructions, Section 5 for device dimensions and space requirements)
CAUTION: Always examine unit components for damage before commencing
treatment. Damaged components must not be used and must be replaced.
CAUTION: Read and understand all accompanying documents for OEM instruments
and equipment purchased for use with the Unic before attempting to connect for use.
CAUTION: Before using the Dental Delivery System, ensure the instruments have
been properly flushed and that the suction tubes as well as the dental Delivery
System’s waterlines have been cleaned as instructed in this manual.
CAUTION: Observe local regulations concerning disposal of amalgam waste.
CAUTION: Do not run saline solutions through the water system –saline will rust
the water filters.
CAUTION: Ultrasonic cleaning is not suitable for this device.
CAUTION: Ensure this equipment is inspected annually to ensure the device and the
equipment remains fully operational.
ADDITONAL SAFETY INFORMATION
The use of instruments that do not comply with the safety regulations for this type of
equipment may compromise the safety of the entire system. Therefore, the following
must be taken into consideration:

9
1.6 Use of instruments
Documentation of the safety certification of the accessories must be in compliance
with current IEC 60601-1 international standards and the current ISO 7494.
A complete listing of standards that the UnicLine S Dental Delivery System
complies with can be found in Section 12.3 of this manual.
The UnicLine S Dental Delivery System meets the requirements of Directive
93/42/EEC.
IMPORTANT!
To ensure the safety, reliability, and functionality of this Dental Delivery System:
Use only qualified and authorized technicians for installation, calibration,
modification, and repair of the UnicLine S
Compliance with IEC 60364 for all electrical installations
Use of only authorized OEM instruments
Use this Dental Delivery System only in accordance with instructions
provided in this manual
DO NOT:
Attempt to modify this equipment without authorization by Heka Dental A/S
If modification is made, the Dental Delivery System must be fully tested and
inspected prior to use to ensure safety
1.7 Regulatory Classification
Class I
Type B Applied Parts
Ordinary Protection
Not suitable for use in the presence of a flammable anesthetic mixture with
air, oxygen, or nitrous oxide.

10
1.8 Symbols
Type B
Alternating current
General warning
See the attached documents and/or catalogues
Protective earth
Follow Instructions for Use
Dangerous Voltage
Separate collection of electrical and electronic equipment in
Accordance with Directive 2002/96/EEC (WEEE).
Temperature Limitation
Footcontrol

11
Keep dry
This side up
Do not use
Hand Hooks
Fragile
No Rotation
Stacking limitation
Limitation on
Relative Humidity
Limitation on Pressure
Fuse
Do Not Open

12
1.9 UnicLine S Labelled Diagram

13
1.10 Components
The following components of the UnicLine S Dental Delivery System are
manufactured by Heka Dental:
Patient Chair
Console
Instrument Arm, Table, Tray, and Hoses
Instrument Display
Telescoping Suction Arm and Hoses
Foot Control
Installation, operation, maintenance, and cleaning information can be found in this
manual for the items listed above.
1.11 Optional Equipment and Instruments
Optional equipment and instruments for use with the Heka Dental UnicLine S can be
purchased separately.
If you purchased any of the optional equipment and instruments for use with your
Heka Dental UnicLine S Dental Delivery System, please refer to the OEM
documentation included with your shipment for information on installation,
operation, maintenance, and cleaning of those Dental Delivery Systems.
1.12 Diagram of the Display
Display information
see section 4.0

14
2.0 Operating introductions
If the equipment does not start as described below
- contact an authorized Heka Dental dealer immediately.
2.1 Starting UnicLine S
WARNING: Clean, disinfect, and sterilize new or repaired handpieces and
instruments before first use and between each patient use. Only use sterilized
handpieces and instruments during treatment. Non-sterilized handpieces and
instruments may cause bacterial or viral infections. Always sterilize handpieces and
instruments after operation.
Please see the section on Cleaning and Disinfection for a detailed description
of cleaning methods for the UnicLine S device. See enclosed OEM
instructions for cleaning, disinfection, sterilization, and maintenance of any
OEM equipment and instruments.
1. Press the switch on outside of console
2. The UnicLine S will display the clock in the
instrument display
UnicLine S is now ready for use.
The main tap relays for water and air are
automatically switches On/Off together with
the unit.

15
3.0 Foot control
If the equipment does not start as described below
- contact an authorized Heka Dental dealer immediately.
To avoid unintentional activation of the Dental Delivery System, the foot
control can only activate the instrument lifted from the instrument table, all
other instruments is inactive and can’t be activated.
The operating instructions are based on a standard round foot control. Therefore,
there may be some sentences elsewhere in the manual which do not comply with
the instructions on this page. If in any doubt, please refer to this page.
3.1 Standard foot control
UnicLine S is delivered standard with the round, patented foot control which is used
to control the selected instrument.
Operation of the Foot Control:
Operation:
Location:
Action:
Activate OP lamp
Top of Foot
Control
Press
Change spray on activated
instrument
Middle Ring
Quick Press (<1
second)
Activate mechanical chip
blow (stays on for duration
of press)
Middle Ring
Continuous Press (>1
second)
Change the rotational
direction of the instrument
Activation ring &
Middle Ring
Tap the Activation
ring and then tap the
middle ring

16
3.2 Standard variable foot control
Optional the UnicLine S can be delivered with a standard variable foot control.
Operation of the Foot Control:
Operation:
Location:
Action:
Activate OP lamp
Top of Foot
Control
Press
Change spray on activated
instrument
Middle Ring
Quick Press (<1
second)
Activate mechanical chip
blow (stays on for duration
of press)
Middle Ring
Continuous Press (>1
second)
Increase the intensity of the
instrument
Pedal Arm
Push counter
clockwise
Decrease the intensity of
the instrument
Pedal Arm
Push clockwise
Change the rotational
direction of the instrument
Pedal Arm &
Middle Ring
Push pedal arm to
right and tap the
middle ring
The standard foot control has three pre-programmed speeds. The variable foot
control does not have pre-programmed speeds.

17
3.3 Universal variable foot control
The UnicLine S can be delivered with a universal variable foot control which is used
to control the selected instrument.
If your UnicLine S is supplied with a universal variable foot control, there will not be
3 pre-selected speeds. However, it can be programmed linearly or logarithmically -
please see the technical section for further details.
Setting the pedal spring.
The pedal spring can be activated or deactivated under the foot control by holding
the pedal arm in the MAX position while screwing the screw either out or in. (Only
turn the screw until it is free of the base plate).
If the spring option in the bottom is changed, remember to change the settings in
the program menu on the telescopic head.
Assistant call bracket
Left ear:
Brief activation of
the control (less
than 1 second)
changes the spray
selection for the
selected instrument.
Prolonged activation
(more than 1
second) activates
the mechanical chip
blow. Chip blow
remains activated
for the activated
time.
Assistant call bracket
Right ear:
Brief activation of the
control (less than 1 second)
changes the spray selection
for the selected instrument.
Prolonged activation (more
than 1 second) activates the
mechanical chip blow. Chip
blow remains activated for
the activated time.
Please see the
operating
instructions for the
UnicLine S patient
chair for a
description of the
joystick that
operates the chair.
The intensity of the selected instrument can be
increased or decreased by moving the pedal arm in
the direction of the arrow. To change the direction of
rotation of the motor, briefly press the pedal arm
down and then press the spray selector.
Min - Max

18
3.4 Wireless Standard foot control
UnicLine S can be delivered with a Wireless Standard foot control, which is used to
control the selected instrument.
Top: Can be used for activation of OP-lamp
(Additional equipment)
Middle ring: A short press on the middle ring (less than1 second)
changes the spray on the activated instrument.
A long press on the middle ring (greater than 1 second)
activates the mechanical chip blow. The chip blow will remain
activated as long as the press is maintained.
Activation ring: A constant press on the Activation ring
activates the chosen instrument. Turning the
activation ring in the direction indicated by the arrows
increases or decreases the intensity of the instrument.
By pressing the activation ring twice, you can switch between 3
pre-programmed speed/spray settings.
To reverse the rotation of the motor, press shortly on the
activation ring and then press shortly on the middle ring of the
foot control.
The foot control can be delivered with a brace to make it easier to move. A variable
version of the foot control is also available (see following page).
In case of “low battery” or disturbances in the wireless connection, please connect the
foot control to the Dental Delivery System using the foot control cable.
For Technical instruction, specification and Spare parts see Technical Chapter.

19
Pairing of the foot control
Read this instruction before pairing the foot control.
1. Connect the foot control to the console using the cable. The Dental Delivery
System must be turned ON.
2. Press and hold the TOP and the middle ring down simultaneously until you
hear three beeps
3. Within 5 seconds:
a. Activate the TOP shortly. You hear one beep.
The encryption code is now transferred from the foot control to the receiver.
b. Within 5 seconds:
c. Activate the TOP shortly. You hear one beep.
d. Activate the TOP again. You hear five beeps. The foot control is now
paired with the unit and goes back to normal work mode
If you do not press within 5 seconds or press something other than expected, you will
hear 10 rapid beeps and foot control goes back to normal operating mode without
having changed anything.
The Top, Middle ring and Activation ring can be activated from all sides
Increase
Decrease
Activation ring
Middle ring
Changes the spray /
Mechanical chip blow
Top:
OP-lamp ON/OFF
Battery indicator

20
3.5 Wireless standard variable foot control
UnicLine S can be delivered with a Wireless Standard variable foot control, which is
used to control the selected instrument.
Top: Can be used for activation of OP-lamp
(Additional equipment)
Middle ring: A short press on the middle ring (less than1 second)
changes the spray on the activated instrument.
A long press on the middle ring (greater than 1 second)
activates the mechanical chip blow. The chip blow will remain
activated as long as the press is maintained.
Pedal arm: By turning the pedal arm in the directions indicated with
arrows, the intensity of the instrument can be increased or
decreased.
To reverse the rotation of the motor, turn the pedal arm quickly
to the right and then press shortly on the middle ring of the foot
control.
If your UnicLine S is equipped with a variable foot control, the Dental Delivery System
does not have 3 pre-programmed speeds. The foot control can be delivered with a
brace to make it easier to move the foot control.
In case of “low battery” or disturbances in the wireless connection, please connect the
foot control to the Dental Delivery System using the foot control cable.
For Technical instruction, specification and Spare parts see Technical Chapter.
Table of contents
Other Heka Dental Dental Equipment manuals
Popular Dental Equipment manuals by other brands
Sirona
Sirona HELIODENT DS installation instructions

OrthoAccel Technologies
OrthoAccel Technologies AcceleDent OPTIMA Directions for use
VHF
VHF E5 Original operating instructions

Coltene
Coltene CanalPro Apex Locator Compact Instructions for use
Braun
Braun Oral-B AQUACARE manual
Ivoclar Vivadent
Ivoclar Vivadent 747832BU operating instructions
