Hello Kitty KT3015 User manual
M
M
MA
A
AN
N
NI
I
IC
C
CU
U
UR
R
RE
E
E
A
A
AN
N
ND
D
D
P
P
PE
E
ED
D
DI
I
IC
C
CU
U
UR
R
RE
E
E
S
S
SE
E
ET
T
T
O
O
OW
W
WN
N
NE
E
ER
R
R’
’
’S
S
S
M
M
MA
A
AN
N
NU
U
UA
A
AL
L
L
K
K
KT
T
T3
3
30
0
01
1
15
5
5- 1 -
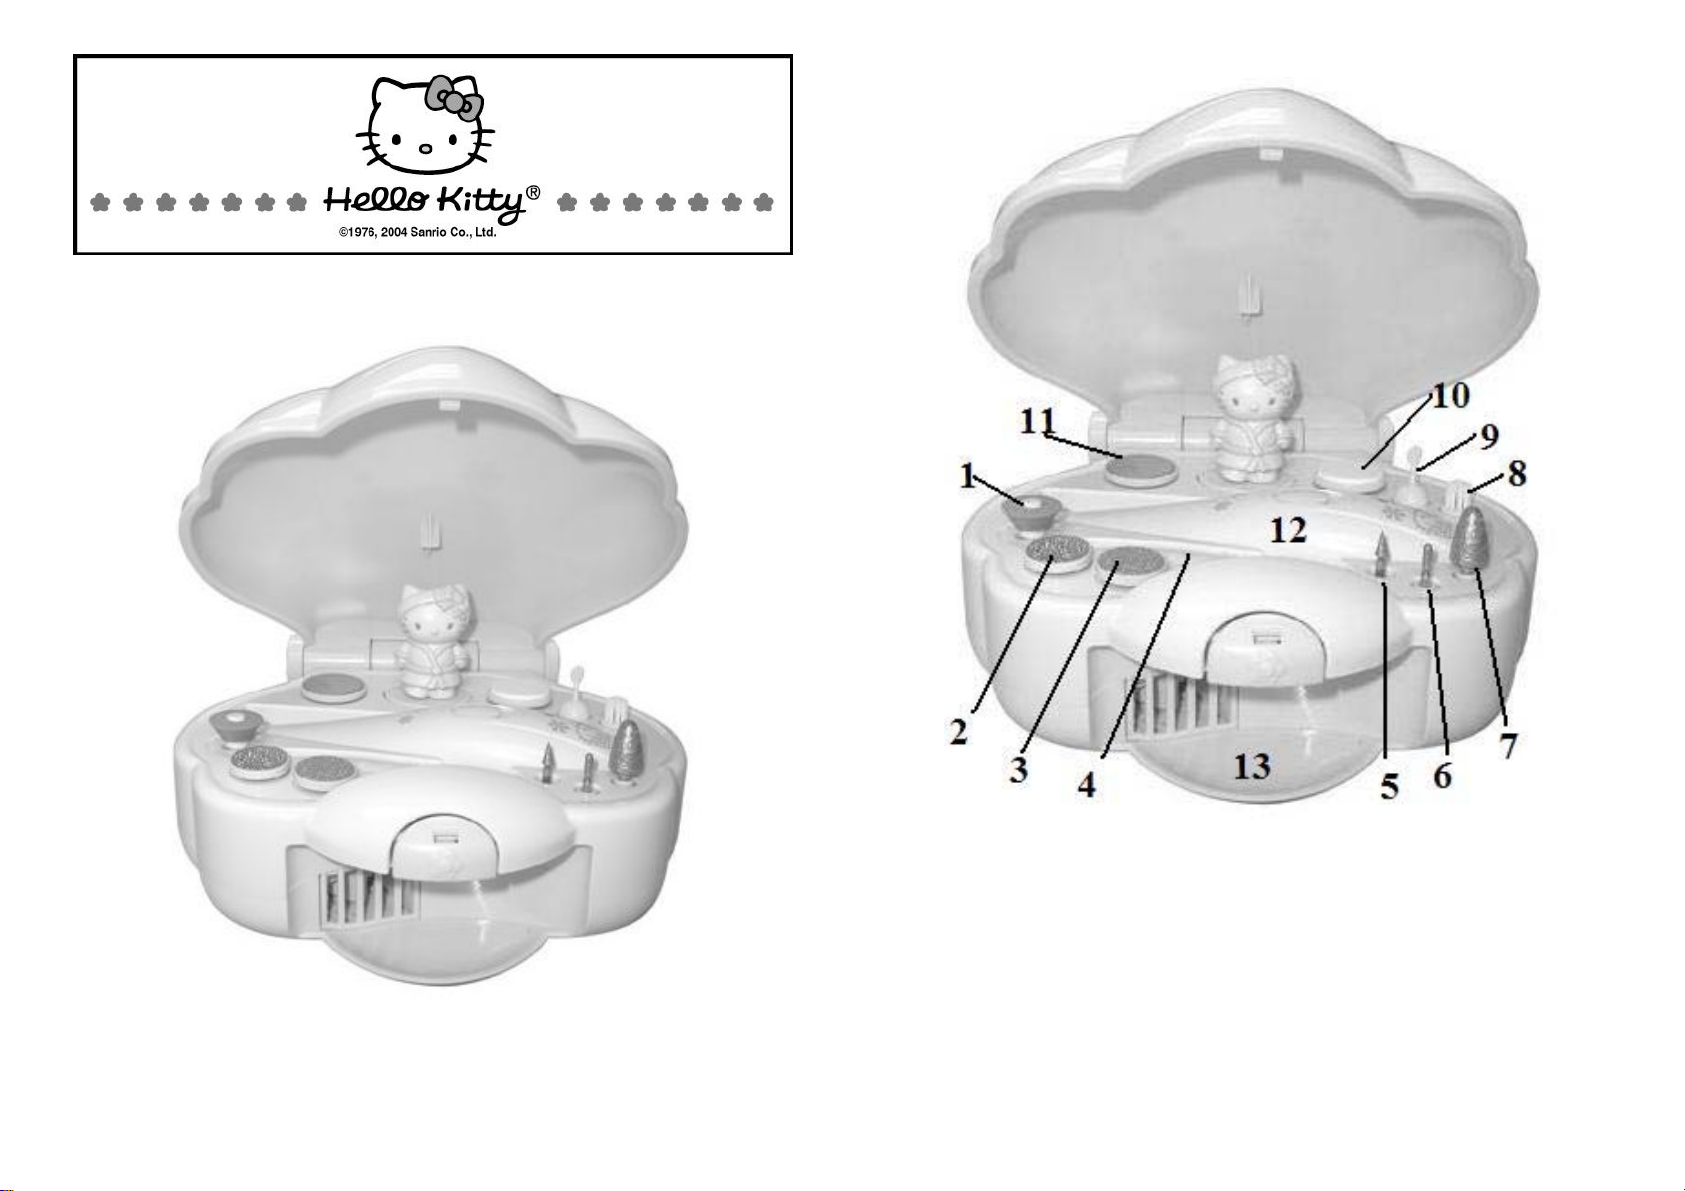
Product:
1. Emery disk 6. Thick sharp point 11. Fine shaping disk
2. Fine skin remover 7. Fine grain cone 12. Power handle
3. Rough skin remover 8. Nail brush 13. Nail dryer case
4. Cuticle lifter 9. Vibrating cuticle lifter
5. Thin sharp point 10. Polishing disk
- 2 -
IMPORTANT SAFEGUARDS
Please read these instructions carefully before using the appliance.
Never use accessories which are not recommended by the manufacturer. They could
constitute a danger to the user and risk damage to the appliance.
Only use the appliance for domestic purposes and in the way indicated in these
instructions.
Never immerse the appliance in water or any other liquid.
Never use or put away the appliance near hot surfaces.
Never use the appliance outside and always place it in a dry environment.
When you decide to throw away the appliance, make sure to remove the battery and
to dispose of it thoughtfully at a proper recycling point.
Be careful never to leave the appliance unsupervised when in use. Keep out of reach
of children or incompetent persons.
This appliance is not waterproof and cannot be used in the proximity of water.
Always place the appliance in a dry environment.
Be careful. This appliance is a manicure and pedicure set and cannot be used to
polish, grind down, or sand down hard materials. The accessories would not
stand up to this use as they are made to work with materials such as nails and
calluses.
- 3 -
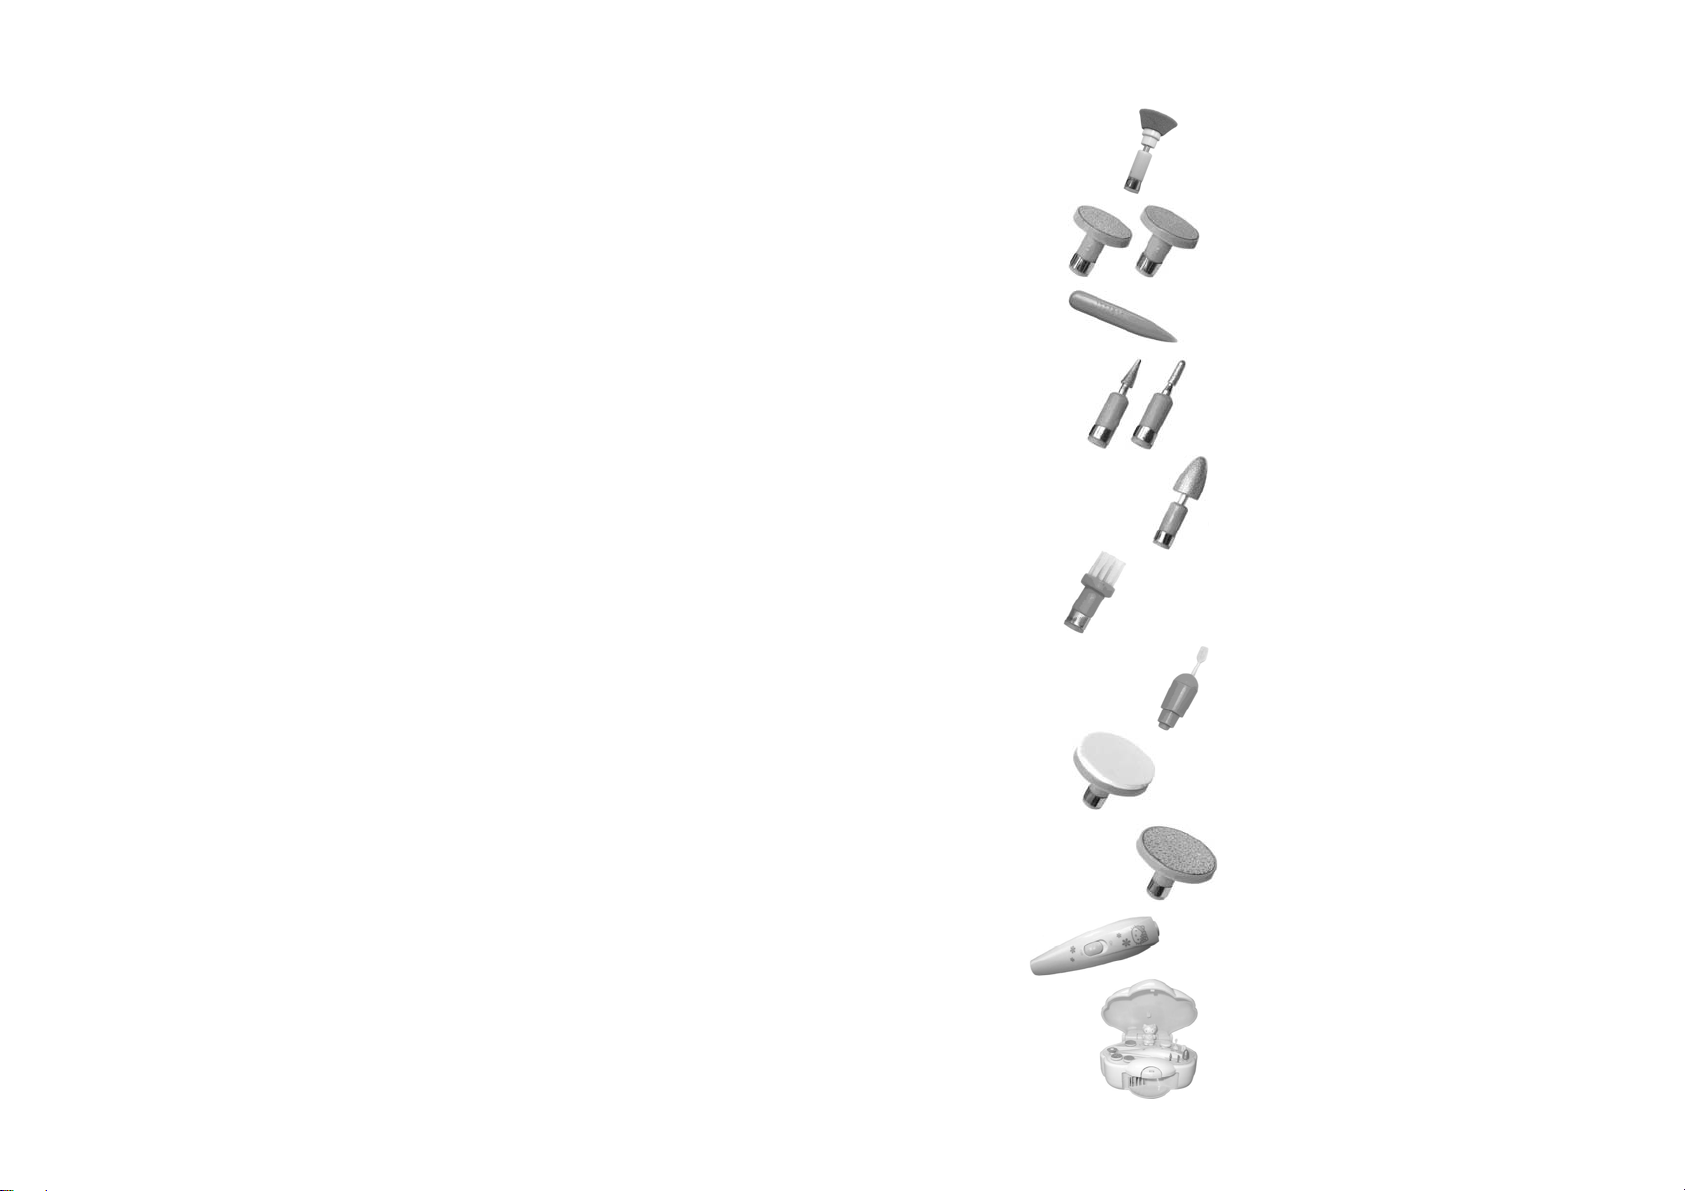
HOW TO USE THE DIFFERENT ATTACHMENTS
Your manicure & pedicure set comes with eleven interchangeable attachments:
•Attachment 1 : Emery disk: to reduce length of natural
nailsor hardened thickened toenails.
•Attachment 2 & 3: Fine and rough skin remover (2 attachments):
to treat hard skin on heels, toes and anywhere
wherehardskinis present. Choose the one
thatmostsuitsyourskin.
•Attachment 4 : Cuticle lifter: for lifting up cuticles.
•Attachment 5 & 6: Thin and thick sharp point (2 attachments):
to file and treat the surface of thick toe nails.
•Attachment 7 : Fine grain cone: to eliminate rough skin
andcorns.
•Attachment 8 : Nail brush: to clean your nails
•Attachment 9 : Vibrating cuticle lifter: to lift up
cuticles and different area.
•Attachment 10 : Polishing disk: to smooth round nail
edges after filing and to polish nail surface.
•Attachment 11 : Fine shaping disk: to eliminate rough
skin and corns Fine shaping disk
•No. 12 : Powerhandle:with strong power for filing
nail with different attachments.
•No. 13 : Nail Dryer Case: comes out soft air for drying
after using nail polish. This dryer dries nails,
helps maintain manicure / pedicure and can be
used on either natural or artificial nails.

- 4 -
HOW TO REPLACE THE BATTERIES
The appliance (Manicure and Pedicure set) uses 2 AAA (UM-4) batteries (not included)
for power handle and 2 AA (UM-3) batteries (not included) for nail dryer. To obtain the
best performance from your appliance, we recommend use good quality alkaline
batteries.
1. Hold the body of the appliance, use a Philips head screw driver to loosen the screw
on the battery compartment cover located on the bottom of the unit.
2. Remove cover and old batteries.
3. Insert new batteries into the compartment matching the polarity (+ and -) as marked
inside.
4. Replace the cover and tighten the screw.
Caution:
-Only adult should replace batteries.
-Replace the batteries when appliance stops operating properly.
-Do not mix old and new batteries or different types of batteries. Do not mix alkaline,
standard (carbon-zinc) or rechargeable (nickel-cadmium) batteries.
-Use only fresh batteries of the required size and recommended type.
-Dispose of old batteries promptly and properly. Do not burn or bury old batteries.
-Non-rechargeable batteries are not to be recharged.
-Exhausted batteries are to be removed from the appliance.
-The supply terminals are not to be short-circuited.
-If you do not plan to use your appliance for several weeks, remove the batteries.
Batteries can leak chemicals that can harm electronic parts.
- 5 -
MAINTENANCEAND CLEANING
•Avoid dropping the unit to prevent internal parts from being damaged.
•Never use liquids or abrasive cleaners to clean the housing of the unit and the case.
Just wipe off with a damp cloth.
•The attachments can be cleaned from time to time with alcohol (70 to 90).
TECHNICALSPECIFICATION
Power Requirement
Power Handle 2 X 1.5VAAA (UM-4) Batteries
NailDryer 2X1.5VAA(UM-3)Batteries
GETTING HELP
Please refer to the instruction on the enclosed warranty card for returning your unit for
service. When returning the unit, please remove batteries to prevent damage to the unit in
transit and/or from possible battery leakage. We are not responsible for batteries returned
with the product or for the cost of replacement.
Distributed by:
Spectra Merchandising International, Inc.
Chicago Industry Tech Park
4230 North Normandy Avenue
Chicago, IL60634, U.S.A.
Please have model number ready, for Customer Service, call 1-800-777-5331
Printed in China
©1976, 2006 Sanrio Co, Ltd.


