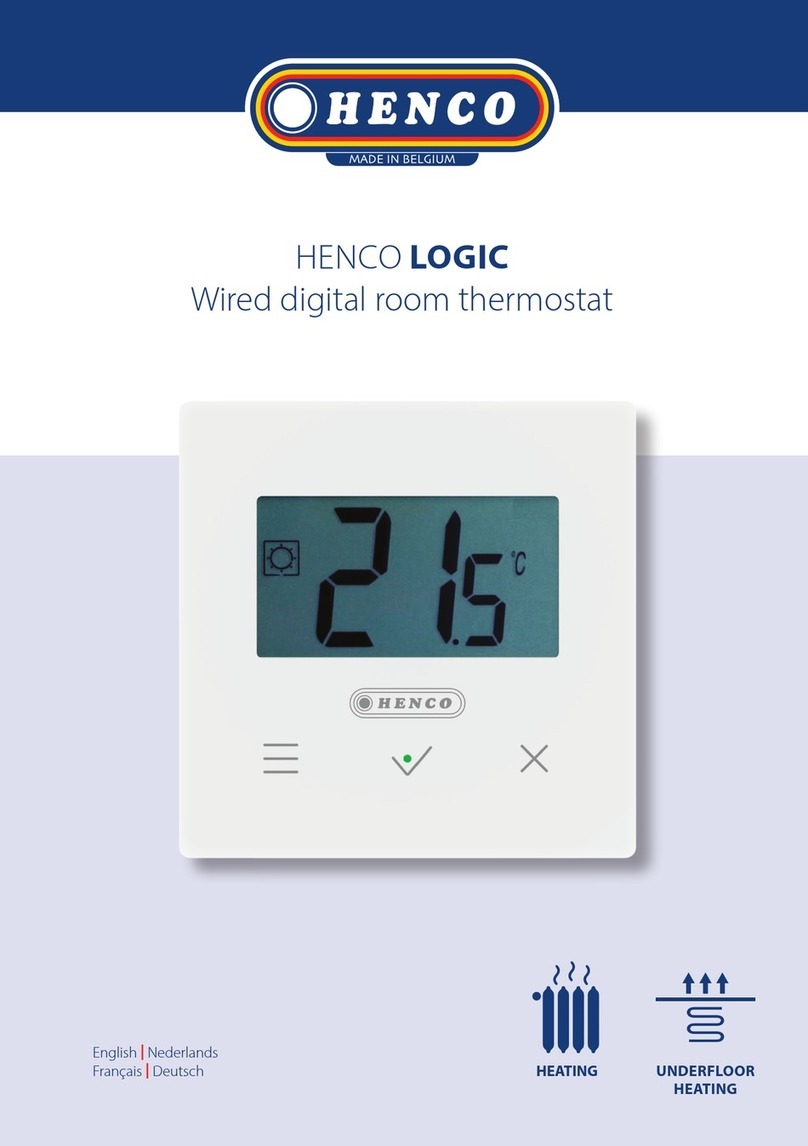
Henco CU-REGK-24V User manual

CU-REGK
CU-REGC

DEU
ENG
FRA
NDL
ITA
ESP
Contents
ENG
ENG 26
1 About these instructions ................................................ 27
1.1 Validity, storage and forwarding of the instructions 27
1.2 Symbols 27
2 Safety ............................................................................ 28
2.1 Intended use 28
2.2 General safety notes 28
3 Device overview ............................................................. 30
4 Operation .......................................................................31
4.1 Setting the target temperature 31
4.2 Navigation and settings 31
4.2.1 Lifestyle functions menu 33
4.2.2 Settings menu 37
4.2.3 Service menu 42
5 Comfort and protection functions................................... 45
5.1 Comfort functions 45
5.1.1 Smart Start/Smart Stop function 45
5.1.2 Heating/cooling change-over 45
5.2 Protection functions 45
5.2.1 Valve protection function 45
5.2.2 Antifreeze protection 45
6 Maintenance ..................................................................46
6.1 Troubleshooting 46
6.2 Cleaning 47

DEU
ENG
FRA
NDL
ITA
ESP
1 About these instructions
1.1 Validity, storage and forwarding of the instructions
These instructions apply to the room thermostats of the following
types:
CUREGKV
CUREGKV
CUREGCV
CUREGCV
These instructions include information necessary for the operation
of the devices. The room thermostats are designated as “Standard”,
“Comfort” and “Control” in order to point out dierences between
these types. These instructions must the read completely and thor-
oughly before commencing any work with the devices. These in-
structions must be kept and to be handed over to future users.
1.2 Symbols
The following symbols are used in this manual:
Hazard symbols: Identifies a hazard
Information: Identifies important or useful information
¾User action
9Result from an action
• List without fixed order
1., 2. List with fixed order

DEU
ENG
FRA
NDL
ITA
ESP
The room thermostat controls, directly or via a connection unit,
thermal actuators connected in a room-by-room temperature con-
trol system. It is suitable for 24V or 230V components, depending
on the variant. The unit serves for
• a fixed installation,
• the registration of the actual temperature (room temperature),
• the setting of the target temperature (comfort temperature)
• the control of the actual temperature by activating actuators
in heating/cooling operation (Komfort, Control) in an assigned
zone,
• the connection of an external sensor (CU-REGC-V en CUREGC-
V)
Every other use, modification and conversion is expressively forbid-
den and leads to dangers the manufacturer cannot be held liable for.
All safety notes in these instructions must be observed in order to
avoid accidents with personal damage or property damage.
• Only an authorised electrician may open the device. It may only
be opened in de-energised state.
• Always disconnect from the mains network and secure against
unintended activation before opening.
• Only use the device if it is in flawless state.
• Observe the performance limits of the device and the environ-
mental conditions.
• This device is not intended to be used by persons (including chil-
dren) with restricted physical, sensory or mental skills or who
2 Safety
2.1 Intended use
2.2 General safety notes

DEU
ENG
FRA
NDL
ITA
ESP
lack experience or knowledge. If necessary, these persons must
be supervised by a person responsible for their safety or receive
instructions from this person on how to use this unit.
• Ensure that children do not play with this device. Children must
be monitored if necessary.
• In case of emergency, disconnect the complete room-by-room
temperature control system.
Intended use

DEU
ENG
FRA
NDL
ITA
ESP
3 Device overview
Display
Mo Tu We Th Fr Sa Su
0 6 12 18 24
Rotary control with
turn/press mecha-
nism and fine ratchet
Room thermostats
Symbol Meaning Symbol Meaning
Komfort
Control
Lifestyle functions
menu Temperature unit
Settings menu Target/
actual temp.
Heating Min. temperature
Operating lock Max. temperature
Switching o Make/confirm
entry
Automatic operation Correction of actual
temp. measuring
Day operation Back
Night operation
Service menu Display illum.
Cooling Factory settings
Holiday function Time indications
Time
0 6 12
Comfort programs
Mo Su
Mo Su
Mo Su
Week day Setting the min.floor
temperature1
0 6 12 18 24
Time scale
1Displayed if an external floor sensor is registered.

DEU
ENG
FRA
NDL
ITA
ESP
4 Operation
WARNING
Danger to life in case of swallowing!
The rotary control can be taken o; children might swallow it.
The navigation and settings of the room thermostat are performed
with the rotary control:
+-
The target temperature is set by turning the rotary control
to the left or to the right. Rotating to the left decreases the
temperature, rotating to the right increases it.
By pressing the rotary control, menus are opened and func-
tions are activated, and changed settings are applied.
+-
By rotating the rotary control, settings can be done and
functions and menus can be chosen.
Room thermostats Comfort and Control
Comfort temperatures for day and night operation can be
stored. A manual or automatic change between the oper-
ating modes day and night operation changes to the stored
temperature. The target temperature can be changed with
the rotary control, independent from the active operating
mode. You can find more information in section Lifestyle
functions menu.
4.1 Setting the target temperature
4.2 Navigation and settings

DEU
ENG
FRA
NDL
ITA
ESP
Menu selection
Lifestyle functions
Includes all important basic functions.
Settings
Includes extended functions and numerous setting possi-
bilities.
Service
Includes various system parameters. An optimal tuning of
the overall system can be obtained by corresponding set-
tings.
Back
Leaves the menu selection and returns to the basic level.
The available menus depend on the room thermostat variant.
Basic level
In the basic level, all room thermostats show the current actual tem-
perature as well as active functions. The Control variant additionally
is equipped with a clock function.
A basic level and three menus are available for navigation and set-
tings:
Setting the target temperature
• A selected menu resp. a selected function is displayed
with a flashing symbol.
• If no operation is performed, the display returns to the
basic level after approximately 5 seconds.

DEU
ENG
FRA
NDL
ITA
ESP
4.2.1 Lifestyle functions menu
This menu allows the setting of the lifestyle functions. Depending
on the room thermostat variant, the settings listed in the graphic
are available. The following pages contain detailed information.
• For the selection of an operating mode (day, night, auto-
matic operation) only the inactive modes are available for
selection.
• If no operation is performed, the display returns to the
basic level after approximately 30 seconds.
Komfort and Control
Only Control
+-

DEU
ENG
FRA
NDL
ITA
ESP
Description Steps
Day operation
Adjustment to the set comfort tempera-
turein the menu Settings.
ü Confirm the selection by
pressing.
VDay operation is activated.
VThe basic level is displayed.
Night operation
Adjustment to the set reduction temper-
aturein the Settings menu
ü Confirm the selection by
pressing.
VNight operation is selected.
VThe basic level is displayed.
The symbol flashes if the target
temperature is changed. The tem-
perature change is applied for day
operation. Subsequently, the soft-
ware re-calculates the reduction
temperature for night operation.
.
¾Open the menu selection by pressing.
¾Select the menu Lifestyle functions.
¾Activate the menu by pressing again.
¾Select the desired function.
Lifestyle functions menu

DEU
ENG
FRA
NDL
ITA
ESP
Description Steps
Automatic operation
Komfort
The signal of an external system clock
(e. g. from a Control room thermostat)
activates day or night operation.
Control
Automatic temperature control ac-
cording to the Comfort programs in the
Settings menu.
ü Confirm the selection by
pressing.
VAutomatic operation is acti-
vated.
VThe basic level is displayed.
VControl: The time scale is
displayed.
Holiday function
Automatic reduction to the set
holiday temperaturein the Set-
tings menu.
Activate
ü Confirm the selection by
pressing.
ü Set the number of holiday
days by rotating.
ü Confirm the entry.
VThe holiday function is activat-
ed immediately.
VThe basic level is displayed.
A subsequent change of
the target temperature de-
activates the holiday func-
tion.
Deactivate
ü Observe the operating steps
under “Activation”.
ü Set the number of holiday
days to 00 by rotating.
Lifestyle functions menu

DEU
ENG
FRA
NDL
ITA
ESP
Lifestyle functions menu
Description Steps
Operating lock
Blocks the room thermostat.
The actual temperature and all
active functions are still displayed, the
possibility to change the target temper-
ature and the operation are deactivated.
Activate
ü Confirm the selection by
pressing.
VThe operating lock is activated.
VThe symbol is displayed.
VThe basic level is displayed.
Deactivate
ü Press the rotary control for >
5 seconds.
VThe symbol is deactivated,
operation is possible again.
Switching o
Switches the room thermostat
o. Temperature control is
deactivated. The protective functions
(valve protection and antifreeze protec-
tion) remain active.
For the room thermostat Control, the
comfort programs from the Settings
menu are still applied. Queued switch-
ing signals are given out to connected
thermostats via the reduction output.
ü Confirm the selection by
pressing.
VAll functions are deactivated.
VThe symbol is displayed.
VThe target temperature is
displayed
Switching on
ü Press the rotary control for >
5 seconds.
VThe basic level is displayed.
VAll active functions are dis-
played.
Back
Leaves the menu.
ü Confirm the selection by
pressing.
VThe display is in basic level.

DEU
ENG
FRA
NDL
ITA
ESP
4.2.2 Settings menu
Extended settings can be made in this menu. Depending on the
room thermostat type, the settings listed in the graphic are availa-
ble. The following pages contain detailed information.
If no operation is performed, the display returns to the basic
level after approximately 30 seconds.
Komfort and Control Only Control
+-
0 6 12
1

DEU
ENG
FRA
NDL
ITA
ESP
¾Open the menu selection by pressing.
¾Select the settings menu.
¾Activate the menu by pressing again.
¾Select the desired setting.
Description Steps
Comfort temperature
Heating
Setting the target tempera-
ture for day operation.
ü Confirm the selection by
pressing.
ü Set the target temperature.
ü Confirm the entry by press-
ing.
VThis is displayed in the Settings
menu.
Reduction temperature
Heating
Setting the target tempera-
ture for night operation.
ü Confirm the selection by
pressing.
ü Set the target temperature.
ü Confirm the entry.
VThis is displayed in the Settings
menu.
Comfort temperature
Cooling
Setting the target tempera-
ture for day operation.
ü Confirm the selection by
pressing.
ü Set the target temperature.
ü Confirm the entry.
VThis is displayed in the Settings
menu.
Reduction temperature
Cooling
Setting the target tempera-
ture for night operation.
ü Confirm the selection by
pressing.
ü Set the target temperature.
ü Confirm the entry.
VThis is displayed in the Settings
menu.
Settings menu

DEU
ENG
FRA
NDL
ITA
ESP
Description Steps
External floor sensor
Setting the minimum floor
temperature.
ü Confirm the selection by
pressing.
ü Make the setting.
ü Confirm the entry.
VThe display flashes in the
Settings menu.
This function is displayed if the
connection of an external floor
sensor is defined in the Service
menu under Parameter 040.
Holiday temperature
Setting the target tempera-
ture for the holiday function in
the Lifestyle functions menu.
ü Confirm the selection by
pressing.
ü Set the target temperature.
ü Confirm the entry.
VThis is displayed in the Settings
menu.
Target temperature
limitation
Setting of the maximum and
minimum settable target tem-
perature.
ü Confirm the selection by
pressing.
ü Set the minimum temper-
ature.
ü Confirm the entry.
ü Set the maximum temper-
ature.
ü Confirm the entry.
VThis is displayed in the Settings
menu.
Time indications
Setting of time and weekday.
ü Confirm the selection by
pressing.
ü Set the time (hh:mm) and
the weekday by rotating and
apply by pressing.
VThis is displayed in the Settings
menu.
Settings menu

DEU
ENG
FRA
NDL
ITA
ESP
Description Steps
0 6 12
Comfort programs
In automatic operation there
is a control with the switching
times of the comfort programs:
• Week (Mon–Sun)
• Weekdays (Mon-Fri)
• Weekend (Sat–Sun)
• Day (Mon, Tue, Wed, Thu, Fri, Sat,
Sun)
Every weekday can include four switch-
ing times (P1 - P4). After reaching the
starting time, the comfort tempera-
ture is adjusted. Outside the switching
times control is performed according
to the reduction temperature. The pre-
defined switching times can be adapt-
ed individually:
Mon–Fri: 5.00 am - 8.00 am
3.00 pm - 10.00 pm
Sat - Son: 6.00 am - 11.00 pm
ü Confirm the selection by
pressing.
VThe display switches to the
comfort program overview;
the display indicates “day”.
ü Select and activate a com-
fort program.
ü Select a switching time P1
to P4.
ü Set the start time and the
end time by rotating and
apply by pressing.
ü Return to the comfort pro-
gram overview with “BACK”.
ü Set further switching times
or change to the Settings
menu with “BACK”.
• Automatic operation must be
activated.
• The comfort and reduction
temperatures must be set in
the Settings menu.
• The current time indications
must be set.
• If connected room thermo-
stats are in automatic oper-
ation, the Comfort programs
allow a change between day
and night operation.
Settings menu

DEU
ENG
FRA
NDL
ITA
ESP
Description Steps
Temperature correction
Corrects a deviating measure-
ment of the actual tempera-
ture of the internal sensor by ±2°C in
0.1°C increments.
ü Confirm the selection by
pressing.
ü Set the correction value.
ü Confirm the entry.
VThis is displayed in the Set-
tings menu.
Display illumination
Sets the brightness of the dis-
play illumination in five levels:
0 O
25 Level 1
50 Level 2
75 Level 3
100 Level 4
ü Confirm the selection by
pressing.
ü Set the brightness of the
display illumination.
ü Confirm the entry.
VThe Settings menu is dis-
played.
The display of the setting is sig-
nalled by the time scale.
Factory settings
Restores the factory settings.
All previously made settings
will be reset.
ü Confirm the selection by
pressing.
ü Select the entry “Yes” for
resetting.
ü Press the rotary control for
5 seconds.
VA restart is performed. The
basic level is displayed
subsequently.
The entry “No” cancels
the process.
Back
Leaves the menu.
ü Confirm the selection by
pressing.
VThe basic level is displayed.
Settings menu

DEU
ENG
FRA
NDL
ITA
ESP
4.2.3 Service menu
Room thermostats Komfort and Control!
An optimal tuning of the overall system can be reached by corre-
sponding settings of the system parameters. In order to avoid a
faulty configuration, this menu is protected by a 4-digit PIN (stand-
ard: 1234).
¾Open the menu selection by pressing.
¾Select the Parameter menu.
¾Activate the menu by pressing again.
¾Select the menu entry “Code”.
¾Activate the PIN entry by pressing.
¾Enter the 4-digit PIN (standard: 1234). Select the individual ci-
phers by rotating and confirm by pressing.
¾Start the entry by activating the function “PAr”.
¾Select the individual ciphers of the parameter number by rotat-
ing and confirm by pressing.
¾Activate the entry by selecting “SET” and by pressing.
¾Perform the setting according to the subsequent parameter list.
¾Return to the basic level by selecting “BACK” 2 times.
CAUTION
Damage to the installation!
Faulty configuration can lead to errors and installation damage.
¾Only authorised specialists may perform settings.
If no operation is performed, the display returns to the basic
level after approximately 30 seconds.

DEU
ENG
FRA
NDL
ITA
ESP
No. Description Setting
010
Heating system
Sets the existing heating system:
• Floor heating, standard (FBH St.)
• Floor heating, low energy (FBH NE)
• Radiator (RAD)
• Convector, passive (KON pas)
• Convector, active (KON akt)
0 = FBH St.
1 = FBH NE
2 = RAD
3 = KON pas
4 = KON akt
Standard: 0
020
Blocking of cooling
Deactivates the cooling function.
0 = activated
1 = deactivated
Standard: 0
030
Operating lock
Protects the deactivation of the operating
lock with a PIN.
0 = deactivated
1 = activated
Standard: 0
031 PIN operating lock
Sets the PIN for parameter 30.
0 ... 9999
Standard: 0000
040
External sensor
(CU-REGC-V CUREGCV)
Registration of an external room sensor or
floor sensor. The registration of a room sensor
deactivates the internal sensor. If a floor sen-
sor is used, the minimum floor temperature
can be set via the Settings menu in the func-
tion “External floor sensor”.
0 = no external
sensor
1 = room sensor
2 = floor sensor
Standard: 0
041
Correction of actual temperature of exter-
nal sensor
(CU-REGCV CUREGCV)
Corrects a deviating measurement of the ac-
tual temperature.
-2 ... +2°C
Standard: 0 °C
050
Duration of the display illumination
Sets the duration of further illumination of the
display after use.
0 ... 30sec.
in 5 second incre-
ments
Standard: 15sec.
Service menu

DEU
ENG
FRA
NDL
ITA
ESP
No. Description Setting
090
Signalling of switching output
Signalises the control of switching outputs by a
flashing heating resp. cooling symbol.
0 = deactivated
1 = activated
Standard: 1
110
Control direction switching output
Sets the control direction of connected actua-
tors:
• Normally closed (NC)
• Normally open (NO)
0 = NC
1 = NO
Standard: 0
161
Antifreeze temperature
Activates the antifreeze protection function
when the temperature falls below the set tem-
perature.
5 ... 10 °C
Standard: 5
170
Smart Start/Smart Stop function
CU-REGC-V CUREGCV)
Teaches the temperature behaviour of the room.
0 = deactivated
1 = activated
Standard 1
190
Valve protection function
Cyclic opening of the valve in order to avoid clog-
ging.
0 ... 28 days
Standard: 14
191
Valve activation duration
Time for triggering actuators for performing the
valve protection function.
0 ... 10 minutes
Standard: 5 min
Service menu
This manual suits for next models
3
Table of contents
Other Henco Thermostat manuals
Popular Thermostat manuals by other brands
Living Heat
Living Heat T5 user manual
Warmup
Warmup Luxury 2 LUXY2D44 user manual
Honeywell
Honeywell PRO TH2000DV Series installation guide

Siemens
Siemens RDF340 Series operating instructions
Honeywell Home
Honeywell Home RTH2410B1019/E1 operating manual
MILL
MILL Convection WiFi Series Assembly and instruction manual
KMC Controls
KMC Controls FlexStat Application guide
White Rodgers
White Rodgers 1F95-1271 Installation and operating instructions
Sampford IXL
Sampford IXL Cannon User instructions

York
York DPC-1R Operating and maintenance instructions
Aube Technologies
Aube Technologies TH141-HC-28 user guide
Honeywell
Honeywell INNCOM e7w troubleshooting guide


