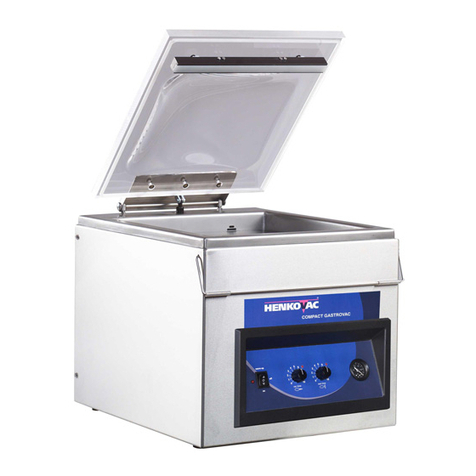
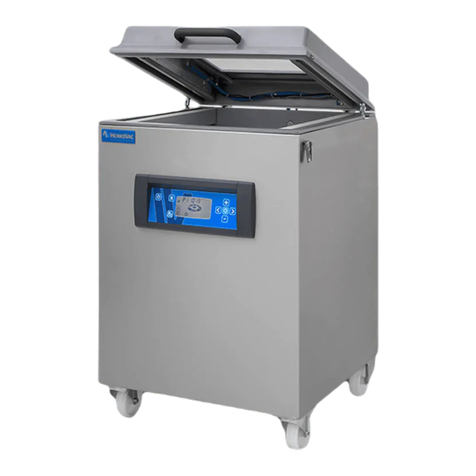
Henkovac COMPACT ECO Series User manual

Art. no. 96.06.5.0705/05.07
User manual
COMPACT ECO-RANGE
Manufactured by:
Het Sterrenbeeld 36, 5215 ML ‘s-Hertogenbosch The Netherlands
P.O.Box 2261, 5202 CG ’s-Hertogenbosch The Netherlands
tel: +31(0)73-6271271, fax: +31(0)73-6271200

II User manual Compact Eco-range
2007 HFE vacuum systems b.v.
All rights reserved.
No part of this document may be reproduced and/or published by means of printing, photocopy, microfilm or any other method, without
the prior written permission of the manufacturer. This also applies for the accompanying illustrations and/or diagrams and schematics.
The information in this document is based on the general data associated with the construction, material qualities and working methods,
known at the moment of publication, so that we reserve the right to make changes without giving prior notice.
This document is applicable to the indicated models of the Henkovac packing machine in the version supplied. The manufacturer
therefore does accept any liability for any form of damage or injury resulting from deviating from the specifications of these machines as
supplied to you.
All possible care was taken when creating this document, but the manufacturer accepts no liability for mistakes or any consequences
thereof.
TAKE THE TIME TO READ THIS DOCUMENT THOROUGHLY TO ACQUAINT YOU WITH THE CORRECT
AND APPROPRIATE USE OF THE HENKOVAC VACUUM PACKING MACHINES.
2007-05

Contents
User manual Compact Eco-range III
CONTENTS
SAFETY AND WARNING NOTICES ............................................................................................... 4
1
INSTALLATION ........................................................................................................................... 5
2
OPERATION ................................................................................................................................ 6
2.1
Warm up ............................................................................................................................................... 7
2.2
Vacuuming and Sealing........................................................................................................................ 7
2.2.1
Vacuuming.................................................................................................................................................. 7
2.2.2
Sealing ........................................................................................................................................................ 7
2.3
Packing ................................................................................................................................................. 7
3
MAINTENANCE........................................................................................................................... 8
3.1
Warnings............................................................................................................................................... 8
3.2
Clean Daily............................................................................................................................................ 8
3.3
Weekly maintenance ............................................................................................................................ 8
3.4
Monthly maintenance............................................................................................................................ 8
3.5
Annual maintenance ............................................................................................................................. 8
3.6
Oil.......................................................................................................................................................... 9
4
SEAL BAR ................................................................................................................................. 10
4.1
Replacing the sealing wire and Teflon tape........................................................................................ 10
4.2
Replacing the sealing wires ................................................................................................................ 11
4.3
Replacing the Teflon tape................................................................................................................... 11
4.4
Replacing the silicone in the counter bar............................................................................................ 11
4.5
Maintenance of the silicone gasket in the lid ...................................................................................... 11
4.6
Replacing silicone gasket in the lid..................................................................................................... 11
5
TECHNICAL DATA.................................................................................................................... 12
6
PROBLEMS AND SOLUTIONS ................................................................................................ 14

Safety and warning notices
4 User manual Compact Eco-range
SAFETY AND WARNING NOTICES
The manufacturer accepts no liability whatsoever for damage or injury caused by not (strictly) following the
safety directions and instructions in this manual, or carelessness during the installation, use, maintenance
and repair of the machines identified on the front of this document and any accompanying options.
The owner of the machine is responsible at all times for observing the locally applicable safety
regulations and guidelines.
Obey all safety instructions and guidelines as given in this manual.
Users manual
•Every user should be informed of the contents of this manual and follow the instructions in it carefully.
Management must train personnel on the basis of this manual and obey all directions and indications.
•Never change the order of the actions to be taken.
•Always keep the manual in the proximity of the machine.
•This manual is intended as a reference for users and technicians, who can install, use and maintain the
machine(s) stated on the front of this document in a safe way.

Installation
User manual Compact Eco-range 5
1 INSTALLATION
The vacuum machines are solid and safe. For your own safety and optimal maintenance of the
machine, the following instructions must be obeyed.
•Make sure the machine is level and has been placed on a solid surface.
•To ensure easy access for maintenance and sufficient ventilation, the machine must not be closed
in and is easily accessed from all sides.
•Before connecting the machine to the mains make sure that the voltage stated on the specifications
plate is the same as that of the mains supply and that the connection is properly earthen.
•The standard machine must be connected to 230 Volt - 1 phase - 50 Hertz (depending on the
country).
•Check the oil level.
•The temperature in the workspace should not be lower than 10°C (or 50º F), as the oil in the
vacuum pump will thicken and prevent the smooth operation of the pump.
•Always remove the power plug from the socket during repair and maintenance work!!!
•Never clean the machine with a high-pressure cleaner. Water jets may penetrate and damage the
electronics.
•The machine must be switched of immediately in case of a damage in the gas springs. Contact
your dealer as soon as possible!!
•Always have a recognised HFE-dealer carry out maintenance and repairs.
•Don’t just start vacuuming sauces or other liquid products. When vacuuming sauces or soups, the
pressure in the vacuum chamber must be carefully monitored, because the boiling point of liquids
is lower as the vacuum percentage goes up. As soon as the boiling point has been reached, you
can see the gas bubbles in the product.

Operation
6 User manual Compact Eco-range
2 OPERATION
The Compact is a machine that functions automatically. When the filled vacuum pouch has been put in
the vacuum chamber and the lid is closed the operation will start automatically. The machine will
automatically follow the entered program from vacuuming to sealing. After the sealing has been
completed the vacuum pump will turn off, the chamber aerates and the lid will automatically open.
Pos
Description Function
A Vacuum gauge Indicates the reached vacuum in the chamber
B Buttons to adjust Vacuum time
•Press +to increase the vacuum time. Maximum = 99 sec.
•Press -to decrease the vacuum time. Minimum = 0 sec.
•Adjustable per 1 second
C Buttons to adjust Seal time
•Press +to increase the seal time. Maximum = 6,0 sec.
•Press -to decrease the seal time. Minimum = 0 sec.
•Adjustable per 0,1 second
D Display
•Shows ‘on’ in stand-by mode
•Shows ‘spinning’ zero when in warm-up mode
•Shows time left when vacuuming
•Shows time left when sealing
E Button to warm up pump Starts function to warm the pump
F STOP button If pressed at any time, this key stops the active function and
start the next function when necessary.
G Off / On switch •At position 0, turns the machine OFF.
•At position 1, turns the machine ON.
Fig. 2-1

Operation
User manual Compact Eco-range 7
2.1 Warm up
If the machine has been switched off for a period of time we recommend that the machine is “warmed
up”. The machine vacuums a certain time, aerates a short time and then starts vacuuming again.
These cycles will be repeated for certain times.
1. Turn on the machine with the Off/On switch (G) and press button (E). The display shows a
‘rolling’ or ‘spinning’ zero.
2. Close the lid. The machine now starts to vacuum and the display shows the number of cycles to
go.
3. After the last cycle the machine aerates totally, the lid opens and returns to the stand-by mode.
4. The machine is ready to use.
2.2 Vacuuming and Sealing
The vacuum chamber contains filler plates. When the vacuum pouches are filled, a number of the filler
plates must be removed so that the vacuum pouch lies directly on the sealing bar. The vacuum
pouches should never stick out of the machine!!
2.2.1 Vacuuming
Depending on the desired vacuum, the vacuum time can be set by pressing buttons (B).
With OPEN lid, press the + to increase or – to decrease the vacuum time. The range is between 0 and
99 seconds and adjustable per 1 second.
Only when vacuuming, the attained vacuum can be seen on the vacuum gauge (A). It is important that
the vacuum time for products with enclosed air is extended.
2.2.2 Sealing
Depending on the desired seal, the seal time can be set by pressing buttons (C).
With OPEN lid, press the + to increase or – to decrease the seal time. The range is between 0 and 6
seconds, and adjustable per 0.1 second.
If the sealing time is too long (scorching the bag), set to a lower value; if the sealing time is too short
(the sealed product easily opens), set to a higher value.
2.3 Packing
1. Turn on the machine with the Off/On switch (G).
2. The display shows ‘on’, to indicate that the machine is ready to use.
3. Put the vacuum bag with your product in it in the vacuum chamber.
4. Be sure that the open side of the bag lays smoothly over the seal bar but not OUTER the
chamber. The bag must be inside the chamber.
5. Close the lid. The machine now starts to run and the display shows the vacuum time to go.
6. After the reached vacuum time the machine begins to seal. The display shows the seal time to
go.
7. After sealing, the machine aerates automatically and the lid opens.
8. Check the quality of the package and adjust the vacuum or seal time if necessary before
continuing.

Maintenance
8 User manual Compact Eco-range
3 MAINTENANCE
Regular and thorough maintenance prevents breakdowns, prolongs the machine’s operational life and
guarantees optimum hygiene.
3.1 Warnings
•Always unplug the machine when carrying out maintenance or repairs.
•Never use high-pressure water to clean the machine as this can cause irreparable damage to the
machine and to the electronics.
•Use a wet cloth with a solution of soap for cleaning the machine. Clean the control panel with a dry
cloth.
•Never use chemicals to clean the machine.
•The gas springs may NOT show any damages. In this case to prevent accidents the gas springs
must be replaced.
•Switch off the machine in case of damage of the springs and contact your dealer.
3.2 Clean Daily
Vacuum chamber and insert plates
Clean the lid, insert plates, bottom and walls of the vacuum chamber with a damp cloth, pay particular
attention tot the silicon strip in the lid.
Do not clean the transparent lid with synthetic cleaning agent as this weakens the acrylic
material.
Warming up vacuum pump
In order to prevent oxidation in the pump, the vacuum pump must run for about 5 minutes after
cleaning, to allow the condensed water in the oil can evaporate. For this place the main switch on the
“warm up” stand.
3.3 Weekly maintenance
•Oil reservoir
Check the oil, add oil if necessary. Use the correct oil: you can buy this by your dealer. The
vacuum pump as well as the vacuum machine requires less maintenance. For the pump it is
important to check the oil and to replace it.
•Seal bars
Check the condition of the bars; replace if damaged.
•Rubber of the cover
Check the rubber; replace if damaged.
3.4 Monthly maintenance
•Oil
Check the condition of the oil.
Note: Replace the oil after 160 hours of operation. If the machine is not used frequently, change the
oil every 6 months.
3.5 Annual maintenance
•Vacuum hoses and pipes
Check the condition of the vacuum hoses and pipes and replace them if necessary.
•Silicone strip of the counter bar
Check the condition of the silicone strip of the counter bar and replace if necessary.
•Gas springs in the lid
Check the condition of the gas springs in the lid and replace them if necessary.

Maintenance
User manual Compact Eco-range 9
3.6 Oil
Check oil:
1 time a week. If necessary fill till the correct level.
Replace oil
By normal use after 160 running hours; by incidental use at least 1 time a year.
POS Description
A Cap
B Oil filler plug
C Oil gauge
D Oil drain plug
1. Drain the oil off only by a warm pump. (see Paragraph 2.1).
2. Switch the pump of and remove the power cable from the socket.
3. Use a tray for catching the oil.
4. Remove CAP (A)
5. Loosening the oil filler plug (B).
6. Loosening the oil drain plug (D).
7. Make sure the oil will completely flow away. Take time to let flow the oil completely. Wait at least 5
minutes before taking the next step.
8. Tighten the drain plug again.
9. Fill the oil with the correct quantity of oil.
10. Tighten the oil filler plug again.
11. Place the back the cap
Recommended oil: See Technical Data.
Fig. 3-1 COMPACT ECO MINI

Seal bar
10 User manual Compact Eco-range
4 SEAL BAR
•Clean the sealing and counter bars daily to ensure optimum sealing of the packaging material. Use
a dry cloth for this purpose.
•Check the condition of the sealing wires regularly. They should be free of kinks and should be
tightly strung on the sealing bar. For flawless operation the Teflon tape must be free of damage.
•If the sealing wires or the Teflon tape are damaged, replace them immediately.
•Check the counter bar. This is made of silicone which generally has a long operational life and
therefore does not need replacing often. However, if parts of the beam are scorched, replace the
silicone strip immediately.
•Ensure that spare sealing wires and Teflon tape are always kept in stock.
4.1 Replacing the seal wire and teflon tape
Removing of old materials
1. Remove the seal bars by pulling these up.
2. Remove the old teflon tape (5).
3. Unscrew the hexagon socket screws (4)
4. Check if the tightening springs (2 & 3) at the end of the bars are present. The tightening springs are
necessary to catch up the expansion of the wires during the heating process.
5. Remove the seal wire (6)
POS Description
1 Beam
2 Spring
3 Screw
4 Hexagon socket screw
5 Teflon tape
6 Seal wire
Fig. 4-1

Seal bar
User manual Compact Eco-range 11
4.2 Replacing the seal wire
1. Ensure that the two tension spring (2) and screw (3) assembly are in place in either end of the
seal bar.
2. Fold over 50mm of the end of the new seal wire (6), push this end into the slot (underneath the
seal bar) so that it extends beyond the (hole) position where the electrical pin contacts in the
chamber fit. Clamp this end of the wire into place with the hexagon socket screw (4).
3. Run the remaining length of the wire along the top of the bar, fold over the end and fit similarly at
this opposite end as the first, ensure that both screws (6) are tightly secured.
4.3 Replacing the Teflon tape
Remove the protective paper backing strip and stick the tape onto the bar
4.4 Replacing the silicone in the counter bar
Replacement of the rubber is done as follows:
1. Pull the rubber out of the counter beam.
2. Clean the groove.
3. Push a new rubber evenly into the groove. Make sure that it does not stick out at the ends of the
counter beam.
4.5 Maintenance of the silicone gasket in the lid
Clean the silicone gasket with a damp cloth. Never use synthetic cleaning agents. Treat the rubber
eventually with talcum powder in order to prevent that it will stick to the bar.
4.6 Replacing silicone gasket in the lid
Replacement of the cover rubber is done as follows:
1. Pull the cover rubber out of the groove
2. Clean the groove.
3. Push the new cover rubber evenly and without tension into the groove. Put the rubber ends tightly
against each other. This will prevent a leak, by which the chamber is not vacuuming very well.

Technical data
12 User manual Compact Eco-range
5 TECHNICAL DATA
Data per machine
COMPACTType
MINI ECO
MAXI ECO
Gastrovac
ECO
Gastrovac
PRO ECO
Size and weight of the machine
Height mm 310 310 475 480
Width mm 340 340 465 535
Depth mm 520 520 560 580
Weight Kg 30 40 55 65
Size and weight of the packed machine
Length mm 550 550 670 670
Width mm 470 470 670 710
Depth mm 670 670 660 660
Weight Kg 36 46 65 80
Size of the vacuum chamber
Length mm 365 365 385 420
Width mm 280 280 360 460
Depth mm 95 95 140 170
Sealing configuration Net sealing length
1 x sealing beam mm 270 270 320 420
Vacuum pump
50 Hz m³/h 4 8 16 16
Capacity 60 Hz m³/h 4.8 9.6 19 19
Final pressure mBar 15 2 2 2
Oil quantity Ltr 0,06 0,25 0,3 0,3
Weight vacuum pump Kg 5.1 10.3 18 18
50 Hz Db(A) 59 59 60 60
Noise 60 Hz Db(A) 59 59 64 64

Technical data
User manual Compact Eco-range 13
General data
Maximum leakage 1 mbar/s
Recommend oil Ambient temperature
VM 068 5 - 12º C
VM 100 12 - 30º C
VS 100 or VC 101 30 - 40º C
Electrical connections
Tension, power, frequency See the identification
Maximum permissible voltage variance - 10% to + 10%
Ambient conditions
Ambient temperature + 5 to + 30º C
Transportation temperature - 25 to + 55º C
Humidity 30 % to 95 % (without condensation)
Positioning Inside, level, free of walls, etc,
•Voltage data was not included in this summary because these are dependent on the electricity supply of
the country that the machine is intended for. The voltage data are given on the machine identification plate.
•The useful space in the vacuum chamber depends on the number of seal beam and their positioning. Each
beam lessens the useful space by about 50 mm.
•Sizes and weights are mentioned for standard machines.

Problems and solutions
14 User manual Compact Eco-range
6 PROBLEMS AND SOLUTIONS
If the machine indicates a fault, use the following table to check whether you can solve the problem.
Problem Cause Solution
• The plug is not inserted in the
socket correctly.
• Push the plug into the socket correct.
• The On/Off switch is in the ‘OFF’
position.
• Put the switch in the ‘ON’ position.
Machine does not work.
• A fuse in the machine is ruptured. • Contact your authorized service
representative.
• The lid micro switch is damaged • Contact your authorized service
representative.
• The thermal safeguard has
switched the machine off due to
overheat.
• Check if the ventilation openings are
free from obstructions.
-Let the machine cool down and switch.
on again.
Contact your dealer if the machine will
be switched off again after a short time.
• A fuse could have ruptured.
• Contact your authorized service
representative
The machine does not
work, but the lights are on.
• There is an internal malfunction. • Contact your authorized service
representative.
The vacuum pump is not
functioning correctly.
• The oil is too thick, the temperature
is too low.
• Let the pump warm up. (see “Warm up”
procedure).
• The value entered for the vacuum
function is too low.
• Increase the value of the vacuum
function.
• There is not enough oil in the
pump.
Replenish the oil.
• The oil is dirty. • Change the oil.
• The suction filter is blocked. • Contact your authorized service
representative.
• The pump’s spray filter is blocked. • Contact your authorized service
representative.
There is insufficient
vacuum.
• The lid’s silicone gasket is
damaged.
• Replace the silicone gasket.
• The vacuum pouch is of inferior
quality.
• Select vacuum pouches of a better
quality.
• The product has damaged the
pouch.
• Use a new pouch.
Insufficient vacuum in the
bag.
• There is insufficient room between
the seal bar and the counter bar.
• Check the position of the sealing bar.
• The vacuum pouch is incorrectly
placed on the seal bar.
• Place the opening of the vacuum
pouch over the sealing bar correctly.
• The sealing time is not set
correctly.
• Adjust the sealing time value.
• There is a break in the seal wire. • Replace the seal wire.
• The seal bars are dirty. • Clean the seal bars.
• The Teflon tape is worn. • Replace the Teflon strip
• The counter bar is damaged. • Replace the silicon strip.
• The vacuum pouches are of
inferior quality.
• Select better quality vacuum pouches.
The vacuum pouch is
incorrectly sealed.
• The opening of the vacuum pouch
is contaminated.
• Remove any obstructions from the
opening of the pouch. Make sure the
opening of the package remains clean
while filling. or replace the bag.

CE
D
ECLARATION OF CONFORMANCE
(according to annex IIA of the machine guideline)
We, HFE vacuum systems B.V.
Het Sterrenbeeld 36, 5215 ML 's-Hertogenbosch
The Netherlands,
declare totally on our own responsibility that the products:
Henkovac Vacuum packing machines:
Compact MINI, Compact MAXI,
Compact Gastrovac and Compact Gastrovac Pro.
to which this declaration refers, comply with the following standards:
•EN 60204-1: 1997;
•EN 60335-1: 1994;
•EN 55014, EN 60555-2 and EN 60555-3;
•EN 55014-2 carried out using the values of the EN 50082-2
according to the determinations of:
•the machine guideline 89/392/EEG, amended by the guidelines 91/368/EEG, 93/44/EEG,
93/68/EEG;
•the low voltage guideline 73/23/EEC, amended by the guideline 93/68/EEG;
•the EMC-guideline 89/336/EEC, amended by the guidelines 92/31/EEG, 93/68/EEG.
A.P.J.M. van der Velden
Managing Director
The Netherlands, 's-Hertogenbosch, may 2007
This manual suits for next models
4
Table of contents
Other Henkovac Kitchen Appliance manuals
Popular Kitchen Appliance manuals by other brands

Gaggia Milano
Gaggia Milano MAGENTA operating instructions

Tricity Bendix
Tricity Bendix SB411 Operating and installation instructions

KitchenAid
KitchenAid KSM45-KSM200 Series manual
Caple
Caple WI6141 instruction manual
Gallet
Gallet MAH 302 Dijon instruction manual
Univex
Univex 9512 MAX Series instruction manual
R.G.V.
R.G.V. Ausonia Smarty 170 instruction manual
ZANOLLI
ZANOLLI CITIZEN Series Installation, use and maintenance manual

Great Northern Popcorn
Great Northern Popcorn 6251 SS TWISTER STOVE TOP POPPER Assembly instructions

Speidel
Speidel 47014 operating instructions
Kaboodle
Kaboodle W-50553 installation guide
ACME
ACME BA200 user manual
