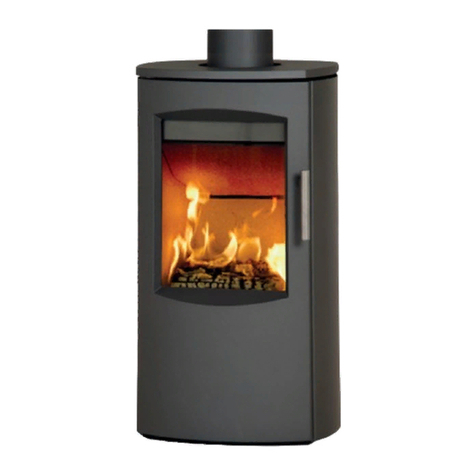
Henley Stoves Orion Avon Installation instructions

AVON & BURNBRIGHT
TO BE INSTALLED BY A HETAS/METAC QUALIFIED INSTALLER
THIS APPLIANCE IS SUITABLE FOR WOOD BURNING ONLY
0.12%
CO
NOx
CxHy
0.10%
SPARE PARTS

2
Congratulations on the choice of
your New Henley-Orion Stove!
With the proper care & attention your Henley-Orion stove will give
you a lifetime of heat & comfort.
This manual contains instructions on how to install
and maintain your Henley-Orion Stove.
For both your comfort & safety please take the time to
read instructions carefully.
THIS APPLIANCE IS SUITABLE FOR WOOD
BURNING ONLY
DO NOT CONNECT THIS STOVE TO A CHIMNEY
FLUE SERVING ANOTHER APPLIANCE

3
Shutting Down Stove
Maintenance
Air Controls
Useful Information
Stove Finish (Paint)
Carbon Monoxide Alarm
Spare Parts
FAQ’s
Terms & Conditions
Stove Commissioning Checklist
Warranty Form
Technical Information
Installation Instructions
Flue Positions
Flue Options
Non-Combustible Materials
The Clean Air Act 1993
Combustible Materials
Recommended Fuels
Lighting The Stove
4
5
6
7
8
8
9
10
10
10
11
11
11
12
13
13
13
14
14
15
15
15
15
15
15
16
16
17
17
17
18
18
19
19
19
20
21
22
22
22
23
26
27

4
AVON
AVON Wood
CONFIRMS TO : EN13240
8
623
62
550
335
335
345
25
127
280
550
392
100
8
623
62
550
335
335
345
25
127
280
550
392
100
8
623
62
550
335
335
345
25
127
280
550
392
100

5
Burnbright Wood
BURNBRIGHT
CONFIRMS TO : EN13240

6
Regulations
British Standard BS 8303, Code of Practice
for Installation of domesting heating
appliances burning solid mineral fuel
Domestic Heating
Fuel
Fireguard
Combustible Materials
Asbestos
Fire Cement
Extractor Fan
Ventilation:
Alterations
Chimney
Flue System
Serial Number
Manual Handling

7
Constructional Hearth Dimensions
for Solid Fuel Appliances & Open Fires
The Stove should be installed on:
A:
Non Combustible Hearth
surrounding Solid Fuel Appliance Ways of Providing Hearths

8
British Standards BS EN 15287-1:2007 -
design,installation and commissioning of
chimneys
HETAS/
METAC
The following must be checked:

9
•
•
C
B
D
A
Horizontal
Measurement
Terminal
Flue
Vertical
Measurement
Insulation
150mm
Max
Seek specialist advice if installing
in a dwelling with a thatched roof
The datum for vertical measurement is the point of
discharge of the flue from either the point of disxcharge
ofn the flue or 150mm above insulation, whichever is
the lower.
Adjacent
Building
Adjacent
Building
These positions are defined by Document J of the Building Regulations.
B
WARNING
Under no circumstances should
this appliance be connected to

10
Height Over Adjacent Building
Height Over Roof
Height Over Openings

11
External
air
WARNING
If Not using External Air Supply
Do not remove cover from back
WE RECOMMEND
Flexi-Liner is Used for
less than the diameter of the outlet of the
External
air
45o
600mm
minimum Access for
soot removal
External Air
Non Combustible
Reducer Plate
(Minimum
1.5mm Thick
Steel)

12
External Air
(b)
(a)
150mm on top50mm
(although we recommend 150mm) around
the sides50mm at the back

13
The Clean Air Act 1993 &
Smoke Control Areas
Avon and Burnbright 1200mm to the
Wood Only
DO NOT burn construction timber painted,
impregnated / treated wood, manufactured
board products or pallet wood
200mm
100mm
Wood length
MAX 200mm, and 100mm in diameter

14
DO NOT BURN
bituminous coal,‘petro-coke’ or other
petroleum based fuels as this will
DO NOT leave the stove unattended if the
Note:
WE RECOMMEND THAT WOOD LOGS BE
PLACED VERTICALLY IN THE STOVE FOR
BEST FLAME & FUEL CONSUMPTION
RESULTS
DO NOT load fuel above the tertiary air inlet

15
Directly after refueling it was
necessary to operate with the secondary air
fully open for a period 3 to 5 minutes before
closing to the desired setting
When refueling the appliance
it was necessary to leave the door ajar for a
period of 1 - 2 minutes in order to sustain
The stove will remain very
Petroleum coal fuels or household waste
must not be burnt in this appliance

16
NACS
Stove Rope on Inside of Door
stove rope

17
.
Stove Door Glass
Do not use appliance without the fuel
retainer in position.
Bafe Plate Location
Bafe Plate example
Top of bafe
Rear of bafe
Removing Fuel Retainer
(Front View)
1. LIFT UP
2. ROTATE
Stove Glass
Glass Clips

18
Appliances have air systems providing cleaner
Please see diagram to view where the various air
controls are located on your Stove
1)Primary Air
2) Tertiary Air
DO NOT USE BARE HANDS
Stove Parts become very hot while the stove
is running so should not be touched with bare
WHEN STARTING A FIRE
Leave Door Slightly Ajar for 2 Mins when
Starting A Fire with the Stove.
DO NOT LEAVE AIR LEVERS / RODS
FULLY OPENED FOR LONG PERIODS.
We Recommend to Never Open More than 60%, As
Extended Use of Stove at More than
If fume emission does persist:
Stove Air Controls

19
Repainting Instructions:
USE ONLY GENUINE
HENLEY-ORION STOVES SPRAY PAINT
DO NOT OVER FIRE YOUR APPLIANCE
If a Chimney Fire Occurs :
• Call the Fire Service - Dial 999 or 112
• Immediately close all of the air inlets to
the appliance to reduce the air supply to
• Move items of furniture and combustibles
away from the stove to reduce the risk
• Ensure access to the loft space is
available
• Evacuate the property
Do not use the stove again until the stove,
chimney and connector have been inspected,
and any damage parts have been repaired or
This work should only be carried out by a
HETAS/METAC

20
Brightfire 5kw exploded drawing
Ref
NO. Description Ref
NO. Description Ref
NO. Description Ref
NO. Description
1 Handle 7 Inner rear plate 13 Inner Left Plate 19 Control Bar
2 Door 8 Thertiary air
box 14 Stove body 20 Up Baffle
3 Glass 9 Rear
Vermiculite 15 External air
collar 21 Fire retainer
4 Top 10 Left Vermiculite 16 Gernal Air boX 22 Bottom
Vermiculite
5 Flue cover 11 Right
Vermiculite 17 Bottom
6 Down Baffle 12 Inner Right
Plate 18 Slider
This manual suits for next models
1
Table of contents
Other Henley Stoves Wood Stove manuals
Popular Wood Stove manuals by other brands
Eureka
Eureka Jindara Duet SRS2/Duplicity installation instructions
Rocal
Rocal HABIT 50 V user guide
Jøtul
Jøtul F 400 ECO Installation & operating instructions

Aito
Aito 16 Instructions for installation and use
Dru
Dru DRU 55CB Installation instructions and operating manual
Quadra-Fire
Quadra-Fire 57ST-ACC-AU owner's manual
