Henry Schein 112-7157 User manual
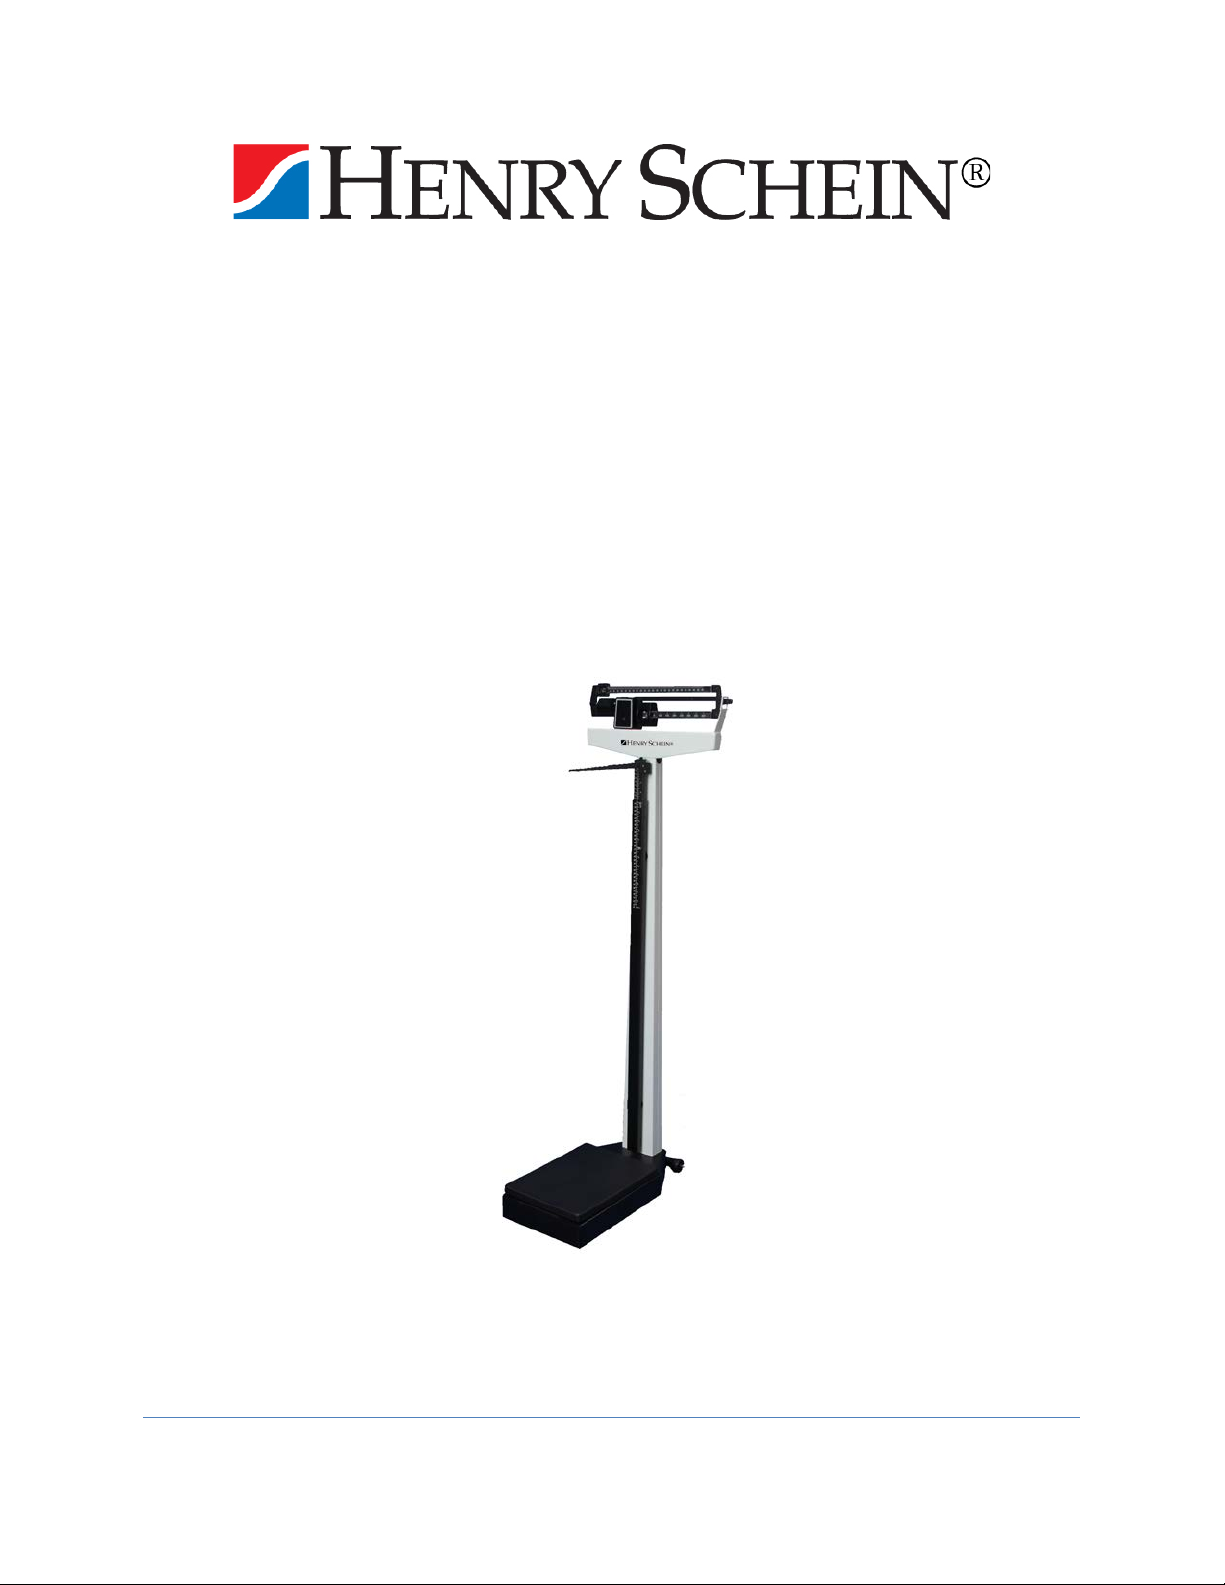
112-7157
Mechanical Beam Scale
with Height Rod

Table of Contents
Congratulations! ......................................................................................................................................... 3
Safety....................................................................................................................................................... 3
Before you start.......................................................................................................................................... 4
Unpacking ................................................................................................................................................. 4
Assembly Instructions................................................................................................................................ 5
Operation..................................................................................................................................................... 7
Zero Balance Adjustment...................................................................................................................... 7
Weighing Instructions............................................................................................................................ 8
Height Measurements ........................................................................................................................... 9
Cleaning..................................................................................................................................................... 10
What do I do if... ....................................................................................................................................... 10
Maintenance.............................................................................................................................................. 11
Technical data........................................................................................................................................... 11
Disposal..................................................................................................................................................... 11
Technical Support.................................................................................................................................... 12
Warranty.................................................................................................................................................... 12
2

Congratulations!
The Henry Schein Mechanical Beam Scale you have purchased is a high-precision yet sturdy
piece of equipment. In accordance with national regulations, the Henry Schein Mechanical
Beam Scale provides a rugged mechanical design to measure patient weight and height. Each
Henry Schein Mechanical Beam Scale is designed to provide accurate, reliable, and
repeatable weight measurement. The scale is of a very sturdy construction and will give you
long and loyal service.
Safety
Before using the new scale, please take time to read the following safety instructions carefully.
•To prevent injury, as well as scale damage during assembly, exercise caution when
assembling the scale pillar.
•Assemble and operate the scale per the enclosed user instructions.
•For accurate weighing, this scale must be placed on a flat, stable surface.
•Do not drop the scale or subject it to violent shocks
•Do not exceed recommended weight limit of 450 lb / 210 kg
•If the scale becomes damaged, it should not be operated until properly serviced. All
repairs should only be performed by a qualified service agent
3

Before you start...
Unpacking
Carefully remove and unwrap the scale from the shipping carton. To prevent scratching on any
components of the scale, please do not use a box cutter or sharp object to open the inner
packaging. If you notice any shipping damage to the product, please contact the shipper
immediately. Please retain all shipping material in case the product needs to be returned or the
scale needs to be shipped to another location.
Remove the packaging and place the scale on a firm, level surface. The scope of supply
includes:
•1 Scale Platform
•1 Pillar
•4 Pillar nuts
•User instructions
•Wrench (included)
•Wheel Bracket
•Adjustable wrench or 10mm wrench (not included)
4
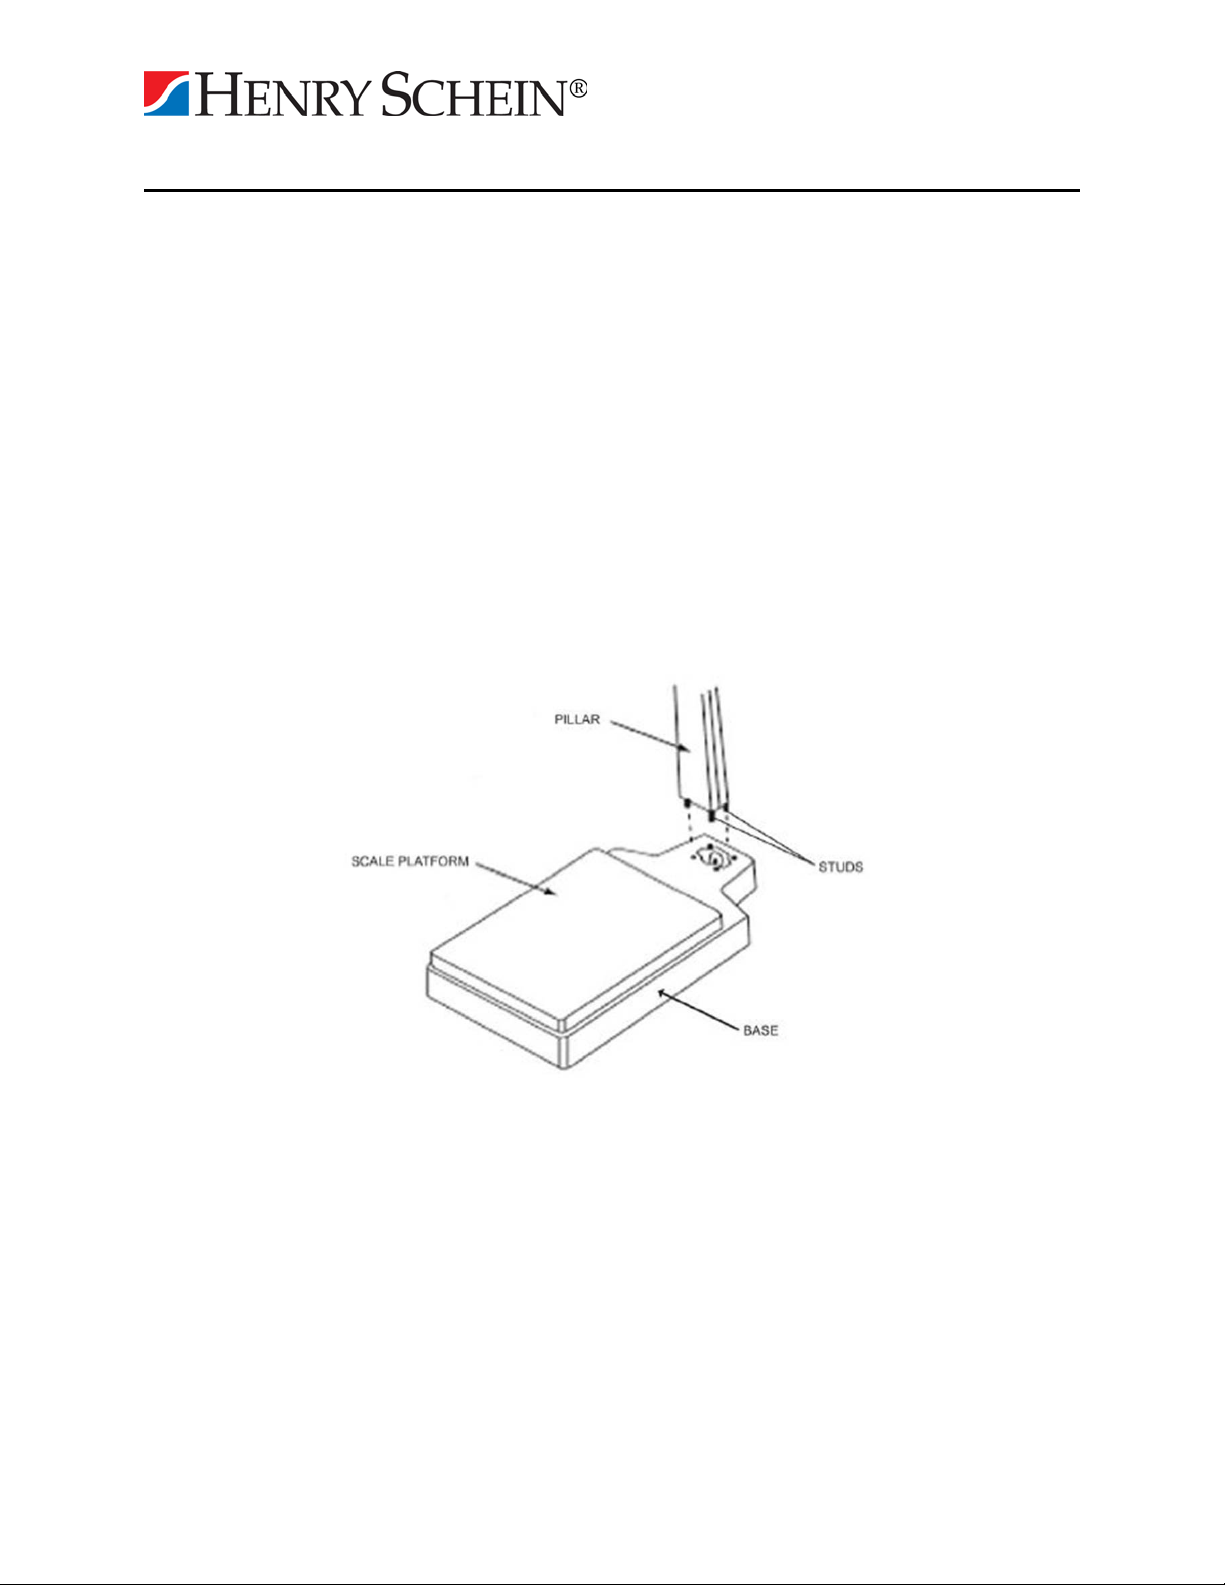
Assembly Instructions
Step 1. Carefully remove the scale platform and pillar from the carton. Place the scale platform
and pillar on a flat service. Using a table top can be helpful for assembly of the scale.
Step 2. Remove the four pillar nuts and wrench from the carton
Step 3. Locate the steel rod at the base of the pillar
Step 4. Cut the tie wraps that holds the steel rod to the pillar studs
Step 5. Insert the studs into the four holes provided in the scale platform
Step 6. Tip the scale platform at an angle, resting the top of the pillar on a stable support.
Step 7. Using the wrench provided, secure the pillar to the scale platform with the four nuts
Step 8. Pull the steel rod toward the base of the scale platform by grasping the finger pull loop
on the steel rod end.
Step 9. Push the lever extension in the base toward the pillar with your hand
5

Step 10. While holding this position, hook the steel rod to the hold at the end of the lever
extension.
Step 11. Release the finger pull loop and ensure that the steel rod and lever extensions is
hooked together.
Installing the Wheel Bracket
Step 12. Tip the scale forward until top front of the pillar is resting on the floor.
Step 14. Align the wheel bracket to the base assembly holes.
Step 15. Install the mounting screws through the wheel bracket. Tighten the mounting screws
securely.
Step 16. Carefully position the scale to its upright position.
Step 17. The scale is now assembled and ready to use.
6
Operation
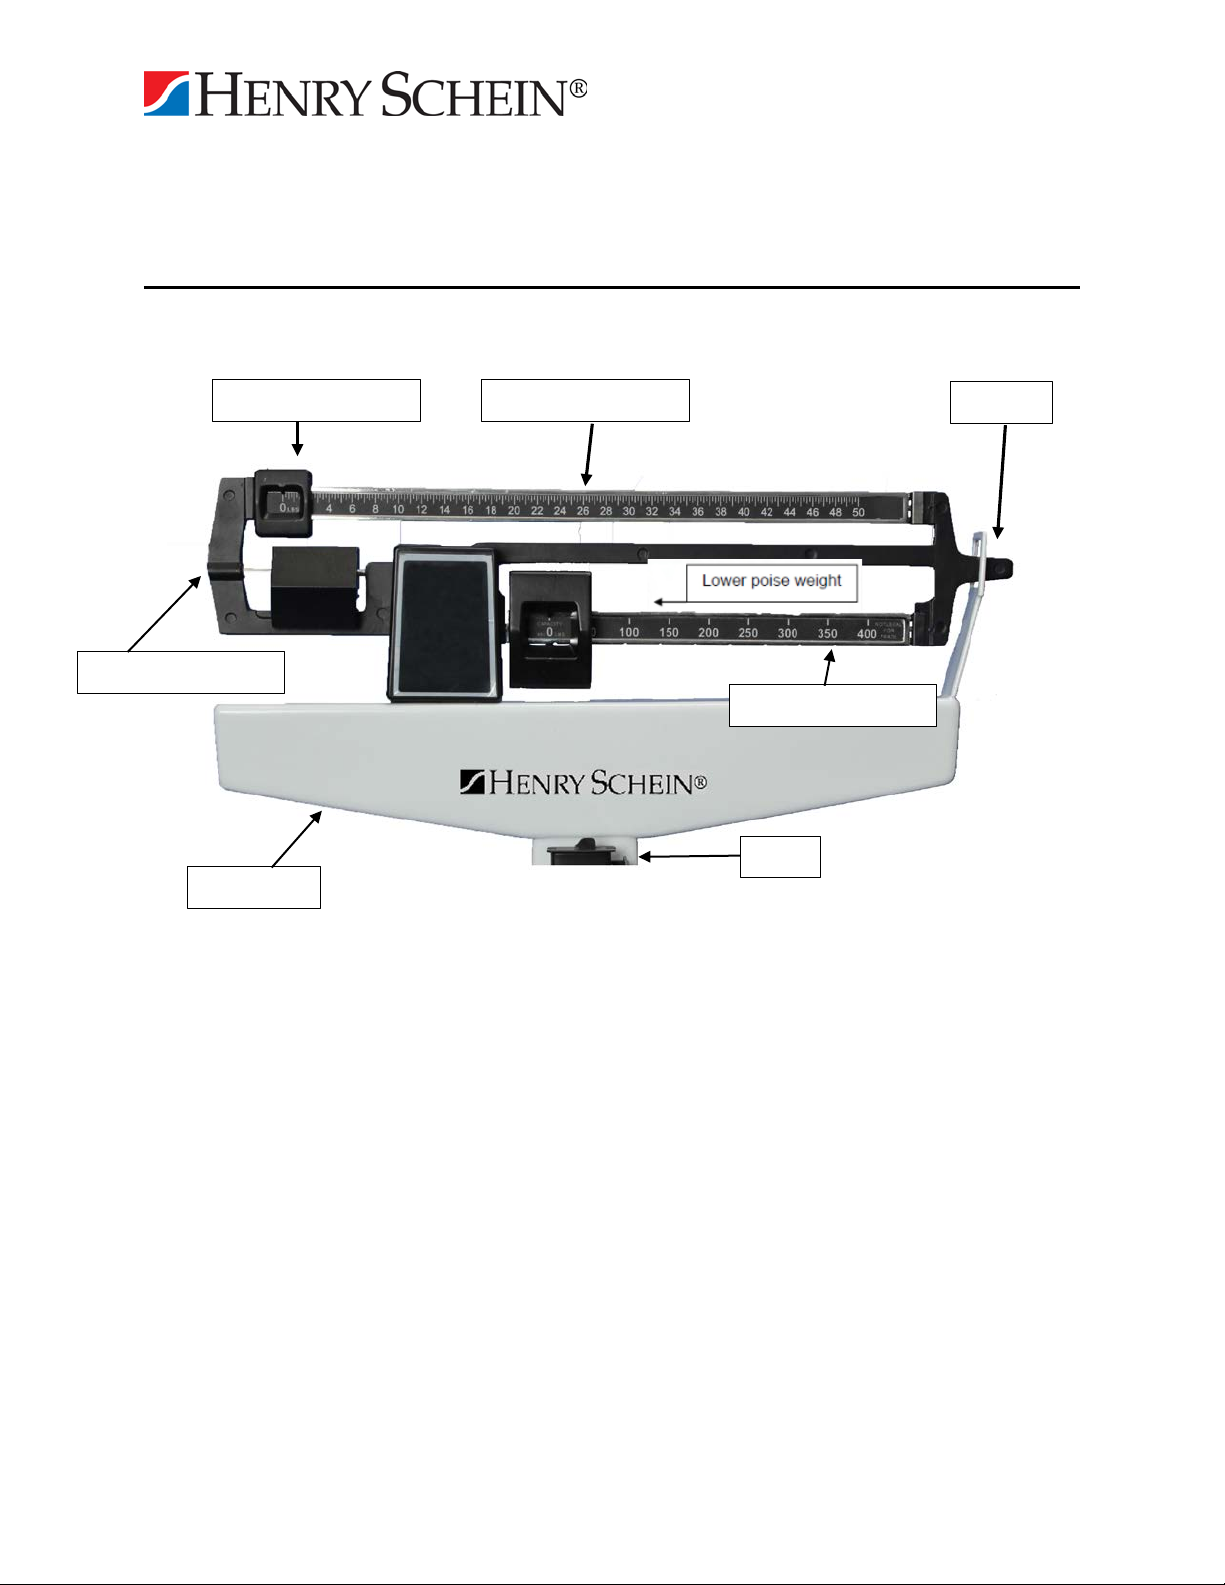
Zero Balance Adjustment
The scale should be checked periodically, particularly when moved, by following the instructions
below:
Note: A flat head screwdriver is required.
1. Ensure that the scale is located on hard, flat, and level surface. Step on and off scale
several times in order to align all internal parts.
2. Place both poise weights on the “0” value on both bars. The beam pointer should float
gently up and down, and not touch the top or bottom of the trig-loop.
3. If the beam pointer is not centered in the trig-loop opening, rotate balance ball screw to
correct the beam pointer.
Upper poise weight
Upper poise bar
Pointer
Balance ball screw
Lower poise bar
Pillar head
Pillar
7

Weighing Instructions
1. Set the large and small poises to indicate your approximate weight.
2. Step onto the scale. Move the small and large poise weights until the pointer is centered.
NOTE: It is not necessary for you to wait for the pointer to stop moving in order to ready
your weight. As long as the pointer is moving equally within the trig-loop opening, then
your weight can be determined.
3. The weight can be recorded in either pounds or kilograms.
4. Observe the location of the indicator arrow built into each poise weight. Read the value
on the poise bar, closest to the indicator arrow.
5. For easy identification, pounds (lb) have silver graduations on a black background,
located on the upper portion of each poise bar; kilograms (kg) have black graduations on
a silver background, located on the lower portion of each poise bar.
6. Add the indicated reading of the small poise value to the indicated reading of the large
poise value and the total amount is your weight.
Weighing Tips
1. Too consistently maintain an accurate weight reading, weigh yourself approximately the
same time each day as the food and liquid you intake can cause your weight to vary
during the day.
NOTE: For accurate measurements, weigh yourself without clothing
Recording a Patient Weight
To read the patient’s weight, add the weight value indicated on the lower and upper poise bars.
For example: If a patient weighs 441 lbs:
1. When a patient weights 441 lbs, place the lower poise weight at 400 lb.
2. Adjust the small poise weight to 41 lbs to match the patient’s weight. The poise bar will center in
the trig-loop.
3. Add the weight value indicated on the upper and lower poise bars. Example below:
400 lbs + 41 lbs = 441 lbs
Patient’s weight is: 441 lbs.
8

Height Measurements
Note: A patient needs to be a minimum of 23 5/8” (600 mm) in height for the height to be
accurately measured.
1. Raise the headpiece above the patient’s head.
2. Position the patient against the height rod
3. Ensure that the patient’s posture is upright and the patient’s head is straight and level.
4. Push the headpiece down until it rests on the patient’s head.
Determine the patient’s height by reading the value on the measuring strip nearest to the
line on the indicator. (Please refer to picture)
9

Cleaning
Clean all external surfaces with a clean damp cloth or tissue. Mild antimicrobial or antibacterial
soap and water solution may be used. Dry with a clean soft cloth. Do not immerse the scale
into cleaning or other liquid solutions. Do not use abrasive cleaners.
Under no circumstances should abrasive or acid cleaners, white spirit, benzene or the like be
used for cleaning. Such substances can damage the high-quality surfaces. Proper care and
cleaning is essential to ensure a long life of accurate and effective operation.
What do I do if...
… Questionable weight, or the scale does not center equally in the trig loop when the
poise weight is “0” value?
oPossible cause – Bar does not “0” balance
oThe balance ball must be balanced such that the pointer comes to rest in the
center of the trig-loop when both poise weights are set at “0” value.
oEnsure the large and small poise weights are firmly against the shoulder of the
beam.
oAdjust the balance ball screw by turning the screw at the left end of the bar.
… The bar does not move freely?
oPossible cause – Bar sticking or adjustment needed
oCheck if the pointer is touching the side of the trig loop in its range of travel.
Realignment of the beam may be necessary if it is touching.
oEnsure that the large and small poise weights are firmly against the shoulder of
the beam.
oAdjust the balance ball screw by turning the screw at the left end of the bar.
… The platform rocks excessively or touches base at any corner?
oPossible cause – Base out of alignment
oContact technical support.
… Beam does not move at all during weighing process?
oPossible cause – Scale may have improper steel rod connection or poise weight
may have been set a higher weight than patient’s actual weight.
oReset weights to a lower weight.
oEnsure the steel rod is connected properly, refer to “Assembly Instructions”.
10

Maintenance
To ensure that the scale accuracy is maintained, the product must be carefully set up and regularly
maintained. Depending on the frequency of use, it is recommended to service the scale every 3
to 5 years by a qualified service lab. For any additional questions please contact Henry Schein
Customer Service at 1-888-392-8492 for further information.
Technical data
Item #:
112-7157
Scale Width:
18 ¼” (46.4 cm)
Platform Width:
11 ¾” (29.8 cm)
Scale Height:
58 ¼” (147.9 cm)
Platform Height:
4” (10.1 cm)
Scale Depth:
22 ¼” (56.5 cm)
Platform Depth
14 ¾” (37.5 cm)
Capacity
450 lb (210 kg)
Height Rod
200 x ¼” inches (200 cm x 0.64 cm)
Disposal
Disposing of the device
Batteries
Do not dispose of the device in domestic waste. The device must be disposed of properly as
electronic waste. Follow the national regulations which apply in your case.
Do not throw used batteries away in domestic waste. Dispose of batteries at collection points in
the vicinity. When buying new batteries, select those low in harmful substances and containing no
mercury (Hg), cadmium (Cd) or lead (Pb).
11

Technical Support
To warranty service or need further information, make sure you keep your sales receipt or
document showing proof of purchase. Contact our service department at:
1-888-392-8492
Warranty
A two-year warranty from date of delivery applies to defects attributable to poor materials or
workmanship. All moveable parts - batteries, cables, etc. - are excluded. Defects which come
under warranty will be made good for the customer at no charge on production of the receipt.
No further claims can be entertained. The costs of transport in both directions will be borne by
the customer should the equipment be located anywhere other than the customer’s premises. In
the event of transport damage, claims under warranty can be honored only if the complete
original packaging was used for any transport and the scale secured and attached in that
packaging just as it was when originally packed. All the packaging should therefore be retained.
A claim under warranty will not be honored if the product is opened by persons not authorized
by Henry Schein, Inc.
Henry Schein scales' liability under this warranty is limited to the repair or replacement of the
defective product and in no event be liable for consequential or indirect damages to equipment
or personnel.
REV DATE: 10/14
Distributed by (in US only):
HENRY SCHEIN INC.
135 DURYEA ROAD
MELVILLE, NY 11747 USA
YYWKRR
12
Table of contents
Other Henry Schein Scale manuals


Popular Scale manuals by other brands

Silvercrest
Silvercrest SPWSD 180 A1 Operating instructions and safety instructions

Cambridge Scale Works, Inc.
Cambridge Scale Works, Inc. SS660-PT-OB Installation, Set-Up and Operation Manual

TScale
TScale M501 Operation manual

Easy@Home
Easy@Home CW222 Instruction

eatsmart
eatsmart ESBS-60 quick guide

ATO
ATO WTA Series installation guide


