Herman Miller Canvas Office Landscape Interiors Installation instructions

Z
© 2013 Herman Miller, Inc. Zeeland, Michigan. Printed in the U.S.A.
® Y, Zand Canvas Office Landscape are among the registered trademarks of Herman Miller, Inc.
Illustrations and specifications are based on the latest product information available at the time of publication.
The right is reserved to make changes in design and specifications at any time, without notice, and also to discontinue products.
Part no. 1b4p6v rev C.
1
Y
Parts Included:
Tools Needed:
Canvas Office Landscape®Interiors Door Lock Installation
and Disassembly for Recycling Instructions
Lock Assembly
(LH Shown)
Frame Lock Bracket
Assembly
Flat Head Machine
Screw (3)
Truss Head Tapping
Screw (4)
Flat Head Tapping
Screw (4)
Frame Lock
Bracket
Corner Lock
Bracket
Handle Latch Holder
G
A
D
E
E
B C
HJ
Hardware Pack
Hardware Pack
Power Driver Phillips Bit #18 Drill Bit
(11/64 or . 169”)
5/64 Allen Wrench
Safety Glass
Z
© 2013 Herman Miller, Inc. Zeeland, Michigan. Printed in the U.S.A.
® Y, Zand Canvas Office Landscape are among the registered trademarks of Herman Miller, Inc.
Illustrations and specifications are based on the latest product information available at the time of publication.
The right is reserved to make changes in design and specifications at any time, without notice, and also to discontinue products.
Part no. 1b4p6v rev C.
2
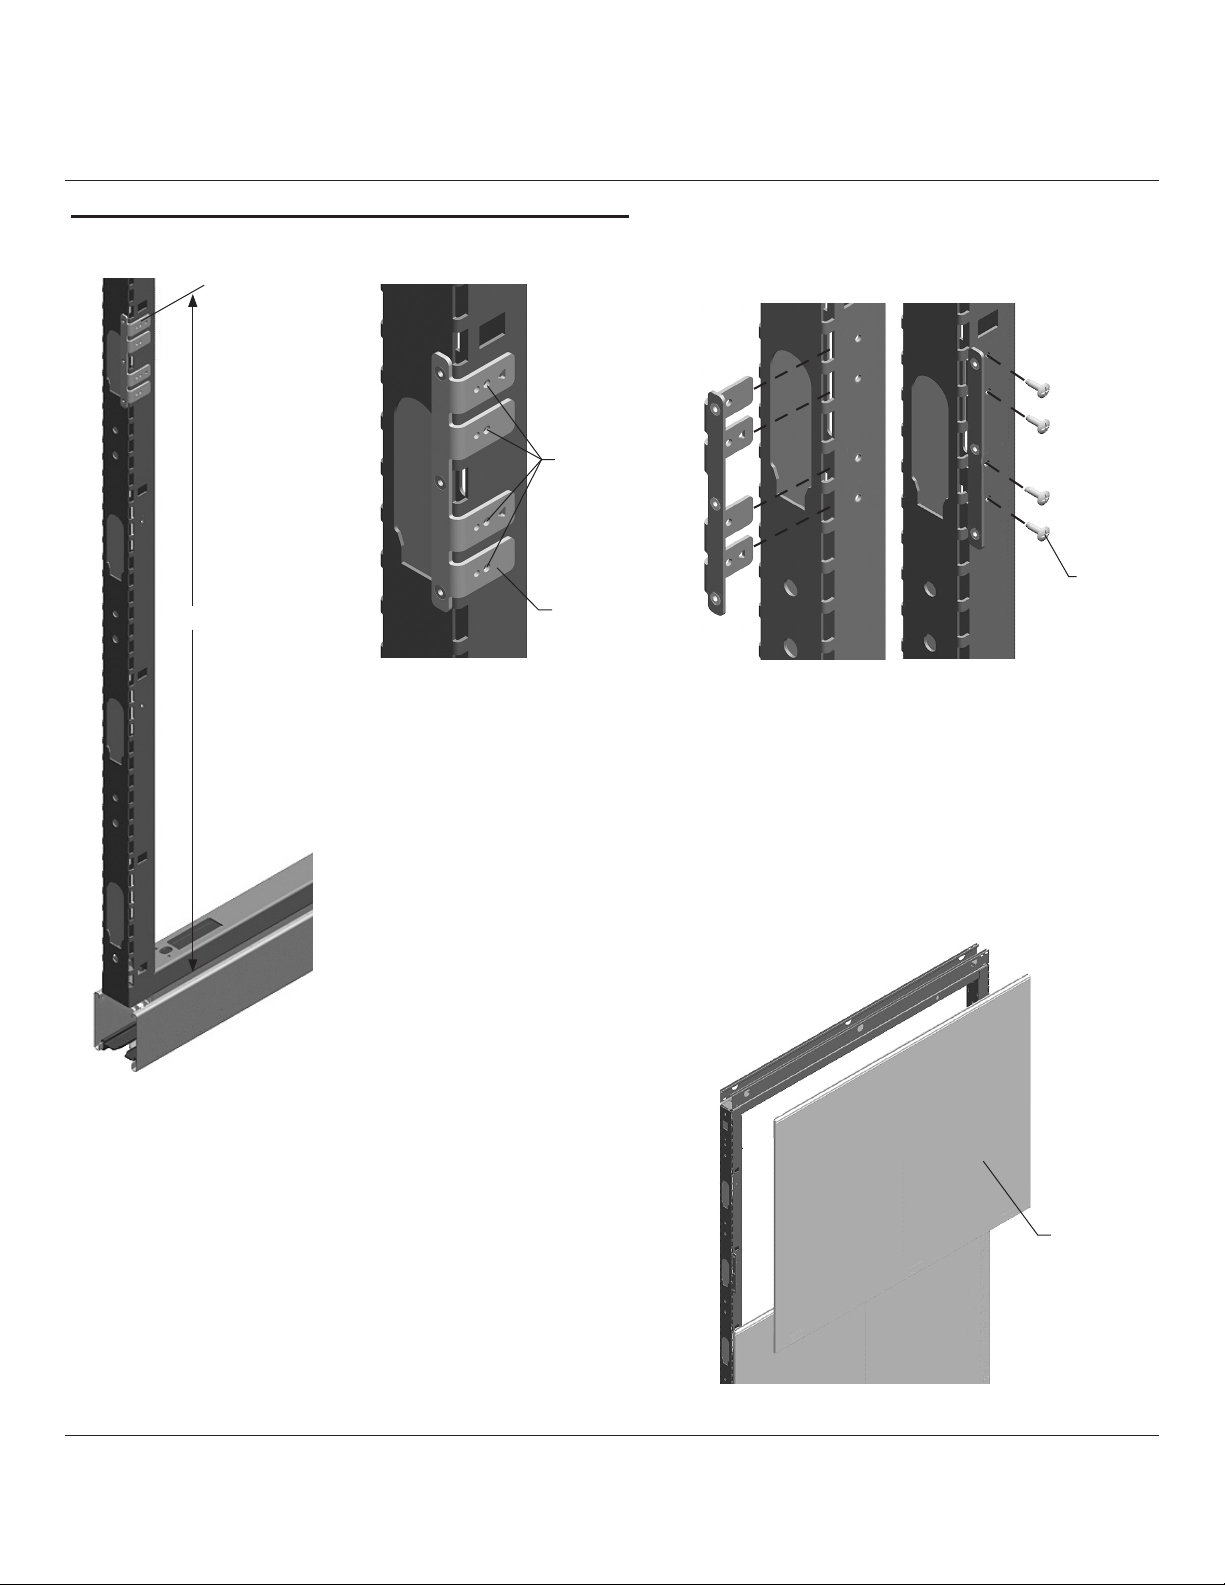
Installing Lock Housing for Inline Frames:
41”
Drill Holes
Cladding
AE
5. Insert Tabs on Bracket Assembly into
Slots in Frame.
7. Return or install Cladding to Frame.
1. Remove Cladding if already installed.
2. Position Lock Bracket Assembly (A)
against side of Frame as shown.
3. Measure from bottom of Frame to
top of Lock Bracket Assembly Tab 41”.
4. While holding Bracket tight against Frame
and positioned on slot, use as template to
drill 4 mounting holes. Use thru holes not
threaded holes on Bracket.
6. While holding Bracket Assembly in
place, install 4 Truss Head screws (E).
Z
© 2013 Herman Miller, Inc. Zeeland, Michigan. Printed in the U.S.A.
® Y, Zand Canvas Office Landscape are among the registered trademarks of Herman Miller, Inc.
Illustrations and specifications are based on the latest product information available at the time of publication.
The right is reserved to make changes in design and specifications at any time, without notice, and also to discontinue products.
Part no. 1b4p6v rev C.
3
8. Assembly Lock Bracket (B) to
Lock Assembly (G) with 4 Flat head
Screws (F). Make sure Return Flange
is on same side as Lock Pawl.
9. Position Lock Assembly to Lock Bracket
Assembly.
10. Install 3 Flat Head Screws (D).
G
F
F
D
B
Lock Pawl
Return Flange
Lock Bracket Assembly
Lock Assembly
Z
© 2013 Herman Miller, Inc. Zeeland, Michigan. Printed in the U.S.A.
® Y, Zand Canvas Office Landscape are among the registered trademarks of Herman Miller, Inc.
Illustrations and specifications are based on the latest product information available at the time of publication.
The right is reserved to make changes in design and specifications at any time, without notice, and also to discontinue products.
Part no. 1b4p6v rev C.
4
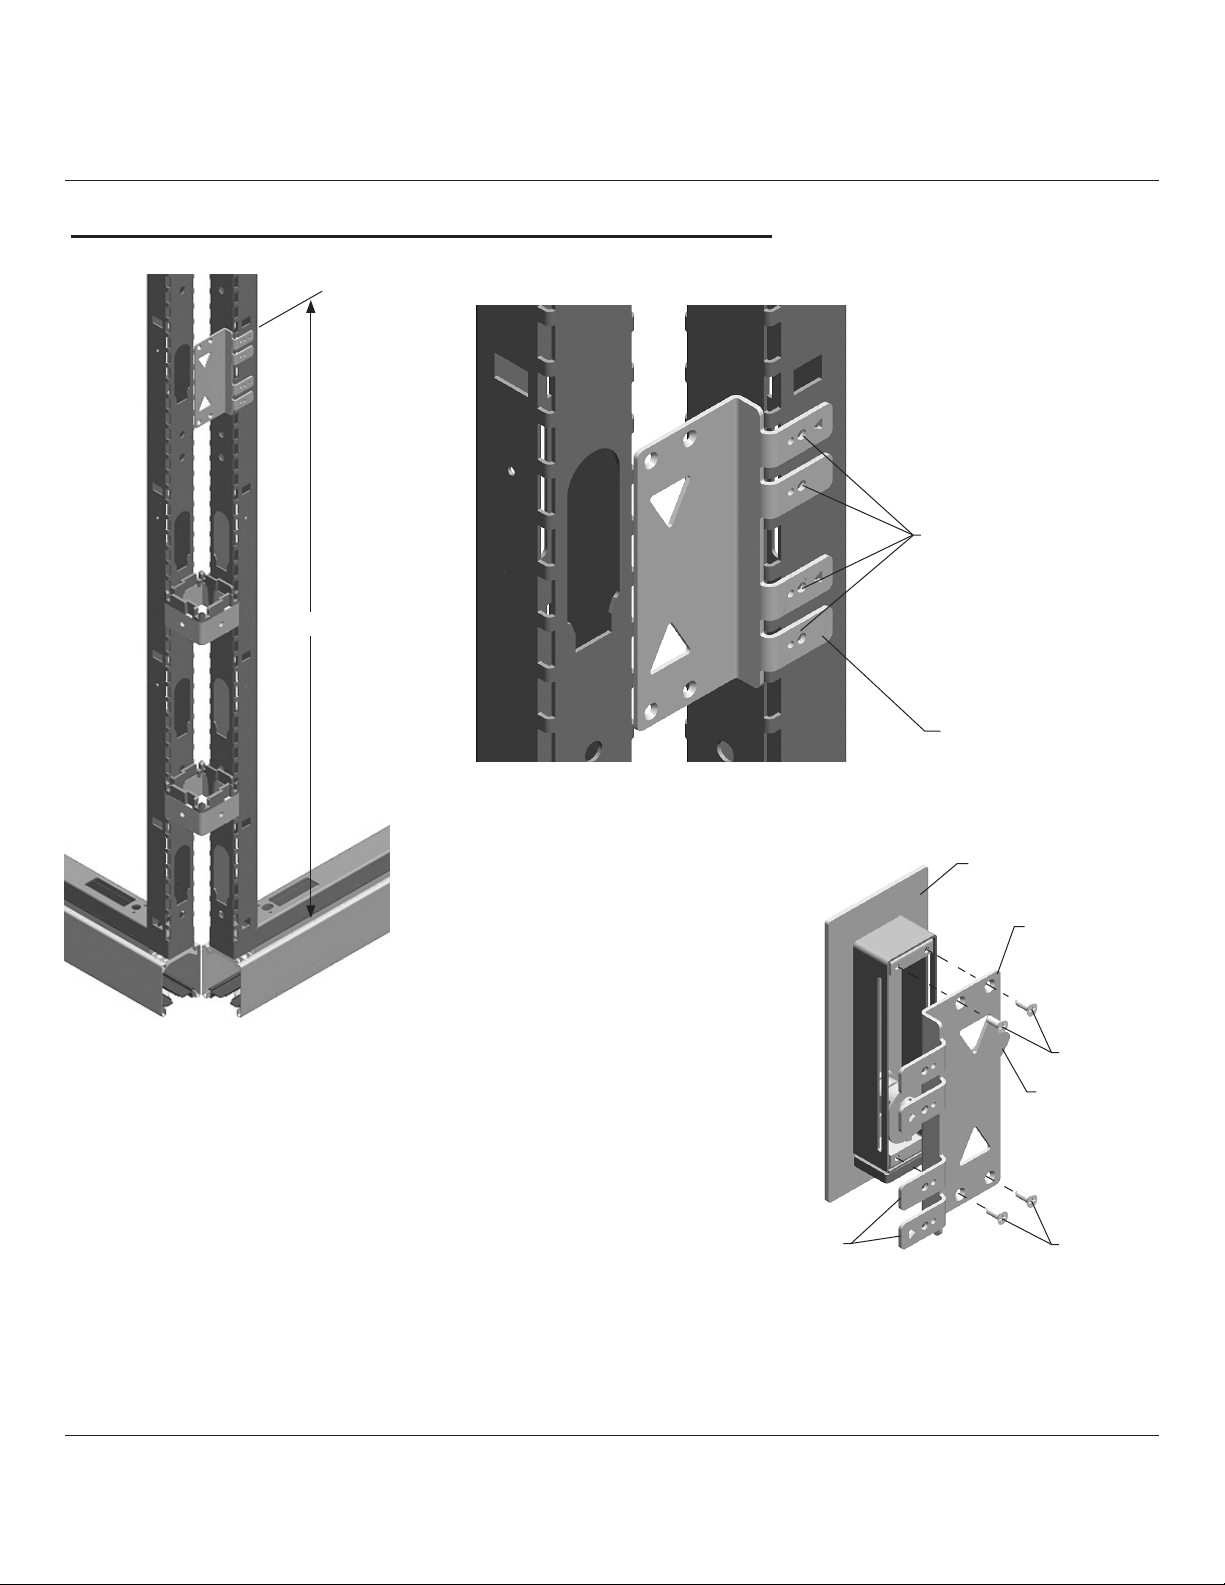
Installing Lock Housing on Corner Connector Cover:
2
41”
Drill Holes
Lock Pawl
Tabs
C
C
F
F
G
15. Assemble Corner Lock Bracket (C)
to Lock Assembly (G) with 4 Flat Head
Screws (F). Make sure Tabs point in
opposite direction of Lock Pawl.
11. Remove Cladding and Corner Connector
Cover if already installed.
12. Position Lock Bracket Assembly (C)
against side of Frame as shown.
13. Measure from bottom of Frame to top of
Lock Bracket Assembly Tab 41”.
14. While holding Bracket tight against
Frame and Positioned on slot, use as
template to drill 4 mounting holes. Use
thru holes not threaded holes on Bracket.

Z
© 2013 Herman Miller, Inc. Zeeland, Michigan. Printed in the U.S.A.
® Y, Zand Canvas Office Landscape are among the registered trademarks of Herman Miller, Inc.
Illustrations and specifications are based on the latest product information available at the time of publication.
The right is reserved to make changes in design and specifications at any time, without notice, and also to discontinue products.
Part no. 1b4p6v rev C.
5
17. Insert Tabs on Bracket Assembly
into slots in Frame.
19. Return or install Cladding onto Frame.
16. Return or install Corner Connector
Cover onto Frames.
18. While holding Bracket Assembly in
place thru window in Frame, install 4
Truss Head Screws (E).
Corner
Connector
Cover
Window
E

Z
© 2013 Herman Miller, Inc. Zeeland, Michigan. Printed in the U.S.A.
® Y, Zand Canvas Office Landscape are among the registered trademarks of Herman Miller, Inc.
Illustrations and specifications are based on the latest product information available at the time of publication.
The right is reserved to make changes in design and specifications at any time, without notice, and also to discontinue products.
Part no. 1b4p6v rev C.
6
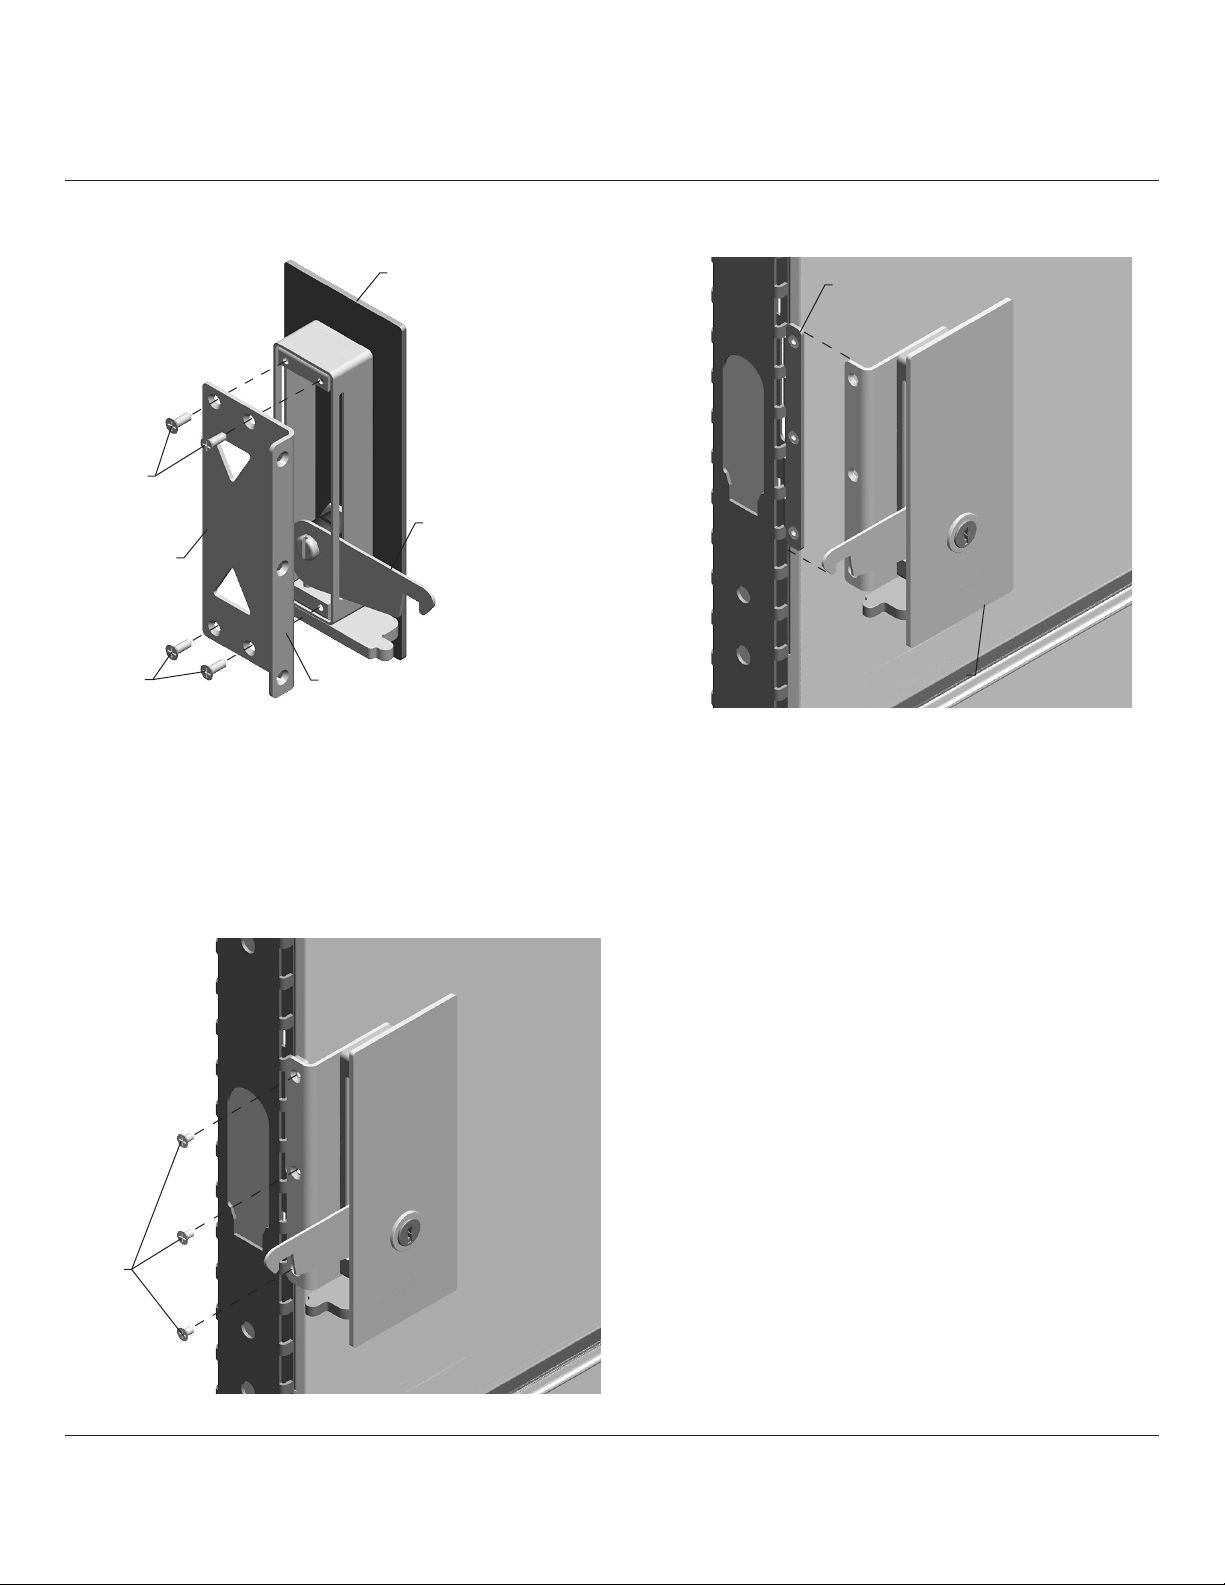
Installing Door Handle:
20. Insert Hex Nuts on Latch Holder
(J) into Keyhole Slots in door and slide
down to bottom of slot. Do not tighten.
23. Place Handle (H) onto middle of Latch Holder. Slide Handle up until top of Ribs on
back of Handle align with top edge of Latch Holder.
24. Secure Handle to Latch with 2 Set Screws. Do not over tighten.
21. Close door and lock.
22. Slide Latch Holder up until Tab fully
engages with Latch. Tighten Screws
(from inside ofce).
Set
Screw
Align
Hex Nut
Screws
Latch
Tab
Keyhole slot
H
J
Tab

Z
© 2013 Herman Miller, Inc. Zeeland, Michigan. Printed in the U.S.A.
® Y, Zand Canvas Office Landscape are among the registered trademarks of Herman Miller, Inc.
Illustrations and specifications are based on the latest product information available at the time of publication.
The right is reserved to make changes in design and specifications at any time, without notice, and also to discontinue products.
Part no. 1b4p6v rev C.
7
Disassembly and Recycling:
Materials Identication and Segregation:
Where possible, plastic components are marked with ASTM recycling codes. Use
these codes to identify material type for recycling. Non marked components should
be treated as mixed plastic. Ferrous metals can be identied using a small magnet
for recycling. Non-ferrous metals should be separated and recycled separately.
To disassemble product, reverse steps 24 through 1.
Table of contents
Popular Door Lock manuals by other brands

MachPower
MachPower SM-DLMW-007 user manual

EZ-ON
EZ-ON SHS-3120 Installation quick guide

Masterlock
Masterlock BCCO0615 Instructions for installation

wink haus
wink haus BS80MLM41 operating instructions

Abus
Abus FTS 3002 Installation and operation instructions

McGrathLocks
McGrathLocks MLWINDSOR quick start guide


iSysmart
iSysmart ZigBee SGZB05A user manual

Baldwin
Baldwin 8252 Series Installation & programming manual

Sargent and Greenleaf
Sargent and Greenleaf D•Drive 2007 installation instructions

Allegion
Allegion LEGGE 6000 Series installation instructions

Weiser
Weiser Powerbolt 2 How to perform

BRINKS
BRINKS BC4031 installation instructions