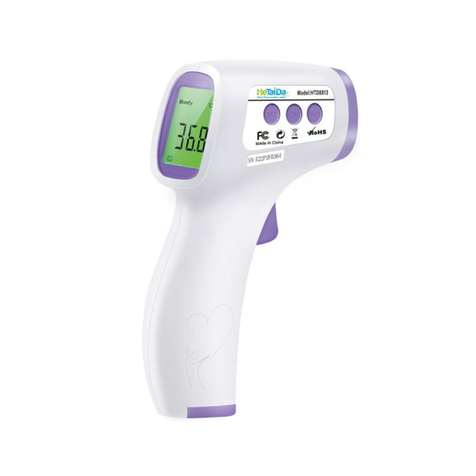
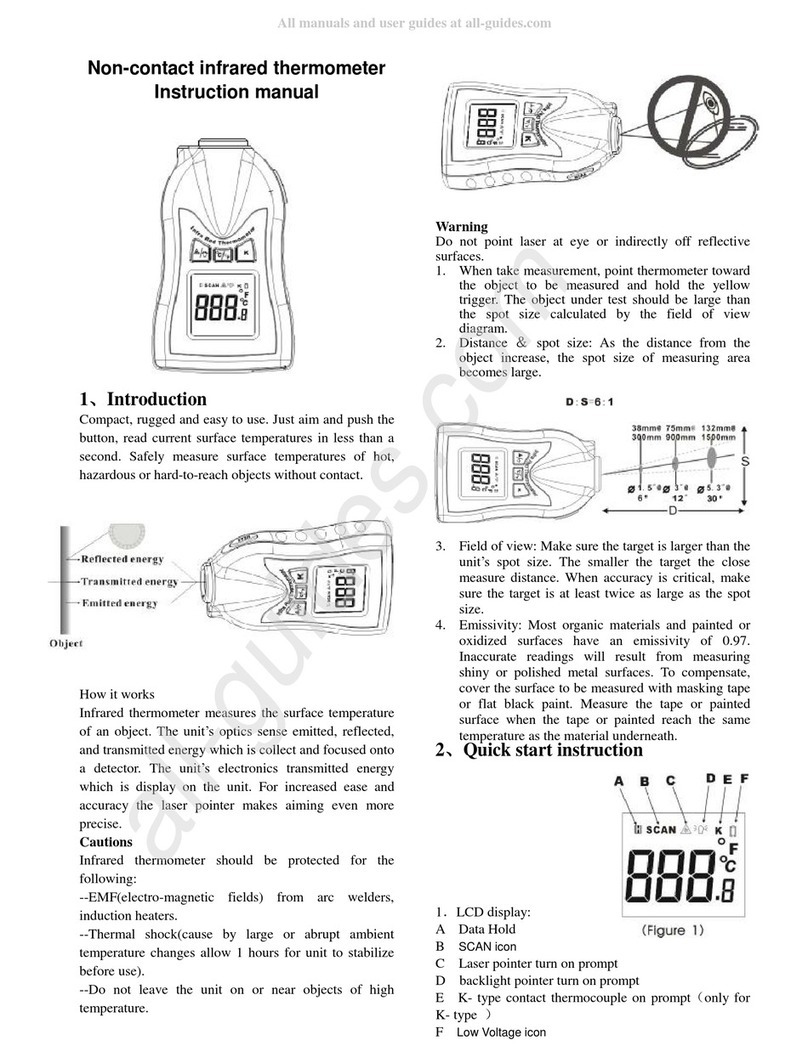
Hetaida HTD8818 User manual

Warranty Card
t'
tutode!; .
Serial No.:
.Date of Purchase:
1.The device covers warranty for 1 year except
damages by man-made factors.
2. Please read carefully the user manual before
operation.
3. Free maintain wont be given under tho
following circumstances:
> The damages caused by the manipulatlon that
hasn't follow the instructions of the manual.
> The breakdown caused by the dismantle
movement of a non-authorized maintenance
ma n,
> The breakdown, row harm or damages
because of the move or drop.
> The damages caused by the customer
inappropriate preservation, maintain or th6
usage.
> The breakdown and damages caused by ths
force majeu re.
User Manual
Non Contact lnfrared Body Thermometer
Model: HTD881 8/8819
Please read this manual before operating this
device,lmportant safety information inside.
.' 'C)
:\
t
:

l.Advice For the 1"'use
For stable and reliable results, it is essential to check the
Non-contact Body lR thermometer and adjust as needed
with the following steps:
1" step: Take the temperature of a person using a
conventional thermometer and get the test result,
37.5"C (99.5"F) for example.
2'o step: Take the lemperature of the same person using the
Non-contact Body lR thermometer keeping 3 -scm (1.2
-2.0 in) bgtween the thermometer and the forehead (Be
sure to remove any obstacle on the forehead which may
affect the testing result, such as hair, perspiration
etc., lf you get 37.5'C (99.5'F), that is to say the Non-
contact Body lR thermometer is properly set and ready
for use-
lf you get a lower temperature, 36.4'C (97.5"F) for
example, the diffsrence is 37.5-36.4=1 .1'C(2.0'F).
You should adjust the temperature on the Non-contact
Body I R thermometer and add the difference, e.g. 1 .'l "C
(2.0"F).
To adjusi the difference, keep pressing the MODE
bulton, the screen displays F1, shortly press the MODE
or MEMO button to add the difference, e.g. 1 .1'C
(2.0'F), then short press ON/SCAN button several
times until the device power off automatically.
3'd step: Take lhe temperature again using the Non-contact
Body I R thermometer to check whether the
thermometer is properly set.
2.General D-escriptions
The non-contact IR th6rmometer is specially designed for
testing baby forehead temperature, it has two models: Body
mode for measuring body temperature and Surface model
for measuring obiect surface temperature, Besides baby
forehead temperature, il can also test the temperatures of
room, food, bath water, babymilketc. ltadoptthe most
advanced infrared techniques, acquire the aim temperature
quickly, analyze the data intelligently and display the result
within 0.5 seconds.
Note: Depending on various skin types and thickness, the
test result may be diffsrent.
3.Safety !nformation
> This device must only be used for the purposes
described in this inslruction manual.
> Do not expose this thermometerto electric shocks.
> Do not use the device in relative humidity > 85%.
> Do not use the device near large elgctromagneticfields
such as found with cordless orcell phones.
> Keep the device away from water and heat, including
direct sunlight,
> Do not drop or knock the device ,and do not use it if
damaged.
> lt may affect the accuracy of measurements when the
forehead is covered by hair, perspiration, cap or scarf.
> lfit can't measure the forehead temperature due to
perspiration or other factors, please take tha temperature
behind the sar lobe.
> Clean the glass with cotton bud lightly moistened with
707o alcohol. @o

> When problems occurwith the device, please contactthe
retailer, don't repair it by yourself.
4.lmportance
> Makesuremoveawaythe hair, perspiratidnetc. onthe
forehead before measuring.
> This device must only be used in an ambient temperature
between 5"C (41 "F)and 40"C(1 04'F), the best ambient
temperature is 25'C(77"F), do not use it in extreme
conditions of >40'C( 1 04" F) or <5'C(4 I 'F).
> To obtain stable and reliable data, you should keep the
device for 1 5-20 minutes to balance its own lemperature
before measuring when the ambient temperature change
greatly, and keep it 1 minute after 2 continuous
measuring.
> Select Body mode to measure the body temperature,
while select Surface mode to measure the surface
temperature.
> lvlake sure the measuring distance is 3-5cm('l .2-2.0 in).
> The use of this thermometer is not intended as substitute
for consultation with your physician, please turn to the
doctor once the measuring result seems abnormal-
5.Features
> Multiple functions: Not only can measure body
temperature, bul also can measure the temperature of
surface, room, bath water, food, baby milk etc.
> Fast and Accurate: 0.5 seconds measuring time and the
accuracy can reach i 0.2'c(0.4'F).
> Non contact: Safe and clean, 3-5cm(1.2-2 in) measuring
distance.
> Easy to use: Operate with one button, very simple to use.
> Three-colorbacklight(ColorAlarm): When the body
temperature is normal, the backlight is Green, Yellow
backlight for slight fever and Rsd backlight for high fever.
> Large memories: Can store 50 memories for data
analysis.
> Alarm value can be set.
> 'C and "F be changeable and selectable.
> Auto shut off:1 I seconds without operation.
> Setting can be adjusted fordifferent kinds of people(such
as white people, black people, yellow people etc.)
> Display resolution is 0.1 "C(0.1 'F).
> Buzzer can be closed or opened by manual.
> Bluetooth wireless communication (Optional): can be
connected to data analysis systems.
> Voice function(Optioal): can be added according to
client's requirements.
> Rechargeable function(Optional).
6.Usages of the thermometer
> Bodytemperature: Measure the bodytemperature for
monitoring young baby's fever, women ovulatory period
and so on.
> Skin temperature: Measure the temperature of people
surface skin.
@
@

> Obiecttemperaturer Measure object surface
temperature, such as tea cup, cake, food etc.
> Liquid temperature: Measure liquid temperature, such as
baby milk, bath water etc.
T.Specifications
S.Configuration
1. lR Sensor 1
2. LCD Display
3. MODE Button 2
4. ON/SCAN Button 3
5. MEMO Button 4
6. Reset Button(Optional) 6
9.LGD !ndicator
l.Surface Mode
2.Body Mode
3.Ambient Temperature Mode
4.Time Mode
5.Digital Readout
6.Smile or Cry lndicator
T.Battery lndicator
S.Buzzer on/off lndicator
9.Memories
10.'c
11 .Memory number
,-G maeetenin, .)
2 ts@q7 nnr=nio/3-f fo
r'rR@@m DD--; ] rr
4rTEmn@ @@ 1l 12
,lm FJ"mm
mru.m.ru
L@-@ q +D
@
Surface mode: 0-1 00'C I 32-212'F
Measuring Accuracy 0.0-33.9"C:12.0"C&2%"C /
32-93.0'F: 13.6"F&2ol6"F
34-34.9'C:10.3'C / 93.2-94.8'F: r0.5'F
35-42"Crt0.2'C / 95.0-107.6'F: r0.4"F
42.1 -42.9" C:r0.3" C I 1 07.8-1 09.2'F: t0.5'F
43- 1 00"C:t2.0"C&2%"C /
1 09.4-21 2" F : *3.6" F &zok" F
Three- color
backlight
(ColorAlarm)
34-37.3"C/93.2'F-99.'t'F):
Green backlight (Normal)
37.4-38.0'C (Alarm ponit)/g9,3'F-100.4'F
Yellow backlight (Slight Fever)
38.1 -42.9'C /1 00.6'F-1 09.2'F:
Red backlight (High Fever)
NOTE: Three-color backlight is only for
Body mode, Always Green backlight for
Surface mode.

10. Operation
10-l.lnstall battery
Push the battery cover by the arrow, open the battery cover,
insert two pieces AAA size batteries accbrding tothe "+"
and "-", and close the battery cover.
Note: Make sure the right positive and negative charges of
the battery.
1 O-1 -1. For the first use or when lnsertinq new batteries,
wait 1 0 minutes for warming up the device.
1o-1-2. lf thedevice is not used fora long timeonceyou
turn it on again, the device will test the room temperature
firstly and will delay turning on for more one two seconds.
1 0-2, Measuring operation
Aim towards the forehead (see the diagram below for the
position ing),from a d istance of 3-5cm (1 .2-2.O in\, press the
ON/SCAN button, the temperature is displayed
immediately, Making sure there is no hair, perspiration,
cosmetic or cap covered on the forehead.
lf it can't measure the forehead temperature due to
perspiration or oiher factors, please take the temperature
behind the ear lobe, make sure there is no hair,
Dersoiration, cosmetic or cap covered.
ffi).--
t_
1 o-2-1 . The ambient temperature should be stable, don't
measure the body temperature in front of fans, air outlets of
the air-condition etc where the airflow is floating.
1o-2-2. To obtain stable and reliable data, you should keep
the device for 1 5-20 minutes to balance its own temperature
before measuring when the ambient temperature change
greatly, and keep it 1 minute after 2 continuous measuring
1 O-2-3. Please don't take the body temperature if the patient
is sweating or have done the cold compresses etc, because
they will lower the measuring result.
1 O-2-4.Suggest measure the body temperature three times
and be subject to the highest value.
I 0-3 Buttons operaiion
I 0-3-1 . ON/SCAN button : Press the ON/SCAN button to
power on the device and begin to measure.
f-Es)-'-'"m
!er1
I __l
I
t
1
@
@

10-3-2. l\,lODE button: Press the MODE button shortly to
switch the body mode and the surface mode.
NOTE: Body mode is for body temperature, and the Surface
mode is for object surface temperature,. please make sure
use the Body mode when taking body tempdfatLtre. r
10-3-3. MEMO button: Press the MEIVIO button shortly to
check the memories.
'I 0-3-4. RESET button: Press the RES ET button to reset the
device(Optional function, only for rechargeable model).
I 0-4. lnstructions of MODE button
When the device is ON, short press the MODE button to
switch Body mode and Surface mode. The LCD wil! display
"Body" and "Surface temp" for the Body mode and the
Surface mode.
'l0-5. How to adjust the settings
The device can adjust the default settings by the MODE
button for different kinds of people and different ambient
temperatures. We suggest keep the default setting,
however, you can adjust the default settings as following
instructions if necessary:
1 0-5-1 Offset setting(Total Difference) - F1
When the device is ON, keep pressing the MODE button,
the LCD willdisplay F'1, shortly press the MEMO button to
decrease the offset or shortly press the MODE button to
@
increase the Offset, and then press the ON/SCAN button
several times uniil the deuice power off, the setting is
fin ished.
NOTEl : When the device in Fl , keep pressing the NIEMO or
MODE button to decrease or increase the offset quickly.
NOTE2: The offset can be adjusted from -5"C(23"F) to
5'C(41 "F), and the default offset is 0"C(32'F).
'10-5-2 Unit setting - F2
When the device is ON, keep pressing the MODE button,
the LCD will display F1, Shortly pr6ss the ON/Scan button,
the LCD will display F2, then shortly press the MEMO
button to switch 'C and "F, and then press the ON/SCAN
button several times until the device power off, the setting is
finished.
1 0-5-3 Alarm setting - F3
When the device is ON, keep pressing the MODE button,
the LCD will display Fl, Shortly press the ON/Scan button
two times, the LCD will display F3, then shortly press the
M E lvlO button to decrease the Alarm setting or shortly press
the MODE button to increase theAlarm setting, and then
press the ON/SCAN button several times until the device
power off, the setting is finished.
NOTEl: When the device in F3, keep pressing the MEMO or
@

MODE button to decrease or increasa the Alarm setting
quickly.
NOTE2: The defaultAlarm setting is 38.1"(100.60"F)
a
1 0-5-4. Buzzer On/Off setting - F4
When the device is ON, keep pressing the MODE button,
the LCD will display F1, Shortly press the ON/Scan button
three times, the LCD will display F4, then shortly press the
MEMO button to turn ON or OFF the Buzzer, and then press
the ON/SCAN button several limes until the device power
off, the setting is finished.
NOTE: For 6very settlng, you should keep shortly pressing
the ON/SCAN button untilthe device is Off automatically,
the setting is finished, otherwise, the setting is still the
previous settings, not the new settings.
l0-6. Data mcmory
Data will be memorized automatically after measuring, it
will display at the right cornor LCD. Press MEMO button to
check all the memorized data.
1 0-6-1 , When the device is ON or OFF, Short press the
MEMO button to entor the memory checking, shortly press
the MEMO and MODE to check all tfle memories.
10-6-2, when the device is ON,Keep pressing the MEMo
button to delete all the memories.
11 . Change-the battery
When the battsry is low, please changs new batteries.
1 1 - l .Please take out the battsries to avoid battery leaking if
the device will not be used for a long time.
11-2. Please make sure the correct positioning, a mistake
with this will cause damage to the device and compromise
the guarantee ofthe dsvice.
1 1 -3. Never use rechargeable batteries, use only batteries
for single usago.
12. Life-span ofthe device
The device is conceived for an intense and professional
use, its life-span is guaranteed for 40000 takings.
1 3.Maintenance and Cleaning
1 3-1 .The protsctive glass over the lens is tha most
important and fragile part of the device, please take great
care of it.
I 3-2. Clean the glass with cotton fabric of 70% alcohol.
1 3-3. Do not expose tho thermometer to sunlight or water.
1 3-4. Do not claan thB device with corrosive detergent.
1 3-5. The Sensor is the most sensitive part of the device,
please take great care of it too.
14. Troubleshooting
lf you happen to havs one of the following problems while
using the device, please refer to this breakdown service
guide to help resolvo the problem, lfthe problem persists,
please contact our customer service.
@
@

14-1. LCD display"Hl": Thedevicetellsyou thatthe aim
object temperature is out ofthe measuring range, eit'her
above 42.9'C(1 09.2'F) in Body mode or above
1 00'C(21 2'F) in Surface mode.
14-2. LC D d isplay "LO": The device tells youthdt the aim
object tem perature is out of the measuring range, either
below 34'C(93.2'F) in Body mode or below 0"C(32'F).
1 4-3. Reasons for "H l" and "1O", and suggestions to solve:
15. General Knowledge of Body Temperature
Human body is a very complicated comprehensive system,
and the body temperature is a very important indicator of
the body health conditions. We can take the temperatures
of our forehead, ear, oral, auxiliary etc to check our health
conditions. Different temperature will be for different body
parts, please kindly check the values as belowingsl
Maintenance Suooestion
Testing results affected by hair, Make sure that there is no
The measuring distance is too far- Vake sure the measuring distance
q3-5.mrl 2-2 O inl
From oulside lo inside, orfrom low ambrent Keep Ine oevrce tn lne new amotenl
for 15-20 minutes before measurinq
The measuring values are too
close each other. Keep the device loftfor 15 seconds
afler 2 continuous measuring, one
minute will be better.
N^rmrl lpmnprrnrrp l'(:
Rectal ?6 6fn3A q7At61OO4
Oral 35 5t^?7 5q5 qt6qq 5
@
Oral 35.5 to 37.5 95.9 to 99.5
AUXiltary
Forehead/ lemporal
lThermo Flash) 34.7 to 37.8 94.5 to 100.0
The human body temperature also varies throughout the
day, it can also be influenced by numerous external factors:
age, sex, type and thickness ofskin......
Normal Temperature According to Age:
Normal TemDereture 1"C) Normal Iemoerature ("F)
0-2 vears 975to1O04
3-10 vears q7 i^ 1On
11-65 vears 35 g to 37.6
>b5 years
Women body temperature is also different from lhe men
body temperature, usually higher than that of men's by
0.3'C(0.5'F), moreover, the women body temperalure who
is under ovulatorytime is usually higher by 0.3'C(0.5'F) to
0.5'C(0.9"F) than that ofthe body temperature when she is
not under ovulatorytime. Basing on this knowledge, many
women take their body temperature every morning and
d raw out the d iagraph of their base body temperature,
which will clearly show when the women is under
ovulatorytime, then the women can plan their babies or
contraceptions.
1 6.Special declarations:
The manufacture reserve the right to explain,revise and
change the specifications, technical datas,usages etc.
without notice. @
This manual suits for next models
1
Table of contents
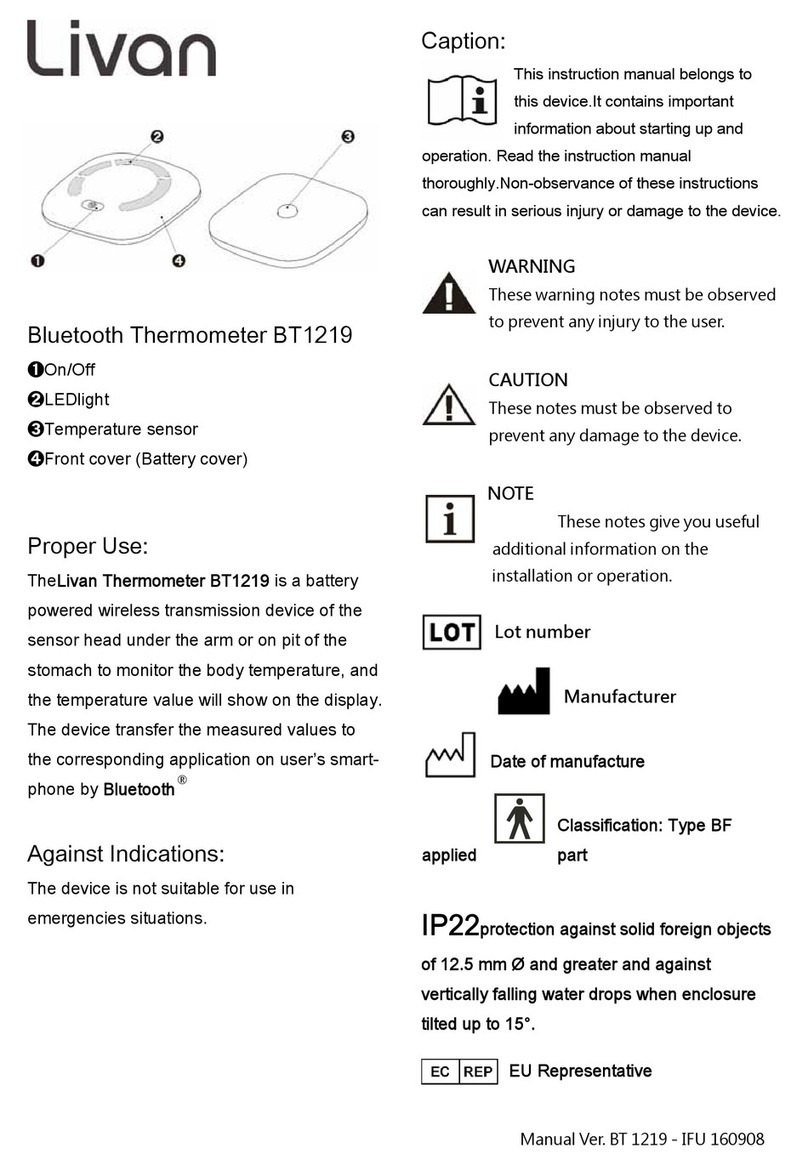
Other Hetaida Thermometer manuals
