www.drtrustusa.com www.drtrustusa.com
12 13
Press the button again, then the ℃ symbol or the ℉ symbol will
be converted to another.
Don`t release the button when “M” Symbol appears, only release
After unit conversion, press the button for about 5 seconds,
thermometer will shut down and save the setting automatically.
when “C” or “F” appearing.
6.5. Turn ON/OFF the Buzzer
Release the button and press the setting button again, then the ‘ON’
The Homedoc Ear and Forehead Thermometer uses a buzzer to ‘beep’, to
interact with users at the end of the measurement. If you want to turn on
or off the buzzer, in the state of thermometer shutdown;
symbol or the ‘OFF’ symbol appears on the screen.
symbol or the ‘OFF’ symbol will be converted to another.
After selection, press the button for about 5 seconds, the thermometer
will shut down and save the setting automatically.
Press the setting button for about 9 seconds until you see the ‘ON’
6.6. Set Threshold for Low Fever
After setting, press the button for about 5 seconds, the
seconds until you see the orange status light on the screen, release the
button. (Note: Ignore the other symbols that appear in the process).
Keep pressing the Set button to increase the threshold (every time
37.5℃/99.5℉ to 37.9℃/100.2℉.
Once it reaches the Max. value, press the button again, it will go back
to the Min. value, then repeat the cycle.
This thermometer has preset 37.5℃/99.5℉ as an alarm temperature for
low fever. However, 37.5℃/99.5℉ is only a reference value. At this
temperature, different people feel different, some feel uncomfortable, but
others feel ne. If you don’t agree with this low fever threshold, you can
manually change it to suit your own situation after consulting your doctor.
0.1℃/0.2℉ threshold will increase). The adjustment range is from
In the state of shutdown, hold pressing the Setting button for 12
thermometer will shut down and save the setting automatically.
6.7. Set Threshold for High Fever
This thermometer has preset 38.0℃/100.4℉ as an alarm temperature for
high fever. However, 38.0℃/100.4℉ is only a classic reference value.
At this temperature, different people feel different, some feel bad, but
others feel not too bad. If you don’t agree with this high fever threshold,
you can manually change it to suit your own situation after consulting your
doctor.
6.8. Turn off
When the thermometer is turned on, the thermometer will shut down
automatically after it is not used for 30 seconds. You can hold down the Power
button for 5 seconds to shut down the thermometer manually.
6.9. Battery Replacement
When the low battery indicator is lighting on the screen;
use.
power.
Close the battery cover, the thermometer can be restored to normal
Mount two new AAA batteries into the battery bin according to the
Open the battery cover to take out two old batteries with insufficient
marked polarity symbols.
Take out the batteries if the thermometer will not be used for more
than one month.
Cauon
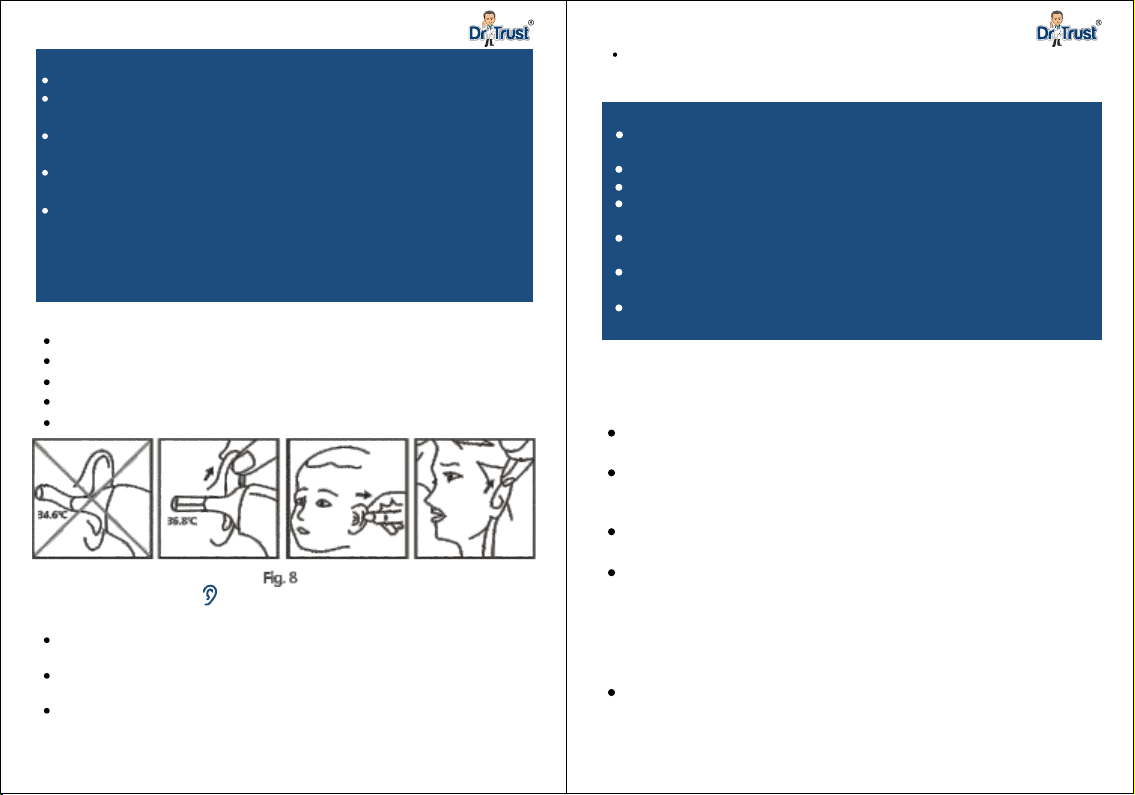
7. TIPS TO MAKE CORRECT TEMPERATURE MEASUREMENTS
It is important to know everyone’s normal temperature when they are
well. This is the only way to accurately diagnose a fever.
Record readings twice a day (early morning and late afternoon). Take
temperature readings may vary from different locations on the
low as 97.0°F (36.1)ºC. Please note that this unit reads 0.5ºC (0.9°F)
the average of the two temperatures to calculate normal oral
A child’s normal temperature can be as high as 99.9°F (37.7)ºC or as
lower than a rectal digital thermometer.
Holding the thermometer for too long in the hand before taking a
measurement can cause the device to warm up. This means the
Always take the temperature in the same location, since the
equivalent temperature.
forehead.
measurement could be incorrect.