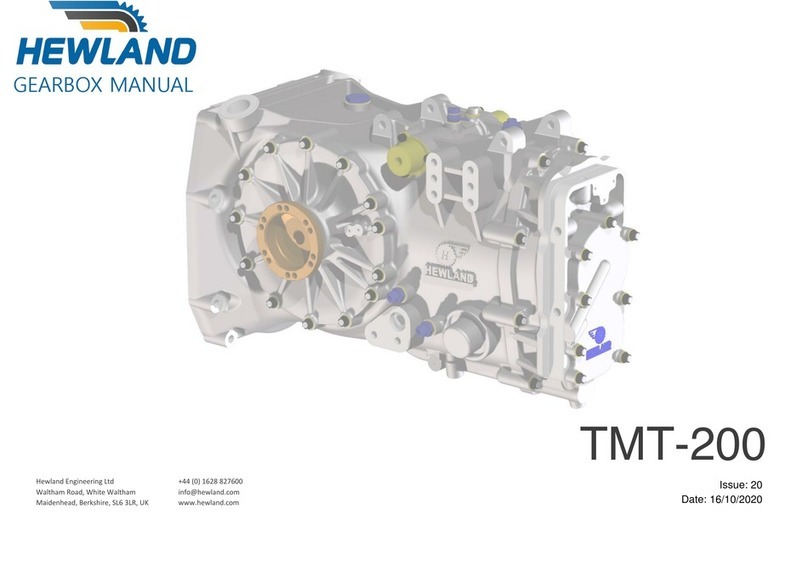
Hewland FTR User guide

PAGE 1© Copyright Hewland Engineering Limited 2001-2009
SERVICING INSTRUCTIONS AND ILLUSTRATED
PARTS LIST FOR THE FTR FAMILY OF HEWLAND
GEARBOXES, COVERING FTR, FTRS, FTRL, JFR &
LJS UNITS.
HEWLAND ENGINEERING LTD
WALTHAM ROAD, WHITE WALTHAM,
MAIDENHEAD, BERKSHIRE,
SL6 3LR, ENGLAND
TELEPHONE: +44 (0)1628 827600
Last Updated 23rd March 2009

PAGE 2© Copyright Hewland Engineering Limited 2001-2008
This page left intentionally blank

PAGE 3© Copyright Hewland Engineering Limited 2001-2009
CONTENTS :-
Page
Technical Specification & Gear Selection 7
GeneralNotes 8
Differential bearing preload & Crownwheel backlash setting 9
PinionSetting 12
Sequential Fork Setting 13
Powerflow Differential 14
FTR-212-ADJ Backlash adjustment 15
Gearboxassembly 17
FTR/JFR 6 Speed Illustrated Parts List 19
FTR/JFR 6 Speed (with FTREL Barrel) Illustrated Parts List 28
FTR/JFR 6 Speed conversion to 5 Speed 30
FTR 6 Speed (fitted with FTRE ratios) Illustrated Parts List 31
FTR/JFR 5 Speed Illustrated Parts List 39
FTRS 6 Speed Illustrated Parts List 48
Bearing Carrier Options 49
Differential Options Illustrated Parts List 50
TypicalRampOrientation 64
GearboxTooling 65
Installationdrawings 67
FTRL Hubbed 2nd Gears 74
TechnicalBulletins 75
General K-Nut Tightening Torques 92
Manual Modification History 93

PAGE 4© Copyright Hewland Engineering Limited 2001-2008
This page left intentionally blank

PAGE 5© Copyright Hewland Engineering Limited 2001-2009
Page
Fig.1 BacklashAdjustment 10
Fig. 2 Differential Bearing Preload 11
Fig. 3 Pinion Shaft Setting 12
Fig. 4 Sequential Barrel Setting 13
Fig.5 PowerflowDiffAssembly 14
Fig. 6 FTR-212-ADJ Assembly 15
Fig. 7 Graph relating turns to preload increase (FTR-212-ADJ) 16
Fig. 8 Casing & Associated Parts - 6 Speed (not FTRE ratios) 20
Fig. 9 Layshaft Assembly - 6 Speed (not FTRE ratios) 21
Fig. 10 Pinion Shaft Assembly - 6 Speed (not FTRE ratios) 22
Fig. 11 Selector Assembly - 6 Speed (not FTRE ratios) 23
Fig.12 Selector Assembly –6 Speed (FTREL Barrel only) 28
Fig.13 5 Speed Conversion Assembly - 6 Speed Gearbox 30
Fig.14 Casing & Associated Parts - 6 Speed (FTRE ratios) 32
Fig.15 Layshaft Assembly - 6 Speed (FTRE ratios) 33
Fig.16 Pinion Shaft Assembly - 6 Speed (FTRE ratios) 34
Fig.17 Selector Assembly - 6 Speed (FTRE ratios) 35
Fig.18 Casing & Associated Parts - 5 Speed (not FTRE ratios) 40
Fig.19 Layshaft Assembly - 5 Speed (not FTRE ratios) 41
Fig.20 Pinion Shaft Assembly - 5 Speed (not FTRE ratios) 42
Fig.21 Selector Assembly - 5 Speed (not FTRE ratios) 43
Fig.22 FTRS Additional Parts 48
Fig.23 BearingCarrierOptions 49
Fig.24 Tripod Differential Assembly 51
Fig.25 FTR-212-FD 52
ILLUSTRATIONS:-

PAGE 6© Copyright Hewland Engineering Limited 2001-2008
Page
Fig.26 FTR-212 53
Fig.27 FTRL-212 54
Fig.28 Tripod Adjustable Differential Assembly 55
Fig.29 FTR-212-ADJ 56
Fig.30 Flanged Free Differential 57
Fig.31 LJS-212-F 58
Fig32 LD-212 59
Fig.33 Flanged Free Differential Inboard Brake Discs 60
Fig.34 LJS-212-F 61
Fig.35 Flanged LSD Differential Inboard Brake Discs 62
Fig.36 LD-212 63
Fig.37 RampOrientation 64
Fig.38 Gearbox Tooling 65
Fig.39 Installation Drawing - FTR 68
Fig.40 Installation Drawing -JFR 69
Fig.41 Installation Drawing - Bearing Carriers 70
Fig.42a-c Installation Drawing - Flanges 71-73
Fig.43 FTRL Hubbed Gears 74
Fig.44 Technical Bulletin -01A 77
Fig.45 Technical Bulletin - 02 78
Fig.46 Technical Bulletin - 02 79
Fig.47 Technical Bulletin - 08 85
Fig.48 Technical Bulletin - 013 89
Fig.49 Technical Bulletin - 014 90
ILLUSTRATIONS :- continued

PAGE 7© Copyright Hewland Engineering Limited 2001-2009
TECHNICAL SPECIFICATION
The FTR gearbox family are transaxle units, designed for mid-engined, rear wheel drive cars. The units are produced with six or five
forward gears, reverse, and a differential.
The gear selection mechanisms are sequential, with separate mechanically actuated reverse / neutral baulking mechanisms. The
gear selection order is Rev - Neutral - 1st 2nd 3rd 4th 5th & 6th (If applicable).
The drive is taken from the engine via the clutch shaft, which turns input and pinion gears to drive the final transmission assembly.
Gear changing is effected through non-synchronising face dogs. An extensive range of gear ratios provides a wide range of gearing
permutations. The gear ratios and differential assembly can easily be changed without removing the gearbox from the vehicle.
Heat treated nickel chrome steel is used to manufacture all gears and shafts. The selector forks are also steel. The gearboxes are
splash lubricated.
In general configuration, the FTR family of gearboxes are high tech racing transaxle units which achieve the maximum effective use
of power, in conjunction with extremely stiff integral rear suspension mountings.
Weight (Aluminium) FTR(6sp) 88 lbs (40 Kg) Gear ratios from 3.167:1 to .89:1
JFR(6sp) 79 lbs (36 Kg) Final drive ratio 12/34, 9/35 or 9/31
Oil type SAE 80 or 90 Clutch shaft made to customers requirements
Oil quantity FTR/JFR(6sp) 4.4 pints (2.5 litres) Pinion shaft nut torque (6sp) = 75 lbs.ft (100 Nm)
Maximum engine torque 220 lbs.ft (298 Nm) Pinion shaft nut torque (5sp) = 115 lbs.ft (155Nm)
Crownwheel bolt tightening torque = 75 lbs.ft (100 Nm)
Engine oil tank capacity (FTR ONLY) 13 pints (7.5 litres)
Pinion bearing nut torque = 150 lbs.ft (205 Nm) (FTR FORMULA BMW ONLY) = 130 lbs.ft (176 Nm)
(See Page 89 for general K-nut tightening torques)
GEAR SELECTION
Up shifting is effected by moving the gear lever in a backward direction. For Downshifting the opposite is necessary. Shifting down
into either neutral or reverse is prevented by a baulk plunger. So the plunger operating cable must be pulled before such a shift can
be made. Up shifting is as for any other gear, as it does not require the plunger cable to be pulled.

PAGE 8© Copyright Hewland Engineering Limited 2001-2008
GENERAL NOTES :-
aRead these instructions carefully and with reference to the illustrations.
bBefore dismantling the gearbox, see that a clean tray is available, in which to place the parts.
cThoroughly clean and inspect all parts before reassembly. Discard any worn or damaged components and replace
with new ones.
dUse only genuine Hewland parts as replacements. These are manufactured in our workshops to the fine tolerances
necessary and are rigorously inspected.
eAlways ensure that locknuts, and oil seals are in good condition when reassembling.
fAll studs and screws must be Loctited or wirelocked in position, unless stated otherwise.
gBearing Replacement :-
Bearings can only be removed or renewed if the casings have been warmed in an oven, or with a blowlamp. In the
latter case, keep the blowlamp moving while heating the casing.
Note: Do not overheat. Test with a spot of water which will bounce off at the correct temperature.
Once a casing is heated, all bearings should be pressed into their respective seatings without delay, thus eliminating
the need to reheat. At the correct temperature, fitting the bearings should present no difficulty.
During cooling, or when the casings have cooled, it is advisable to once more lightly press the bearings to ensure
that they are correctly seated. Removal of the existing bearing outer races from the maincase and sideplate can
be achieved by locally heating the area of the casings around the bearing outer races with a blowlamp, as above.
Light mallet blows around this area will cause the bearing outer to drop away from its location face, it can now be
tapped from behind it to remove it.
Care must be taken not to damage the shims and spacer located under the race face.
hOil:
Fill the gearbox through the plug hole on top of the bearing carrier. The oil will find it's own level within the gearbox.
Note: Too much oil will not directly cause any harm, but is undesirable as it may induce power loss and overheating
of internals.

PAGE 9© Copyright Hewland Engineering Limited 2001-2009
a) Determine the correct fixture settings to achieve the correct backlash at a given bearing pre-load.
(See illustrations on following pages)
It is assumed that the pinionshaft is fitted and set at the correct position inside the maincase.
Build the differential and then press the bearing inners (7) onto the journals and mount the crownwheel onto it. Fit spacer (22) into the
maincase bearing bore, followed by a nominal amount of shim (21). A good starting point is probably 0.040”
Fit the dummy bearing outer track SK-1715 to the maincase followed by the diff assembly. Fit the second dummy bearing outer track
SK-1715 to the setting fixture and position onto the maincase. Secure the fixture to the maincase using all 12 nuts (55) and torque to
35Nm.Ensure that the pinionshaft does not run out of backlash whilst tightening the sideplate fixing nuts and add shim if necessary.
Please note that it is important to use all nuts torqued to the correct setting, as this affects backlash readings.
Fit the nut (SK-1718-A) to the setting fixture (SK-1718-B or SK-2066 for JFR) and wind it by hand into position behind the bearing until
a firm ‘stop’ is felt. Use a suitable rod to engage in the hole in the nut if necessary. Unwind the nut by a quarter turn, then whilst rotat-
ing the pinionshaft backwards and forwards, wind the nut in by hand until a firm stop is felt. This is important as it ensures the diff is
correctly seated in it’s bearings. With a marker pen mark the position of the ‘0’ line on the nut on the setting fixture.
This is the 0 bearing pre-load point.
Undo the setting fixture nuts (55) by half a turn or so to release the pressure from the maincase. Wind the nut (SK-1718-A)back into
the fixture to the position where the line marked on the fixture lines up with the number on the nut that equates to the pre-load that is
required.
The nut has a number of lines scribed on it and the number next to it is the pre-load in thousandths of an inch. For example 10 equates
to 0.010”.
The specified pre-load is 0.010” to 0.013” which is ‘10’ to ‘13’ on the nut.
CW& Pinion backlash setting
And Differential bearing pre-load setting
Special Tools Required: SK-1718-A, SK-1718-B (for JFR use SK-2066), SK-1715 and SK-1913-A

PAGE 10© Copyright Hewland Engineering Limited 2001-2008
With the nut set at the required bearing pre-load, secure the fixture to the maincase
using all 12 nuts (55) torqued to 27Nm.
Then fit tool SK-1913-A to the spline on the pinionshaft and secure it in position with an M6 cap screw. Measure the backlash at the
indicated position on tool SK-1913-A.
Rotate the pinionshaft 30° or so and take another reading. Repeat this process until the difference between the minimum and
maximum readings is the same as the value for the average backlash variation on the setting sheet.
If the minimum reading is outside of what is specified on the spiral bevel setup card,
alter the shim (21) inside the maincase. Increasing the shim thickness will reduce the backlash, decreasing it will increase the
backlash. (See Fig.1)
Run through procedure described above until the backlash is within specification.
b) Calculate correct shimstack.
Sideplate shimstack.
With the setting fixture secured in position and backlash having been set correctly, measure DIM A using a depth micrometer.
This is the distance from the end of the nut to the top face on the setting fixture.
Record this dimension.
Measure & record DIM B with a height gauge.
Record DIM C (this is etched on the face of the nut)
Record DIM D (this is etched on the face of the setting fixture)
Calculate the total thickness of spacer & shimstack to be fitted to the sideplate:
TOTAL SIDEPLATE SHIM + SPACER THICKNESS = DIM A + DIM B + DIM C - (DIM D + 0.005”)
DIM A “
DIM B “
DIM C “
DIM D “
BACKLASH ADJUSTMENT 12/34 RATIO
0
0.002
0.004
0.006
0.008
0.01
0.012
0.014
0.016
0.005
0.006
0.007
0.008
0.008
0.009
0.010
0.011
0.012
0.013
0.014
0.014
0.015
0.016
0.017
0.016
MEASURED BACKLASH
REDUCE SHIM B
Y
Fig.1

PAGE 11© Copyright Hewland Engineering Limited 2001-2009
Maincase shimstack.
The maincase shimstack to be
fitted with the standard bearing
outer track (7) rather than the
dummy bearing outer track
SK-1715 is simply that fitted
already minus 0.005”. So
simply remove 0.005” from the
shimstack used in above
section.
c) Finalise the assembly &
check backlash.
Fit the spacers and shimstack
calculated above together with
the standard bearing outer
tracks to the maincase and
sideplate. Allow casings to cool
to room temperature and fit diff
and sideplate and secure with
nuts (55) tightened to 27Nm.
Check that the backlash is
within specification.
Fig.2
(FTR shown)
DIM D WILL
BE ETCHED
ON FACE
DIM C WILL BE
ETCHED ON
FACE
SK-1718-B or SK-2066

PAGE 12© Copyright Hewland Engineering Limited 2001-2008
FIGURE 2
PINION SETTING
Requires special tool No.SK-1709
Press the pinion head bearing (57) front inner race onto the pinion shaft (29). Fit the bearing housing (57) and shims (59) into
the maincase, and secure with washer and nut. Use socket (SK-247) to tighten the pinion bearing nut to the correct torque
(see page 7). Assemble the pinion shaft into the maincase (16), add the pinion head bearing rear inner race, spacer, hubs and
bearing inner tracks, pinion tail bearing and pinion shaft nut. Tighten the pinion shaft nut (71) onto the pinion shaft to the
correct torque setting using the splined socket and reaction bar.
Fit tool SK-1709 into the maincase diff bearing bore, and use feeler gauges to measure the gap between the tool and the
pinion front face.This clearance should comply with the dimension indicated on the pinion shaft label (also etched on the front
face of the pinion shaft), and can be adjusted by adding or removing shims (59) from behind the pinion head bearing housing
(57).
Alternatively, the pinion mounting distance can be
measured with a height gauge, and set to the
dimension on the pinion shaft label.
Notes:
1 It is not correct practice to replace a pinion
shaft without measuring the setting distance,
even if the old and new shafts have the
same calibration.
2. The fork setting should always be checked
after replacing or re-shiming the pinion head
bearing. Failure to do so may result in poor
shift quality, and damaged parts.
Fig.3 (FTR SHOWN)
Feeler Gauge Dimension
Tool SK-1709

PAGE 13© Copyright Hewland Engineering Limited 2001-2009
SEQUENTIAL FORK SETTING
The FTR family sequential fork setting procedure is unique amongst Hewland sequential transaxles to date. Previous designs
have been fork set by means of a barrel positioning spacer. The FTR family is set by moving the hubs along the pinion shaft by
means of a spacer.
This fork setting procedure must be carried out each time the pinion head bearing is replaced or re-shimed.
a/ Assemble the entire ratchet, barrel, and detent assembly into the maincase.
b/ Slide the fork setting spacer, hubs, clutch rings, forks, bearings, inner tracks, and pinion shaft gears into position on the
pinion shaft, and secure with the pinion shaft nut.
c/ Engage the selector forks (44) into the barrel (use special tool SK-1716) and slide the selector rail through the forks to
engage the maincase.
d/ Rotate the barrel to engage reverse
or neutral. Measure and record the
gap between the dogfaces of all
gears. Any difference between the
dog gap measurements must be
averaged out by replacing the barrel
spacer (35) with one of the correct
thickness.
Note: It is not possible (or
necessary) to individually adjust
each fork.
Fig.4 (FTR SHOWN)
Barrel Spacer (Next to
pinion head bearing)

PAGE 14© Copyright Hewland Engineering Limited 2001-2008
Optional Lightened
Parts
The following lightened parts are available for the FTR
3/ The second adjustable factor is how
tightly the plate stack is compressed
on assembly (known as static
preload). Included in the plate stack is
a preload spacer. The preload torque
is measured between the side bevel
gears, by holding one side bevel gear
stationary, and measuring the torque
required to turn the other using tools
SK-1710-A & SK-1710-B. When the
diff is assembled, the preload torque
must be at least 10 lbs.ft, but can be
much greater if required. New plates
‘run in’ so a higher preload is advised
than with used plates. To assist in de-
termining the size of the preload
spacer
set up shims may be used. They are
available in 5 different sizes,
.003” .005” .008” .010” .015”
4/ The final adjustment is simply to re-
order the plate stack so as to change
the number of relatively rotating
faces. The diagram shows the stack
setup with the maximum 12 working
faces. Standard stack may be
shuffled to give as few as 2 working
faces.
1The side bevel gears thrust apart to
clamp the plates as they transmit
the driving power. This is a feature
of the gear geometry, and is not
adjustable.
2The ramp angles cut on the side
ring gears have an effect on how
much of the transmitted torque is
converted into sideways (clamping)
force onto the plates. For example,
on the drive side ramp, 45 degrees
transmits less sideways force than
30 degrees. Likewise on the coast
side ramp, an 80 degree angle will
transmit little or no clamping force
onto the plates, whereas a 45
degree angle will transmit a much
greater force. Side ring gears are
available with many different drive/
coast ramp angle combinations.
Fig.5
POWERFLOW DIFFERENTIAL
This powerflow differential unit is designed with versatility as it's major asset. Many factors will contribute to the settings required. A car
with good traction and low power, may require a completely different arrangement to that of a car with poor traction and high power.
There are 10 friction plates within the unit 4 splined to the diff casing, and 6 splined to the side bevel gears. Slip limiting is dependant on
the friction resistance between these plates, and is affected by clamping the plates together.. Four factors contribute to the total friction
torque between the plates :-
Clutch Plates
Core Plates
Direction of Car
Planet Gear
6 Working Faces
per Side
Right Hand Side
Ring Gear
Right Hand Side
Bevel Gear
30º
40º
Greater angle transmits
less thrust onto plates
Preload Spacer
Direction of
force on plates
Fig.5

PAGE 15© Copyright Hewland Engineering Limited 2001-2009
FTR-212-ADJ BACKLASH ADJUSTMENT
The end float in the tripods determines the amount of backlash in the bevel gears. This end float is changed by machining the
top hats (215) as shown below.
Set up the differential as shown in the assembly below (Fig 6).
Torque the centre bolt (214) to 25Nm and measure the tripod end float. There should be 0.025”-0.030” of end float. If there is
more than this, remove material from the spacers so to achieve the require end float. The top hats are deliberately manufactured
so that the initial amount of end float is greater than the end float required. When the correct amount of end float is achieved
torque and Loctite (No. 648) the centre bolt (214).
Item numbers refer to page 53
Fig.6

PAGE 16© Copyright Hewland Engineering Limited 2001-2008
To adjust the amount of preload on the differential, use tool SK-1623 (p54). Insert the tool into the worm and turn the tool anticlock-
wise to increase the preload. Below (Fig7) is a graph showing the relationship between turns and preload added.
0
5
10
15
20
25
30
35
40
45
0 10203040506070
Preload (lbft)
Turns (anticlockwise)
Fig.7

PAGE 17© Copyright Hewland Engineering Limited 2001-2009
GEARBOX - ASSEMBLY
aIt is assumed that all bearings, oil seals, studs, and dowels are already fitted into casing.
bSlide the rearmost tophat bush into place in the maincase, then slide it rearwards as far as it will go. Push the other
tophat bush into place in the maincase. Press the bearing into the reverse idler gear (39), slide the sleeve into the
bearing and position the gear between the tophat bushes. Apply loctite to the retaining bolt and tighten into place.
cFit the pinion shaft and head bearing assembly to the maincase.
dPress the dowel into the maincase. Assemble the detent arm, trunion, washer and spring into the maincase and
secure with screw.
ePosition the pawl in the slot in the selector rack. Press the pin into place, ensuring that it isn’t left protruding outside
the rack outer diameter. Slide the washers, spring, and sleeve onto the rack, and secure with circlip. Carefully fit the
rubber seal onto the rack, taking care that it sits squarely, not twisted, in it’s groove. Oil liberally, and slide the rack
into the maincase. Ensure that the rack is free to slide back and forth in the maincase. Any stiction here may cause
shift problems in service.
fPut one spacer on the barrel. (Early barrels only). Hold the detent arm against it’s spring using a pair of pliers. Using
a thin rod or stiff wire, push the free end of the pawl upwards in the maincase and hold it there whilst sliding the
barrel into place. Slide on the second spacer (Early barrels only), and secure the barrel with the circlip.
gSlide the plunger, spring, and washer into the selector rack, and secure with circlip. Fit the oring to the selector rack
stop, slide the rack stop into the casing and secure with circlip.
hAssemble the bell crank, bearings, spacer, and washers to the maincase, and secure with bolt. Note: Select washers
of a thickness so as not to load the casting lugs when tightening the bolt. This could cause casting damage. Ensure
that the selector operates smoothly in both directions, and self returns to it’s normal position.
iAdd the baulking plunger, o’ring, spring, and cap. Note: when installing the gearbox in the car, the baulk release
cable length should be adjusted so that the baulking plunger is held just clear of the barrel (when a forward gear is
selected).
jFit the wire clip onto the clutch shaft, and push the clutch shaft into the spigot bearing from the gear cluster end. The

PAGE 18© Copyright Hewland Engineering Limited 2001-2008
wire clip is only fitted to hold the clutch shaft in position when changing ratios. It serves no purpose when the
gearbox is fully assembled.
kAfter adjusting the differential bearing preload and crownwheel backlash. Oil the taper roller bearings then load the
differential assembly in through the sideplate bore, add the sideplate and secure with nuts.
lThe gear cluster can be built up directly into the gearbox as described below, or built up onto fixture SK-1703.
mSlide the spacer and reverse hub onto the pinion shaft. Assemble reverse selector fork onto the reverse pinion gear,
then slide them onto the reverse hub. Allow the reverse fork head to rest against the inside of the maincase.
nSlide a bearing inner track and bearing onto the pinion shaft. Holding the layshaft in one hand and 1st pinion gear in
the other, insert them both into position.
oAdd a hub, clutch ring, and fork, and allow the fork to rest against the maincase. Add the bearing inner track and
bearing, and slide 2nd gear pair into place.
pAdd another bearing, and slide 6th gear pair into position, (if applicable). Add the hub, clutch ring, bearing inner track
and bearings to the pinion shaft, slide the spacer onto the layshaft, then add 5th gear pair. Repeat for 4th and 3rd
gear set.
qSlide the remaining selector forks onto their clutch rings. Insert the selector rail through all the forks, and engage it
into the maincase. Special tool SK-1716 is available to help align the forks with the tracks in the barrel.
rAdd the thrust washer, bearing inner race, and nut to the pinion shaft. Tighten the nut to the correct torque setting,
then fit the locking ring and secure with circlip, or fit split pin through the nut.
sAdd the bearing inner track spacer to the layshaft, and fit the bearing inner track into the rear cover. Position the rear
cover and secure with nuts. Check that all gears are selectable, and that the bell crank returns freely to it’s rest
position after each shift. Note: The layshaft is located between it’s two bearings and must be preload with spacer.
This means that the shaft may be a little stiff to turn when the gearbox is cold.

PAGE 19© Copyright Hewland Engineering Limited 2001-2009
ILLUSTRATED PARTS LIST
FOR 6 SPEED CONFIGURATION OF
FTR, FTRS, FTRL & JFR.
(NOT INCLUDING FTRE RATIOS)

PAGE 20© Copyright Hewland Engineering Limited 2001-2008 Fig.8
CASINGS & ASSOCIATED PARTS– 6 SPEED
(NOT SUITABLE FOR USE WITH FTRE RATIOS)
This manual suits for next models
4
Table of contents
Other Hewland Microphone System manuals
Popular Microphone System manuals by other brands
Audio Technica
Audio Technica ATR100G Operation manual
HURST
HURST 3910201 installation instructions

Lectrosonics
Lectrosonics SMWB/E07 Series instruction manual

Samson
Samson XPD2m owner's manual

PCB Piezotronics
PCB Piezotronics 377B11 Installation and operating manual

Sony
Sony WCS999 - Wireless Camcorder Microphone operating instructions
