Hi-Force TWE Series User manual

OPERATING INSTRUCTIONS:
Electric Torque Wrench
Series: TWE
TDS:-
1399
Prepared by:-
M.DAVIES Approved by:- Date: 25/03/14
REV NO:-
1
ECO:-
Page 1of 20
OPERATING INSTRUCTIONS
Hi-FORCE: SERIES TWE
Electric Torque Wrench
These instructions are issued to ensure safe operation of the tool by the intended Operator
To ensure maximum safety a copy of these instructions should accompany the tool at all times.
Ensure these instructions are read and fully understood by the operator before use of the tool.

OPERATING INSTRUCTIONS:
Electric Torque Wrench
Series: TWE
TDS:
-
1399
Prepared by:
-
M.DAVIES
Approved by:
-
Date:
25/03/14
REV NO:
-
1
ECO:
-
Page 2of 20
Contents
1. SAFETY....................................................................................................................................3
1.1. ELECTRIC TORQUE WRENCH..................................................................................... 4
1.2 SYMBOLS.................................................................................................................................4
1.3 OPERATING PARAMETERS...............................................................................................5
1.4 EMISSIONS..............................................................................................................................5
1.5 RISK ASSESSMENT...............................................................................................................5
1.6 ELECTRICAL SAFETY.........................................................................................................7
1.7 OPERATOR..............................................................................................................................7
2. TECHNICAL DATA................................................................................................................7
3. OPERATION............................................................................................................................7
3.1 GENERAL INFORMATION..................................................................................................7
3.2 TORQUE ANGLE MODE(OPTIONAL).............................................................................11
3.3 INFORMATION MESSAGES..............................................................................................13
3.4 ERROR MESSAGES.............................................................................................................14
3.5 SYSTEM ERROR..................................................................................................................15
4. TIGHTENING AND RELEASING OF BOLTS.................................................................16
4.1 TECHNICAL REMARKS.....................................................................................................17
4.2 TROUBLE SHOOTING.......................................................................................................17
5 MAINTENANCE AND REPAIR.........................................................................................18
6 TOOL ILLUSTRATION......................................................................................................19

OPERATING INSTRUCTIONS:
Electric Torque Wrench
Series: TWE
TDS:
-
1399
Prepared by:
-
M.DAVIES
Approved by:
-
Date:
25/03/14
REV NO:
-
1
ECO:
-
Page 3of 20
1.0 SAFETY
Please carefully read all safety instructions, in order to ensure the safest use and longest service life of the
equipment supplied.
Improper handling, misuse or operation by unqualified personnel will cause risks for
- The operator's health and life
- The machine and other objects
KEEP these operating instructions and other applicable Hi-Force manuals in a safe place, and ensure they
are available for all personnel that install, use or maintain the equipment.
Work Area.
Ensure the work area is kept clean and tidy.
Identify the risk area in which the tool is to be used.
Do not use the power tool in an area that is subject to the risk of explosion, in which flammable liquids,
gases or dusts are present.
Ensure that no unauthorised personnel are within the working/risk area when the equipment is in use.
Never leave the working/risk area with the equipment under load.
Be aware: Distraction can cause you to lose control of the power tool.
Personal Safety.
Before commencing work with this equipment, the operator should wear all the personal protective
equipment recommended by his/her Company. Also we recommend that non-slip work gloves, ear
defenders and safety glasses/visor are worn at all times.
Before commencing work the tool should be inspected to ensure:-
-All moving parts are in the correct working order and are not jammed.
-No parts of the tool are broken, badly worn or damaged.
-IF IN DOUBT DO NOT USE THE TOOL.
Do not use the power tool if you are tired or under the influence of drugs, alcohol or medicines.
Inattention when using power tools can lead to serious injury.
Do not overestimate your capabilities. Ensure when operating the tool you have a secure stance and that
you are evenly balanced. This will allow you to control the power tool better in all situations.
Do not wear loose clothing or jewellery. Keep hair, clothing and gloves away from moving parts, as these
can become entangled in the moving parts of the power tool.
Torque wrenches can be dangerous if used by inexperienced or untrained persons.
IF IN DOUBT ASK.

OPERATING INSTRUCTIONS:
Electric Torque Wrench
Series: TWE
TDS:-
1399
Prepared by:-
M.DAVIES Approved by:- Date: 25/03/14
REV NO:-
1
ECO:-
Page 4of 20
Electrical safety
The plug must not be modified in any way. Do not use any adapter in conjunction with electrically
earthed power tools. Unmodified plugs and matching sockets reduce the risk of an electric shock.
Do not use the cable to pull the plug from the socket. Keep the cable away from heat, oil, sharp edges and
moving parts of equipment.
Damaged or twisted cables increase the risk of an electric shock.
1.1. ELECTRIC TORQUE WRENCH
Careful handling and use of electric power tools
Do not overload the power tool. Only use the torque wrench rated for the work you are carrying out.
Do not use an electric power tool with a defective power switch. A power tool that cannot be switched on
or off easily is dangerous, must be withdrawn from use and must be repaired by a qualified technician.
Do let any unauthorized personnel use the power tool. Electric power tools are dangerous if used by
inexperienced persons.
Before commencing work the tool should be inspected to ensure that all moving parts are in correct
working order and are not jammed. Ensure no parts of the tool are broken or damaged and all electric
cables and plugs are in good condition. If in doubt do not use the tool.
Accidents can be caused by poorly maintained electric power tools.
1.2. SYMBOLS
Please read the operating manual carefully before using.
Do not dispose of electric power tools in domestic waste! In accordance with
European Directive 2002/96/EC on Waste Electrical and Electronic Equipment
(WEEE Directive) and its implementation in national law, used electrical tools
must be collected separately for environmentally friendly recycling.
Double insulation, protection class II
Indicates important text passages.

OPERATING INSTRUCTIONS:
Electric Torque Wrench
Series: TWE
TDS:
-
1399
Prepared by:
-
M.DAVIES
Approved by:
-
Date:
25/03/14
REV NO:
-
1
ECO:
-
Page 5of 20
1.3. OPERATING PARAMETERS
The Hi-Force Electric Torque wrench and the Hi-Force electric angle torque wrench are hand-controlled
tools and must be used exclusively for tightening and loosening bolted connections.
The minimum and maximum torque values are indicated on the wrench and in addition are recorded in
the attached setting table.
The torque wrench must only be used with the reaction arms supplied as standard by Hi-Force.
Consult Hi-Force, before modifying any support arm, as an uncontrolled operating state (overturning
moment) can occur, and lead to the risk of accidents.
Any modification to the tool or associated parts without prior written permission from Hi-Force, will be
deemed as improper use and all warrantyand guarantees on the tool are declared invalid.
The wrench must not be used in an atmosphere where explosions are possible, for example in explosive
gas, vapours, or dust.
Use of the tool for any applications other than its intended purpose is deemed to be improper use and
warranty will be void.
Any unauthorized conversions or modifications of the device are prohibited on safety grounds.
All operating and maintenance provisions contained within this operating manual must be complied with.
1.4. EMISSIONS
The permanent level of sound pressure is 78 dB(A) according to DIN 45635.
Vibration is lower than 2,5 m/s2.
1.5. RISK ASSESSMENT
Incorrect use poses the risk of crushing, shearing and serious damage to the torque wrench.
Risk of crushing and shearing
A jam and shear risk is possible between reaction arm and abutment (fig. 1+2).
The reaction arm must find a close rest!
Fig: 1 Fig: 2

OPERATING INSTRUCTIONS:
Electric Torque Wrench
Series: TWE
TDS:
-
1399
Prepared by:
-
M.DAVIES
Approved by:
-
Date:
25/03/14
REV NO:
-
1
ECO:
-
Page 6of 20
Risk of tool breakage.
Incorrectly applied support arms can fracture (Fig: 3).
The support arms should always be applied in opposition to the direction of rotation of the torque wrench.
Fig: 3
The risk of overturning moment, by extension of the impact socket, modification of the support arm or
reverse fitting of the support arm. The impact socket can fracture and the torque wrench can fail.
Fig: 4
Other hazards
A risk of crushing between the pistol-grip and surrounding components. The pistol-grip and /or driving
unit are able to rotate.
The impact socket and the support arm can become detached if they are not correctly fixed in position.
Always lock the impact socket and the support arm, with the locking pin and the rubber collar (fig. 6).
Only use impact sockets which conform to DIN 3129 (Sockets) power torque wrenches.
Unexpected starting of the wrench after a cut in the mains supply.
In the case of a cut in the mains supply, unlock button (3) on the wrench. Put the wrench safely away.
After return of the mains supply, loosen the last bolt again and repeat the tightening procedure.
Keep the mains cable away from the reaction arm.

OPERATING INSTRUCTIONS:
Electric Torque Wrench
Series: TWE
TDS:
-
1399
Prepared by:
-
M.DAVIES
Approved by:
-
Date:
25/03/14
REV NO:
-
1
ECO:
-
Page 7of 20
1.6. ELECTRICAL SAFETY
If used outdoors or in wet room conditions the operator should ensure they comply with the relevant EN
standards!
Protect the tool from water and wet conditions this can cause short circuits and permanent damage to the
electronics.
Do not use the torque wrench if the motor housing or cable are damaged
Do not lift or carry the wrench by the electrical cable.
Before caring out any work on the electric unit, remove the plug from the mains supply.
1.7. OPERATOR
Minimum age: 18 years
The operator must carefully read and understand the operating manual before using the torque wrench.
The operator should always act responsibly in their work area and with regard to other persons in the
vicinity.
2. TECHNICAL DATA
Mains
voltage Frequency
Mains
consumption Nominal
capacity Protected acc. To DIN
40050
230 V
50 Hz
4,7 A
1,0 kW
IP20
3.0 OPERATION
The wrench should only be put into operation, if the mains supply is in accordance with voltage and
frequency of the wrench.
3.1 GENERAL INFORMATION
3.1.1 Overview and operation of the digital display
Not activated items do not appear on digital Display (7).

OPERATING INSTRUCTIONS:
Electric Torque Wrench
Series: TWE
TDS:
-
1399
Prepared by:
-
M.DAVIES
Approved by:
-
Date:
25/03/14
REV NO:
-
1
ECO:
-
Page 8of 20
GENERAL: Each input has to be confirmed by pressing the Enter button. If this is not done, the input
will be deleted.
If the motor and gear are rotating it is not possible to make a setting on the display.
Also the on/off switch and left/right switch are closed down.
Classification:
Construction size Slow/Strong Mode Fast Mode
05, 075, 09ST, 12, 16 Standard n.a.
16ST, 28, 28ST, 40, 60, 70, 90, 95, 120 Standard On enquiry
60L, 95L n.a. Standard
Torque Mode
Five-digit display
Gear display
Select display
Select button
Torque adjustment
Torque-Angle Mode
strong/fast Mode
Unit
Enter display
Enter button

OPERATING INSTRUCTIONS:
Electric Torque Wrench
Series: TWE
TDS:-
1399
Prepared by:-
M.DAVIES Approved by:- Date: 25/03/14
REV NO:-
1
ECO:-
Page 9of 20
3.1.2 Measure selection
As soon as the tool is switched on, the
operator can see the factory settings in
Nm and lbf.ft.
The user can’t see this when Poti-
setting is selected.
3.1.3 Gear selection
The engaged gear is illuminated on the
display:
Gear 2
Gear 1
3.1.4 TORQUE SETTINGS
The torque setting can be made in two different ways:
1.0 Torque setting with poti setting
Select the required torque from the chart fixed
to the motor housing and adjust the knurl to
those values.
The poti setting is displayed with one post-
decimal place on the display.
e.g. 3,2
This is a factory default setting.
2.0 Torque setting in clear
The display shows the torque in Nm or lbf.ft.
The intervals of the torque setting are
dependent on the rotational speed of the poti
wheel.
Torque setting on the display
(valid for both)
Turn the torque setting dial (2) to the required
value.
After the torque setting dial is stopped, the set
value will flash.
Press the enter button to set this value. If this does
not happen within 3 seconds the value will not be
set and the original value will remain.
The original value also remains after the tool is
switched off.

OPERATING INSTRUCTIONS:
Electric Torque Wrench
Series: TWE
TDS:-
1399
Prepared by:-
M.DAVIES Approved by:- Date: 25/03/14
REV NO:-
1
ECO:-
Page 10 of 20
3.1.5 RIGHT / LEFT SWITCH
The direction of rotation of the tool is
permanently indicated by the LED (3) when tool
is switched on.
Push the right/left button to switch rotation
direction, the tool will also emitting a short
sound signal during this operation.
3.1.6 GEAR SETTING
The wrench is calibrated in 1st and 2nd gear mode, therefore choose the respective gear according to the
required selected torque.
1st gear: control knob (9) in position 1
2nd gear: control knob (9) in position 2
Only change gear when the motor is NOT running.
Should the speed selector not engage properly, operate the torque wrench for a short time with no load
applied.
3.1.7 FAST / SLOW MODE
By pressing the <Select> button the operator can
switch between FAST uand STRONG Mode.
By pressing <Select> the chosen selection will
flash three times.
Display: Strong = Str, Fast = Fst
In STRONG Mode the tool operates with less
speed and switches off automatically.
The operator must work in the SLOW/STRONG
Mode, if the bolt is 20% longer than that laid
down in the factory calibration certificate.
In FAST Mode uthe tool works with higher
speed.
The operator can work in the FAST Mode u, if
the bolt is the same length as the value laid
down
in the factory calibration certificate.

OPERATING INSTRUCTIONS:
Electric Torque Wrench
Series: TWE
TDS:-
1399
Prepared by:-
M.DAVIES Approved by:- Date: 25/03/14
REV NO:-
1
ECO:-
Page 11 of 20
3.1.8 Restart protection
With the gear and motor rotating, it is
not possible to engage the right/left
switch. This also applies for the on/off
switch. After the gear and motor have
stopped rotating for 2-3 seconds, the
machine can be restarted.
The respective direction LED will flash
blue.
3.2. TORQUE ANGLE MODE (OPTIONAL)
Push the button <Select> to switch
between the modes FAST u,
STRONG and angle of tilt mode M+α.
Releasing the button <Select> causes
the respective selection, including the
symbol, to flash three times. Then the
selected mode is engaged.
ATTENTION:
Angle of tilt mode selection is only
possible in gear 1 mode. If this
selection is attempted in gear 2 mode, a
warning signal sounds. The “2”in the
display and the two directional LEDs
will flash red alternately.
In angle of tilt mode, the last setting of
snugging torque alternates every 2
seconds (≡)…
…with the last setting for the continued
turning angle (°).
The setting visible at any time can be
changed by turning the potentiometer
wheel (2). Once the potentiometer
wheel stops, the set value flashes in the
display, as does the <Enter> button,
until the value is confirmed by pressing
<Enter>. Should the enter button not be
pressed within 3 seconds, the value is
not engaged and the original set value
will appear in the display.
OPERATING INSTRUCTIONS:
Electric Torque Wrench
Series: TWE
TDS:-
1399
Prepared by:-
M.DAVIES Approved by:- Date: 25/03/14
REV NO:-
1
ECO:-
Page 12 of 20
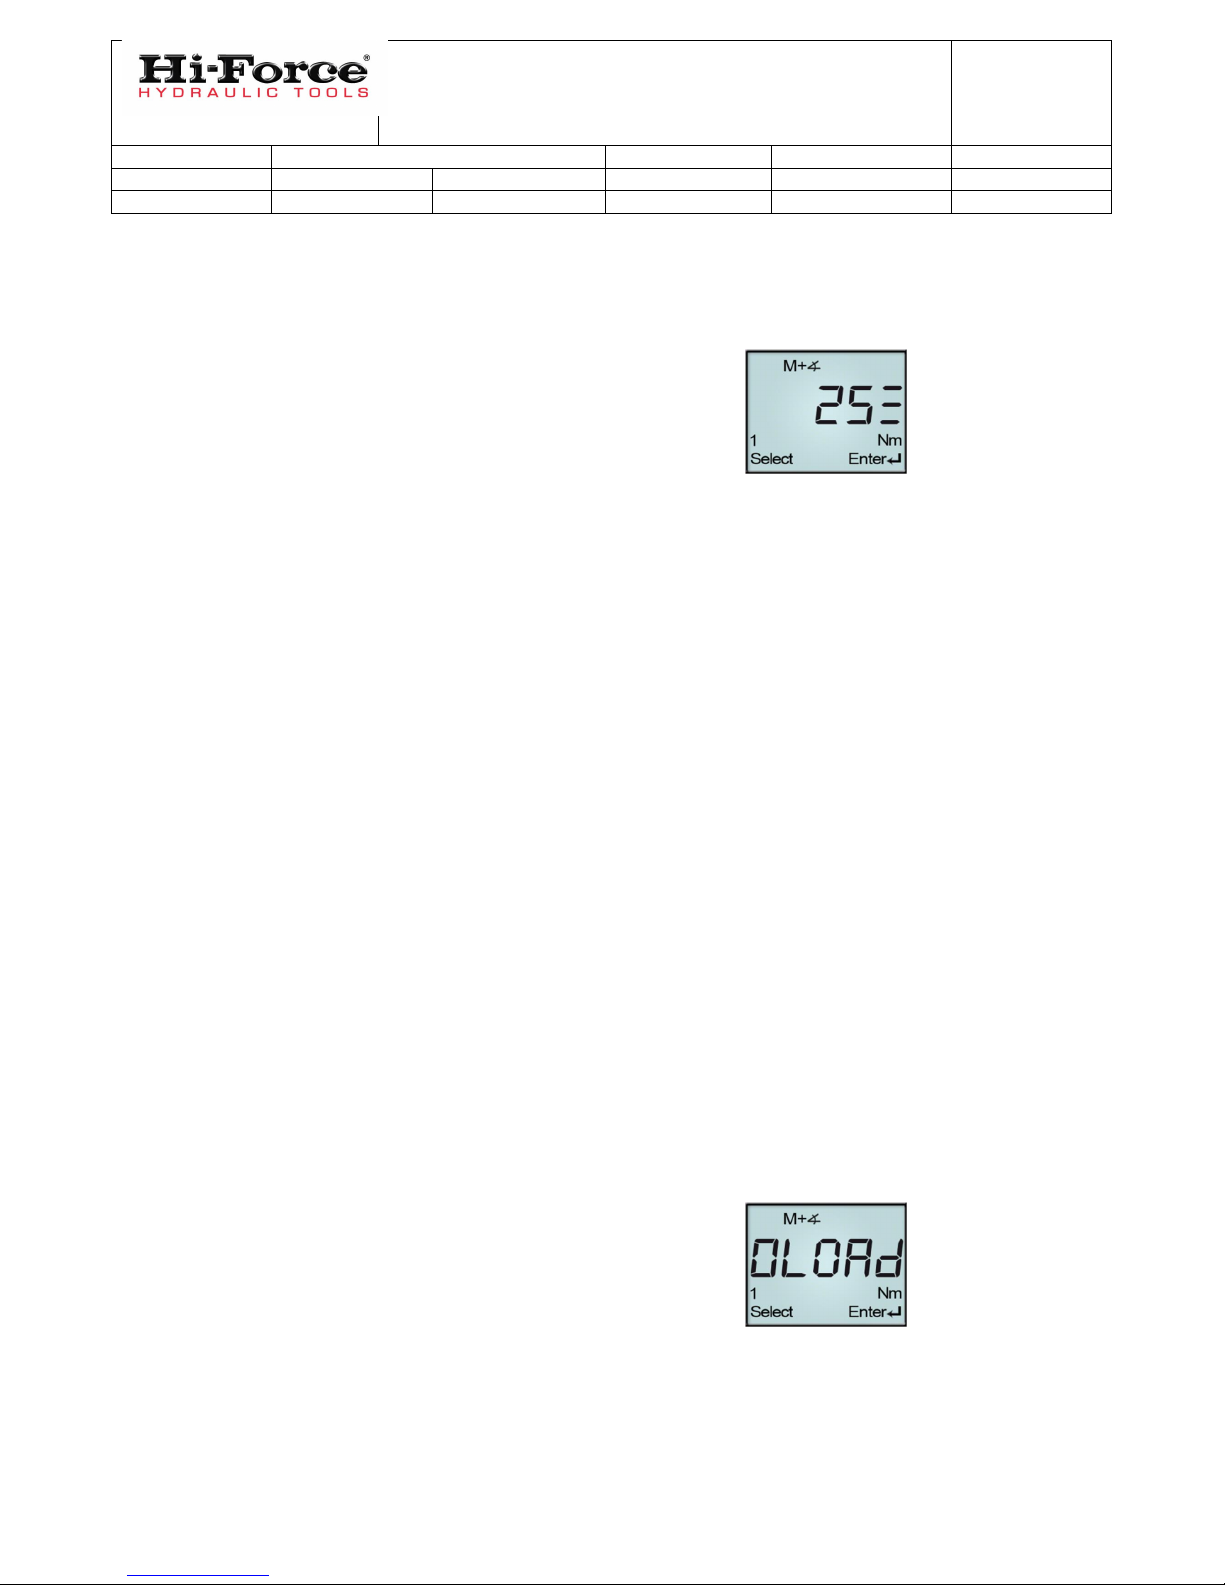
3.2.1 Snugging torque settings
The snugging torque can be set between
positions 10 and 25. The snugging torque
settings are displayed by the icon ≡.
The setting approximately equates to the
percentage of the maximum output force of the
tool.
E.g.: Max. torque of the device 4,000Nm
Snugging torque
10≡corresponds to ~10% = 400Nm
25≡corresponds to ~25% = 1,000Nm
3.2.2 Setting the continued turning angle
The continued turning angle can be set from 0 to
max. 90°.
3.2.3 Starting the bolting process
Operate the on/off switch to start the bolting
process with the application of the snugging
torque.
Apply the torque at slow motor speed in order to
keep the dynamic forces low.
When the snugging torque is achieved, a signal
will sound, the direction LED will flash blue,
the display changes to rotating angle (°) and the
motor clearly increases in speed.
The display shows the current angle, counting
up. Shortly before the pre-selected angle is
reached, the device reduces speed and switches
off automatically.
3.2.4 Overload of the device in the Torque-Angle Mode
If the torque required for angle tightening is
outside of the device output, the process will be
interrupted and OLOAD will flash in the display
for 3 seconds.
Additionally, an acoustic warning signal sounds,
the two light diodes flash red alternately. The
message is documented.

OPERATING INSTRUCTIONS:
Electric Torque Wrench
Series: TWE
TDS:-
1399
Prepared by:-
M.DAVIES Approved by:- Date: 25/03/14
REV NO:-
1
ECO:-
Page 13 of 20
3.3 INFOMESSAGE
3.3.1 Service Message
After the runtime is reached, the message CAL
flashes in the device display for 5 seconds once
the device is connected to the mains.
Additionally, an acoustic warning signal sounds.
The two light diodes flash yellow alternately.
The message is documented.
3.3.2 Overloading when loosening bolts
The tool has an integrated overload protection
for releasing and tightening bolts.
The tool rotates with less speed until the
reaction arm touches the restriction. Then the
motor increases in speed. If the required torque
is too high for the tool, the process stops.
The display shows for 3 seconds „OLOAD“
(OVERLOAD). Additionally, an acoustic
warning signal sounds. The two light diodes
flash red alternately. The message is
documented.
3.3.3 Interrupted bolting situation
If a bolting situation is manually interrupted in
clockwise rotation, e.g. by releasing the on-
switch, the message STOP flashes in the display
for 3 seconds. Additionally, an acoustic warning
signal sounds. The two light diodes flash yellow
alternately. The message is documented.
3.3.4 Over-temperature
For under-/over-temperature (-25°C to 80°C),
the message tEnnP flashes in the display for 3
seconds.
Bolting is stopped.
Additionally, an acoustic warning signal sounds.
The two light diodes flash red alternately. The
message is documented.
OPERATING INSTRUCTIONS:
Electric Torque Wrench
Series: TWE
TDS:-
1399
Prepared by:-
M.DAVIES Approved by:- Date: 25/03/14
REV NO:-
1
ECO:-
Page 14 of 20
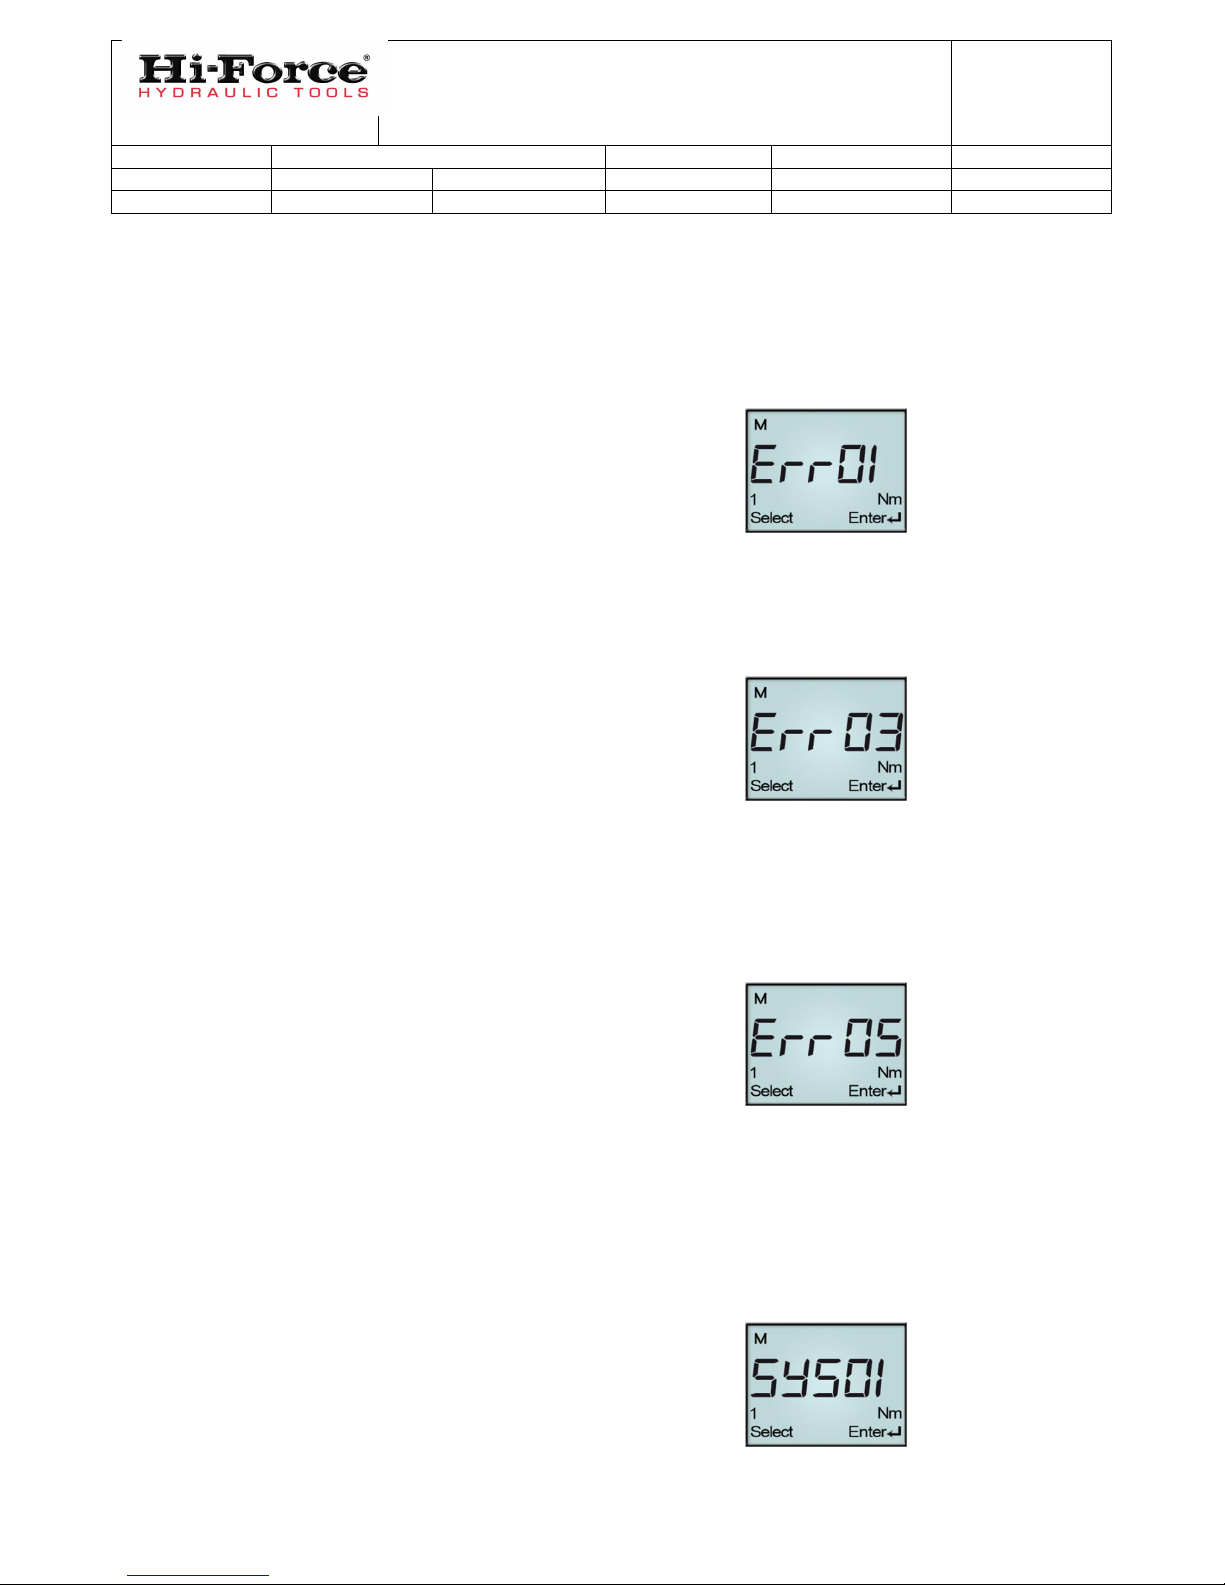
3.4 ERROR MESSAGES
3.4.1 Non-permissible gear change
A gear change is not allowed while the motor is
running. If this is attempted, the bolting process
is interrupted immediately.
The message Err01 flashes in the display for 3
seconds.
Additionally, an acoustic warning signal is
emitted.
The two diode lights flash red alternately. The
message is documented.
3.4.2 Deviating mains voltage
If the mains voltage deviates by ±15%, the
message Err03 flashes in the display for 3
seconds. Bolting process is interrupted.
Additionally, an acoustic warning signal emits.
The two diode lights flash red alternately. The
message is documented.
3.4.3 Deviating mains frequency
The device automatically recognises 50 and
60Hz networks. In case of deviations of the
mains frequency by 50Hz-10% and 60Hz+10%
(45-66Hz) the message Err05 flashes in the
display for 3 seconds.
Additionally, an acoustic warning signal is
emitted.
The two diode lights flash red alternately. The
message is documented.
3.5 SYSTEM ERROR
3.5.1 Error in the speed sensor
If there is any error in speed measurement, the
message Sys01 flashes in the display for 3
seconds.
The bolting process is interrupted.
Additionally, an acoustic warning signal is
emitted.

OPERATING INSTRUCTIONS:
Electric Torque Wrench
Series: TWE
TDS:-
1399
Prepared by:-
M.DAVIES Approved by:- Date: 25/03/14
REV NO:-
1
ECO:-
Page 15 of 20
The two diode lights flash red alternately. The
error is documented.
Remedy: Unplug the tool and plug in again. If
the error is still present, send device to Hi-Force
Limited.
3.5.2 Error in the temperature sensor
If there is any error in temperature
measurement, the message Sys02 flashes in the
display for 3 seconds.
Bolting process is interrupted.
Additionally, an acoustic warning signal is
emitted.
The two diode lights flash red alternately. The
error is documented.
Remedy: Unplug the tool and plug in again. If
the error is still present, send device to Hi-Force
Limited.
3.5.3 Error motor overcurrent
If there is any error in motor over-current, the
message Sys03 flashes in the display for 3
seconds.
Bolting process is interrupted.
Additionally, an acoustic warning signal is
emitted.
The two diode lights flash red alternately. The
error is documented.
Remedy: Unplug the tool and plug in again. If
the error is still present, send device to Hi-Force
Limited.
Cause: Blockage of motor in clockwise rotation,
or short circuit in the coil.

OPERATING INSTRUCTIONS:
Electric Torque Wrench
Series: TWE
TDS:
-
1399
Prepared by:
-
M.DAVIES
Approved by:
-
Date:
25/03/14
REV NO:
-
1
ECO:
-
Page 16 of 20
4. TIGHTENING AND RELEASING BOLTS
Put the reaction arm (13) onto the spline (11) of the wrench. Then put the impact socket (14) onto the
square drive (12).
Fix impact socket (14) and reaction arm (13) with locking pin (15) and rubber collar (16).
Preparation of the torque wrench
Tightening bolts
Set the direction of rotation on the pistol-grip (1) at the right / left switch (5) above the on / off switch (4).
Put the wrench onto the bolted connection with pre-selected torque (see TORQUE SETTING).
For tightening procedure, move the reaction arm (13) to the abutment. For a loosening procedure turn
the reaction arm (13) slowly towards the abutment by starting the motor. If necessary start motor at
intervals!
Make sure the reaction arm is tightly fitted against the abutment.
The reaction moment must be absorbed by the reaction arm at the level of the socket.
IMPORTANT NOTE: The reaction arms will always move for abutment against the direction of
rotation of the wrench.
Keep the on/off switch (4) on the pistol grip (1) pressed down until the selected torque is reached. When
the torque is reached, the motor cuts off automatically. Put the wrench onto the next bolted connection
and tighten the bolt as described above.
Releasing bolts
Select the required direction of rotation, using the reversing switch (5) above the on/off switch (4) on the
pistol grip (1).
If the torque wrench switches off, the torque adjuster setting must be set higher or the higher speed must
be selected.

OPERATING INSTRUCTIONS:
Electric Torque Wrench
Series: TWE
TDS:
-
1399
Prepared by:
-
M.DAVIES
Approved by:
-
Date:
25/03/14
REV NO:
-
1
ECO:
-
Page 17 of 20
4.1. TECHNICAL REMARKS
In order to achieve a constant and accurate repetition of the cut-off points, the bolt must be tightened in
one go without interruption of the procedure from the motor start until the wrench reaches its cut off
setting. Before increasing the torque, the rated speed must be reached. The tool speed when running idle
is in accordance with the selected torque.
During certain tightening procedures, for example, if bolts are already tightened, and are tightened
further, the motor will become very hot. Should this happen, let the motor run idle, so that the air flow
can cool down the motor to its normal operating temperature.
This will prevent overheating and damage to the motor!
Should the warning lamp (10) is flash, stop work immediately and proceed as described above.
If the tightening procedure is stopped before the cut off setting is reached, this bolt must be loosened
again, and the tightening procedure repeated!
A bolt which has already been tightened to the required torque must not be tightened again with the
same torque. This will lead to excess torque being applied.
At normal operating temperature and with constant mains voltage, the accuracy of repetition of the cut-off
points lies within a tolerance of +/-5%. The calibrated torque values at the different settings are for a bolts
with a short length of grip. Bolted connections of other types can result in a different torques being
achieved.
In general - when making bolted connections - observe the instructions of the manufacturers or the
directions of the engineering specifications in the first place.
4.2. TROUBLE SHOOTING
Wrench has no torque capacity.
The power frequency is different from the value prescribed by the machine label, or
the wrench is connected to an inappropriate power supply.
Wrench does not start after operating the Right/Left-Switch (5)
nor after a repeated pressing of the On/Off-Switch (4)
The electronic restart protection allows a restart only after a delay of approx. 3 seconds, this is
necessary to prevent a restart of gear parts which are still in motion.
Unusual bolting performance
(Hard and soft bolting jobs excluded)
Within the area of radar radiation (or similar), it is necessary to provide an equi-potential bonding,
and the torque applied must be checked.

OPERATING INSTRUCTIONS:
Electric Torque Wrench
Series: TWE
TDS:
-
1399
Prepared by:
-
M.DAVIES
Approved by:
-
Date:
25/03/14
REV NO:
-
1
ECO:
-
Page 18 of 20
5. MAINTENANCE AND REPAIR
The gear parts of the wrench are maintenance-free.
Repairs to the gears must be made by the manufacturer, as - after the exchange of parts - the accuracy of
the torque values must be checked and the wrench must be re-calibrated.
According to legal regulations, the wrench must be checked by a competent electrician at regular intervals
in order to safeguard the electrical safety.
Before use always check that the fixing bolts of the pivoting handles sit tightly, and that the handle itself
is intact.
After gears have been run in (approx. 1000 to 2000 bolts) and thereafter once a year, it is necessary to
check and possibly re-calibrate the torque wrench.
If a mains power lead is damaged, this must be replaced by Hi-Force, because special-purpose tools
are required.
Use only genuine Hi-Force accessories and genuine Hi-Force spare parts.
6. TOOL ILLUSTRATION
1) Pistol Grip
2) Torque Adjustment
3) LED Display
4) On/Off Switch
5) Right/Left Switch
6) Label
7) Digital Display
8) Gear Shift
9) Planetary Gear
13) Reaction Arm

OPERATING INSTRUCTIONS:
Electric Torque Wrench
Series: TWE
TDS:-
1399
Prepared by:-
M.DAVIES Approved by:- Date: 25/03/14
REV NO:-
1
ECO:-
Page 19 of 20
1
2
3 4
5
6
7
8
9
13

OPERATING INSTRUCTIONS:
Electric Torque Wrench
Series: TWE
TDS:
-
1399
Prepared by:
-
M.DAVIES
Approved by:
-
Date:
25/03/14
REV NO:
-
1
ECO:
-
Page 20 of 20
UK Head Office:
Hi-Force Limited
Prospect Way
Daventry
Northamptonshire
NN11 8PL
United Kingdom
Tel: + 44 1327 301000
Fax: + 44 1327 706555
Email: daventry@hi-force.com
Hi-Force Regional Offices:
Hi-Force Australia Pty. Ltd
Rockingham
Australia
Tel: +61 8 9591 1288
Hi-
Force Caspian
Baku
Azerbaijan
Tel: +994 12 447 4100
Email: baku@hi-force.com
Hi-Force Hydraulics (Asia) S.B
Selangor
Malaysia
Tel: +603 5569 4209
Email: malaysia@hi-force.com
Hi-Force Nederland BV
Strijen
Netherlands
Tel: +31 78 6745488
Hi-Force Hydraulics (Pty) Ltd
Midrand
South Africa
Tel: +27 11 314
0555
Email: south.africa@hi-force.com
Hi-
Force FZCO
Dubai
United Arab Emirates
Tel: +971 4 815 0600
Hi-Force Hydraulics
Abu Dhabi
United Arab Emirates
Tel: +971 2 551 3100
Email: abu.dhabi@hi-force.com
Hi-Force Hydraulic Equipment
(Shanghai) Ltd. Co.
Shanghai, China
Tel: +86 21 6697 3010
Email: china@hi-force.com
GLOBAL BRAND. LOCAL
SERVICE.
www.hi-force.com
Table of contents
Other Hi-Force Power Tools manuals


Popular Power Tools manuals by other brands

Arbortech
Arbortech PCH.FG.900.20 instruction manual

Altrad
Altrad BELLE PCEL 320X Operator's manual

ADENDORFF
ADENDORFF MAC AFRIC SWRENC-001 Original operating instructions

Yamato
Yamato PT 2000 N instruction manual

Milwaukee
Milwaukee FSPE 110X Original instructions

Renfert
Renfert basic professional quick start guide


